History


For You
 Savior Of Galaxy
Savior Of Galaxy: Survival War throws you into a collapsing world overrun by mutants and infected survivors. As one of the last fighters left alive, you must explore abandoned streets, scavenge resources, and take down enemies before they overwhelm you. Use firearms, melee weapons, and tactical movement to survive intense third-person combat missions. Upgrade your gear, unlock better equipment, and adapt to dangerous environments filled with traps and ambushes. Every decision matters — one wrong step could mean the end. If you enjoy fast-paced action, post-apocalyptic survival, and high-pressure combat challenges, Savior Of Galaxy: Survival War delivers a thrilling and immersive experience where only the strongest walk away.
 Block Cali
Block Cali is a casual 3D block-elimination puzzle game that offers a fresh twist on the classic block-clearing genre. Rotate the cylindrical game board and place blocks strategically onto its surface. When a full row or full column is completed, the blocks in that line disappear — and you score points. With each elimination you get closer to mastering the level. Be careful of obstacles that cannot be cleared, adding extra challenge and strategy. Featuring vibrant 3D visuals, simple controls and soothing progress loops, Block Cali is perfect for quick sessions or longer puzzle-focused play. Whether you’re relaxing or sharpening your mind, this game delivers satisfying block-clearing fun.
 Captain, Don't Throw
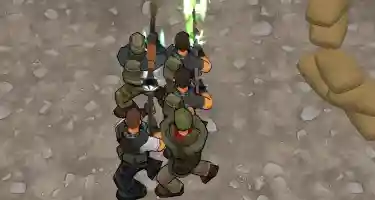
Captain, Don't Throw About This Game Captain, Don't Throw is a casual shooting action game built around movement control, automatic attacks, mission objectives, airdrop timing, support rescue, and upgrade choices. You control a captain through short battlefield stages where enemy groups close in from different directions and pressure the player into making fast route decisions. The captain attacks automatically when hostile units enter range, so the core skill is not manual aiming. The real challenge is guiding the captain with the movement slider, keeping enough space to avoid being surrounded, collecting airdrops at the right moment, and rescuing support soldiers without walking into a trap. A typical stage is short and objective-driven. Some missions ask you to survive enemy pressure, while others require you to rescue support soldiers or finish the objective before a timed mission condition is missed. The safest early approach is to improve clearing power first, keep your escape route open, and avoid chasing rewards through dense enemy groups. The main danger is not one enemy by itself. Problems usually begin when fast enemies push the captain toward tougher enemies and cut off the route to airdrops or support soldiers. Strong play comes from managing space, choosing upgrades that solve the current pressure, and finishing the mission instead of trying to clear everything on screen. How to Play Use the movement slider to guide the captain around the battlefield. When enemies enter the captain’s attack range, the captain fires automatically. Your job is to control spacing, choose safe routes, collect useful airdrops, rescue support soldiers, and complete the mission objective before the captain is defeated or a timed objective is missed. In the opening seconds, move away from the first enemy cluster instead of standing in place. Let the captain’s auto-attacks thin out the closest threats while you guide him along the edge of the enemy group. When the screen becomes crowded, circle around the outside of the group instead of cutting through the center. The round becomes dangerous when Swarmers and Armored Raiders appear together. Swarmers close distance quickly, while Armored Raiders take longer to defeat and can block the path to supplies or support soldiers. Mechanic · How It Works · Practical Use Movement · Use the movement slider to guide the captain · Move in wide routes and avoid tight corners Auto-attacks · The captain fires when enemies enter range · Stay close enough to trigger attacks, then reposition Airdrops · Supply crates appear during the stage · Collect them after clearing a safe route Support soldiers · Rescued allies add combat pressure · Reach them with both an entry path and an exit path Mission timer · Some stages have timed objectives · Do not chase low-value enemies far from the goal Failure condition · The captain is defeated, or a timed mission objective is missed · Protect health and mission progress at the same time Beginner Strategy Guide Upgrade Priorities Combat upgrades decide how safely the captain can handle crowded stages. Do not upgrade randomly in the early game. Choose the upgrade that solves the problem you are actually facing. Priority · Upgrade · Best Use Case · Why It Helps 1 · Heavy Rounds · Enemies survive too long near the captain · Increases clearing power and opens safer routes 2 · Extended Barrel · You need more space while kiting enemies · Expands useful attack range so you can fight from safer positions 3 · Twin Fire · Groups are stacking up too quickly · Adds multi-target pressure and helps thin Swarmers 4 · Field Armor · You are moving better but still losing health too fast · Gives more room for small positioning mistakes 5 · Supply Magnet · Airdrops are hard to reach without risk · Makes reward collection safer after your damage is stable Choose Heavy Rounds first when enemies remain alive too long near the captain. Choose Extended Barrel when you need more distance to control enemy groups. Choose Field Armor when your route planning is improving but you still lose health too quickly during crowded stages. Support Soldiers Support soldiers are not just bonus characters. In rescue missions, they are part of the main objective rather than optional rewards. After being rescued, support soldiers increase your combat pressure and make it easier to thin enemy groups. The danger is not the rescue itself. The danger is entering the rescue area without a safe exit path. Before moving toward a support soldier, pull nearby enemies away from the route, open a gap, then enter and leave quickly. A strong rescue pattern is: 1. Move near the support route. 2. Pull Swarmers away from the direct path. 3. Let auto-attacks clear the closest group. 4. Move in when the route opens. 5. Exit before Armored Raiders close the gap. Airdrop Timing Airdrops can give valuable resources and combat advantages, but they are also one of the easiest ways to lose a run. Do not treat every airdrop as urgent. When an airdrop lands behind a group of enemies, wait briefly, circle around the crowd, and let auto-attacks reduce the closest threats. If the path is still blocked, skip the drop and protect the mission objective instead. A missed reward is better than a failed run. Airdrop Situation · Best Decision Airdrop lands in open space · Collect it immediately Airdrop lands behind Swarmers · Circle once before entering Airdrop lands near Armored Raiders · Clear or weaken the route first Airdrop appears while the mission timer is tight · Take it only if it does not delay the objective Airdrop is blocked by multiple enemy types · Skip it unless you already have strong clearing power First Run Walkthrough Step 1: Move out of the starting pressure. At the beginning of a stage, use the movement slider to guide the captain away from the first enemy cluster. Do not let the opening group surround you before your auto-attacks start creating space. Step 2: Build a safe attack loop. Move close enough for enemies to enter attack range, then guide the captain away before they reach him. This lets the captain deal damage while keeping contact time low. Step 3: Watch the first airdrop. If the first airdrop appears in open space, collect it. If it appears behind enemies, circle around first. The first airdrop is useful, but it is not worth losing half your health. Step 4: Rescue support with an exit route. When a support soldier appears, check both the entry route and the exit route. The rescue is only safe if the captain can leave the area after reaching the support soldier. Step 5: Push the mission objective. Once you have one or two upgrades and at least one support soldier, shift attention back to the mission objective. Do not clear every enemy unless the objective requires it. Stage Progression Tips Stage Phase · What Usually Gets Harder · Best Adjustment Opening wave · Basic movement pressure · Learn attack range and avoid standing still Early pressure · More fast enemies begin to appear · Upgrade Heavy Rounds or Twin Fire Crowded phase · Enemy groups begin blocking rewards · Collect only safe airdrops Support phase · Rescue routes become riskier · Pull enemies away before entering rescue zones Final objective phase · Mission pressure increases · Ignore enemies that are far from the objective Many beginners start losing runs when enemy groups begin blocking rewards and support routes more aggressively. At that point, survival and mission completion matter more than collecting every airdrop on the screen. Advanced Strategy Crowded screen control: When Swarmers and Armored Raiders fill the center of the battlefield, move around the outside edge and let auto-attacks hit the nearest enemies. This reduces contact from multiple directions and keeps your escape path open. Airdrop delay: When a supply crate lands inside or behind an enemy group, wait briefly, circle the group, then collect it from the safer side. Treating every airdrop as an emergency pickup is one of the easiest ways to lose a run. Support rescue routing: When a support soldier is surrounded or placed near a dangerous route, open a path first, then enter and exit quickly. Rescued soldiers help your combat pressure, but only if the captain survives the rescue. Upgrade-based routing: If enemies start surviving long enough to block movement, choose upgrades based on the current problem. Use Heavy Rounds for tough enemies, Extended Barrel for safer spacing, and Twin Fire for enemy groups. Mission-first play: When the objective is nearly complete or the mission timer is becoming a problem, stop chasing enemies far from the mission route and move toward the objective. Common Mistakes Mistake · What It Looks Like · How to Fix It Walking into dense enemy groups · Health drops quickly before rewards can help · Move around the edge and protect your route Chasing airdrops too early · The captain reaches the crate but gets trapped · Delay the pickup until the route opens Weak upgrade priority · Enemies survive long enough to surround you · Start with Heavy Rounds or Extended Barrel Unsafe support rescue · The support soldier is rescued, but the captain cannot escape · Plan the exit before entering Poor timer management · The captain survives but the mission fails · Stay closer to the mission route Ignoring mixed enemy pressure · Fast enemies push you into tougher enemies · Separate enemy groups by moving in wide loops The most common beginner mistake is treating automatic attacks as permission to stand still. The captain can shoot on his own, but he cannot escape danger unless you keep moving and protect a route out of crowded areas. FAQ What is Captain, Don't Throw? Captain, Don't Throw is a casual shooting action game where you guide a captain through short mission-based stages. The game focuses on automatic attacks, movement control, airdrop timing, support rescue, and upgrade choices. Does the mission timer pause when picking up an airdrop? Do not plan around the timer stopping during a pickup. If the mission timer is tight, collect only the airdrops that are already close to your objective route. Which upgrade should I choose first? Choose Heavy Rounds first if enemies survive too long near the captain. Choose Extended Barrel if you need safer spacing, and choose Twin Fire when Swarmers begin stacking up in groups. Do auto-attacks target the closest enemy first? Auto-attacks are most useful when enemies are inside the captain’s active range. For practical play, assume nearby enemies create the most immediate danger and position the captain so the closest threats are cleared before they can surround him. When should I rescue support soldiers? Only when you have secured both an entry and an exit path. Rushing blindly into a crowd to save a soldier is one of the fastest ways to end your run. Why do beginners lose during crowded phases? Crowded phases are where enemy groups begin blocking rewards and support routes more aggressively. Beginners usually lose because they chase airdrops through dangerous areas instead of improving clearing power and protecting their movement route. Editorial Note This page provides a gameplay overview and beginner strategy guide for Captain, Don't Throw. It focuses on movement control, automatic attacks, mission objectives, upgrade choices, airdrop timing, support rescue, and common early mistakes. This guide is based on practical strategy analysis for surviving high-pressure swarms and optimizing upgrade paths in the game.
 Match & Clear Nonstop
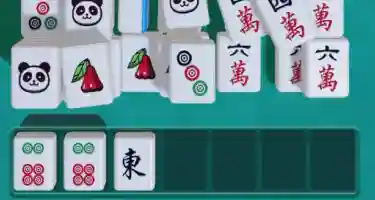
Match & Clear Nonstop About This Game Match & Clear Nonstop is a Mahjong-style tile matching puzzle game where players select available tiles, move them into a 7-slot reserve tray, and clear tiles when three identical tiles are collected. The game is not traditional Mahjong. It focuses on stacked tiles, tray management, timed decision-making, and smart tool usage. Your main challenge is to keep the reserve tray from filling with unrelated tiles while opening enough board space to keep clearing matches. How to Play 1. Select available visible tiles from the board. 2. Move tiles into the 7-slot reserve tray. 3. Clear tiles when three identical tiles are collected. 4. Open stacked areas to reveal more useful tiles. 5. Use Shuffle, Flip Card, Clear, and Undo when they solve a specific problem. 6. Finish the level before the timer runs out. The most common beginner mistake is filling the 7-slot reserve tray before a three-tile clear can be made. Beginner Strategy Guide Reserve Tray Strategy The reserve tray is the most important pressure system in Match & Clear Nonstop. Because there are only 7 slots, each tile choice needs a purpose. A strong tray usually contains one or two focused tile groups. A weak tray contains many loose symbols with no clear forming soon. Do not add unrelated tiles unless the move helps a near-term clear. When the Tray Is Almost Full When the tray has only 1 or 2 empty slots left, stop playing normally. Use this recovery order: 1. Look for a tile that completes a three-tile clear. 2. Use Undo if the last move caused the problem. 3. Use Clear if the first tray tile is blocking your options. 4. Use Flip Card only if hidden information is the real issue. 5. Use Shuffle only after checking visible options. Tool Priority Guide Tool · Best Used When · Avoid Undo · Your last move created a tray problem · Using it for every small move Clear · The first tray tile blocks future organization · Using it while the tray is still flexible Flip Card · Hidden or standing tiles may reveal the tile you need · Using it while safe visible clears remain Shuffle · No useful visible route remains · Shuffling before checking the board Opening Strategy Start by scanning the board for visible matches, thick stacks, and blocked sections. Clear safe matches first, but prioritize moves that open more tiles. A move that reveals a new layer is often better than a move that only removes a flat tile. Midgame Strategy Track which tile types are already in the tray. Do not start too many unfinished clears at the same time. If the board has hidden or standing tiles, use Flip Card before committing a tray slot. Endgame Strategy When time is low, choose the clearest available three-tile clear. If the tray is almost full, Clear can be better than Shuffle because Clear directly creates tray space. Shuffle changes the board, but it does not automatically fix a crowded tray. Common Mistakes Mistake · Fix Tapping the first visible tile · Check whether it completes a tray clear or unlocks covered tiles Filling the tray too quickly · Stop adding new types and look for clears using existing tray tiles Wasting Shuffle too early · Check visible matches and blocked areas first Using Flip Card at the wrong time · Use it only when hidden information affects your next move Using Undo too late · Use Undo immediately after a bad tap Playing it like traditional Mahjong · Focus on tray control, stacked layers, and tool timing FAQ What causes most beginners to fail in Match & Clear Nonstop? Most beginners fail because they fill the 7-slot reserve tray with too many unfinished tile groups. The safest approach is to build around tile types already in the tray and avoid starting too many clears at once. What should I do when the reserve tray is almost full? First, look for a tile that completes a three-tile clear. If the last move caused the problem, use Undo. If the first tray tile is blocking your options, use Clear before starting another tile group. How should I prioritize tools when stuck? Fix immediate mistakes with Undo, use Clear for tray blockage, use Flip Card when hidden information matters, and save Shuffle as the last resort after visible options are checked. Is Match & Clear Nonstop traditional Mahjong? No. Match & Clear Nonstop uses Mahjong-style tile visuals, but it does not use traditional Mahjong hands, scoring patterns, or table rules. Editorial Note This independent game page and strategy guide is based on hands-on gameplay review and the game rules described in this article. It is designed to help players understand the core gameplay, 7-slot reserve tray pressure, tool usage, and beginner mistakes. It is not an official game manual. Players should check the in-game interface for exact feature behavior as updates occur.
 Cue Shot Challenge 3D
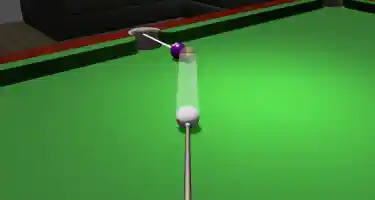
Cue Shot Challenge 3D About This Game Cue Shot Challenge 3D is a casual 3D pool and billiards challenge game where your goal is to pocket all the balls before your lives run out. Each shot costs 1 life, so the main challenge is not speed, but choosing safer angles, controlling power, and keeping the cue ball in a useful position. The 3D view helps you judge ball spacing, pocket lines, cut angles, cue direction, and possible shot paths before taking a shot. This matters because one careless attempt can waste a life and leave the next angle blocked. Cue Shot Challenge 3D also includes coins, daily rewards, tables, and ball skins as in-game virtual content. These items may change visual progression or appearance, but the core gameplay still depends on aiming, power control, cue ball positioning, and efficient table clearing. How to Play Cue Shot Challenge 3D is mainly about power, precision, and careful shot preparation. Before taking your first shot, look over the full table. Check which balls have open pocket lines, which balls are blocked, and where the cue ball may stop after contact. Control / Rule · What It Does · Practical Tip Broad Aim · Slide on the empty area of the screen to adjust your general shot direction. · Use this first to face the cue toward the target ball or pocket line. Fine-Tuning · Use the right-side dial to make smaller angle adjustments. · Make a final correction before shooting, especially on narrow pocket angles. Power Control · Use the left-side dial to set shot force. · Medium power is often easier to control because it reduces wild cue ball movement, makes rebounds less chaotic, and helps the ball stop in a more useful position. Take the Shot · After setting direction and power, hit the cue ball. · Aim to pocket the target ball while keeping the next shot playable. Life System · Each shot removes 1 life. · Clear all balls before your lives run out to complete the challenge. A good turn usually follows this order: observe the table, set your broad aim, fine-tune the angle, adjust power, then shoot. The more carefully you prepare each shot, the fewer lives you are likely to waste. One useful detail to watch is the cut angle. A straight shot sends the target ball toward the pocket more predictably, while a sharp cut angle requires more precision because the cue ball contacts the target ball from the side. When the angle looks narrow, use the 3D view to check whether the pocket line is truly open before committing the shot. Beginner Strategy Guide Treat your lives as a strict shot budget. A simple pocket is always better than a risky trick shot. Start by choosing the clearest ball on the table. A clean, direct shot is usually more valuable than a difficult angle that might fail or leave the cue ball in a bad position. Use broad aim first, then fine-tune. Sliding on the empty screen area helps you set the main direction, while the right-side dial helps you correct the final angle. Many missed shots come from stopping after the rough aim instead of making a small final adjustment. Control your power with the left-side dial. New players often use too much force because it feels safer, but strong shots can create awkward rebounds and poor cue ball placement. Medium power is often better when you want a cleaner pocket and a more predictable next shot. If the cue ball can fall into a pocket during play, treat that situation carefully. In pool-style games, this is commonly called a scratch. Based on the provided gameplay details, the confirmed penalty is that every shot costs 1 life; no extra scratch penalty has been confirmed. Still, beginners should avoid scratches because they usually ruin cue ball position, waste the value of the shot, and can make the next angle much harder. Think about the next shot before taking the current one. You do not need perfect cue ball control every time, but try to avoid leaving the cue ball trapped near a rail, blocked by another ball, or facing an impossible angle. When you are low on lives, stop choosing shots based on what looks impressive. Choose the clearest pocket line available, even if it is a simple shot. A safe ball that keeps the level alive is better than a difficult angle that may end the run. When a ball is close to the edge or sitting at a difficult cut angle, do not force it too early. Clear easier balls first, open more space, and return to the harder shot when the cue ball position is better. Avoid flashy shots unless they are truly necessary. Rebounds, sharp cuts, and long-distance attempts can be useful in some situations, but beginners will usually make better progress by taking stable, direct routes. Common Mistakes Mistake · Why It Fails · How to Fix It Using maximum power constantly · Strong shots can create wide rebounds and poor cue ball positions. · Use medium power when a clean, controlled shot is enough. Hitting long-distance shots too hard · A powerful long shot can make the cue ball travel too far, bounce unpredictably, or end in a bad position. · Use enough power to reach the target, but avoid over-hitting just because the shot is far away. Ignoring the remaining life count · A risky shot becomes more dangerous when only a few lives remain. · When lives are low, choose the clearest pocket line instead of a sharp cut, rebound, or long-distance attempt. Only looking at the current ball · You may pocket one ball but leave the next shot blocked or awkward. · Think one shot ahead before you shoot. Skipping fine adjustment · Rough aim may look close, but small angle errors can cause missed pockets. · Use the right-side dial before taking narrow or angled shots. Shooting before reading the table · Rushed shots often waste good opportunities. · Pause briefly and check open pocket lines first. Forcing difficult edge shots too early · Rail-side or narrow-angle balls can consume too many attempts. · Clear easier balls first and return when the cue ball position improves. Treating the 3D view as decoration · You may miss useful visual clues about spacing, cut angles, and pocket lines. · Use the 3D perspective to judge shot paths and cue direction. Ignoring power control · Poor force can send the cue ball into an unhelpful position. · Adjust the left-side dial based on distance and table layout. Expecting skins to change performance · Visual unlocks do not replace careful play. · Focus on aim, shot choice, and cue ball control. FAQ How do you aim more accurately in Cue Shot Challenge 3D? Use the empty screen area for broad aim first, then use the right-side dial for smaller corrections. This two-step approach is especially helpful when the target ball needs a narrow cut angle. How should beginners control shot power? Beginners should avoid using full power on every shot. A controlled medium-power shot is often easier to predict, reduces wild cue ball movement, and can leave the cue ball in a better position. Why do I run out of lives so quickly? You usually run out of lives because every shot costs 1 life and missed shots reduce your shot budget quickly. Avoid risky cut angles early, use the right-side dial for final aim correction, and choose open pocket lines before attempting difficult edge balls or long-distance shots. Can you pocket two balls with one shot? Sometimes, a single shot may lead to more than one ball dropping if the table layout allows it. However, beginners should not force double-pocket attempts unless the first pocket line is already safe and clear. What should I do with a difficult edge ball? Do not rush it. Clear easier balls first, create more open space, and return to the edge ball when the cue ball position gives you a cleaner angle. What happens if the cue ball falls into a pocket? Based on the provided gameplay details, each shot costs 1 life, but no additional scratch penalty has been confirmed. Even so, a scratch is usually bad for positioning, so it is better to avoid shots that send the cue ball toward a pocket. Is it better to use the broad aim control or the right-side dial? Use both. Broad aim helps you set the main direction, while the right-side dial is better for fine angle control before the final shot. Do coins, table skins, or ball skins improve gameplay? Coins are an in-game virtual resource used for visual progression such as tables or ball skins. These items should be understood as visual unlocks, not gameplay advantages. Your progress still depends on aiming, shot choice, power control, and cue ball position. Editorial Note This guide is based on the gameplay information provided for Cue Shot Challenge 3D. It is written to help players understand the rules, controls, life system, table-clearing goal, aiming method, power control, and beginner strategy. Coins, daily rewards, gift rewards, tables, and ball skins are described only as in-game virtual content. They should not be understood as real-world rewards, cash-value items, gambling features, or guaranteed gameplay advantages.
 Drop Zone Survivor
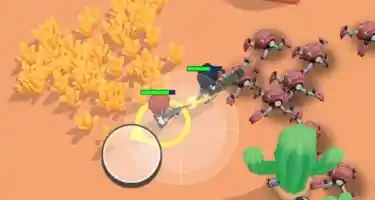
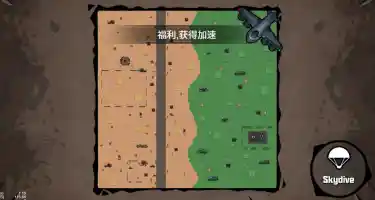
Drop Zone Survivor About This Game Drop Zone Survivor is a casual 2D battle royale survival shooter where each match begins with players entering the battlefield from a plane. Your goal is to choose a landing area, stay alive as the safe zone changes, protect your health, and become the final survivor. The main pressure comes from several simple decisions: where to land, when to move, when to fire, when to avoid a fight, when to use speed boost, and when to heal. If your health bar runs out, the match ends for you. If you survive and eliminate the remaining enemies, you win. A match usually moves through three stages. The early match is about finding a safe start. The middle of the match is about moving with the safe zone and choosing smart fights. The final stage is about staying calm, keeping enough health, and avoiding unnecessary risks when only a few enemies remain. How to Play Start each match by watching the plane route and choosing a landing area. A crowded drop can lead to quick action, but it can also end your run early. If you are still learning, choose a quieter area where you have time to move, read the map, and understand where danger may come from. Controls: Movement (WASD/Arrows) | Attack (Left Click) | Boost (Space) | Heal (E/Q) After landing, use the direction keys to control your movement. Move toward useful space instead of wandering randomly. Your first goal is not always to attack. It is to understand your position, the safe zone direction, and whether nearby enemies are worth fighting. Use the fire button when you have a clear reason to attack. Before firing, check four things: 1. Is the enemy close enough for the attack to matter? 2. Do you have enough health to survive the fight? 3. Do you have room to escape if the fight goes badly? 4. Will this fight pull you away from the safe zone? If the answer to several of these questions is no, moving first may be smarter than shooting immediately. Watch your health bar throughout the match. If your health is low, do not keep fighting just because an enemy is nearby. Break away from danger first, then heal when you have enough space. Healing while exposed can waste the opportunity and leave you vulnerable. Use speed boost only when it changes your survival chance. Good uses include reaching the safe zone, escaping pressure, repositioning around an enemy, or chasing a clearly weakened opponent. Poor uses include boosting across open space with no plan or wasting it before the safe zone creates real pressure. When the safe zone refreshes, move early. Many beginner losses happen because a player wins a small fight but loses position. Staying inside the playable area is just as important as defeating enemies. To win, stay alive, manage your health, move with the safe zone, choose fights carefully, and survive until every other enemy has been eliminated. Beginner Strategy Guide Early match: Choose a quieter landing area if you are still learning. A safe start gives you time to read the battlefield, check nearby enemies, and understand where the safe zone is moving. Dropping into the busiest area may feel exciting, but it often forces you into a fight before you are ready. Landing plan: A good landing area should give you space to move, not just a place to start. Try to avoid landing where enemies can surround you immediately. If you land near danger, move first and fight only when your direction, health, and escape path make sense. Mid match: Move with the safe zone instead of chasing every enemy. If an enemy runs away from the safe area, do not automatically follow. One unnecessary chase can put you in a worse position, waste your boost, or force you to heal at the wrong time. Fight selection: A fight is usually worth taking when the enemy is already weakened, you have enough health, you have room to move, and the safe zone is not pulling you away. A fight is usually not worth taking when your health is low, another enemy may attack from the side, or you have no clear escape route. Speed boost: Save it for real problems. Use it to enter the safe zone, escape danger, reposition, or finish a clear opportunity. Do not use it just because it is available. Player tip: the later the match gets, the more valuable a saved boost can become. Healing: Heal after you create space. A good healing moment usually comes after you break contact with an enemy, before you enter another risky area, or when you know the next fight may happen soon. Do not wait until your health is almost gone if you already have a safe moment to recover. Final stage: Do not expose your position too early when only a few enemies remain. Let other enemies make mistakes, keep enough room to move, and avoid chasing into a bad angle just to finish one opponent. In the final moments, survival, health, and position often matter more than aggressive shooting. Use this simple decision table during a match: Situation · Better Choice · Why It Helps You land near several enemies · Move first before fighting · It gives you space and lowers early risk The safe zone moves away · Rotate early · You avoid rushed movement later Your health is low · Break contact and heal · You reduce the chance of losing the next trade An enemy runs away from the zone · Let them go or reposition · Chasing may damage your own position Only a few enemies remain · Stay patient · The final fight is easier when you keep health and space Weapon stats can help you understand different in-game behavior. Instead of treating every weapon the same way, notice whether a weapon feels better for short fights, safer distance, quick movement, or finishing weakened enemies. Use that information to choose a playstyle inside the match. • Scout Weapons: Higher movement speed, moderate damage. • Heavy Weapons: Lower movement speed, high impact. Check the home screen stats to match your chosen landing strategy. A lighter setup may help when you want to move early and avoid pressure, while a heavier setup may feel better when you expect slower, more committed fights. The best beginner mindset is simple: survive first, fight second. Drop Zone Survivor rewards players who move early, avoid bad fights, protect their health, and attack only when the situation is favorable. Common Mistakes Mistake · Why It Hurts · Better Habit Landing in the most crowded area too early · You may lose before you understand the match · Start in a quieter area and learn the flow first Chasing enemies away from the safe zone · You can win a fight but lose your position · Stop chasing if the enemy is pulling you into danger Fighting with low health · One more exchange may end your run · Create space, heal when safe, then decide whether to fight again Healing while exposed · You may be attacked before recovery helps · Move to safer space before healing Wasting speed boost · You may not have it when danger appears · Save boost for escape, safe zone movement, or repositioning Ignoring escape space while firing · You can get trapped if the fight turns bad · Keep room to move before committing Playing only for eliminations · You may forget that survival is the win condition · Take fights that improve your chance to be the last survivor The most common beginner mistake is treating every enemy as an immediate target. Not every fight improves your chance of winning. If a fight damages your health, wastes your boost, or pulls you away from the safe zone, it may be better to reposition. Another common mistake is moving too late. The safe zone should guide your route before it becomes urgent. Moving early gives you more control, more escape space, and better timing for future fights. Still having trouble? Experiment with different landing spots to find your own rhythm between survival and combat. FAQ What is Drop Zone Survivor? Drop Zone Survivor is a casual 2D battle royale survival shooter. Players enter the battlefield from a plane, choose where to land, move through the match, watch the safe zone, and try to become the final survivor. How do you play Drop Zone Survivor? Choose a landing area, use WASD or the arrow keys to move, use left click to attack, watch your health bar, and stay inside the safe zone. Use Space for boost and E or Q for healing when the timing is safe. If your health bar runs out, the match ends for you. What is the best beginner strategy? The best beginner strategy is to land in a quieter area, move early with the safe zone, avoid unnecessary fights, and save speed boost or healing for moments that protect your survival. To win, focus on staying alive first, then take fights when your health and position are favorable. How do you survive the safe zone? Check the safe zone often and move before you are forced to rush. Avoid chasing enemies in the wrong direction. A safe route with room to escape is usually better than a risky fight that leaves you trapped. When should you use speed boost or healing? Use speed boost when you need to enter the safe zone, escape danger, reposition, or chase a weakened enemy. Use healing after you have created distance from danger or before entering a risky area. Do not heal while exposed if an enemy can still pressure you. Do skins, weapon stats, or in-game items have real-world value? Skins, weapon stats, and item information in Drop Zone Survivor should be understood as virtual game content. They may affect appearance or help players understand in-game behavior, but they should not be treated as cash-value rewards, betting features, real-money competition, real weapon advice, or financial guidance. Editorial Note This guide is based on the gameplay information provided for Drop Zone Survivor. It is written to help players understand landing choices, movement, safe zone awareness, health management, speed boost timing, healing decisions, weapon stat differences, and beginner survival strategy. All combat, health, safe zone, boost, healing, skins, weapon stats, and item-related systems discussed here refer only to virtual in-game mechanics. This guide is for gameplay understanding only and should not be used as real-world combat, weapon, gambling, or financial advice.
Action
- Savior Of Galaxy
Savior Of Galaxy: Survival War throws you into a collapsing world overrun by mutants and infected survivors. As one of the last fighters left alive, you must explore abandoned streets, scavenge resources, and take down enemies before they overwhelm you. Use firearms, melee weapons, and tactical movement to survive intense third-person combat missions. Upgrade your gear, unlock better equipment, and adapt to dangerous environments filled with traps and ambushes. Every decision matters — one wrong step could mean the end. If you enjoy fast-paced action, post-apocalyptic survival, and high-pressure combat challenges, Savior Of Galaxy: Survival War delivers a thrilling and immersive experience where only the strongest walk away.
- Captain, Don't Throw
Captain, Don't Throw About This Game Captain, Don't Throw is a casual shooting action game built around movement control, automatic attacks, mission objectives, airdrop timing, support rescue, and upgrade choices. You control a captain through short battlefield stages where enemy groups close in from different directions and pressure the player into making fast route decisions. The captain attacks automatically when hostile units enter range, so the core skill is not manual aiming. The real challenge is guiding the captain with the movement slider, keeping enough space to avoid being surrounded, collecting airdrops at the right moment, and rescuing support soldiers without walking into a trap. A typical stage is short and objective-driven. Some missions ask you to survive enemy pressure, while others require you to rescue support soldiers or finish the objective before a timed mission condition is missed. The safest early approach is to improve clearing power first, keep your escape route open, and avoid chasing rewards through dense enemy groups. The main danger is not one enemy by itself. Problems usually begin when fast enemies push the captain toward tougher enemies and cut off the route to airdrops or support soldiers. Strong play comes from managing space, choosing upgrades that solve the current pressure, and finishing the mission instead of trying to clear everything on screen. How to Play Use the movement slider to guide the captain around the battlefield. When enemies enter the captain’s attack range, the captain fires automatically. Your job is to control spacing, choose safe routes, collect useful airdrops, rescue support soldiers, and complete the mission objective before the captain is defeated or a timed objective is missed. In the opening seconds, move away from the first enemy cluster instead of standing in place. Let the captain’s auto-attacks thin out the closest threats while you guide him along the edge of the enemy group. When the screen becomes crowded, circle around the outside of the group instead of cutting through the center. The round becomes dangerous when Swarmers and Armored Raiders appear together. Swarmers close distance quickly, while Armored Raiders take longer to defeat and can block the path to supplies or support soldiers. Mechanic · How It Works · Practical Use Movement · Use the movement slider to guide the captain · Move in wide routes and avoid tight corners Auto-attacks · The captain fires when enemies enter range · Stay close enough to trigger attacks, then reposition Airdrops · Supply crates appear during the stage · Collect them after clearing a safe route Support soldiers · Rescued allies add combat pressure · Reach them with both an entry path and an exit path Mission timer · Some stages have timed objectives · Do not chase low-value enemies far from the goal Failure condition · The captain is defeated, or a timed mission objective is missed · Protect health and mission progress at the same time Beginner Strategy Guide Upgrade Priorities Combat upgrades decide how safely the captain can handle crowded stages. Do not upgrade randomly in the early game. Choose the upgrade that solves the problem you are actually facing. Priority · Upgrade · Best Use Case · Why It Helps 1 · Heavy Rounds · Enemies survive too long near the captain · Increases clearing power and opens safer routes 2 · Extended Barrel · You need more space while kiting enemies · Expands useful attack range so you can fight from safer positions 3 · Twin Fire · Groups are stacking up too quickly · Adds multi-target pressure and helps thin Swarmers 4 · Field Armor · You are moving better but still losing health too fast · Gives more room for small positioning mistakes 5 · Supply Magnet · Airdrops are hard to reach without risk · Makes reward collection safer after your damage is stable Choose Heavy Rounds first when enemies remain alive too long near the captain. Choose Extended Barrel when you need more distance to control enemy groups. Choose Field Armor when your route planning is improving but you still lose health too quickly during crowded stages. Support Soldiers Support soldiers are not just bonus characters. In rescue missions, they are part of the main objective rather than optional rewards. After being rescued, support soldiers increase your combat pressure and make it easier to thin enemy groups. The danger is not the rescue itself. The danger is entering the rescue area without a safe exit path. Before moving toward a support soldier, pull nearby enemies away from the route, open a gap, then enter and leave quickly. A strong rescue pattern is: 1. Move near the support route. 2. Pull Swarmers away from the direct path. 3. Let auto-attacks clear the closest group. 4. Move in when the route opens. 5. Exit before Armored Raiders close the gap. Airdrop Timing Airdrops can give valuable resources and combat advantages, but they are also one of the easiest ways to lose a run. Do not treat every airdrop as urgent. When an airdrop lands behind a group of enemies, wait briefly, circle around the crowd, and let auto-attacks reduce the closest threats. If the path is still blocked, skip the drop and protect the mission objective instead. A missed reward is better than a failed run. Airdrop Situation · Best Decision Airdrop lands in open space · Collect it immediately Airdrop lands behind Swarmers · Circle once before entering Airdrop lands near Armored Raiders · Clear or weaken the route first Airdrop appears while the mission timer is tight · Take it only if it does not delay the objective Airdrop is blocked by multiple enemy types · Skip it unless you already have strong clearing power First Run Walkthrough Step 1: Move out of the starting pressure. At the beginning of a stage, use the movement slider to guide the captain away from the first enemy cluster. Do not let the opening group surround you before your auto-attacks start creating space. Step 2: Build a safe attack loop. Move close enough for enemies to enter attack range, then guide the captain away before they reach him. This lets the captain deal damage while keeping contact time low. Step 3: Watch the first airdrop. If the first airdrop appears in open space, collect it. If it appears behind enemies, circle around first. The first airdrop is useful, but it is not worth losing half your health. Step 4: Rescue support with an exit route. When a support soldier appears, check both the entry route and the exit route. The rescue is only safe if the captain can leave the area after reaching the support soldier. Step 5: Push the mission objective. Once you have one or two upgrades and at least one support soldier, shift attention back to the mission objective. Do not clear every enemy unless the objective requires it. Stage Progression Tips Stage Phase · What Usually Gets Harder · Best Adjustment Opening wave · Basic movement pressure · Learn attack range and avoid standing still Early pressure · More fast enemies begin to appear · Upgrade Heavy Rounds or Twin Fire Crowded phase · Enemy groups begin blocking rewards · Collect only safe airdrops Support phase · Rescue routes become riskier · Pull enemies away before entering rescue zones Final objective phase · Mission pressure increases · Ignore enemies that are far from the objective Many beginners start losing runs when enemy groups begin blocking rewards and support routes more aggressively. At that point, survival and mission completion matter more than collecting every airdrop on the screen. Advanced Strategy Crowded screen control: When Swarmers and Armored Raiders fill the center of the battlefield, move around the outside edge and let auto-attacks hit the nearest enemies. This reduces contact from multiple directions and keeps your escape path open. Airdrop delay: When a supply crate lands inside or behind an enemy group, wait briefly, circle the group, then collect it from the safer side. Treating every airdrop as an emergency pickup is one of the easiest ways to lose a run. Support rescue routing: When a support soldier is surrounded or placed near a dangerous route, open a path first, then enter and exit quickly. Rescued soldiers help your combat pressure, but only if the captain survives the rescue. Upgrade-based routing: If enemies start surviving long enough to block movement, choose upgrades based on the current problem. Use Heavy Rounds for tough enemies, Extended Barrel for safer spacing, and Twin Fire for enemy groups. Mission-first play: When the objective is nearly complete or the mission timer is becoming a problem, stop chasing enemies far from the mission route and move toward the objective. Common Mistakes Mistake · What It Looks Like · How to Fix It Walking into dense enemy groups · Health drops quickly before rewards can help · Move around the edge and protect your route Chasing airdrops too early · The captain reaches the crate but gets trapped · Delay the pickup until the route opens Weak upgrade priority · Enemies survive long enough to surround you · Start with Heavy Rounds or Extended Barrel Unsafe support rescue · The support soldier is rescued, but the captain cannot escape · Plan the exit before entering Poor timer management · The captain survives but the mission fails · Stay closer to the mission route Ignoring mixed enemy pressure · Fast enemies push you into tougher enemies · Separate enemy groups by moving in wide loops The most common beginner mistake is treating automatic attacks as permission to stand still. The captain can shoot on his own, but he cannot escape danger unless you keep moving and protect a route out of crowded areas. FAQ What is Captain, Don't Throw? Captain, Don't Throw is a casual shooting action game where you guide a captain through short mission-based stages. The game focuses on automatic attacks, movement control, airdrop timing, support rescue, and upgrade choices. Does the mission timer pause when picking up an airdrop? Do not plan around the timer stopping during a pickup. If the mission timer is tight, collect only the airdrops that are already close to your objective route. Which upgrade should I choose first? Choose Heavy Rounds first if enemies survive too long near the captain. Choose Extended Barrel if you need safer spacing, and choose Twin Fire when Swarmers begin stacking up in groups. Do auto-attacks target the closest enemy first? Auto-attacks are most useful when enemies are inside the captain’s active range. For practical play, assume nearby enemies create the most immediate danger and position the captain so the closest threats are cleared before they can surround him. When should I rescue support soldiers? Only when you have secured both an entry and an exit path. Rushing blindly into a crowd to save a soldier is one of the fastest ways to end your run. Why do beginners lose during crowded phases? Crowded phases are where enemy groups begin blocking rewards and support routes more aggressively. Beginners usually lose because they chase airdrops through dangerous areas instead of improving clearing power and protecting their movement route. Editorial Note This page provides a gameplay overview and beginner strategy guide for Captain, Don't Throw. It focuses on movement control, automatic attacks, mission objectives, upgrade choices, airdrop timing, support rescue, and common early mistakes. This guide is based on practical strategy analysis for surviving high-pressure swarms and optimizing upgrade paths in the game.
- Drop Zone Survivor
Drop Zone Survivor About This Game Drop Zone Survivor is a casual 2D battle royale survival shooter where each match begins with players entering the battlefield from a plane. Your goal is to choose a landing area, stay alive as the safe zone changes, protect your health, and become the final survivor. The main pressure comes from several simple decisions: where to land, when to move, when to fire, when to avoid a fight, when to use speed boost, and when to heal. If your health bar runs out, the match ends for you. If you survive and eliminate the remaining enemies, you win. A match usually moves through three stages. The early match is about finding a safe start. The middle of the match is about moving with the safe zone and choosing smart fights. The final stage is about staying calm, keeping enough health, and avoiding unnecessary risks when only a few enemies remain. How to Play Start each match by watching the plane route and choosing a landing area. A crowded drop can lead to quick action, but it can also end your run early. If you are still learning, choose a quieter area where you have time to move, read the map, and understand where danger may come from. Controls: Movement (WASD/Arrows) | Attack (Left Click) | Boost (Space) | Heal (E/Q) After landing, use the direction keys to control your movement. Move toward useful space instead of wandering randomly. Your first goal is not always to attack. It is to understand your position, the safe zone direction, and whether nearby enemies are worth fighting. Use the fire button when you have a clear reason to attack. Before firing, check four things: 1. Is the enemy close enough for the attack to matter? 2. Do you have enough health to survive the fight? 3. Do you have room to escape if the fight goes badly? 4. Will this fight pull you away from the safe zone? If the answer to several of these questions is no, moving first may be smarter than shooting immediately. Watch your health bar throughout the match. If your health is low, do not keep fighting just because an enemy is nearby. Break away from danger first, then heal when you have enough space. Healing while exposed can waste the opportunity and leave you vulnerable. Use speed boost only when it changes your survival chance. Good uses include reaching the safe zone, escaping pressure, repositioning around an enemy, or chasing a clearly weakened opponent. Poor uses include boosting across open space with no plan or wasting it before the safe zone creates real pressure. When the safe zone refreshes, move early. Many beginner losses happen because a player wins a small fight but loses position. Staying inside the playable area is just as important as defeating enemies. To win, stay alive, manage your health, move with the safe zone, choose fights carefully, and survive until every other enemy has been eliminated. Beginner Strategy Guide Early match: Choose a quieter landing area if you are still learning. A safe start gives you time to read the battlefield, check nearby enemies, and understand where the safe zone is moving. Dropping into the busiest area may feel exciting, but it often forces you into a fight before you are ready. Landing plan: A good landing area should give you space to move, not just a place to start. Try to avoid landing where enemies can surround you immediately. If you land near danger, move first and fight only when your direction, health, and escape path make sense. Mid match: Move with the safe zone instead of chasing every enemy. If an enemy runs away from the safe area, do not automatically follow. One unnecessary chase can put you in a worse position, waste your boost, or force you to heal at the wrong time. Fight selection: A fight is usually worth taking when the enemy is already weakened, you have enough health, you have room to move, and the safe zone is not pulling you away. A fight is usually not worth taking when your health is low, another enemy may attack from the side, or you have no clear escape route. Speed boost: Save it for real problems. Use it to enter the safe zone, escape danger, reposition, or finish a clear opportunity. Do not use it just because it is available. Player tip: the later the match gets, the more valuable a saved boost can become. Healing: Heal after you create space. A good healing moment usually comes after you break contact with an enemy, before you enter another risky area, or when you know the next fight may happen soon. Do not wait until your health is almost gone if you already have a safe moment to recover. Final stage: Do not expose your position too early when only a few enemies remain. Let other enemies make mistakes, keep enough room to move, and avoid chasing into a bad angle just to finish one opponent. In the final moments, survival, health, and position often matter more than aggressive shooting. Use this simple decision table during a match: Situation · Better Choice · Why It Helps You land near several enemies · Move first before fighting · It gives you space and lowers early risk The safe zone moves away · Rotate early · You avoid rushed movement later Your health is low · Break contact and heal · You reduce the chance of losing the next trade An enemy runs away from the zone · Let them go or reposition · Chasing may damage your own position Only a few enemies remain · Stay patient · The final fight is easier when you keep health and space Weapon stats can help you understand different in-game behavior. Instead of treating every weapon the same way, notice whether a weapon feels better for short fights, safer distance, quick movement, or finishing weakened enemies. Use that information to choose a playstyle inside the match. • Scout Weapons: Higher movement speed, moderate damage. • Heavy Weapons: Lower movement speed, high impact. Check the home screen stats to match your chosen landing strategy. A lighter setup may help when you want to move early and avoid pressure, while a heavier setup may feel better when you expect slower, more committed fights. The best beginner mindset is simple: survive first, fight second. Drop Zone Survivor rewards players who move early, avoid bad fights, protect their health, and attack only when the situation is favorable. Common Mistakes Mistake · Why It Hurts · Better Habit Landing in the most crowded area too early · You may lose before you understand the match · Start in a quieter area and learn the flow first Chasing enemies away from the safe zone · You can win a fight but lose your position · Stop chasing if the enemy is pulling you into danger Fighting with low health · One more exchange may end your run · Create space, heal when safe, then decide whether to fight again Healing while exposed · You may be attacked before recovery helps · Move to safer space before healing Wasting speed boost · You may not have it when danger appears · Save boost for escape, safe zone movement, or repositioning Ignoring escape space while firing · You can get trapped if the fight turns bad · Keep room to move before committing Playing only for eliminations · You may forget that survival is the win condition · Take fights that improve your chance to be the last survivor The most common beginner mistake is treating every enemy as an immediate target. Not every fight improves your chance of winning. If a fight damages your health, wastes your boost, or pulls you away from the safe zone, it may be better to reposition. Another common mistake is moving too late. The safe zone should guide your route before it becomes urgent. Moving early gives you more control, more escape space, and better timing for future fights. Still having trouble? Experiment with different landing spots to find your own rhythm between survival and combat. FAQ What is Drop Zone Survivor? Drop Zone Survivor is a casual 2D battle royale survival shooter. Players enter the battlefield from a plane, choose where to land, move through the match, watch the safe zone, and try to become the final survivor. How do you play Drop Zone Survivor? Choose a landing area, use WASD or the arrow keys to move, use left click to attack, watch your health bar, and stay inside the safe zone. Use Space for boost and E or Q for healing when the timing is safe. If your health bar runs out, the match ends for you. What is the best beginner strategy? The best beginner strategy is to land in a quieter area, move early with the safe zone, avoid unnecessary fights, and save speed boost or healing for moments that protect your survival. To win, focus on staying alive first, then take fights when your health and position are favorable. How do you survive the safe zone? Check the safe zone often and move before you are forced to rush. Avoid chasing enemies in the wrong direction. A safe route with room to escape is usually better than a risky fight that leaves you trapped. When should you use speed boost or healing? Use speed boost when you need to enter the safe zone, escape danger, reposition, or chase a weakened enemy. Use healing after you have created distance from danger or before entering a risky area. Do not heal while exposed if an enemy can still pressure you. Do skins, weapon stats, or in-game items have real-world value? Skins, weapon stats, and item information in Drop Zone Survivor should be understood as virtual game content. They may affect appearance or help players understand in-game behavior, but they should not be treated as cash-value rewards, betting features, real-money competition, real weapon advice, or financial guidance. Editorial Note This guide is based on the gameplay information provided for Drop Zone Survivor. It is written to help players understand landing choices, movement, safe zone awareness, health management, speed boost timing, healing decisions, weapon stat differences, and beginner survival strategy. All combat, health, safe zone, boost, healing, skins, weapon stats, and item-related systems discussed here refer only to virtual in-game mechanics. This guide is for gameplay understanding only and should not be used as real-world combat, weapon, gambling, or financial advice.
 Doodle Toss Squad
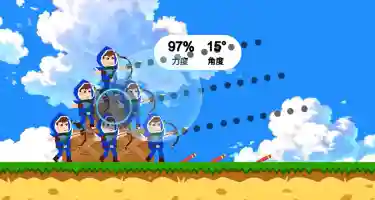
Doodle Toss Squad Doodle Toss Squad is a creative and fast-paced casual game where your drawing choice matters. Instead of selecting pre-made items, you draw your own in-game shapes to knock down the opposing squad. If you are looking for ways to improve your throws or clear challenges more smoothly, this guide breaks down useful beginner shapes, how to adjust your aim, and the common mistakes to avoid. 1. Top 3 Useful Shapes to Draw The game responds best to clear, readable drawings. Complex or messy scribbles can behave unpredictably. Instead, match these three simple shapes to the opposing squad's formation: • The Solid Block (Square/Rectangle) • Best For: Clustered opponents. • Strategy: A solid block has a wide contact area. Use it when multiple opponents are standing close together. Keep your drawing clean and balanced so it travels in a more predictable direction. • The Hook Shape (L-Shape or Curve) • Best For: Different contact angles. • Strategy: If an opponent is standing in a difficult position, a hook or curved shape can help you test a different landing angle. Keep the curve simple so the shape remains easy to control. • The Long Line (Horizontal or Vertical) • Best For: Single, exposed targets. • Strategy: A long line travels in a narrower path and covers less space than a block. Draw a straight line when one squad member is clearly exposed and you do not need a wide contact area. 2. Beginner Tips for Aiming and Throwing Knowing what to draw is only half the process. Improve your throwing technique with these adjustments: • Master the Micro-Adjustment: If you miss, do not make huge up-or-down swipes on your screen. If your previous shape flew slightly too high, lower your angle by a small amount. Gradual corrections usually lead to better control. • Read the Formation First: Never throw before checking the screen. Pause and identify the easiest target. Knocking down one opponent early can reduce pressure on your own squad. • Protect Your Own Squad: You fail the challenge if your squad is completely knocked down. If you are down to your last remaining member, choose a safer shape with a wider contact area rather than attempting a risky narrow throw. Aim Correction Table What Happens · Likely Problem · Better Adjustment Shape flies too high · Angle is too high · Lower aim slightly Shape falls short · Angle is too low · Raise direction gradually Shape reaches target but misses · Target choice may be wrong · Aim at an exposed opponent Shape hits only one opponent in a group · Contact area may be too narrow · Try a solid block Near hit becomes a complete miss · Overcorrection · Use smaller movements 3. Common Mistakes to Avoid • Overcomplicating the Drawing: Highly detailed or uneven shapes can make the object's in-game behavior harder to predict. Fix: Start with simple, balanced shapes, then experiment with more creative drawings after you understand how they move. • Sticking to One Shape: A block shape may work well against grouped opponents, but it may not work as well against widely spread targets. Fix: Change your drawing based on the specific round instead of using the same shape every time. • Assuming Customization Improves Performance: Coins, drawing skins, and pets mainly support customization and collection. Fix: Focus first on shape control, target choice, and aim correction. • Changing Aim Too Aggressively: Large aim changes can turn a near hit into a complete miss. Fix: If your throw was close, adjust gradually and use small up-or-down movements. • Only Focusing on Style: Creative drawings are fun, but a stylish shape is not always the easiest one to aim. Fix: Choose a shape that can make reliable contact first, then add style once your throws feel consistent. 4. FAQ: Troubleshooting Your Throws Q: Why do my drawings often miss the target completely? A: Your shape may be unbalanced, too messy, or aimed at the wrong angle. Try drawing a cleaner shape and raising or lowering your throwing direction slightly. Q: What happens if I run out of squad members? A: If your entire squad is knocked down before the opponents are cleared, the challenge fails. Watch your remaining squad members and choose safer throws when needed. Q: Is there a specific shape that works for every round? A: No. The most useful shape depends on how the opposing squad is positioned in that specific challenge. Adaptability is your best approach. Q: How can I aim more consistently after missing? A: If your throw was close, adjust your aim first with a small up-or-down movement. Watch where the shape landed, make one careful correction, and keep your drawing simple enough to control. If the same shape keeps missing or feels unreliable, switch to a cleaner shape that better matches the opposing squad's formation.
 Stickman Gunfight
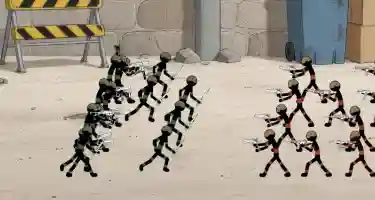
Stickman Gunfight About This Game Stickman Gunfight is a landscape-view, cartoon-style stickman squad strategy game where the most important decisions happen before the battle begins. The goal is not to place soldiers randomly and hope the squad wins. Each level asks you to read the enemy side, plan your own formation, and decide which units should protect the front row and which units should support from behind. This beginner guide focuses on enemy checking, placement order, front-line balance, unit selection, formation ideas, and how to adjust your squad after a failed attempt. Your formation starts from the first available position in the first row, so early choices can affect the whole battle. If the first row is too weak, your support units may not have enough time to help. If the back row is too light, your squad may survive the opening but fail to finish the level. Different soldier types fill different roles. A Sword Unit works best as a front-line pressure unit, a Pistol Unit is useful as basic ranged support, and an SMG Unit helps when your squad needs steadier back-row output. As more units become available, the best choice is not always the newest soldier. A good Stickman Gunfight strategy is about choosing the unit that solves the current formation problem. Pre-Battle Checklist: How to Set Up Your Squad Before starting a battle in Stickman Gunfight, use this simple setup process. Step 1: Check the enemy side • Swipe right at the beginning of the level. • Count how many enemy units are waiting. • Look at where the enemy pressure seems strongest. • Decide whether the stage needs a stronger front row, more back-row support, or a balanced mix. Step 2: Build your squad in order • Start from the first available position in the first row. • Think about the next few placements before filling the current slot. • Use Sword Units when the front row needs more stability. • Use Pistol Units when you need flexible ranged support. • Use SMG Units when your squad needs steadier pressure from behind. • Check whether the front row and back row have clear jobs before starting the battle. A useful Stickman Gunfight formation usually has one clear purpose: protect the opening line, spread pressure evenly, or add enough support to finish the level. Unit Comparison Table Unit · Role · Suggested Row · Use When · Avoid When Sword Unit · Front-line pressure and early protection · Front Row · Enemy pressure reaches your squad early · Your squad already survives early but lacks output Pistol Unit · Basic ranged support and flexible filler · Middle or Back Row · You need simple support behind the first row · The front row collapses too quickly SMG Unit · Steadier back-row output · Back Row · Your squad survives the opening but needs more finishing pressure · There is not enough front-line protection These row suggestions are beginner-friendly guidelines, not fixed rules. The best position can change depending on enemy count, available slots, unlocked units, and how quickly your front row falls under pressure. If a recommended unit is not unlocked yet, use the closest role you currently have. The goal is not to copy one exact lineup, but to balance front-line protection and back-row support. Beginner Formation Ideas & Winning Strategies These formation ideas are beginner-friendly examples, not the only correct setups. Use them as starting points and adjust them based on enemy count, unit availability, and battle results. 1. Balanced Formation Recommended idea: Use enough Sword Units to protect the first row, then place Pistol Units or SMG Units behind them for steady support. Use this formation when the enemy side looks balanced and does not create one obvious problem. Why it works: • Sword Units help protect the opening line. • Pistol Units can fill simple support positions. • SMG Units help maintain pressure from behind. • The squad is not too weak in the front or too passive in the back. When not to use it: Do not rely on this setup if the enemy side creates very heavy opening pressure. In that case, strengthen the front row first. 2. Anti-Rush Formation Recommended idea: Add more Sword Units early when the enemy side creates heavy opening pressure, then keep only enough back-row support to finish the fight. Use this formation when your squad keeps losing almost immediately after the battle starts. Why it works: • Extra Sword Units give the first row more stability. • Your back row gets more time to contribute. • The formation is harder to break during the opening clash. When not to use it: Do not use this setup when your squad already survives early but fails to finish enemies. In that case, you may need more SMG or Pistol support instead of more Sword Units. 3. Firing Squad Formation Recommended idea: Use a light front-line anchor with more Pistol Units or SMG Units behind it when the enemy side has fewer early-pressure units. Use this formation when the enemy side has fewer units or when your main problem is not early survival but finishing the level. Why it works: • A small front-line anchor gives your support units time to work. • Pistol Units provide flexible ranged support. • SMG Units add steadier output from the back row. When not to use it: Avoid this setup when the enemy side rushes the front line. Too many back-row units can fail if the first row breaks too quickly. How to Adjust After Losing A failed battle usually shows which part of your formation was weak. If you are not sure what failed, watch the first few seconds of the battle. The first unit group to collapse usually tells you which part of the formation needs adjustment. • If your squad loses almost immediately, strengthen the front row. • If your squad survives early but cannot finish the level, add more back-row support. • If one side collapses first, spread useful units more evenly. • If a new unit makes the result worse, return to a simpler balanced setup. • Change one thing at a time so you can tell which adjustment helped. Quick Tips • Check the enemy side before every battle. • Do not fill the first row without planning the next few placements. • Use Sword Units when the front row collapses early. • Use SMG Units when your squad survives but lacks finishing pressure. • Use Pistol Units when you need flexible support. • Do not use newly unlocked soldiers unless they solve a clear formation problem. • A balanced squad is usually safer than stacking only one unit type. Common Mistakes Putting SMG Units in the first row • Problem: SMG Units are better as support, not as the first line of pressure. • What happens: They can be overwhelmed early if there is no Sword Unit protecting the front. • Fix: Place Sword Units first when the enemy side looks aggressive. Using only Sword Units • Problem: A full Sword lineup may survive the opening better but lack enough support later. • What happens: Your squad can hold at first but lose momentum before clearing the level. • Fix: Add Pistol Units or SMG Units behind the front row. Using every newly unlocked soldier right away • Problem: New units are options, not automatic upgrades. • What happens: Your formation can become unbalanced if the new unit does not fit the stage. • Fix: Use a new soldier only when it solves a visible problem. Ignoring enemy numbers • Problem: Some players focus only on enemy unit types and forget to count how many enemies are waiting. • What happens: A larger enemy group can pressure more positions than expected. • Fix: If the enemy side has many units, spread your useful roles instead of stacking everything in one area. Leaving the front row too weak • Problem: A weak first row gives your support units no time to work. • What happens: The formation can break before the back row becomes useful. • Fix: Reinforce the first row with Sword Units before adding more output behind it. Overloading one side of the formation • Problem: Placing too many useful units in one area leaves other positions exposed. • What happens: One side may hold while the other side falls apart. • Fix: Spread your strongest roles across the formation when the enemy layout is wide. Restarting without changing anything • Problem: Repeating the same layout usually repeats the same result. • What happens: You lose again for the same reason. • Fix: After each failed battle, change one clear thing: the first row, one support unit, or the placement order. FAQ Should I choose SMG Units or Pistol Units in Stickman Gunfight? Choose Pistol Units when you need simple ranged support or a flexible filler. Choose SMG Units when your squad already survives the opening but needs steadier back-row pressure. What should I do if my front-row Sword Units keep falling early? Strengthen the front row before adding more back-row support. If the first row breaks too quickly, your Pistol Units and SMG Units may not have enough time to help. What is the best beginner formation in Stickman Gunfight? The safest beginner idea is usually a Balanced Formation: enough Sword Units to protect the front, with Pistol or SMG support behind them. This gives your squad both early stability and steady follow-up pressure. Why do I keep losing even after unlocking stronger soldiers? You may be using new soldiers without a clear purpose. A stronger-looking unit does not automatically fix a weak formation. Check whether your problem is front-line weakness, poor back-row support, or uneven placement. How do I win more levels in Stickman Gunfight? Check the enemy side first, build around the enemy count, protect your front row, and avoid relying on only one unit type. After losing, adjust one part of the formation instead of rebuilding randomly. Editorial Note This guide discusses Stickman Gunfight as a cartoon-style squad strategy game. All Sword, Pistol, and SMG references describe virtual unit roles and in-game formation decisions only.
 Tank Arena Survivor
Tank Arena Survivor About This Game Tank Arena Survivor is a casual tank arena survival game built around swipe movement, bullet power-ups, and upgrade planning. Your goal is to guide your tank through the arena, avoid being trapped, collect useful boosts, defeat every enemy tank, and keep your own tank active until the round is cleared. The main challenge comes from reading enemy pressure, choosing when to grab a boost, and upgrading health, movement speed, or firepower after each round. How to Play At the start of a round, do not rush straight into the middle cluster. Use the opening moments to move around the outer area, read where enemy pressure is forming, and decide which side gives you the cleanest route. Swipe on the screen to guide your tank’s movement direction. Smooth movement matters more than rushing. A good beginner route is to move in wide curves, avoid sharp panic turns, and keep enough space to escape if enemies start closing in. A practical round flow looks like this: Round Phase · Main Goal · What to Do Early round · Stay active and read the arena · Stay on the perimeter, avoid early crowding, and watch where enemies group First power-up chance · Improve your attack without taking unnecessary risk · Collect bullet multiplier, faster firing, or firepower only if the route is open Mid-round pressure · Clear enemies without getting surrounded · Flank the enemies, keep turning space, and avoid chasing one target too long Low-health situation · Stop forcing direct trades · Create distance, move toward open space, and wait for a better angle Final cleanup · Finish carefully · Do not rush just because only a few enemies remain; keep moving and clear them from controlled angles A simple beginner movement pattern is: 1. Move along the edge of the arena first. 2. Watch which side becomes crowded. 3. Turn away from that side instead of cutting through it. 4. Engage from the outer edges while leaving an exit route. 5. Collect a boost only when you can enter and leave without being boxed in. 6. After the round, upgrade based on what actually caused the loss. Bullet power-ups change the pace of the match. A bullet multiplier is useful when several enemies are still active because it can increase your coverage. Faster firing helps when you need steady pressure while moving. Firepower boosts are better when you already have enough room to aim and reposition. To win, defeat all enemies in the arena. If your tank is defeated by enemy pressure, the challenge fails and you need to try again. After a round ends, choose between health, movement speed, and firepower upgrades depending on your biggest problem. Specific enemy behavior, upgrade limits, reward values, and power-up effects may vary by version, so use the in-game prompts as the final reference. Beginner Strategy Guide The strongest beginner habit is to treat movement as your first defense. Do not start a round by chasing the nearest enemy. First, make room, read the arena, and look for a route that lets you engage without trapping yourself. Opening Movement Strategy At the start of a round, avoid driving straight into the middle. Circle the outside first and watch where enemies begin to gather. This gives you more turning space and helps you choose your first attack angle. A safer beginner pattern is: 1. Circle the outer area during the opening. 2. Identify the most crowded side. 3. Move away from that pressure instead of cutting through it. 4. Flank the enemies instead of charging through the center. 5. Grab a power-up only when the path in and out is clear. This opening reduces early damage and gives you time to understand the round before committing to a fight. Enemy Pressure Patterns Think of enemies by pressure pattern rather than fixed names: Enemy Pressure Pattern · What It Feels Like · Better Response Grouped enemies · Several enemies gather in one area · Stay outside the cluster, flank the enemies, and use bullet multiplier when you have room Slow heavy pressure · A slower enemy still creates danger if you trade directly · Keep distance, turn early, and avoid straight-line fighting Chasing pressure · Enemies follow your movement path · Use wider turns, lead them away from boosts, then circle back Split pressure · Threats approach from more than one direction · Stop chasing and move toward the most open space first End-round pressure · Only a few enemies remain, but one mistake can still end the run · Slow down, avoid greedy boosts, and finish from a controlled angle Power-Up Choices Do not collect every boost just because it appears. A power-up is only valuable if you can use it without giving up your position. Power-Up or Upgrade · Best Use Case · Beginner Tip Bullet multiplier · Several enemies are active or grouped · Strong when you have space to move; risky if you are already trapped Faster firing · You need steady pressure while repositioning · Keep moving; faster firing does not make standing still safe Firepower boost · You survive well but clear enemies slowly · Use it from the outer edges instead of rushing into the center Health upgrade · You lose early or take too much damage · Consider this for your first few upgrade choices if you are still learning Movement speed upgrade · You struggle to dodge, escape, or reach boosts · Useful after you understand basic movement routes Firepower upgrade · You survive most rounds but need faster clears · Better once your movement is already consistent Upgrade Styles Choose upgrades based on your failure pattern, not just what looks strongest. Upgrade Style · Upgrade Focus · Works Well For Survival Build · Health first, then movement speed · Beginners who lose early or take too many hits Kiting Build · Movement speed + faster firing support · Players who prefer circling, dodging, and attacking while moving Clear-Speed Build · Firepower + bullet multiplier value · Players who survive well but take too long to finish rounds Balanced Build · Health, speed, and firepower upgraded evenly · Players who want steady progress without relying on one stat A simple upgrade decision rule: What Went Wrong · Upgrade Direction You were defeated early · Add health You could not escape crowded areas · Add movement speed You survived but enemies took too long to clear · Add firepower You lost after chasing boosts · Improve movement choices before blaming upgrades You lost near the end · Slow down during final cleanup and avoid risky direct trades The best beginner mindset is: survive the opening, collect only useful boosts, clear from the edges, and upgrade for the problem you actually faced. Common Mistakes Wrong Move · Better Move Driving into the center too early · Stay on the perimeter first, read enemy movement, then engage from a side route Standing still while attacking · Keep moving in curves so enemies have less time to surround you Chasing one enemy across the arena · Break off if the chase pulls you into crowded space Grabbing every power-up immediately · Check whether the route is open before committing Taking a bullet multiplier while trapped · Create room first so the extra bullets can actually help Ignoring low health · Stop forcing trades, create distance, and look for a cleaner angle Only upgrading firepower · Add health or speed if your main issue is survival or escape Repeating the same upgrade after every failure · Match the upgrade to the loss: health for early defeat, speed for escape problems, firepower for slow clears Playing too aggressively near the end · Treat the final enemies carefully and avoid unnecessary risks Expecting one power-up to win the round · Combine boosts with movement control, timing, and upgrade planning FAQ Do power-ups stack in Tank Arena Survivor? Current gameplay confirms bullet-related boosts such as bullet multiplier, faster firing, and firepower boosts, but stacking behavior may depend on the version. Watch the in-game effect after collecting a boost, and do not rely on stacking unless your version clearly shows it. Is there a max level for upgrades? A maximum upgrade level may depend on the version. If your version has a cap, it should appear in the upgrade screen. Until then, choose health, movement speed, or firepower based on your latest round result. What is the hardest enemy pattern to deal with? The hardest situation for beginners is usually split pressure, where enemies threaten from more than one direction. When that happens, stop chasing one target and move toward open space before attacking again. Should I always collect a bullet multiplier? No. Bullet multiplier is useful when several enemies are active, but it is not worth taking if the route is too risky. A missed power-up is better than driving into a trap. What should I do when my tank has low health? Stop forcing direct fights. Move away from crowded areas, use wider turns, and attack only when you have a clear escape route. Why do I keep losing near the end of a round? Many players become too aggressive when only a few enemies remain. Final cleanup still requires patience. Keep moving, avoid greedy power-up grabs, and finish enemies from controlled angles. Is faster firing better than stronger firepower? It depends on the situation. Faster firing helps with steady pressure while moving, while stronger firepower helps if enemies take too long to clear. If you are still getting surrounded, movement and positioning matter more than either one. Editorial Note This guide is based on the current version of Tank Arena Survivor. Gameplay mechanics, enemy patterns, and upgrade values may change in future updates.
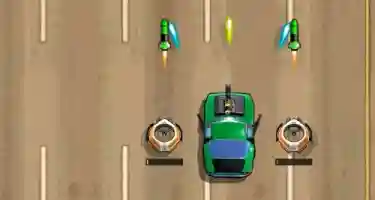 I'm Really Good With Tanks
I'm Really Good With Tanks In I'm Really Good With Tanks, survive first, collect second, and upgrade with a purpose. Use the middle lanes to keep escape options open, avoid getting trapped on the edge, skip risky Money Trucks or Fuel Trucks, and prioritize control-focused upgrades before speed-focused upgrades. About This Game I'm Really Good With Tanks is a casual tank driving arcade game built around lane switching, road survival, and quick reactions. You guide a tank along a five-lane road, moving between lanes to avoid traffic and clear selected road targets. The core loop is easy to understand: drive forward, read the traffic grid, avoid collisions, collect in-game cash from safe target clears, then return to the Home page to unlock tanks or improve performance. Money Trucks, Fuel Trucks, other tanks, and road vehicles all work as arcade gameplay elements inside the run. What makes I'm Really Good With Tanks interesting is the lane pressure. A clear lane can become dangerous quickly, especially if you move too late or chase a target into a blocked route. Strong runs come from planning your next lane before the current one becomes unsafe. The Basics • Watch the road across all lanes, not just the lane your tank is using. • Move left or right to avoid vehicles and keep the run alive. • Clear Money Trucks, Fuel Trucks, or other tank targets only when the route stays open. • Do not chase every target; a missed truck is better than an early crash. • Collect in-game cash during the run. • If your tank hits another vehicle, the run ends. • Use the Home page after a run to unlock new tanks or improve performance. The simplest rule is this: the best lane is not always the empty lane now. It is the lane that still gives you a way out two seconds later. Beginner Strategy Guide Read the Traffic Grid, Not Just Your Lane Many new players crash because they react only to the vehicle directly ahead. In I'm Really Good With Tanks, you need to scan the whole road pattern. Check your current lane, the lane you want to enter, and the lane beside that one. If two or three lanes are filling up at the same time, move before the gap disappears. Late lane changes force panic decisions, and panic decisions usually lead to collisions. A good habit is to keep your eyes slightly ahead of the tank instead of staring at the tank itself. This gives you more time to see where the next safe opening will form. Use the Center Lane Strategy The middle area of the road is usually safer for beginners because it gives you more escape options. From the center lanes, you can move left or right depending on where traffic opens. This does not mean you should sit in the center forever. It means you should use the center as a reset point after collecting a target or dodging a tight traffic pattern. Good center-lane moments: • You are unsure where the next target will appear. • Both sides of the road are changing quickly. • You just cleared a truck and need to recover position. • You want to avoid being forced into a single escape direction. The center lanes give you choices. In a lane switching game, choices are often more valuable than speed. Avoid the Edge Lane Trap The outer lanes can look safe, but they are dangerous when traffic closes in. If you move into the far-left or far-right lane, you only have one direction to escape. If that return path is blocked, you are trapped. Use edge lanes for quick moves, not long stays. Enter the edge only when the lane ahead is open and you can return toward the middle before the next traffic cluster arrives. Pro-Tip: Don't skim past targets. Give Money Trucks and Fuel Trucks a full lane's width of clearance, especially when they appear near the edge of the road. That extra space helps you avoid getting pinned with no recovery lane. Know When to Skip Money Trucks and Fuel Trucks Money Trucks and Fuel Trucks are tempting because they can help your in-game cash flow, but they are not worth chasing into a blocked lane. Before moving toward a truck, check three things: 1. Is the lane ahead open? 2. Can you leave that lane after clearing the target? 3. Will the move force you into the edge with no return route? If the answer looks risky, skip the target. The best way to collect more over time is usually to survive longer, not to grab every truck on screen. A strong player does not collect every target. A strong player collects the targets that do not break the route. Control Your Lane Switching Rhythm Fast movement is useful only when it is controlled. Random lane switching makes the tank harder to position and can place you directly in front of traffic you had already avoided. Use this rhythm: • Read the road. • Choose one safe lane. • Move once. • Recheck the pattern. • Move again only if needed. This rhythm keeps your tank stable and gives you time to plan. If you keep crashing early, slow down your decisions and move earlier instead of moving more often. First 3 Runs Practice Focus If you are new to I'm Really Good With Tanks, use your first few runs as practice instead of trying to collect everything immediately. • Run 1: Ignore most targets and focus only on avoiding collisions. • Run 2: Practice early lane changes before a lane becomes blocked. • Run 3: Start collecting safe trucks only when at least one escape lane remains open. After that, you can begin mixing survival, target collection, and upgrades more confidently. Upgrade Priority for Beginners The Home page upgrade system can help future runs, but beginners should avoid spending in-game cash randomly. The best early upgrade plan is to make the tank easier to control before making it faster. A useful beginner priority is: 1. Control-Related Upgrades First Prioritize handling, steering, movement stability, or any upgrade that makes lane changes easier to manage. A tank that responds cleanly is far more useful than a tank that moves fast but feels difficult to place. 2. Survival and Consistency Next Put your next upgrades into anything that helps you last longer or recover from lane pressure more easily. Longer runs create more chances to collect safely. 3. Collection Efficiency After Stability Once your tank feels stable, spend upgrades on anything that improves your ability to collect more from safe runs. Do this only after you can survive long enough to benefit from those upgrades. 4. Speed-Focused Upgrades Later Speed can make the road harder to read if your control is still weak. Choose speed-focused upgrades after you are comfortable handling crowded traffic patterns. 5. New Tanks When They Support Your Playstyle Unlock new tanks when they clearly help your control, comfort, or run consistency. If a new tank mainly changes appearance, it is usually better to improve basic performance first. Beginner rule: control before speed, survival before collection, and safe targets before risky trucks. Common Mistakes Looking only at the current lane The lane ahead may be open now but blocked a moment later. Watch the nearby lanes so you know where to move next. Switching too late Waiting until a vehicle is close gives you fewer options. Move early when the traffic pattern starts closing. Chasing trucks without an escape route Before going for Money Trucks or Fuel Trucks, check whether you can leave the lane afterward. If the target sends you into a dead end, skip it. Staying on the edge too long The far-left and far-right lanes limit your escape direction. Use them briefly, then return toward the center when possible. Choosing speed before control A tank that moves faster than you can steer is a problem, not an upgrade. Driving with high speed but poor control makes every lane change feel rushed, and it is an easy way to crash into the next truck or vehicle. Fix your handling first. Repeating the same crash pattern If you keep failing in the same situation, stop chasing targets for a few runs and focus on lane timing. Fix the route decision before trying to collect more cash. FAQ How can beginners collect more cash safely? Focus on survival time. The game naturally creates more safe target chances the longer you stay alive. Chasing every single truck is a trap that ends runs early. Should I upgrade control or speed first? Upgrade control-related performance first. Better steering, handling, or movement stability makes it easier to dodge traffic, recover from lane pressure, and collect safely. Are Money Trucks and Fuel Trucks always worth chasing? No. They are worth chasing only when the lane ahead is open and you can leave the lane afterward. If a truck pulls you into an edge trap or crowded traffic grid, skip it. Why do I keep crashing early? You are probably moving too late, watching only one lane, or chasing targets before checking escape routes. For a few runs, ignore trucks and practice early lane changes across the traffic grid.
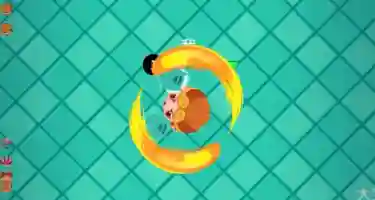 Teddy Glove Arena
Teddy Glove Arena About This Game Teddy Glove Arena is easiest to understand as two connected loops: survive the arena first, then improve your glove setup on the Home page. This is a casual cartoon boxing arena game with simple arena attacks and a glove merge upgrade system. You control a cartoon-style boxer in a match against nine rival boxers, moving around the arena, choosing when to attack, and trying to stay in the round until you are the last boxer standing. The action is built around two virtual attack moves: a quick punch and a heavier hammer swing. The attacks are virtual game mechanics, not real-world fighting instruction. Your success depends less on button mashing and more on reading the arena, choosing safer targets, and repositioning after each attack. The Home page adds the main growth system. You can buy basic gloves and merge matching glove levels to build higher-level gloves step by step. This gives Teddy Glove Arena a light glove merge game feel while keeping the core match focused on movement, attack choice, and arena survival. A good beginner approach is simple: do not treat every opponent as a target. Watch the field, pick one rival boxer you can approach safely, attack once, and move again before the arena closes around you. How to Play When a match begins, take a moment to read the arena. Look for open space, check where rival boxers are gathering, and avoid walking directly into the busiest area. Use the left side of the screen to control your boxer’s movement direction. Smooth swipes are better than sudden random movement because your position decides whether you can attack safely or escape pressure. Use the right side of the screen to choose your attack. The punch is the safer close-range option when a rival boxer is already near you. The hammer swing is a higher-commitment attack option when you have enough space, a clear angle, and a target path that makes sense. To win a match, defeat the other nine opponents and remain as the final boxer in the arena. If your boxer is defeated first, the challenge fails and you need to start another attempt. After the match, return to the Home page to manage glove upgrades. The upgrade system is based on merging gloves of the same level into the next level, so planning your pairs matters more than buying randomly. Quick Beginner Plan 1. Start by moving around the outer area. 2. Watch where opponents gather. 3. Choose one safer, isolated target. 4. Move in only when the angle is clear. 5. Attack once, then reposition. 6. Return to the Home page after the match to merge gloves. Specific button labels, glove stats, attack range, damage values, and reward rules may vary by version, so this guide focuses on the confirmed core loop: move, choose an attack, survive the arena, and upgrade gloves through merging. Beginner Strategy Guide Pro Tip: A good target is not always the closest target. A good target is one you can approach, hit, and leave without getting trapped. At the start of a match, use what can be called The Orbiting Strategy: move around the outer side of the arena instead of cutting straight through the middle. This gives you more time to see where rival boxers are grouping and helps you avoid being squeezed from several directions at once. When you chase a target, do not follow blindly. Choose a rival boxer near open space, move in from an angle, use one attack, and then step away. If the target is standing inside a group, leave it for later and circle toward a safer opponent. If two or more opponents close in on you, move first. New players often attack immediately when they feel pressured, but that usually keeps them in the danger zone. Create distance, reset your angle, and only attack after you have room to leave. When the center becomes crowded, stay near the outside and look for a lone boxer drifting away from the group. This is the safest time to apply the Safe Target Rule: approach only when you have a clear entry path and a clear exit path. Attack Choice Guide Situation · Better Choice · Why It Works Opponent is already close and not protected by nearby rivals · Punch · Fast, simple, and lower commitment There is open space and a clear attack angle · Hammer swing · Better when the angle gives the swing room to work Two or more opponents are nearby · Move first · Escaping pressure is safer than forcing an attack Your attack would place you in the center of a crowd · Do not attack yet · Bad position can cost the round Target is close but surrounded · Wait or change target · The safest target is not always the nearest one The punch is best when the target is already in range and the risk is low. Think of it as your close-range tool for quick moments. The hammer swing should be used more selectively. It works better when you have space, angle, and a clear target route. Do not treat it as a mindless power move. The Home page glove system should be handled with a simple Merge Pair Rule: merge existing pairs first, avoid random purchases, and build toward the next glove level step by step. If you already have one glove close to forming a pair, prioritize completing that pair before starting a new upgrade path. Each higher glove level requires more basic gloves behind the scenes. For example, a Level 2 glove needs two basic gloves, a Level 3 glove effectively needs four basic gloves, and a Level 4 glove effectively needs eight basic gloves if the same two-for-one merge pattern continues. Glove upgrades support your run, but they are not a replacement for arena control. A better glove setup can improve progression, while winning still depends on when you move in, when you back away, and which target you choose. Common Mistakes Pro Tip: Most early losses come from bad positioning before the attack, not from choosing the wrong attack button. Mistake · Fix Rushing into the center at the start · Circle around the outside first and wait for a safer target. Attacking while surrounded · Move away first, then attack after creating space. Spamming hammer swing · Use it only when the distance and angle are favorable. Chasing the closest opponent every time · Choose the safest target, not always the nearest one. Using punch from too far away · Step closer only when you can still retreat after attacking. Swinging into a crowded group · Wait for one opponent to separate from the cluster. Standing still after an attack · Reposition immediately so you are not caught by nearby rivals. Buying gloves randomly · Merge matching levels with a clear upgrade route. Relying only on glove level · Use upgrades as support, not as a substitute for arena decisions. A clean beginner rhythm is: move, check the angle, attack once, and reposition. If you skip the final step, even a good attack can leave your boxer in a bad spot. FAQ What should I do if I get pushed toward a corner? Move along the edge instead of attacking immediately. Look for the nearest opening, escape the pressure, and attack only after you have space again. Avoid forcing a hammer swing here, because it is a higher-commitment move and may leave your boxer exposed. How does glove merging work? The Home page lets you merge two gloves of the same level into one higher-level glove. Plan your upgrade route around matching existing pairs instead of buying random gloves and filling up your available glove space. Why am I losing even with a higher-level glove? A glove upgrade may improve your attack performance or margin of error, but poor movement and bad target choices can still cost you the round. Focus on safe approach paths, single strategic attacks, and quick repositioning. Is Teddy Glove Arena a real boxing or gambling game? No. Teddy Glove Arena is a casual cartoon arena game. Its boxers, gloves, attacks, upgrades, and rewards are virtual gameplay mechanics, not real boxing training, gambling, betting, or real-money rewards. Editorial Note This guide is based on the gameplay information provided for Teddy Glove Arena. It focuses on controls, attack choice, arena survival, target selection, and the glove merge system. All boxing, glove, attack, upgrade, and reward references describe virtual game mechanics only.
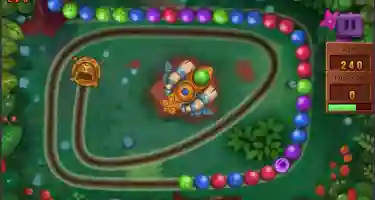 Zuma Adventure
Zuma Adventure About This Game Zuma Adventure is a marble-shooting color puzzle built around aiming, matching, and pressure control. A moving line of colored marbles travels along a track toward the exit, and your goal is to clear the line before it reaches the end. The main challenge is not only hitting the right color. Good play depends on track pressure, color priority, shot timing, and combo planning. A small clear near the danger zone can be more useful than a large match far away, especially when the foremost group is already close to the exit. As levels become more difficult, players may need to respond to tighter paths, faster movement, denser color mixes, or special elements when they appear. The best approach is to keep the track organized, avoid random shots, and choose clears that give you more space to work with. How to Play Start each level by reading the track. Look at where the marbles enter, where they are moving, and where the exit is. This helps you decide which section is safe and which section needs immediate attention. Basic play flow: 1. Read the track direction and identify where the marble line is moving. 2. Check the launcher color before choosing a target. 3. Aim at a matching color group already on the track. 4. Connect three or more same-colored marbles to clear them. 5. Watch for pull-back clears when separated same-color groups connect after a match. 6. Protect the danger zone whenever the foremost group gets close to the exit. If the marble line reaches the exit, the level fails. If you clear the current line before that happens, the level is completed. Specific buttons, special effects, or booster behavior may vary by version or level, so focus first on clean matching, safe placement, and defensive decision-making. Beginner Strategy Guide The best beginner strategy in Zuma Adventure is to treat every shot as a board-management decision. A shot should either clear marbles, reduce danger, prepare a combo, or keep the track easier to manage. If a shot does none of those things, it may create more trouble than value. Shot Priority Order Use this order when you are not sure where to shoot: 1. Clear marbles near the exit if the line is close to failing. 2. Make a direct three-color match when it helps immediately. 3. Set up a combo only when the critical area is still safe. 4. Place an unmatched marble beside the same color when a direct match is not available. 5. Avoid narrow mixed sections unless the shot clearly improves the position. This priority system helps new players avoid random shooting. A clean small match in the danger zone is often better than a larger match far from the exit. When the Foremost Group Is Close to the Exit If the foremost group is near the finish point, stop chasing stylish clears in the back of the track. Focus on stabilizing the critical area first. Good emergency shots usually do one of these things: • Remove marbles from the front section. • Pull the line backward after a clear. • Open space before the final bend. • Connect a quick combo only if it helps the danger zone. Do not spend several shots building a long setup while the line is already close to failure. In pressure moments, survival comes before score. When the Launcher Color Does Not Match Sometimes the loaded marble will not give you a direct match. The worst response is to fire it into a tight mixed section just to get rid of it. A better approach is: • Place the marble beside the same color if that color is available. • Put it in a low-pressure section if no useful match exists. • Avoid splitting two colors that are close to forming a match. • Use the shot to prepare the next color instead of forcing a weak clear. A color that cannot clear immediately can still be useful if it keeps the track organized. How to Create Better Combos The strongest clears often happen when two same-color groups are separated by one or two marbles of another color. If you clear the blocker between them, the two matching groups may pull together and disappear as a follow-up clear. Example: • A red group is on one side. • Another red group is nearby. • A small blue group sits between them. • Clear the blue group first. • The red groups connect and may trigger another clear. This is the basic logic behind chain-clearing. It works best when the danger zone is under control and you have enough time to set up the middle clear. Safe Shot vs Risky Shot Shot Type · Better Choice Safe shot · Completes a match or reduces pressure near the exit Setup shot · Prepares a combo while the critical area is still safe Risky shot · Adds a random color into a tight mixed section Emergency shot · Clears the foremost group before it reaches the end If a shot does not clear, prepare, or protect, it is probably risky. Special Effects and Booster Timing When a level provides special effects, use them to solve real pressure instead of spending them immediately. A useful effect should either reduce danger near the front, slow down a difficult section, clear a crowded area, open a blocked color group, or help you aim at a narrow gap. Do not waste special effects when the board is already safe. Their best value comes from fixing danger, opening blocked colors, or turning a crowded section into a manageable one. Dealing with Complex Track Layouts If a level includes a more complex path, do not treat every visible marble as equally important. Always prioritize the route or section closest to the exit, because that is where failure is most likely to happen. When part of the line becomes harder to read, focus on the color order you can still see and prepare safer clears near the danger zone. If the track bends sharply or overlaps visually, avoid risky shots into crowded areas unless you are sure the marble will complete a match or reduce pressure. For confusing layouts, divide your attention in a simple order: first check the critical area, then look for direct matches, then consider combo setups. This keeps your decisions stable even when the track becomes harder to read. Strategy for Fast or Confusing Levels When the line moves faster or the colors become more mixed, simplify your decisions: • Clear the critical area first. • Avoid long setup shots unless the track is stable. • Keep colors grouped instead of scattering them. • Use special effects only when they solve an immediate problem. • Watch the next shot if the game shows it, but do not ignore current danger. Fast levels punish messy shooting. Clean, defensive clears usually work better than risky combo attempts. Common Mistakes Only looking at the nearest marbles The closest target is not always the best target. Check the danger zone often, especially when the track bends near the exit. Chasing big matches in the wrong area A large match far from danger may look useful, but it does not help if the foremost group is about to reach the end. Shooting unmatched colors into narrow gaps This can split useful color groups and make future clears harder. If the current color does not match, place it where it causes the least damage. Ignoring separated same-color groups Two groups of the same color with a small blocker between them are often a combo opportunity. Clear the blocker first when the critical area is safe. Using special effects too early Special effects are most valuable when they fix a real problem. Save them for crowded sections, fast movement, blocked colors, or dangerous pressure near the exit. Playing too fast after one successful clear A clear can change the whole track. Pause briefly after each important match and check whether the line pulled together, opened a combo, or created a new danger area. Trying to force combos under pressure Combos are useful, but not when the line is close to the end. In emergency situations, take the safe clear first. Ignoring difficult track shapes Sharp turns, tight paths, or visually crowded sections can hide the real danger. When the layout becomes harder to read, return to the basics: protect the exit, make clean matches, and avoid clutter. FAQ How do you play Zuma Adventure? Aim the launcher at matching colors on the moving track. Connect three or more marbles of the same color to clear them before the line reaches the end. What should beginners focus on first? Beginners should focus on the danger zone, clean three-color matches, and avoiding random shots that make the track harder to manage. What should I do when the launcher color does not match? Place the marble beside the same color if possible. If there is no useful match, put it in a low-pressure area and prepare for the next shot. How do you create chain reactions in Zuma Adventure? Look for two same-color groups separated by a small group of another color. Clear the middle group so the matching sides can pull together and possibly clear again. What is the best strategy for fast-moving levels? Play defensively. Clear the foremost group first, avoid risky setup shots, and use special effects only when they reduce immediate pressure. When should boosters or special effects be used? Use them when the line is close to the end, when colors are badly mixed, or when one effect can open several useful matches. Do not waste them while the board is already under control. How can I improve my level results? Focus on cleaner matches, faster recovery after each clear, and well-timed combos. Completing the stage safely should come before risky high-score attempts. Are boosters, scores, or level results real prizes? No. Boosters, scores, effects, and level progress in Zuma Adventure are virtual in-game elements only. Editorial Note This guide focuses on gameplay explanation and beginner strategy for Zuma Adventure. It describes marble launching, color matching, track pressure, combo planning, and defensive decision-making based on the game-style mechanics discussed on this page. Any scores, boosters, effects, rewards, or level progress mentioned in this guide refer only to virtual in-game elements. This article does not claim an official relationship with any other brand, developer, publisher, or franchise.
 Bubble Shooter
Bubble Shooter About This Game Bubble Shooter is a casual arcade fruit shooter and timing puzzle game. Despite the name, this is not a traditional bubble-matching game. This Fruit Edition is built around a launcher, a fruit target, and a moving spike gate that can block the shot path. Your goal is to launch shots at the fruit until it gradually shrinks and disappears. Each successful hit moves the target closer to being cleared, but every shot must pass safely around the spike gate. If the shot collides with the gate, the attempt fails. The game is less about clicking quickly and more about reading the obstacle pattern. The fruit may be visible, but that does not always mean the shot is safe. The best moment usually comes after the spike gate has moved away from the path. Bubble Shooter also includes launcher upgrades and fruit-themed shot visuals. Upgrades may improve clearing speed or target progress, while different fruit-style shots add variety to the arcade feel. The core challenge remains the same: clear the fruit by timing each shot around the moving obstacle. How to Play Start by watching the fruit target and the moving spike gate. Before taking the first shot, let the gate complete at least one movement cycle so you can understand its rhythm. When the gate moves away from the shot path, click the launcher to send a shot toward the fruit. If the shot reaches the fruit, the fruit becomes smaller. Repeat this process until the fruit disappears completely. Avoid clicking as soon as the fruit appears open. A safe shot depends on the gate position, not just the fruit position. If the gate is entering the path or the opening looks too narrow, wait for the next chance. Use single, deliberate shots instead of rapid clicking. Panic spamming can send a shot into the spike gate even when the previous shot was safe. A slower rhythm often gives you better control. Launcher upgrades can help improve progress, but they do not remove the timing challenge. Even with upgrades, each shot still needs to avoid the moving gate. Tips & Tricks Watch whether the gate is leaving the path or returning into it. A visible fruit target is only safe when the gate is moving away from the shot line. When the fruit becomes smaller, stay patient. The final hit can be the easiest moment to rush and the easiest moment to fail. Treat the last shot like the first one: check the gate, confirm the opening, then launch. If you fail, think about the timing of the shot. Did you click before the gate fully cleared the path? Did you wait too long and let it return? Did you focus on the fruit while ignoring the obstacle? Most failed attempts come from one of these mistakes. The best runs come from patience, not faster clicking. Watch the movement, launch only when the path is clean, and let each safe hit reduce the fruit step by step. Common Mistakes to Avoid • Blind Launching: Failing to watch one full movement cycle of the spike gate before taking the first shot. • Panic Spamming: Using rapid, multi-click bursts instead of single, deliberate shots. • Rushing the Finish Line: Losing patience when the fruit is almost cleared. Treat the final hit with the same caution as the first. Our Verdict / Personal Review Overall Rating: ⭐⭐⭐½ (3.5/5) This Fruit Edition of Bubble Shooter works because the rules are simple, but the timing pressure gives each attempt a real challenge. The fruit-shrinking mechanic makes progress easy to understand, while the moving spike gate keeps the game from becoming a basic click-and-clear routine. The game feels most fair when the gate movement is readable. You can see why a shot worked or failed, which makes each retry feel like a timing adjustment rather than random luck. It becomes frustrating mainly when players click before confirming the opening. If you rush, the spike gate can punish even a nearly completed run. That is also what gives the game its tension: the final hit still matters. Overall, Bubble Shooter is best approached as a fruit target timing game, not a classic bubble shooter. It is a simple arcade puzzle for players who enjoy short rounds, clear goals, and timing-based decisions. Editorial Note This guide is based on visible gameplay mechanics, including the launcher, fruit target, moving spike gate, and in-game upgrade system. It focuses on beginner timing decisions rather than hidden values or guaranteed level outcomes.
 Battle Monster Island
Battle Monster Island About This Game Battle Monster Island is a casual side-scrolling monster shooter and action adventure game built around stage movement, shooting timing, upgrades, and character growth. At first, the game can look like a title where holding the fire button is enough. Once a narrow platform, a flying butterfly-type monster, a seven-spotted ladybug monster, and a risky coin path appear together, the real lesson becomes clear: positioning matters just as much as firepower. The player controls a character through horizontal monster island stages, clears monster enemies, avoids obstacles, collects coins and items, and prepares for tougher stage pressure. Different themed chapters, including holy coast-style chapter areas, can change the rhythm by adding tighter platform space, denser monster placement, riskier pickup locations, and Boss pressure that forces more movement. The Arms button in the lower-left area opens the weapon upgrade area. In the Arms system, labels such as straight-fire or cutter-style options can represent different in-game firepower paths. A stronger weapon setup can help clear enemies faster, but it still works best when paired with good movement and safe positioning. Battle Monster Island also includes Reform and Research systems. Reform and Research are character growth areas that support survivability, including attributes such as health and defense. If Arms helps you remove threats faster, Reform and Research help you stay alive long enough to handle longer stages, crowded enemy patterns, and Boss encounters. How to Play When a stage begins, do not rush forward immediately. First, read the screen: where enemies are placed, where obstacles move, where coins and items appear, and where your safest landing spots are. In this title, many early failures come from moving into danger before understanding the layout. Mastering the joystick is your first step to survival. Use it to control distance, stop before hazards, retreat when enemies get too close, and create space before attacking. The right-side buttons are generally used for shooting and jumping, so the basic rhythm is simple: move into position, attack briefly, dodge or jump when needed, then reposition. Do not fire while drifting blindly into obstacles. If a monster is standing near a narrow platform or a hazard is directly ahead, settle your character first. A short controlled burst from a safe spot is usually better than jumping forward while shooting and landing with no escape route. For a more specific example, if a venom monster appears near a flame trap, do not run straight toward the coin path. Wait for the trap rhythm, move or jump to a safer platform, then attack the venom monster from a position where you can still retreat. Once the danger is cleared, collect the nearby coins or items if the route is stable. Jumping should always have a purpose. Jump when you can see the landing spot, when you need to cross an obstacle, when an enemy attack forces you to reposition, or when you need to reset your spacing. Avoid jumping inside enemy pressure without knowing where your character will land. Coins and items are useful, but they should not control the whole run. Use this collection order: 1. Clear or avoid the enemy blocking your route. 2. Watch the obstacle timing. 3. Confirm the landing space. 4. Collect coins and items only if the path remains safe. The Arms system is worth upgrading when enemies take too long to clear or when normal stages start dragging on. If your front-fire setup clears straight-line enemies well but struggles when flying monsters pressure you, focus on positioning before assuming another weapon upgrade will solve the stage. If cutter-style firepower appears more useful in close or crowded situations, treat it as a tool for specific pressure rather than a universal answer. Reform and Research become more important when your main problem is survival. If you keep losing health before reaching the later part of a stage, or if a holy coast-style Boss section pressures you before you can learn the pattern, invest in survivability before chasing faster clears. In Boss stages, watch the attack pattern before committing to damage. If the Boss creates a short quiet moment after an attack pattern, use that window for shooting instead of attacking during the dangerous part. The basic Boss rhythm is: observe the pattern, dodge first, attack briefly, then move again before the next pressure arrives. Beginner Strategy Guide Before starting a stage, check five things: enemy position, obstacle timing, safe platforms, coin or item risk, and whether your current upgrades match the problem you are facing. If you failed the same stage several times, do not retry with the same habits. Change one thing: movement, upgrade focus, or collection route. Early Game Upgrade Priority · When to Focus on It · Reason Arms · Monsters take too long to clear · Better firepower can reduce pressure in regular stages. Straight-fire weapon path · You need steady forward fire · Useful when enemies approach from the front or block the route. cutter-style weapon path · Enemies crowd your space · Better for close pressure if the stage gives you less room to stand safely. Reform · You lose health too quickly · Extra survivability gives beginners more time to react. Research · Boss or later-stage pressure ends runs early · Health and defense growth can help you survive long enough to learn patterns. Movement practice · You keep missing jumps or landing in danger · Upgrades cannot fix poor landing choices. Safer collection habits · Coins and items bait you into damage · Finish the route first; collect only when the stage is stable. A practical beginner rule is to diagnose the failure before upgrading. If enemies stay on screen too long, improve Arms. If you are defeated before understanding the pattern, improve Reform or Research. If you fall into hazards or jump into enemy pressure, practice movement before relying on upgrades. When facing a flying butterfly-type monster, avoid chasing it across unsafe platforms. Hold a stable position, fire when it enters your attack line, and move only after checking the next landing spot. When facing a seven-spotted ladybug monster on a narrow path, do not jump forward for coins first. Clear the monster or wait for a safer opening, then move through the platform. If a venom monster appears near a hazard, treat the hazard as the first problem. The monster may be the visible threat, but the trap or obstacle controls your movement. Move to a safer angle, wait for the obstacle rhythm, then attack when you have room to retreat. Boss stages should not be played like normal monster waves. In regular stages, you may be able to clear enemies while moving forward. In Boss stages, the safer pattern is slower: watch the attack, dodge, use the quiet moment for damage, and move again. Do not stand in one position just because your weapon feels strong. If you reach a holy coast-style chapter area or another tighter section, expect the stage to punish greedy movement. Coins may sit closer to danger, enemies may appear in denser groups, and Boss pressure may force more repositioning. When the platform space becomes smaller, your escape route matters more than one extra pickup. For repeated failures, use this troubleshooting table: Failure Pattern · Likely Problem · Better Fix You keep losing health · Standing still too long or jumping too late · Create distance, attack briefly, then reposition. You cannot clear enemies fast enough · Arms may be underdeveloped · Improve weapon firepower, then test the stage again. You lose in Boss stages · Attacking during dangerous patterns · Wait for the quiet moment after a Boss attack. You miss jumps often · Jumping without a visible landing spot · Pause, check the platform, then jump with a clear target. You collect coins but fail the stage · Pickups are pulling you into danger · Clear the route first; collect only safe items. You fail after entering a new chapter · The old tactic no longer fits the layout · Adjust for tighter platforms, denser enemies, and riskier item placement. The strongest beginner habit is controlled rhythm: move, stabilize, shoot, dodge, and reset. When that rhythm feels natural, Arms upgrades, Reform growth, and Research improvements become much more effective. Common Mistakes Common Mistake · What Goes Wrong · Better Approach Standing still while shooting · Enemies and obstacles can trap your character from both sides. · Fire in short bursts, then move before pressure closes in. Upgrading only Arms · More firepower may not help if you lose health too quickly. · Add Reform or Research when survival is the main issue. Chasing every coin or item · Risky pickups can pull you into enemy attacks or bad jumps. · Clear enemies first, then collect only what fits the safe route. Fighting near hazards · A trap or obstacle can block your escape while enemies advance. · Move to a safer platform before attacking. Jumping without a landing plan · Early or late jumps can place your character inside danger. · Jump only when the landing space is visible and useful. Ignoring Boss quiet moments · You waste damage chances or attack during unsafe patterns. · Dodge first, then use the short opening after the pattern. Treating every weapon the same · Straight-fire and cutter-style options may feel useful in different situations. · Match the weapon path to the stage pressure you are facing. Using one tactic in every chapter · Later areas may add tighter platforms, denser monsters, or riskier pickups. · Change your movement and upgrade focus as the stage design changes. Panicking during crowded sections · Random shooting and jumping can make the screen harder to control. · Step back, clear the closest threat, then continue forward. FAQ Should beginners upgrade Arms first or Reform first? Upgrade Arms if enemies take too long to clear. Upgrade Reform or Research if you lose health too quickly or cannot survive long enough to learn the stage. What should I upgrade after losing the same stage several times? If enemies stay on screen too long, improve Arms. If your health drops too fast, improve Reform or Research. If you keep missing jumps, practice movement before spending upgrades as the main solution. Why do I keep losing in Boss stages? You are probably attacking during dangerous patterns or standing still too long. Watch the Boss rhythm, dodge first, attack during the short quiet moment, then reposition. Should I collect every coin and item? No. Collect coins and items only when the route is safe. A risky pickup near a trap, enemy, or narrow platform can ruin a run. What should I do when enemies and obstacles appear together? Handle the obstacle rhythm first. For example, if a venom monster is near a flame trap, wait for the trap timing, move to a safer platform, then attack the monster from a position where you can still retreat. Is it better to keep shooting or keep moving? Keep moving. Shooting is important, but staying in one place makes your character easier to pressure. A better rhythm is move, stabilize, shoot briefly, dodge, and reset. What does the Arms button do? The Arms button opens the weapon upgrade area. Labels such as straight-fire or cutter-style options may appear as in-game weapon paths, depending on what your version shows. Are coins, items, weapons, and upgrades real rewards? No. Coins, items, weapons, and upgrades are virtual game systems only. They are not cash rewards, gambling prizes, real weapon guidance, or real-world benefits.
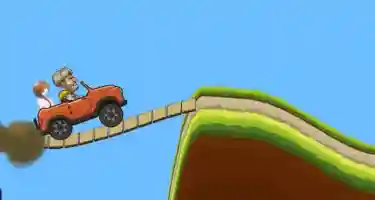 Road Killer
Road Killer About This Game Road Killer is a casual hill-climb physics driving game about keeping a car moving across rough roads, slopes, bumps, ramps, and obstacle-heavy terrain. Many failed runs happen because the car reaches a hill crest too fast and lands at a poor angle, not because the player simply lacks speed. Each run follows a clear driving loop: move forward, collect coins, watch the fuel gauge, survive uneven road sections, and use upgrades to improve the next attempt. The fun comes from learning how the car reacts when it climbs, drops, catches air, or lands on an awkward slope. Road Killer rewards patience more than constant acceleration. A clean run with steady throttle control is usually better than a reckless run that ends after one oversized jump. The road constantly asks small questions: do you need more power before the hill, less throttle before the drop, a safer landing line, or a smarter upgrade choice? Coins, fuel, and upgrades give the game its progression rhythm. Coins support upgrades, fuel keeps the run alive, and upgrades help the car handle longer and rougher sections. The strongest beginner mindset is simple: control first, distance second, collection third. This Road Killer guide focuses on practical driving rhythm, hill-climb balance, fuel awareness, upgrade decisions, and common failure patterns that new players run into during early runs. How to Play Start a Road Killer run by watching the first stretch of road instead of flooring the throttle immediately. The opening terrain matters. A flat start gives you room to build momentum, while an early hill or quick bump requires tighter control from the first second. Use throttle control to move forward without throwing the car off balance. Full throttle helps before certain climbs, but holding it too long can launch the car over a hill crest and make the landing harder to recover. The goal is to keep enough speed to progress while maintaining the car’s center of gravity. The brake is useful for more than stopping. Use it to settle the car before a sharp downhill, reduce speed before a bump, or correct a landing that feels too fast. In hill-climb driving games, the brake often works like a balance tool, not just a slowdown button. Fuel management affects every run. Watch the fuel gauge during long climbs and heavy throttle sections, because aggressive driving burns through distance quickly. Plan for fuel pickups early rather than reacting at the last moment. Coins are worth collecting when they fit the driving line. A coin path across flat or stable ground is easy value. A coin placed near a steep drop, awkward ramp, or unstable landing needs a quick risk check. Crashing for one coin usually costs more progress than leaving it behind. Upgrades improve the car’s performance over time. Road Killer progression is strongest when upgrades support the problem you are actually facing: climbing power, vehicle control, grip, fuel support, or similar performance areas shown in the game. Upgrade names may vary by version, so focus on what each upgrade improves: climbing power, stability, grip, or fuel support. A good run follows this pattern: build speed before a hill, ease off near the crest, keep the car level while catching air, land with control, collect safe coins, watch fuel, then upgrade based on the reason the run ended. Road Section · Better Action · Mistake to Avoid Before a hill · Build momentum before the slope · Accelerating too late Hill crest · Ease off before the top · Flying over at full speed Downhill · Control angle and speed · Letting gravity take over Jump or ramp · Prepare for landing · Chasing distance only Coin route · Take safe pickups first · Crashing for one coin Low fuel · Plan early for fuel · Ignoring fuel until the car is nearly empty Beginner Strategy Guide The most important beginner habit in Road Killer is learning the car’s weight. Do not treat the first few runs as serious distance attempts. Use them to feel how quickly the car accelerates, how easily it tilts, and how it lands after catching air. Once you understand the car’s rhythm, every later run becomes easier to control. Avoid full throttle before the first hill crest. A fast launch can feel useful, but it often puts the car into the first slope at a bad angle. Start with steady acceleration, then increase power only when the road ahead needs it. Before a hill, build momentum early. Many new players press harder only after the car has already slowed down on the slope. That is too late. Enter the climb with enough speed, keep the car stable, and reduce throttle slightly before the top so the car does not fly over the crest nose-first. Hill crests are one of the easiest places to flip. The danger is not the climb itself; it is what happens after the car reaches the top. Too much throttle at the crest can launch the car into a blind landing, especially when the next section drops sharply. Ease off before the top and prepare for the road on the other side. Downhill sections require discipline. Gravity already gives the car speed, so extra throttle can turn a safe descent into a rollover. Let the car settle, keep the front from dipping too hard, and use the brake lightly when the car starts outrunning your ability to control it. When the car catches air, stop thinking about distance and start thinking about the landing. The safest landing is not always the longest jump. Try to keep the car level, then match the landing angle to the road below. A clean landing keeps the run alive; a dramatic jump with a bad landing ends progress quickly. Upgrade choices should match failure patterns. New players often buy power too early because a faster car feels stronger. That can make the game harder. More speed means bigger jumps, sharper landings, and less time to react. Early upgrades should support control before raw speed becomes the priority. A strong beginner upgrade path is to improve control and shock absorption first, then add Engine / Power once the car can handle harder road sections. Suspension upgrades help absorb bumps and rough landings. Tires or grip upgrades help the car stay connected to the road. Fuel Capacity becomes more useful when your runs are stable but end before you can push farther. If Your Run Ends Because... · Upgrade Priority The car cannot climb steep hills · Engine / Power The car flips after bumps or ramps · Suspension or control The car slides or loses contact with the road · Tires or traction The run ends while the driving line is still stable · Fuel Capacity The car becomes too fast to control · Stop over-investing in speed Coins should never control the entire run. Take coins along the natural route, but do not force the car into unstable terrain for a single pickup. A safe run that travels farther gives you more chances to collect later. A short run that ends from one greedy coin route teaches very little. Fuel often becomes the hidden limiter for beginners. A player may think the problem is distance or speed, but the real issue is burning too much fuel during long climbs or rough sections. Smooth driving helps fuel last longer because you waste less time fighting bad angles. After each failed attempt, review the cause before restarting. Road Killer becomes easier when you name the mistake clearly. Did you hit the hill too slowly? Did you stay on throttle over the crest? Did you land nose-first? Did you ignore fuel? Did you upgrade speed before control? Fix one issue at a time instead of repeating the same drive. The best beginner goal is not a perfect run. It is a cleaner run than the last one. Travel farther, flip less often, land more smoothly, and upgrade with a reason. Common Mistakes Full throttle before the first hill crest This makes the car harder to control before you understand the road. Start steady, then add speed when the terrain calls for it. Accelerating too late on a hill A car that reaches the slope without momentum can lose speed quickly. Build power before the climb begins instead of reacting halfway up. Flying over a hill crest at full speed The crest is where many runs fall apart. Ease off near the top so the car does not launch into the next section at a bad angle. Over-accelerating during a long downhill Downhill speed builds naturally. Extra throttle can push the car into a flip or make the next obstacle harder to avoid. Landing nose-first after a ramp Catching air is useful only when the landing is controlled. Keep the car level and avoid forcing extra distance at the cost of stability. Buying speed before the car can handle rough landings A faster car is not always a better car. Control, suspension, grip, and fuel support often matter more during early progression. Chasing coins near unstable terrain Coins near dangerous slopes, jumps, or broken rhythm should be treated carefully. A safe route is better than a risky pickup that ends the run. Forgetting fuel during long climbs Heavy throttle burns through a run quickly. Watch fuel before it becomes an emergency, especially during extended uphill sections. Repeating the same failed approach Crashing in the same place means the driving rhythm needs to change. Try less throttle at the crest, a slower downhill entry, or a different upgrade focus. FAQ What is Road Killer? Road Killer is a casual hill-climb physics driving game where you control a car across uneven roads, slopes, bumps, ramps, and obstacles. The main challenge is keeping the car balanced while driving farther and improving through upgrades. How do you play Road Killer? Drive forward with careful throttle control, use the brake to manage speed and balance, collect coins when the route is safe, watch the fuel gauge, and upgrade the car after runs to improve future attempts. Is Road Killer a hill-climb driving game? Yes. Road Killer fits hill-climb driving gameplay because it focuses on slopes, vehicle balance, fuel awareness, rough terrain, jumps, landings, and distance-based progression. How do beginners avoid flipping? Beginners should avoid full throttle over hill crests, slow down before steep downhill sections, keep the car level while catching air, and land smoothly instead of chasing maximum jump distance. What should I upgrade first? Start with upgrades that improve control, grip, suspension, or fuel stability. Engine / Power upgrades help with climbs, but too much speed too early can make the car harder to handle. Are coins, upgrades, and rewards real-world prizes? No. Coins, upgrades, rewards, vehicles, and distance scores are virtual gameplay elements only. Road Killer is a casual arcade driving game, not a real-money reward or gambling product. *Editorial note: This guide is based on visible gameplay mechanics and beginner-facing driving patterns. It focuses on practical control, upgrade decisions, and common mistakes rather than hidden formulas, fixed reward values, or guaranteed outcomes.
 Escape stars
Escape Stars Core goal: Guide your rocket from asteroid to asteroid and keep climbing past the dashed line. Main challenge: Moving asteroids can shift before your rocket reaches them. Best for: Beginners who miss moving asteroids, overshoot close jumps, or rush high-score attempts. Beginner rule: Study the next asteroid before committing to the shot. About This Game Escape Stars is a space-themed casual jumping game where you guide a small rocket upward by landing on one asteroid after another. Each successful landing keeps the run going, while a missed asteroid sends the rocket falling and ends the attempt. The game looks simple at first: choose a launch angle, send the rocket upward, and try to reach the next landing point. The challenge comes from movement. Some asteroids shift across the screen, some show motion trails, and far targets require more patience than quick reaction. The main goal is to cross the dashed line and keep climbing for a higher score. A better run depends on calm timing, controlled launch strength, and knowing when not to click too soon. How to Play 1. Look at the next asteroid and notice whether it is still, moving sideways, or placed at a difficult angle. 2. Adjust the rocket’s launch angle toward a safe landing path. 3. Click to send the rocket forward. 4. Try to settle the rocket onto the next asteroid. 5. Keep moving upward and cross the dashed line to increase your score. 6. If the rocket misses the asteroid, the run ends and you need to start again. Quick Decision Rules • If the asteroid is close, reduce launch strength and focus on control. • If the asteroid is moving sideways, lead the shot in the direction it is traveling. • If the asteroid is far away, wait briefly and study its motion trail. • If your score is high, slow your rhythm instead of clicking faster. Best beginner habit: Before every far jump, wait long enough to see whether the asteroid is moving into your route or away from it. Beginner Strategy Guide Aim Ahead of Moving Asteroids A moving asteroid is rarely safest at the exact spot where you first see it. If it is sliding left or right, aim toward where it will be when the rocket arrives. Most beginner misses happen when the next asteroid is either moving sideways or close enough to overshoot. For a side-moving asteroid, watch the motion trail and give your launch angle a small lead in the same direction. You are not trying to hit the asteroid’s past position; you are trying to meet its future path. For example, if an asteroid is drifting to the right above your rocket, aiming directly at its center may send you behind it. A slight right-side lead gives the rocket a better chance to meet the asteroid as it moves. How to Read Different Asteroid Positions Close asteroid: Treat a close jump as a control test. Use a softer launch and avoid sending the rocket past the target. A nearby asteroid can be easy to miss if you overreact. Far asteroid: Watch at least part of its movement before firing. Far asteroids usually punish rushed timing more than weak aim, so waiting briefly can be part of the strategy. Side-moving asteroid: Follow the movement direction and aim ahead of the path. Motion trails are useful here because they help you judge whether the asteroid is crossing into your route or moving away from it. Diagonal asteroid: Set the launch angle first, then think about strength. A diagonal landing often fails when the angle is slightly wrong, even if the power feels close. Control Launch Power Escape Stars is not only about pointing the rocket in the right direction. Launch strength matters because close and far asteroids need different decisions. For a close jump, a strong launch can carry the rocket over the asteroid before it has a chance to settle. For a far asteroid, a weak shot may drop too early, while an overpowered shot can miss the landing zone completely. Try to match the launch strength to the distance instead of using the same force every time. A common beginner mistake is treating every upward asteroid like a long-distance target. If the next asteroid is only slightly above you, accuracy is more important than power. Use Gravity Pull Carefully If the game shows a slight pull or curve near an asteroid, treat it as a small correction effect, not as a guaranteed rescue mechanic. Aiming near the edge of an asteroid can sometimes help when your approach angle is tight, but it should only support an already reasonable shot. If the rocket is too far away from the asteroid, a small curve will not save the jump. For example, approaching the lower edge of an asteroid may still work if your angle is close. Flying past the asteroid at full speed usually will not. High Score Rhythm High-score attempts often fail because the player starts rushing. After several clean jumps, it is easy to click too quickly and stop checking the next moving asteroid. Keep a steady rhythm as the rocket climbs. Look at the next position, judge the launch angle, then commit. The dashed line may encourage faster play, but safer scoring usually comes from controlled launch choices rather than rushed asteroid launches. Common Mistakes Mistake: Aiming at the Current Position Fix: Lead the shot when the asteroid is moving. Aim toward the place where the asteroid is likely to be when the rocket reaches it. Mistake: Launching Too Early or Too Late Fix: Use the asteroid’s movement as your timing cue. Fire when the target is moving into a safer path, not when it is already drifting away. Mistake: Using Too Much Power on Close Jumps Fix: Treat close asteroids as precision landings. A smaller, cleaner launch is often safer than a forceful shot. Mistake: Ignoring Motion Trails Fix: Use motion trails to read direction and speed. They can help you decide whether to lead the shot, wait, or adjust the launch angle. Mistake: Depending Too Much on Gravity Correction Fix: Start with a sensible angle first. Any visible pull near an asteroid should be treated as a minor helper, not the main plan. FAQ Is it better to wait before launching in Escape Stars? Yes, especially when the next asteroid is far away or moving sideways. A short pause can reveal whether the asteroid is entering a safer path or moving out of reach. How do motion trails help in Escape Stars? Motion trails show the asteroid’s recent direction, making it easier to judge whether to lead the shot or wait. Should I aim at the center or edge of an asteroid? Aim for the center when the path is clean and direct. Aim closer to the edge only when the approach angle is tight and you need a small correction window. What is the safest way to handle far asteroids? Wait until the asteroid path is readable, then choose a launch angle that gives the rocket room to reach it without overshooting. Why do high-score runs usually fail? They often fail when the player’s rhythm speeds up and launches become rushed. Waiting for a readable asteroid path is safer than launching immediately. Editorial Note This guide focuses on visible gameplay behavior in Escape Stars. Game behavior may vary by version or platform, and this article does not claim hidden scoring formulas or guaranteed results.
 New Pixel Cat
New Pixel Cat About This Game New Pixel Cat is a casual pixel cat flying game built around tap-to-fly movement, obstacle dodging, and quick height control. You tap the screen to make the cat rise, then stop tapping to let the cat fall naturally. The challenge is to guide the cat through the open gaps between obstacles without touching them, dropping below the screen, or flying above the top of the screen. Each successful pass through an obstacle group adds to your in-game score. You can also collect virtual coins along the way for extra points, but coin collection works best when it does not pull the cat away from the next gap. The main skill in New Pixel Cat is learning when to tap, when to pause, and how early to adjust before the next obstacle arrives. The game also includes two one-use virtual power-ups. Shield can block one obstacle collision, making it especially useful for beginners or dense obstacle sections. Magnet can attract nearby in-game coins or score items, which helps once you already understand the basic flying rhythm. These power-ups improve your margin for error, but they do not guarantee a high score or replace careful control. New Pixel Cat is best approached as a rhythm-based arcade challenge. Short taps, early gap reading, and simple route decisions matter more than speed. How to Play Tap anywhere on the screen to begin controlling the cat. Each tap lifts the cat upward for a short moment. When you stop tapping, the cat falls. Your goal is to combine these two movements so the cat stays at a useful height while moving toward the next obstacle gap. Before entering each gap, look at where the opening is. If the gap is higher, give the cat a light tap before it arrives, then pause briefly so it does not overshoot. If the gap is lower, stop tapping for a moment and let the cat drop into position before making the next small correction. Try to enter the opening near the center rather than scraping the top or bottom edge. You earn score by passing through obstacle groups. If coins appear close to your path, collect them when it is safe. If a coin is outside the center route and would force a risky movement, keep the cat lined up with the gap instead. Shield can protect the cat from one obstacle hit. Use it before a section that looks tight or uncertain. Magnet helps pull nearby coins or score items toward the cat, so it is better used when you can already fly steadily and want to reduce unnecessary route changes. Ready to find your rhythm? Scroll up to the game screen and start your first flight! Beginner Strategy Guide Learn the basic rhythm first Do not start by tapping as fast as possible. In New Pixel Cat, rapid taps often send the cat too high, while long pauses make it fall too low. A better beginner pattern is: short tap, short pause, check the height, then tap again only when needed. The goal is not to keep the cat perfectly still. The goal is to keep the cat moving within a manageable height range so each obstacle gap is easier to enter. Look ahead before entering each gap Avoid staring only at the cat. Your eyes should move slightly ahead toward the next obstacle opening. When you see the gap early, you can make a small correction before the cat reaches it. Use this simple rule: • If the next gap is higher, tap lightly before the obstacle, then pause before entering. • If the next gap is lower, stop tapping briefly and let the cat fall into position. • If a coin sits outside the center route, skip it and prepare for the obstacle. When two gaps appear at different heights in a row, avoid overcorrecting back to the middle too quickly. Make the first gap safely, then adjust early for the second gap instead of tapping hard at the last moment. Small early adjustments are safer than large last-second movements. Keep the cat near the center line The center of the gap gives you the most room for error. Entering too close to the top edge makes one extra tap dangerous. Entering too close to the bottom edge makes one long pause risky. When you are learning New Pixel Cat, treat the middle of each opening as your main target. Coins and extra score should come after you can pass through obstacles consistently. Beginner Priority Table Priority · What to Focus On · Why It Matters 1 · Keep the cat’s height stable · Prevents sudden climbs, drops, and panic corrections 2 · Pass through the center of each gap · Gives more room for small mistakes 3 · Collect coins only when safe · Adds score without forcing risky movement 4 · Use power-ups at the right time · Expands your margin for error during harder moments Use Shield before risky sections Shield is the better beginner power-up because it can block one obstacle collision. Use it when the next section looks crowded, when the gap feels hard to judge, or when you are still learning the tapping rhythm. Do not wait until the cat is already hitting an obstacle. Shield is most useful when prepared before a risky approach. Use Magnet only after rhythm is stable Magnet is helpful when you already know how to keep the cat moving through gaps. It reduces the need to drift away from the main route for nearby coins or score items. Magnet should not make you fly into unsafe spaces. Let it support your coin collection while your main focus stays on the next obstacle opening. Review each failed run After a run ends, think about the exact mistake. Did you tap too quickly and climb too high? Did you pause too long and drop below the screen? Did you react late because you were watching a coin instead of the next gap? Improving in New Pixel Cat usually comes from fixing one small habit at a time. Common Mistakes • Panic tapping: Rapid taps can push the cat above the safe height. Use short taps with small pauses instead. • Waiting too long: Long pauses can make the cat drop below the screen. Correct the height before the fall becomes too steep. • Watching only the cat: Look ahead to the next gap instead of staring at your character. • Chasing coins at bad angles: Coins are useful only when they fit your route. Magnet can help, but it does not make risky coin paths safe. • Adjusting too late: Last-second height changes often cause overcorrection. Start moving toward the next opening as soon as you see it. • Using Shield too late: Shield works best when prepared before a difficult obstacle section, not after the mistake has already happened. • Expecting one rhythm to work forever: Some gaps require a higher or lower approach. Keep your tapping steady, but adjust based on the next obstacle. FAQ Which power-up is better for beginners? Shield is usually better for beginners because it can block one obstacle collision. It gives new players more room to learn the tap timing and obstacle spacing. When should I use Shield in New Pixel Cat? Use Shield before a section with tight gaps, dense obstacles, or a route you are not confident about. It is a one-use protection tool, so save it for a moment where a mistake is more likely. When should I use Magnet in New Pixel Cat? Use Magnet after you can already keep the cat flying steadily. It is best for attracting nearby virtual coins or score items without forcing the cat away from the main obstacle route. Should I chase every coin? No. Coins can add extra in-game score, but they are optional. If a coin pulls the cat away from the center of the next gap, skip it and focus on passing the obstacle. What ends a run in New Pixel Cat? A run ends if the cat hits an obstacle, falls below the screen, or flies above the top of the screen. If Shield is active, it can protect against one obstacle collision. Is New Pixel Cat a gambling game? No. New Pixel Cat is a casual tap-to-fly arcade game. Its coins, score, Magnet, Shield, and rewards are virtual in-game mechanics only. Editorial Note This New Pixel Cat guide is based on the visible gameplay mechanics described in the game, including tap-to-fly movement, obstacle gaps, virtual coins, Magnet, and Shield. It is written as an independent gameplay resource to help players understand the controls, timing decisions, and power-up use.
 Happy tourist
Happy Tourist About This Game Happy Tourist is a casual planet rolling and star collecting arcade game where you guide a character around a rotating planet surface and collect stars before the missed-star limit catches up with you. You can miss up to nine stars, but the 10th missed star ends the run. Tapping the screen uses a limited flight attempt, letting your character briefly lift off the surface to reach higher or farther stars. Happy Tourist is more than a simple tap-and-collect game. It tests rhythm, impulse control, and risk judgment. The strongest runs usually come from collecting safe surface stars consistently, saving flight for truly unreachable targets, and knowing when a far star is not worth breaking your route. The table below summarizes the rules that matter most for beginners. Gameplay Element · What It Means · Smart Beginner Habit Surface stars · Stars close to the planet route · Collect them first to build a stable run High stars · Stars above your normal path · Use flight only when timing cannot solve it Far stars · Stars that pull you away from the route · Chase only if you can recover quickly Flight attempts · Limited tap-to-fly resource · Save them for pressure moments Missed counter · Tracks stars you failed to collect · Play defensively when it gets high Ball skins · Visual style changes from touching other balls during flight · Treat them as optional bonuses In practice, Happy Tourist rewards target selection more than fast tapping. The game favors players who stay calm after a miss, protect the easy collectibles, and avoid wasting flight on stars that were still reachable through normal movement. How to Play • Watch the next star position before reacting. • Roll around the planet surface and collect nearby stars first. • Tap to fly only when a star is clearly too high or too far to reach from the surface. • If flight attempts run out, keep playing more conservatively and focus on reachable stars. • Touching other balls during flight may change your ball’s visual style, but it should not distract from star collection. • Background scenery is not part of the decision-making; your real focus is star position, flight timing, and missed-star pressure. If a star is only slightly above your route, do not tap instantly. Wait a moment and see whether the planet movement naturally brings your character close enough. Saving one flight attempt early can matter much more later when several difficult stars appear close together. Beginner Strategy Guide Quick Tips • Collect nearby surface stars first. • Save flight for stars that are truly out of reach. • Treat 7–8 missed stars as the danger zone. • Return to the planet surface quickly after flying. • Do not chase skin changes at the cost of important stars. The first skill to learn in Happy Tourist is target priority. Surface stars are your safest pickups, so they should anchor your route. If you repeatedly ignore easy stars while chasing dramatic high targets, your run becomes unstable even if some flights look impressive. A useful beginner benchmark is reaching the early 50-score range if your version shows a score counter. If your version tracks collected stars instead, treat the first 50 collected stars as a basic consistency goal. To reach that stage more consistently, avoid using flight in the opening stretch unless the star is clearly unreachable. Early flight mistakes usually do not feel serious right away, but they reduce your options once the pattern becomes harder. When you miss several stars in a row, the biggest danger is panic tapping. A practical recovery method is to deliberately skip one risky high star and force your route back to the planet surface. This feels conservative, but it often prevents a bad streak from turning into a failed run. Use flight when it solves one of these problems: • A star is clearly above the surface path. • A distant target would push the missed counter into a danger zone. • Two difficult pickups appear close enough that one controlled flight can help stabilize the route. • You can fly out, collect the star, and return without losing the next easy pickup. Do not use flight just because a star looks tempting. If chasing one far target makes you miss two simple pickups afterward, the trade is bad. High-level play is not about collecting the most difficult star on the screen; it is about choosing the star that keeps the run alive. When the missed counter reaches 7 or 8, change your style. Stop taking wide flight paths unless they are necessary. Focus on safe pickups, short corrections, and clean recovery after every tap. At that stage, one calm surface route is better than one flashy flight that leaves you out of position. Skin changes are optional visual bonuses. If a skin change happens during play, treat it as visual only. A clearer-looking skin may be easier to track, but no gameplay or scoring advantage should be assumed. Common Mistakes • Flying too early: Save flight for stars that normal movement cannot reach. • Ignoring safe pickups: Easy surface stars are the foundation of a longer run. • Panic tapping after a miss: Slow your decision-making instead of spending flight immediately. • Overextending in the air: Collect the target, then return to the planet surface quickly. • Forgetting to recover after flight: A successful flight still becomes risky if you land far from the next easy star. • Playing too aggressively in the danger zone: When the missed counter is high, choose safe targets first. • Using the same rhythm after flight runs out: Without flight, you need a more conservative route. • Chasing visual skin changes: A new look is not worth losing important stars. FAQ When should you use flight attempts in Happy Tourist? Use flight when a star is clearly too high or too far for surface movement. If the planet route can still reach it, save the flight attempt. What happens when you miss 10 stars? The run ends when the missed counter reaches 10 stars. You can miss up to nine, but the 10th missed star triggers failure. Does running out of flight attempts end the game? No. Running out of flight does not end the run by itself. It only limits your ability to reach high or distant stars. Is there a confirmed way to reduce missed stars? No confirmed reset or reduction method is described in the visible rules. Beginners should treat each missed star as permanent during the run. Is there a pattern to where the stars spawn? No fixed spawn formula is confirmed. The safer approach is to read each new star position quickly instead of trying to memorize a pattern. How can beginners break the first 50-point range? Collect surface stars first, avoid early flight waste, recover calmly after misses, and use flight only for targets that would otherwise be lost. Editorial Note This guide is based on visible gameplay rules and practical beginner decisions. It does not claim hidden formulas, official scoring data, fixed spawn patterns, or guaranteed results.
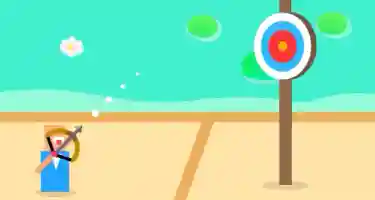 Marksman legend
Marksman Legend About This Game Marksman Legend is a casual archery aiming and target shooting challenge game built around drag-to-aim controls, limited arrows, and simple physics-based shot adjustment. Your goal is to hit the target and clear the level before your arrows run out. The game is easy to understand, but each shot still requires judgment. A close target may only need a short, controlled pull, while a far target usually needs more power and a slightly higher angle because the arrow can drop during flight. The red center of the target gives the highest score, but smart arrow use matters just as much as accuracy. In the current example layout, the upper-right corner shows 5 arrows. That small counter matters because every missed shot reduces your room for correction. Classic Mode is the basic progression mode for learning distance and power control. If Limited Mode appears in your version, treat it as a stricter aiming challenge where quick, clean decisions matter. Obstacle Mode adds blockers between the bow and the target, making the shot more about reading the path before release. How to Play Start each level by checking the target position. Look at the distance, the height of the target, the remaining arrow count, and whether the path is clear. Press and hold the screen, then drag backward to aim. Pulling farther back usually sends the arrow farther and faster. Move your aim to adjust the angle, then release your finger to shoot. For close targets, avoid using maximum power unless the layout clearly requires it. A lighter pull gives you more control and helps prevent overshooting. For distant targets, use more power and lift the angle slightly so the arrow can travel far enough before dropping too low. In Obstacle Mode, look at where the blocker sits before aiming. A blocker near the middle of the path may require a higher arc. A blocker close to the target may require a more precise landing angle. A blocked direct line usually means you should plan the path first instead of firing immediately. Quick start routine: • Check the target distance. • Use controlled power for close targets. • Add power and a slightly higher angle for far targets. • Watch the arrow counter before taking risky shots. • In blocked layouts, plan the arrow path before release. Beginner Strategy Guide The best beginner habit is to treat every shot as feedback. Do not simply repeat the same pull after a miss. Watch where the arrow lands, then adjust one thing at a time. If the arrow lands low, raise the angle slightly or add a little more power. If it flies over the target, lower the angle or reduce pull strength. If it falls short, increase power first before making a major angle change. Small corrections are usually more reliable than dramatic changes. A practical three-arrow plan can help you stay calm: • First arrow: Read the distance and observe the arrow drop. • Middle arrows: Make small corrections to angle and pull strength. • Last arrow: Choose the safest target hit instead of forcing a risky precision shot. Classic Mode teaches distance control, Limited Mode tests decision speed, and Obstacle Mode tests path reading. Use that difference to guide your play: build consistency first, then work on tighter shots and blocked paths. Situation · Better Adjustment The arrow lands low. · Raise the angle slightly or add a little more power. The arrow falls short. · Increase pull strength first, then adjust angle if needed. The arrow flies over the target. · Lower the angle or reduce power. The target is close. · Avoid full power and use a controlled pull. A blocker covers the direct path. · Look for a higher arc or a safer side angle before releasing. Once you can hit the target consistently, aiming closer to the red center becomes a scoring goal rather than a risky guess. Common Mistakes • Using full power on every shot: Stronger shots are not always more accurate. Close targets usually need a lighter pull. • Shooting before checking distance: A nearby target and a far target need different aiming habits. • Aiming too flat at long range: Far targets often need a slightly raised angle to account for arrow drop. • Changing too much after one miss: If the arrow was close, make a small correction instead of rebuilding the whole shot. • Ignoring blockers in Obstacle Mode: A visible target does not always mean the path is open. Read the obstacle position first. • Forgetting the arrow limit: Every level gives you limited attempts, so a careless early miss can make the final shot much harder. • Rushing in Limited Mode: Fast decisions help, but a rushed miss usually costs more than taking a brief moment to line up the shot. FAQ What is Marksman Legend? Marksman Legend is a casual bow-and-arrow aiming game where you drag to aim, release to shoot, and try to hit targets with a limited number of arrows. Why do my arrows fall short on distant targets? Your shot may need more pull strength, a higher angle, or both. Start by adding a little more power, then adjust the angle if the arrow still lands low. How should I adjust after missing a shot? Look at where the arrow landed. If it was low, raise the angle slightly. If it went too far, reduce power or lower the angle. If it was close, make a small correction rather than a large one. What is the best practice order for beginners? Start with close targets and controlled pulls, then practice mid-range angle adjustment, and finally work on long-distance shots or blocked paths. This order helps you build consistency before chasing red-center accuracy. How do obstacles change the way you aim? Obstacles make the shot more about path reading. Instead of aiming directly at the target, look for a clear arc or side angle that avoids the blocker. What is the most important beginner tip? Do not treat power as the answer to every shot. Distance, angle, and remaining arrows all matter, so controlled adjustments are usually better than pulling as hard as possible. Note: Marksman Legend uses virtual bow, arrow, target, score, mode, and reward systems only. This guide is about casual gameplay, not real-world archery instruction, gambling, betting, or real-money rewards.
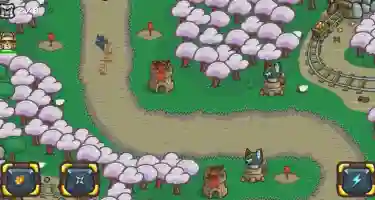 General Kitty
General Kitty Quick Strategy Summary General Kitty is a cat-themed tower defense game about route control, smart placement, and wave pressure. Beginners should build one strong chokepoint first, then support it with Backline DPS cats. Coins, upgrades, traps, and Lightning matter most when the enemy wave is actually putting your castle under pressure. About This Game General Kitty is a casual side-scrolling cat tower defense and castle defense strategy game. Your job is to protect the castle by placing cat units along the enemy route and stopping each wave before it breaks through your defense. The game starts on a forest-style map, but the pressure ramps up as later waves become harder to control. Good play is not about placing every cat as soon as you can afford it. It is about reading the route, finding the best defensive section, and making your cats work together around the busiest part of the path. The main roster has clear roles: Samurai cat: your main Frontline Tank for holding the first serious chokepoint. Ninja cat: a flexible Blocker for early pressure, quick lane support, or catching leaks. Machine-gun cat: a steady Backline DPS cat that works best behind a Blocker. Cannon cat: a heavier Backline DPS cat for crowded waves or overloaded route sections. Mines and traps: support items for narrow paths, turns, and backup defense areas. Lightning: a pressure-control skill for dangerous grouped waves. Coin / buff skill: a support option for rebuilding, upgrading, or strengthening a key defense point. General Kitty feels simple at first, but the real strategy comes from lane control. A well-placed Samurai cat and Machine-gun cat can do more than a messy row of random units if they cover the right part of the route. Mastering the Early Game Start every level by looking at the route before spending coins. Do not panic-place cats at the entrance just because enemies are moving. The strongest defense usually begins where enemies stay inside your attack range the longest. Use this simple early-game plan: 1. Find the first busy route section. Look for the first turn, narrow path, or chokepoint where enemies slow down or group together. 2. Place one Frontline Tank or Blocker there. Use a Samurai cat if you need a stronger front line. Use a Ninja cat if you need cheaper early support or a quick fix for a weak lane. 3. Add one Backline DPS cat behind it. A Machine-gun cat gives steady damage. A Cannon cat is better when enemies arrive in tighter groups. 4. Upgrade the core defense. Once your first defensive section is working, upgrade the unit that helps most in that area. Do not spread coins across too many weak cats too early. 5. Keep a small coin reserve. Save enough for one emergency Ninja cat, upgrade, trap, or backup unit. A small reserve can stop one leak from becoming a lost run. 6. Build a backup defense near the castle. After your main chokepoint becomes stable, place one backup defense closer to the castle gate. This catches fast enemies and gives you a second chance if the first line breaks. 7. Use skills when they change the outcome. Lightning is strongest when enemies group together or when your front line is close to failing. A coin or buff skill is most useful when it helps you afford a key upgrade, rebuild pressure, or strengthen a weak point before the next wave. Mines and traps should go where enemies must walk. The best spots are before chokepoints, around turns, or just ahead of your backup defense. If enemies rarely pass a tile, that tile is usually a poor trap location. If your castle keeps taking hits, rebuild your defense from the route instead of adding random units. Ask yourself: Is the first Blocker placed at the real busy route section? Is your Backline DPS covering the same area? Is there a backup defense near the castle? Are coins being saved for one emergency move? Are upgrades going into the units that actually control the busiest lane? Most early failures happen because the defense is spread too thin. Once your main chokepoint becomes reliable, the whole level feels less chaotic. Common Mistakes Placing every unit near the enemy entrance: build a backup defense closer to the castle. Using only Backline DPS cats: add a Samurai cat or Ninja cat to hold enemies in range. Spending coins too quickly: keep enough for one emergency placement, upgrade, or trap. Using Lightning on small waves: save it for grouped enemies or near-collapse moments. Upgrading too many weak units: improve one or two core defense points first. Placing mines or traps on quiet tiles: use turns, narrow paths, and unavoidable route sections. Repeating the same layout on every map: recheck the route whenever stage pressure changes. Ignoring the first leak: treat it as a warning and build backup defense before the next wave. \Editorial Note: This strategy guide is based on the visible gameplay rules and current beginner-facing version of General Kitty. Unit effectiveness and route-control decisions may change if future game updates adjust enemies, skills, maps, or upgrades. Coins, upgrades, traps, units, and Lightning refer to in-game mechanics and progression systems.\ FAQ Why do fast enemies keep slipping through? Fast enemies usually slip through when your first Blocker is too far from the real chokepoint or your Backline DPS is not covering the same area. Move the Blocker closer to the busy route section, then add a backup defense near the castle. What should I do when I get stuck on a Forest map? Rebuild the route step by step. Find the first turn or narrow path, place a Samurai cat or Ninja cat there, add a Machine-gun cat or Cannon cat behind it, keep coins for one emergency move, and create a backup defense before the castle. Should I upgrade Machine-gun cat or Cannon cat first? Upgrade the unit doing the most work in your main defensive section. If enemies arrive steadily, Machine-gun cat is usually the safer first upgrade. If enemies group together in one lane, Cannon cat may give better value. Why do my mines or traps feel useless? They are probably placed on low-traffic tiles. Mines and traps work best on fixed route sections enemies must cross, especially before turns, narrow paths, or backup defense areas. What should I do if my front line collapses too quickly? Strengthen the first busy route section. Move your Samurai cat or Ninja cat to a better chokepoint, upgrade your main Blocker if possible, and make sure your Backline DPS is supporting the same area.
Adventure
 Core Adventure
About This Game Core Adventure is a casual drilling adventure and mining upgrade game built around a clear loop: drill down, collect materials while rising back up, return to the surface, and upgrade your equipment for the next run. Each run starts with the drill moving underground until it reaches its current depth limit. The most important moment comes during the upward phase, when you collect materials and try to meet the storage target shown in the upper-left corner. Once that target is reached, the drill returns to the surface and you can spend your in-game resources on upgrades. The main progression systems are Storage Capacity, Drill Depth, and Idle Resource Generation. Storage Capacity helps your runs carry more value, Drill Depth opens deeper collection opportunities, and Idle Resource Generation supports longer-term progress between active runs. Core Adventure also includes drill skins and a collection book. These features add visual variety and completion goals, but the main strategy comes from improving the drilling, collecting, and upgrading cycle. How to Play 1. Start a drilling run and let the drill move underground. 2. Wait until the drill reaches its current depth limit. 3. Collect materials during the upward phase as the drill rises. 4. Watch the storage target shown in the upper-left corner. 5. Once the target is reached, return to the surface. 6. Spend your in-game resources on Storage Capacity, Drill Depth, or Idle Resource Generation. 7. Use later runs to adjust your upgrade plan based on what slowed you down. The most important part of each run is the upward phase. This is when your drill depth turns into useful progress, so avoid treating the return trip as passive downtime. Look for reachable material clusters, stay on a stable route, and avoid chasing every single pickup if it makes you miss a larger group. Beginner Strategy Guide Do not upgrade randomly in the first few runs. Your early goal is to identify the bottleneck: storage, depth, route control, or idle progress. After every return to the surface, ask one question before spending resources: what stopped this run from being better? A practical early upgrade order is: 1. Upgrade Storage Capacity first if you are reaching the target quickly or losing value from collected materials. 2. Upgrade Drill Depth after storage feels stable enough to benefit from deeper runs. 3. Add Idle Resource Generation once your active runs already feel productive. 4. Delay drill skins and collection book goals until the basic upgrade loop feels reliable. A good beginner route is not to maximize one upgrade immediately. First make the drilling loop stable, then push deeper, then use Idle Resource Generation to support longer-term progress. Upgrade Priority List • T0: Storage Capacity • Best when you collect enough materials but feel capped too quickly. • Strong early upgrade because it improves the value of successful upward phases. • T0: Drill Depth • Best when runs feel resource-poor or the upward phase does not offer enough material clusters. • More useful after storage can handle the extra materials from deeper routes. • T1: Idle Resource Generation • Best after your active drilling loop already feels stable. • Useful for players who return across multiple sessions, but it should not replace active upgrade planning. • T2: Drill Skins • Good for visual variety and collection goals. • Not the first priority when your drill still feels weak. • T2: Collection Book • Useful as a long-term completion goal. • Better after you understand the main drilling, collecting, and upgrade cycle. Upgrade Decision Table What you notice during runs · Likely issue · Better focus You reach the storage target quickly · Storage may be limiting the run · Upgrade Storage Capacity The upward phase feels empty · Drill range may be too shallow · Upgrade Drill Depth You collect well but progress feels slow later · Idle gain may be low · Improve Idle Resource Generation You miss many materials during the rise · Route control is weak · Practice upward movement before spending blindly You spend on skins while runs still feel weak · Upgrade priority is misplaced · Improve core equipment first Upward Phase Tips The upward phase is not just the end of a run. It is the part where depth becomes useful progress. Treat it as the main collection window. Prioritize material clusters that are easy to reach. A small group near your path is usually safer than a single piece far on the edge. Do not overcorrect for one isolated pickup if it causes you to miss a larger group that was already within reach. Try to collect in controlled lines instead of drifting back and forth. Wide, panicked movement can make the drill miss more materials than it gains. If the storage target is almost complete, focus on stable pickups instead of chasing risky pieces near the side of the screen. If Core Adventure shows different material colors or values in your current version, use a simple rule: only chase higher-value materials when the route stays stable. A valuable pickup is not worth it if it makes you miss an entire cluster afterward. When progress feels slow, check these problems in order: 1. Are you missing too many materials during the upward phase? 2. Are your runs too shallow to reveal enough useful materials? 3. Are you filling storage too quickly? 4. Are you upgrading the same stat without checking the actual problem? 5. Are you spending too early on skins or collection goals? Common Mistakes Mistake 1: Chasing edge materials too often Edge materials can be tempting, but they are not always worth the movement cost. If you move too far sideways for one small pickup, you may miss a better cluster in the center path. Fix: Stay near reliable material groups. Only move toward the edge when the pickup is clearly worth the detour. Mistake 2: Treating the upward phase like a passive return Some players relax after the drill reaches depth, but the upward phase is where most useful collection happens. Fix: Watch the path early, line up with clusters, and avoid random movement. Your goal is not to touch everything; your goal is to collect consistently. Mistake 3: Upgrading Drill Depth before storage can support it Going deeper feels exciting, but it can create weak runs if Storage Capacity is still too low. Fix: Improve Storage Capacity first when your runs already produce enough materials. Then push Drill Depth when you are ready to benefit from deeper routes. Mistake 4: Overbuilding Storage Capacity without enough depth More storage does not help much if your drill does not reach areas with enough useful materials. Some players keep expanding capacity but still struggle because the upward route does not provide enough to collect. Fix: If your storage is not filling efficiently, improve Drill Depth or focus on better upward-phase route control before buying more capacity. Mistake 5: Buying visual goals before stabilizing equipment Drill skins and the collection book can make Core Adventure more enjoyable over time, but they do not replace basic upgrade progress. Fix: Build a stable loop first: collect well, hit the storage target reliably, and return with enough resources to improve equipment. Mistake 6: Ignoring Idle Resource Generation before a long break If you plan to stop playing for a while, leaving Idle Resource Generation underdeveloped can make your next return feel slower than necessary. Fix: Before ending a longer session, consider whether an Idle Resource Generation upgrade would support your next run better than another short-term upgrade. Mistake 7: Spending without diagnosing the last run Many slow-progress problems come from upgrading out of habit. If every return leads to the same upgrade choice, you may be missing the real bottleneck. Fix: Before spending, identify one clear issue from the last run: storage cap, shallow depth, weak upward route, or low idle gain. FAQ What is Core Adventure? Core Adventure is a casual drilling adventure and mining upgrade game where each run involves drilling down, collecting materials during the upward phase, returning to the surface, and upgrading for the next attempt. How do you play Core Adventure? Start a run, let the drill descend, collect materials as it rises, watch the upper-left storage target, and spend resources on upgrades after returning to the surface. What should I upgrade first in Core Adventure? Start with Storage Capacity if you are collecting materials quickly but feel capped. Choose Drill Depth when your upward phase does not offer enough useful pickups. Add Idle Resource Generation later if you play across multiple sessions. What does Drill Depth do? Drill Depth affects how far the drill can go before the upward collection phase begins. It is most useful when your storage and collection control are strong enough to benefit from deeper runs. What does Storage Capacity do? Storage Capacity helps you carry more useful materials from successful runs. It is especially important when you often reach the storage target quickly or feel limited by capacity. What does Idle Resource Generation mean? Idle Resource Generation is an in-game progression mechanic that supports resource gain between active runs. It should be understood only as a virtual game system, not real-world income. Are drill skins important? Drill skins are better treated as visual or collection goals unless the current game version clearly shows a gameplay effect. Beginners should stabilize Storage Capacity, Drill Depth, and collection control before prioritizing skins. What is the collection book for? The collection book gives completion-focused players a long-term goal beyond basic upgrades. It is useful for progression tracking, but it should not replace core equipment upgrades early on. Editorial Note This Core Adventure guide is based on the available gameplay information and focuses on the drilling loop, upward collection phase, storage target, and main upgrade choices. Specific upgrade costs, skin effects, material values, and collection details may depend on the current in-game version, so players should follow the latest information shown inside the game. Core Adventure is a casual mining upgrade game. Idle Resource Generation, drill skins, materials, and the collection book are virtual in-game systems only and should not be understood as real-world financial activity.
 Chibi Hero Tile Quest
Chibi Hero Tile Quest About This Game Chibi Hero Tile Quest is a chibi hero match-and-battle puzzle game built around hero collection, clickable hero tiles, team deployment, and turn-based battle choices. This Chibi Hero Tile Quest strategy guide helps beginners understand how to build a team, read enemy targets, use hero tiles, and press Go at the right time. The game combines cute pixel-style hero portraits with light puzzle strategy. In battle, enemy targets are shown in the upper area, while available hero tiles appear around the lower and side areas of the screen. Players click hero tiles to prepare actions, then use the Go button to confirm the turn. This makes every round a small decision: check the enemy target, choose the hero tile that fits the situation, and press Go only when the move helps the current turn or sets up the next one. The game also includes a wider hero progression loop. The Hero Collection screen lets players view heroes such as KK Rainbow, Super Kid, and White Dragon, along with their level, upgrade progress, and role labels. The Deploy Hero area is where players choose which heroes to bring into battle. Other sections such as Battle, Trial, Treasure, and Shop support progression. In this game, Treasure is mainly connected with coins, while the Shop is used for hero shards and collection progress. The main skill in Chibi Hero Tile Quest is learning how hero roles, tile clicks, and turn timing work together. A strong player does not simply tap every available tile. They build a useful team, check enemy pressure, click the right hero tile, and confirm with Go only after the action makes sense. How to Play Follow this 6-step flow when starting a stage: 1. Step 1: Check your Hero Collection first. Before entering battle, review your available heroes. Look at characters such as KK Rainbow, Super Kid, and White Dragon, then check their level, upgrade progress, and role label. 2. Step 2: Read each hero’s battle role. Use the role labels to understand your team. Super Kid works as your DPS choice, KK Rainbow works as your support option, and White Dragon works as your control option. 3. Step 3: Build a balanced team before battle. A simple beginner setup is: Super Kid for damage, KK Rainbow for support, and White Dragon for control. This gives you a cleaner structure than choosing heroes only by appearance or level. 4. Step 4: Scan enemy targets before clicking tiles. Once the battle starts, look at the upper battle area first. Count the active enemies, find the most urgent target, and decide whether the next move needs damage, support, or control. 5. Step 5: Click the hero tile that solves the current problem. Hero tile actions are triggered by clicking. Click Super Kid when you need direct pressure, KK Rainbow when the team needs support, and White Dragon when enemy pressure needs to be controlled. 6. Step 6: Confirm with Go only after planning the next turn. The Go button confirms your selected action. Before pressing it, ask whether the clicked tile helps now and whether it leaves you with a playable next turn. After the action resolves, repeat the same loop: read the enemy target, scan your available hero tiles, click the best tile, then press Go. This rhythm is more reliable than tapping randomly because every move has a purpose. Beginner Strategy Guide Beginner Team Formula For early stages, use this simple lineup structure: Optimal Team = 1 DPS (Super Kid) + 1 SUP (KK Rainbow) + 1 CC (White Dragon) This formula gives your team three important tools: damage, stability, and control. It also prevents the common beginner mistake of using only damage heroes and then struggling when enemy pressure builds. Hero Skill Roles Super Kid is your main DPS option. Use Super Kid when you need direct damage pressure or when an enemy target is close enough to finish. KK Rainbow is your support option. Use KK Rainbow when the team needs more stability, safer turn flow, or a better setup before pressing Go. White Dragon is your control option. Use White Dragon when enemy pressure is building and you need to slow the pace of the battle or create a safer next turn. Target Priority Rule When several enemies are visible, do not attack randomly. Use this order: 1. Finish an enemy that is already close to defeat if doing so reduces pressure immediately. 2. Target the enemy that creates the biggest problem for your next turn. 3. Use KK Rainbow or White Dragon before damage if your team is under pressure. 4. Avoid spending Super Kid on a low-threat enemy unless it creates a safer board state. This rule is especially important before pressing Go. A strong move is not always the flashiest move. The best move is the one that makes the next turn easier. Hero Tile Click Rule In Chibi Hero Tile Quest, hero tile actions are triggered by clicking. That means every click should have a reason. Before clicking a hero tile, check: • Which enemy needs attention first? • Do I need damage, support, or control? • Is Super Kid, KK Rainbow, or White Dragon the best answer? • Will this click help the current turn? • Will this click leave better options after Go? Do not click the first tile you see. Tiles on the side of the battle area can be easy to miss, but they may offer a better move than the obvious tile near the bottom. Go Button Checklist Before pressing Go, run this quick check: • Did I look at the enemy area first? • Did I click the hero tile for a clear reason? • Am I solving the most urgent threat? • Will this move leave useful options for the next turn? • Am I using Super Kid, KK Rainbow, or White Dragon at the right moment? If the answer is unclear, pause and scan the board again. Most beginner mistakes happen because the player presses Go before the move has a purpose. Upgrade and Resource Rule Do not spread resources across every hero as soon as you unlock them. Build a small core team first. A practical early upgrade order is: 1. Upgrade Super Kid first if damage is your biggest problem. 2. Upgrade KK Rainbow if your team often loses stability before the battle ends. 3. Upgrade White Dragon if enemy pressure becomes difficult to control. 4. Delay upgrades for heroes you rarely deploy. Treasure is mainly connected with coins, while the Shop is used for hero shards. Use coins and shards to support heroes you actually deploy. The goal is to make your core team stronger, not to make every hero slightly upgraded. Energy Use Rule Energy should be spent on progress that improves your main team. Do not burn energy only because it is available. A practical beginner rule is: • Spend energy on battles that help your core team progress. • Use energy on Trial when it supports upgrades or hero growth. • Avoid repeating low-value stages if they do not help your current lineup. • Check whether you need coins, shards, or upgrade progress before spending energy. The best energy use is not always the fastest stage. It is the stage that gives your team the most useful progress. Common Mistakes Pressing Go before reading the enemy target. The Go button should confirm a decision, not replace one. Always check the enemy area before clicking a hero tile. Clicking the first available hero tile. A tile that can be clicked is not automatically the best tile. Compare the bottom and side tiles before acting, especially when multiple enemies are active. Ignoring the beginner team formula. A simple early team should include 1 DPS, 1 SUP, and 1 CC. Using Super Kid, KK Rainbow, and White Dragon together gives you a cleaner structure than stacking only damage. Using Super Kid on the wrong target. Super Kid should be used when damage matters. Do not waste a strong DPS action on a low-threat enemy unless it improves the next turn. Saving KK Rainbow for too long. Support is most useful before the battle falls apart. Use KK Rainbow when the team needs stability, not only after the situation is already bad. Forgetting White Dragon when enemy pressure builds. White Dragon is your control option. If enemies are creating too much pressure, use White Dragon to help slow the battle pace and create a safer turn. Spending coins or shards without a plan. Treasure gives coins, and the Shop provides hero shards. Focus both on heroes you use often instead of spreading upgrades across every character. Wasting energy on low-value progress. Energy should support your main team. Before spending it, decide whether you need coins, shards, upgrade progress, or battle advancement. FAQ What is Chibi Hero Tile Quest? Chibi Hero Tile Quest is a cute chibi hero match-and-battle puzzle game. It combines hero collection, clickable hero tiles, team deployment, enemy target reading, and turn-based battle decisions. How do you play Chibi Hero Tile Quest? Build a team in Hero Collection or Deploy Hero, enter battle, read the enemy targets, click the hero tile that solves the current problem, then press Go to confirm the action. What is a recommended beginner team in Chibi Hero Tile Quest? A strong beginner formula is 1 DPS + 1 SUP + 1 CC. For the early heroes shown in this guide, that means Super Kid as DPS, KK Rainbow as SUP, and White Dragon as CC. How should I use Super Kid? Use Super Kid when you need direct damage pressure. Super Kid is best used against urgent enemy targets or enemies that are close enough to finish. How should I use KK Rainbow? Use KK Rainbow when your team needs support or a safer turn setup. Do not wait too long to use support, because support is most valuable before the battle becomes unstable. How should I use White Dragon? Use White Dragon when enemy pressure is becoming difficult to manage. White Dragon works best as a control option that helps slow the battle pace and create a safer next turn. How should beginners use Shop items and Energy? Use Shop hero shards and Energy to support your main team first. Prioritize heroes you deploy often, such as Super Kid, KK Rainbow, and White Dragon, instead of spending resources across random characters or low-value stages. Coins, hero shards, Treasure, Shop items, and Energy are virtual in-game systems only. They are not real-world rewards, cash prizes, gambling rewards, or physical items.
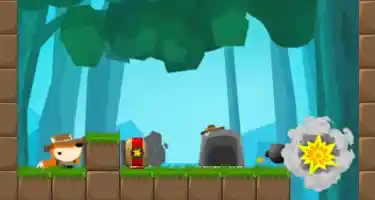 Little Fox Adventure
Little Fox Adventure About This Game Little Fox Adventure is a casual fox platform puzzle game built around block switching, falling routes, and careful timing. Your fox moves through layered stages where some blocks can stay solid while others become transparent. The challenge is not to rush downward, but to decide when a block should support the fox and when it should open the next path. Solid blocks help create safe pauses, landing points, and jump setups. Transparent blocks open the way to lower layers, but poor timing can drop the fox into the wrong area. This puzzle rewards observation. A clean route, a controlled fall, and a well-timed switch usually matter more than quick reactions. How to Play Before making the first move, scan the full layout. • Find the fox’s starting position. • Check the key location. • Notice where the collectible diamonds are placed. • Identify which blocks can change state. • Look one layer below before opening a drop. The core rule is simple: the key is the level-clear objective, while diamonds are optional in-game collectibles used for star rating improvement. Clear the key route first, then replay the level to improve diamond collection and star rating. A basic move sequence looks like this: 1. Keep a solid block active if the fox needs a safe platform. 2. Wait until the fox is lined up above the next landing. 3. Switch the correct block to transparent. 4. Let the fox drop only when the lower route is useful. 5. Use jumps after checking the current block state. 6. Adjust the next switch based on where the fox lands. Not every open path is a good path. A transparent block may look helpful, but if the fox lands too far from the route, the level becomes harder to control. Beginner Strategy Guide Start With the Route, Not the Reward Before switching the first block, decide where the fox should go. A common beginner mistake is reacting to the nearest object instead of reading the whole screen. Ask three quick questions: • Where should the fox end up? • Which block controls the first safe drop? • What happens one layer below? If the first drop is poorly timed, the rest of the level often becomes unstable. Safe Drop Setup Use this method when the fox is standing above two possible landing areas. 1. Do not switch the transparent block immediately. 2. Watch which lower platform gives the fox more control. 3. Keep a nearby solid block active as a stopping point. 4. Wait until the fox is directly above the intended landing. 5. Open the block only when the drop is lined up. This setup works because the first fall often decides the rest of the route. A slower switch can be safer than an early switch. Side Route Decision A side path is only worth taking when the route stays stable. Take the side route when: • The platform is wide enough to recover. • The jump does not require perfect timing. • The fox can return to the main path after landing. • The block switch does not remove an important support. Skip the side route when: • The landing is too narrow. • The fox must cross several transparent blocks in a row. • One missed jump sends the fox away from the main route. • The route forces you to remove a useful solid block too early. A strong first run is not about perfection. It is about learning which parts of the level are safe and which parts should wait for another attempt. Quick Decision Guide: Should You Go For It? Situation · Safer Choice · Why It Helps The main route is below but a side path is nearby · Follow the main route first · The side path may pull the fox away from the stable route A transparent block opens a long drop · Check the next landing before switching · A long drop can send the fox into a poor position A side platform needs a narrow jump · Skip it on the first clear · A failed jump can ruin the route The fox keeps missing the lower platform · Switch the block later · The fox may not be lined up yet A solid block blocks the path · Do not remove it immediately · It may be needed as a timing stop or jump platform What to Change After a Failed Route Do not repeat the exact same move and hope for a better result. Change one decision per attempt. • If the fox falls too early, delay the transparent block switch. • If the fox misses the platform, wait for better alignment. • If a side route keeps failing, return to the safer main route. • If the level feels unstable, keep more solid blocks active. • If the fox drops into the same wrong path, change the first switch timing. Small timing changes are easier to learn than completely changing the whole route at once. Best First-Clear Plan For the first clear, focus on finishing the route before chasing every side path. 1. Find the safest main route first. 2. Keep support blocks solid until the fox is aligned. 3. Open one transparent block at a time. 4. Skip narrow side jumps on the first attempt. 5. Replay the level after you understand the safe path. This approach helps beginners complete the stage first, then improve collection and star rating later. Advanced Techniques Edge Jumping Timing If the current level gives the fox enough platform control, edge timing can help reach a nearby landing. Let the fox approach the edge, keep the landing block solid, then jump before losing platform control. Avoid switching the next block too early unless the lower landing is already lined up. Solid-Block Guardrail A solid block can work like a guardrail. It can stop the fox from dropping too far, create a short planning window, or prevent a bad fall into a lower route. Use this when the next layer has multiple paths or when a transparent block would create a long uncontrolled drop. Multi-Layer Transparent Rhythm Some layouts require several transparent blocks to be switched in sequence. Do not open every layer at once. Open the first block, wait for the fox to land or align, keep the next support solid, then open the next block only when the fox is ready. Jump and Switch Pairing A jump should solve a position problem. A block switch should solve a route problem. If the fox needs distance, jump first and switch after the landing direction is clear. If the fox needs a lower route, switch first and jump only after the fox stabilizes. Common Layout Patterns The examples below describe common layout patterns that may appear in Little Fox Adventure. Use them as route-planning examples rather than fixed stage names. Two-Landing Split Pattern Problem: The fox stands above a transparent block, and there are two lower platforms. One platform is wide but slightly farther away. The other is narrow and closer. Better route: 1. Keep the upper block solid until the fox reaches the center. 2. Check which lower platform leads to the next stable position. 3. Choose the wider platform if both routes are possible. 4. Switch the block only when the fox is above the safer landing. 5. Use the solid lower platform as a pause point before the next move. Why this works: The wider landing gives more time to recover. The narrow platform may look faster, but it can force a risky jump immediately after the drop. Side Platform Gap Pattern Problem: A side platform looks useful, but reaching it requires a jump away from the main downward path. Better route: 1. Test the main route first. 2. Notice where the fox lands after the side jump. 3. Keep the return platform solid. 4. Do not open the next transparent block until the fox has returned. 5. If the return jump fails repeatedly, leave the side route for another attempt. Why this works: A side platform is only useful if the fox can return safely. A detour that breaks the route is not a good first-run target. Three-Block Drop Stack Pattern Problem: The fox is above several transparent blocks arranged vertically. Switching them too quickly causes a long, uncontrolled fall. Better route: 1. Open only the top block first. 2. Let the fox reach the next layer. 3. Keep the next block solid as a control point. 4. Wait for alignment before opening the second block. 5. Repeat the process instead of clearing all layers at once. Why this works: A stacked drop needs rhythm. Each layer should become a new decision point, not just part of one uncontrolled fall. Common Mistakes Chasing a Side Route Before Reading the Main Route A side route can look tempting, but it may lead away from the stable path. Read the lower layout first, then decide whether the detour is worth it. Switching Before Checking the Landing A transparent block is only useful if the fox lands somewhere helpful. Always look one layer below before opening a path. Removing a Useful Solid Block Too Early Some solid blocks are control tools. They can stop movement, support a jump, or prevent a bad drop. Remove them only when they are no longer needed. Jumping Without Preparing the Block State A jump can fail if the landing block is already transparent or if the next platform is not ready. Set the route first, then jump. Repeating the Same Failed Timing If the same drop fails three times, the timing is probably wrong. Delay the switch, keep support blocks active longer, or choose a safer landing. Treating Every Side Path as Required Not every side route needs to be taken on the first attempt. A cleaner route often teaches more than a forced risky detour. FAQ What should I do if the fox gets stuck in a falling loop? Stop changing blocks as soon as the route feels unstable. On the next attempt, keep more solid blocks active and delay the first transparent switch until the fox is better aligned. How do I improve my star rating more consistently? Learn the safe route first, then improve it. Once you know the stable path, add nearby collectibles one by one instead of forcing the hardest detour immediately. Why does my fox keep missing the lower platform? The block is probably being switched too early or too late. Watch the fox’s position, wait for better alignment, and open the transparent block only when the landing is directly useful. Are solid blocks always obstacles? No. Solid blocks can be safety tools. They help the fox stop, prepare a jump, avoid an uncontrolled drop, or line up the next movement. How should I handle multiple transparent blocks in a row? Do not open all of them at once. Switch one layer, let the fox stabilize, then open the next layer when the landing is ready. When should I restart after a failed route? Restart when the fox is far from the intended route, when an important support block was removed too early, or when repeated movement no longer leads to a useful landing. On the next attempt, change the first mistake instead of repeating the same timing.
- Battle Monster Island
Battle Monster Island About This Game Battle Monster Island is a casual side-scrolling monster shooter and action adventure game built around stage movement, shooting timing, upgrades, and character growth. At first, the game can look like a title where holding the fire button is enough. Once a narrow platform, a flying butterfly-type monster, a seven-spotted ladybug monster, and a risky coin path appear together, the real lesson becomes clear: positioning matters just as much as firepower. The player controls a character through horizontal monster island stages, clears monster enemies, avoids obstacles, collects coins and items, and prepares for tougher stage pressure. Different themed chapters, including holy coast-style chapter areas, can change the rhythm by adding tighter platform space, denser monster placement, riskier pickup locations, and Boss pressure that forces more movement. The Arms button in the lower-left area opens the weapon upgrade area. In the Arms system, labels such as straight-fire or cutter-style options can represent different in-game firepower paths. A stronger weapon setup can help clear enemies faster, but it still works best when paired with good movement and safe positioning. Battle Monster Island also includes Reform and Research systems. Reform and Research are character growth areas that support survivability, including attributes such as health and defense. If Arms helps you remove threats faster, Reform and Research help you stay alive long enough to handle longer stages, crowded enemy patterns, and Boss encounters. How to Play When a stage begins, do not rush forward immediately. First, read the screen: where enemies are placed, where obstacles move, where coins and items appear, and where your safest landing spots are. In this title, many early failures come from moving into danger before understanding the layout. Mastering the joystick is your first step to survival. Use it to control distance, stop before hazards, retreat when enemies get too close, and create space before attacking. The right-side buttons are generally used for shooting and jumping, so the basic rhythm is simple: move into position, attack briefly, dodge or jump when needed, then reposition. Do not fire while drifting blindly into obstacles. If a monster is standing near a narrow platform or a hazard is directly ahead, settle your character first. A short controlled burst from a safe spot is usually better than jumping forward while shooting and landing with no escape route. For a more specific example, if a venom monster appears near a flame trap, do not run straight toward the coin path. Wait for the trap rhythm, move or jump to a safer platform, then attack the venom monster from a position where you can still retreat. Once the danger is cleared, collect the nearby coins or items if the route is stable. Jumping should always have a purpose. Jump when you can see the landing spot, when you need to cross an obstacle, when an enemy attack forces you to reposition, or when you need to reset your spacing. Avoid jumping inside enemy pressure without knowing where your character will land. Coins and items are useful, but they should not control the whole run. Use this collection order: 1. Clear or avoid the enemy blocking your route. 2. Watch the obstacle timing. 3. Confirm the landing space. 4. Collect coins and items only if the path remains safe. The Arms system is worth upgrading when enemies take too long to clear or when normal stages start dragging on. If your front-fire setup clears straight-line enemies well but struggles when flying monsters pressure you, focus on positioning before assuming another weapon upgrade will solve the stage. If cutter-style firepower appears more useful in close or crowded situations, treat it as a tool for specific pressure rather than a universal answer. Reform and Research become more important when your main problem is survival. If you keep losing health before reaching the later part of a stage, or if a holy coast-style Boss section pressures you before you can learn the pattern, invest in survivability before chasing faster clears. In Boss stages, watch the attack pattern before committing to damage. If the Boss creates a short quiet moment after an attack pattern, use that window for shooting instead of attacking during the dangerous part. The basic Boss rhythm is: observe the pattern, dodge first, attack briefly, then move again before the next pressure arrives. Beginner Strategy Guide Before starting a stage, check five things: enemy position, obstacle timing, safe platforms, coin or item risk, and whether your current upgrades match the problem you are facing. If you failed the same stage several times, do not retry with the same habits. Change one thing: movement, upgrade focus, or collection route. Early Game Upgrade Priority · When to Focus on It · Reason Arms · Monsters take too long to clear · Better firepower can reduce pressure in regular stages. Straight-fire weapon path · You need steady forward fire · Useful when enemies approach from the front or block the route. cutter-style weapon path · Enemies crowd your space · Better for close pressure if the stage gives you less room to stand safely. Reform · You lose health too quickly · Extra survivability gives beginners more time to react. Research · Boss or later-stage pressure ends runs early · Health and defense growth can help you survive long enough to learn patterns. Movement practice · You keep missing jumps or landing in danger · Upgrades cannot fix poor landing choices. Safer collection habits · Coins and items bait you into damage · Finish the route first; collect only when the stage is stable. A practical beginner rule is to diagnose the failure before upgrading. If enemies stay on screen too long, improve Arms. If you are defeated before understanding the pattern, improve Reform or Research. If you fall into hazards or jump into enemy pressure, practice movement before relying on upgrades. When facing a flying butterfly-type monster, avoid chasing it across unsafe platforms. Hold a stable position, fire when it enters your attack line, and move only after checking the next landing spot. When facing a seven-spotted ladybug monster on a narrow path, do not jump forward for coins first. Clear the monster or wait for a safer opening, then move through the platform. If a venom monster appears near a hazard, treat the hazard as the first problem. The monster may be the visible threat, but the trap or obstacle controls your movement. Move to a safer angle, wait for the obstacle rhythm, then attack when you have room to retreat. Boss stages should not be played like normal monster waves. In regular stages, you may be able to clear enemies while moving forward. In Boss stages, the safer pattern is slower: watch the attack, dodge, use the quiet moment for damage, and move again. Do not stand in one position just because your weapon feels strong. If you reach a holy coast-style chapter area or another tighter section, expect the stage to punish greedy movement. Coins may sit closer to danger, enemies may appear in denser groups, and Boss pressure may force more repositioning. When the platform space becomes smaller, your escape route matters more than one extra pickup. For repeated failures, use this troubleshooting table: Failure Pattern · Likely Problem · Better Fix You keep losing health · Standing still too long or jumping too late · Create distance, attack briefly, then reposition. You cannot clear enemies fast enough · Arms may be underdeveloped · Improve weapon firepower, then test the stage again. You lose in Boss stages · Attacking during dangerous patterns · Wait for the quiet moment after a Boss attack. You miss jumps often · Jumping without a visible landing spot · Pause, check the platform, then jump with a clear target. You collect coins but fail the stage · Pickups are pulling you into danger · Clear the route first; collect only safe items. You fail after entering a new chapter · The old tactic no longer fits the layout · Adjust for tighter platforms, denser enemies, and riskier item placement. The strongest beginner habit is controlled rhythm: move, stabilize, shoot, dodge, and reset. When that rhythm feels natural, Arms upgrades, Reform growth, and Research improvements become much more effective. Common Mistakes Common Mistake · What Goes Wrong · Better Approach Standing still while shooting · Enemies and obstacles can trap your character from both sides. · Fire in short bursts, then move before pressure closes in. Upgrading only Arms · More firepower may not help if you lose health too quickly. · Add Reform or Research when survival is the main issue. Chasing every coin or item · Risky pickups can pull you into enemy attacks or bad jumps. · Clear enemies first, then collect only what fits the safe route. Fighting near hazards · A trap or obstacle can block your escape while enemies advance. · Move to a safer platform before attacking. Jumping without a landing plan · Early or late jumps can place your character inside danger. · Jump only when the landing space is visible and useful. Ignoring Boss quiet moments · You waste damage chances or attack during unsafe patterns. · Dodge first, then use the short opening after the pattern. Treating every weapon the same · Straight-fire and cutter-style options may feel useful in different situations. · Match the weapon path to the stage pressure you are facing. Using one tactic in every chapter · Later areas may add tighter platforms, denser monsters, or riskier pickups. · Change your movement and upgrade focus as the stage design changes. Panicking during crowded sections · Random shooting and jumping can make the screen harder to control. · Step back, clear the closest threat, then continue forward. FAQ Should beginners upgrade Arms first or Reform first? Upgrade Arms if enemies take too long to clear. Upgrade Reform or Research if you lose health too quickly or cannot survive long enough to learn the stage. What should I upgrade after losing the same stage several times? If enemies stay on screen too long, improve Arms. If your health drops too fast, improve Reform or Research. If you keep missing jumps, practice movement before spending upgrades as the main solution. Why do I keep losing in Boss stages? You are probably attacking during dangerous patterns or standing still too long. Watch the Boss rhythm, dodge first, attack during the short quiet moment, then reposition. Should I collect every coin and item? No. Collect coins and items only when the route is safe. A risky pickup near a trap, enemy, or narrow platform can ruin a run. What should I do when enemies and obstacles appear together? Handle the obstacle rhythm first. For example, if a venom monster is near a flame trap, wait for the trap timing, move to a safer platform, then attack the monster from a position where you can still retreat. Is it better to keep shooting or keep moving? Keep moving. Shooting is important, but staying in one place makes your character easier to pressure. A better rhythm is move, stabilize, shoot briefly, dodge, and reset. What does the Arms button do? The Arms button opens the weapon upgrade area. Labels such as straight-fire or cutter-style options may appear as in-game weapon paths, depending on what your version shows. Are coins, items, weapons, and upgrades real rewards? No. Coins, items, weapons, and upgrades are virtual game systems only. They are not cash rewards, gambling prizes, real weapon guidance, or real-world benefits.
- Escape stars
Escape Stars Core goal: Guide your rocket from asteroid to asteroid and keep climbing past the dashed line. Main challenge: Moving asteroids can shift before your rocket reaches them. Best for: Beginners who miss moving asteroids, overshoot close jumps, or rush high-score attempts. Beginner rule: Study the next asteroid before committing to the shot. About This Game Escape Stars is a space-themed casual jumping game where you guide a small rocket upward by landing on one asteroid after another. Each successful landing keeps the run going, while a missed asteroid sends the rocket falling and ends the attempt. The game looks simple at first: choose a launch angle, send the rocket upward, and try to reach the next landing point. The challenge comes from movement. Some asteroids shift across the screen, some show motion trails, and far targets require more patience than quick reaction. The main goal is to cross the dashed line and keep climbing for a higher score. A better run depends on calm timing, controlled launch strength, and knowing when not to click too soon. How to Play 1. Look at the next asteroid and notice whether it is still, moving sideways, or placed at a difficult angle. 2. Adjust the rocket’s launch angle toward a safe landing path. 3. Click to send the rocket forward. 4. Try to settle the rocket onto the next asteroid. 5. Keep moving upward and cross the dashed line to increase your score. 6. If the rocket misses the asteroid, the run ends and you need to start again. Quick Decision Rules • If the asteroid is close, reduce launch strength and focus on control. • If the asteroid is moving sideways, lead the shot in the direction it is traveling. • If the asteroid is far away, wait briefly and study its motion trail. • If your score is high, slow your rhythm instead of clicking faster. Best beginner habit: Before every far jump, wait long enough to see whether the asteroid is moving into your route or away from it. Beginner Strategy Guide Aim Ahead of Moving Asteroids A moving asteroid is rarely safest at the exact spot where you first see it. If it is sliding left or right, aim toward where it will be when the rocket arrives. Most beginner misses happen when the next asteroid is either moving sideways or close enough to overshoot. For a side-moving asteroid, watch the motion trail and give your launch angle a small lead in the same direction. You are not trying to hit the asteroid’s past position; you are trying to meet its future path. For example, if an asteroid is drifting to the right above your rocket, aiming directly at its center may send you behind it. A slight right-side lead gives the rocket a better chance to meet the asteroid as it moves. How to Read Different Asteroid Positions Close asteroid: Treat a close jump as a control test. Use a softer launch and avoid sending the rocket past the target. A nearby asteroid can be easy to miss if you overreact. Far asteroid: Watch at least part of its movement before firing. Far asteroids usually punish rushed timing more than weak aim, so waiting briefly can be part of the strategy. Side-moving asteroid: Follow the movement direction and aim ahead of the path. Motion trails are useful here because they help you judge whether the asteroid is crossing into your route or moving away from it. Diagonal asteroid: Set the launch angle first, then think about strength. A diagonal landing often fails when the angle is slightly wrong, even if the power feels close. Control Launch Power Escape Stars is not only about pointing the rocket in the right direction. Launch strength matters because close and far asteroids need different decisions. For a close jump, a strong launch can carry the rocket over the asteroid before it has a chance to settle. For a far asteroid, a weak shot may drop too early, while an overpowered shot can miss the landing zone completely. Try to match the launch strength to the distance instead of using the same force every time. A common beginner mistake is treating every upward asteroid like a long-distance target. If the next asteroid is only slightly above you, accuracy is more important than power. Use Gravity Pull Carefully If the game shows a slight pull or curve near an asteroid, treat it as a small correction effect, not as a guaranteed rescue mechanic. Aiming near the edge of an asteroid can sometimes help when your approach angle is tight, but it should only support an already reasonable shot. If the rocket is too far away from the asteroid, a small curve will not save the jump. For example, approaching the lower edge of an asteroid may still work if your angle is close. Flying past the asteroid at full speed usually will not. High Score Rhythm High-score attempts often fail because the player starts rushing. After several clean jumps, it is easy to click too quickly and stop checking the next moving asteroid. Keep a steady rhythm as the rocket climbs. Look at the next position, judge the launch angle, then commit. The dashed line may encourage faster play, but safer scoring usually comes from controlled launch choices rather than rushed asteroid launches. Common Mistakes Mistake: Aiming at the Current Position Fix: Lead the shot when the asteroid is moving. Aim toward the place where the asteroid is likely to be when the rocket reaches it. Mistake: Launching Too Early or Too Late Fix: Use the asteroid’s movement as your timing cue. Fire when the target is moving into a safer path, not when it is already drifting away. Mistake: Using Too Much Power on Close Jumps Fix: Treat close asteroids as precision landings. A smaller, cleaner launch is often safer than a forceful shot. Mistake: Ignoring Motion Trails Fix: Use motion trails to read direction and speed. They can help you decide whether to lead the shot, wait, or adjust the launch angle. Mistake: Depending Too Much on Gravity Correction Fix: Start with a sensible angle first. Any visible pull near an asteroid should be treated as a minor helper, not the main plan. FAQ Is it better to wait before launching in Escape Stars? Yes, especially when the next asteroid is far away or moving sideways. A short pause can reveal whether the asteroid is entering a safer path or moving out of reach. How do motion trails help in Escape Stars? Motion trails show the asteroid’s recent direction, making it easier to judge whether to lead the shot or wait. Should I aim at the center or edge of an asteroid? Aim for the center when the path is clean and direct. Aim closer to the edge only when the approach angle is tight and you need a small correction window. What is the safest way to handle far asteroids? Wait until the asteroid path is readable, then choose a launch angle that gives the rocket room to reach it without overshooting. Why do high-score runs usually fail? They often fail when the player’s rhythm speeds up and launches become rushed. Waiting for a readable asteroid path is safer than launching immediately. Editorial Note This guide focuses on visible gameplay behavior in Escape Stars. Game behavior may vary by version or platform, and this article does not claim hidden scoring formulas or guaranteed results.
- Happy tourist
Happy Tourist About This Game Happy Tourist is a casual planet rolling and star collecting arcade game where you guide a character around a rotating planet surface and collect stars before the missed-star limit catches up with you. You can miss up to nine stars, but the 10th missed star ends the run. Tapping the screen uses a limited flight attempt, letting your character briefly lift off the surface to reach higher or farther stars. Happy Tourist is more than a simple tap-and-collect game. It tests rhythm, impulse control, and risk judgment. The strongest runs usually come from collecting safe surface stars consistently, saving flight for truly unreachable targets, and knowing when a far star is not worth breaking your route. The table below summarizes the rules that matter most for beginners. Gameplay Element · What It Means · Smart Beginner Habit Surface stars · Stars close to the planet route · Collect them first to build a stable run High stars · Stars above your normal path · Use flight only when timing cannot solve it Far stars · Stars that pull you away from the route · Chase only if you can recover quickly Flight attempts · Limited tap-to-fly resource · Save them for pressure moments Missed counter · Tracks stars you failed to collect · Play defensively when it gets high Ball skins · Visual style changes from touching other balls during flight · Treat them as optional bonuses In practice, Happy Tourist rewards target selection more than fast tapping. The game favors players who stay calm after a miss, protect the easy collectibles, and avoid wasting flight on stars that were still reachable through normal movement. How to Play • Watch the next star position before reacting. • Roll around the planet surface and collect nearby stars first. • Tap to fly only when a star is clearly too high or too far to reach from the surface. • If flight attempts run out, keep playing more conservatively and focus on reachable stars. • Touching other balls during flight may change your ball’s visual style, but it should not distract from star collection. • Background scenery is not part of the decision-making; your real focus is star position, flight timing, and missed-star pressure. If a star is only slightly above your route, do not tap instantly. Wait a moment and see whether the planet movement naturally brings your character close enough. Saving one flight attempt early can matter much more later when several difficult stars appear close together. Beginner Strategy Guide Quick Tips • Collect nearby surface stars first. • Save flight for stars that are truly out of reach. • Treat 7–8 missed stars as the danger zone. • Return to the planet surface quickly after flying. • Do not chase skin changes at the cost of important stars. The first skill to learn in Happy Tourist is target priority. Surface stars are your safest pickups, so they should anchor your route. If you repeatedly ignore easy stars while chasing dramatic high targets, your run becomes unstable even if some flights look impressive. A useful beginner benchmark is reaching the early 50-score range if your version shows a score counter. If your version tracks collected stars instead, treat the first 50 collected stars as a basic consistency goal. To reach that stage more consistently, avoid using flight in the opening stretch unless the star is clearly unreachable. Early flight mistakes usually do not feel serious right away, but they reduce your options once the pattern becomes harder. When you miss several stars in a row, the biggest danger is panic tapping. A practical recovery method is to deliberately skip one risky high star and force your route back to the planet surface. This feels conservative, but it often prevents a bad streak from turning into a failed run. Use flight when it solves one of these problems: • A star is clearly above the surface path. • A distant target would push the missed counter into a danger zone. • Two difficult pickups appear close enough that one controlled flight can help stabilize the route. • You can fly out, collect the star, and return without losing the next easy pickup. Do not use flight just because a star looks tempting. If chasing one far target makes you miss two simple pickups afterward, the trade is bad. High-level play is not about collecting the most difficult star on the screen; it is about choosing the star that keeps the run alive. When the missed counter reaches 7 or 8, change your style. Stop taking wide flight paths unless they are necessary. Focus on safe pickups, short corrections, and clean recovery after every tap. At that stage, one calm surface route is better than one flashy flight that leaves you out of position. Skin changes are optional visual bonuses. If a skin change happens during play, treat it as visual only. A clearer-looking skin may be easier to track, but no gameplay or scoring advantage should be assumed. Common Mistakes • Flying too early: Save flight for stars that normal movement cannot reach. • Ignoring safe pickups: Easy surface stars are the foundation of a longer run. • Panic tapping after a miss: Slow your decision-making instead of spending flight immediately. • Overextending in the air: Collect the target, then return to the planet surface quickly. • Forgetting to recover after flight: A successful flight still becomes risky if you land far from the next easy star. • Playing too aggressively in the danger zone: When the missed counter is high, choose safe targets first. • Using the same rhythm after flight runs out: Without flight, you need a more conservative route. • Chasing visual skin changes: A new look is not worth losing important stars. FAQ When should you use flight attempts in Happy Tourist? Use flight when a star is clearly too high or too far for surface movement. If the planet route can still reach it, save the flight attempt. What happens when you miss 10 stars? The run ends when the missed counter reaches 10 stars. You can miss up to nine, but the 10th missed star triggers failure. Does running out of flight attempts end the game? No. Running out of flight does not end the run by itself. It only limits your ability to reach high or distant stars. Is there a confirmed way to reduce missed stars? No confirmed reset or reduction method is described in the visible rules. Beginners should treat each missed star as permanent during the run. Is there a pattern to where the stars spawn? No fixed spawn formula is confirmed. The safer approach is to read each new star position quickly instead of trying to memorize a pattern. How can beginners break the first 50-point range? Collect surface stars first, avoid early flight waste, recover calmly after misses, and use flight only for targets that would otherwise be lost. Editorial Note This guide is based on visible gameplay rules and practical beginner decisions. It does not claim hidden formulas, official scoring data, fixed spawn patterns, or guaranteed results.
Casual
- Block Cali
Block Cali is a casual 3D block-elimination puzzle game that offers a fresh twist on the classic block-clearing genre. Rotate the cylindrical game board and place blocks strategically onto its surface. When a full row or full column is completed, the blocks in that line disappear — and you score points. With each elimination you get closer to mastering the level. Be careful of obstacles that cannot be cleared, adding extra challenge and strategy. Featuring vibrant 3D visuals, simple controls and soothing progress loops, Block Cali is perfect for quick sessions or longer puzzle-focused play. Whether you’re relaxing or sharpening your mind, this game delivers satisfying block-clearing fun.
- Captain, Don't Throw
Captain, Don't Throw About This Game Captain, Don't Throw is a casual shooting action game built around movement control, automatic attacks, mission objectives, airdrop timing, support rescue, and upgrade choices. You control a captain through short battlefield stages where enemy groups close in from different directions and pressure the player into making fast route decisions. The captain attacks automatically when hostile units enter range, so the core skill is not manual aiming. The real challenge is guiding the captain with the movement slider, keeping enough space to avoid being surrounded, collecting airdrops at the right moment, and rescuing support soldiers without walking into a trap. A typical stage is short and objective-driven. Some missions ask you to survive enemy pressure, while others require you to rescue support soldiers or finish the objective before a timed mission condition is missed. The safest early approach is to improve clearing power first, keep your escape route open, and avoid chasing rewards through dense enemy groups. The main danger is not one enemy by itself. Problems usually begin when fast enemies push the captain toward tougher enemies and cut off the route to airdrops or support soldiers. Strong play comes from managing space, choosing upgrades that solve the current pressure, and finishing the mission instead of trying to clear everything on screen. How to Play Use the movement slider to guide the captain around the battlefield. When enemies enter the captain’s attack range, the captain fires automatically. Your job is to control spacing, choose safe routes, collect useful airdrops, rescue support soldiers, and complete the mission objective before the captain is defeated or a timed objective is missed. In the opening seconds, move away from the first enemy cluster instead of standing in place. Let the captain’s auto-attacks thin out the closest threats while you guide him along the edge of the enemy group. When the screen becomes crowded, circle around the outside of the group instead of cutting through the center. The round becomes dangerous when Swarmers and Armored Raiders appear together. Swarmers close distance quickly, while Armored Raiders take longer to defeat and can block the path to supplies or support soldiers. Mechanic · How It Works · Practical Use Movement · Use the movement slider to guide the captain · Move in wide routes and avoid tight corners Auto-attacks · The captain fires when enemies enter range · Stay close enough to trigger attacks, then reposition Airdrops · Supply crates appear during the stage · Collect them after clearing a safe route Support soldiers · Rescued allies add combat pressure · Reach them with both an entry path and an exit path Mission timer · Some stages have timed objectives · Do not chase low-value enemies far from the goal Failure condition · The captain is defeated, or a timed mission objective is missed · Protect health and mission progress at the same time Beginner Strategy Guide Upgrade Priorities Combat upgrades decide how safely the captain can handle crowded stages. Do not upgrade randomly in the early game. Choose the upgrade that solves the problem you are actually facing. Priority · Upgrade · Best Use Case · Why It Helps 1 · Heavy Rounds · Enemies survive too long near the captain · Increases clearing power and opens safer routes 2 · Extended Barrel · You need more space while kiting enemies · Expands useful attack range so you can fight from safer positions 3 · Twin Fire · Groups are stacking up too quickly · Adds multi-target pressure and helps thin Swarmers 4 · Field Armor · You are moving better but still losing health too fast · Gives more room for small positioning mistakes 5 · Supply Magnet · Airdrops are hard to reach without risk · Makes reward collection safer after your damage is stable Choose Heavy Rounds first when enemies remain alive too long near the captain. Choose Extended Barrel when you need more distance to control enemy groups. Choose Field Armor when your route planning is improving but you still lose health too quickly during crowded stages. Support Soldiers Support soldiers are not just bonus characters. In rescue missions, they are part of the main objective rather than optional rewards. After being rescued, support soldiers increase your combat pressure and make it easier to thin enemy groups. The danger is not the rescue itself. The danger is entering the rescue area without a safe exit path. Before moving toward a support soldier, pull nearby enemies away from the route, open a gap, then enter and leave quickly. A strong rescue pattern is: 1. Move near the support route. 2. Pull Swarmers away from the direct path. 3. Let auto-attacks clear the closest group. 4. Move in when the route opens. 5. Exit before Armored Raiders close the gap. Airdrop Timing Airdrops can give valuable resources and combat advantages, but they are also one of the easiest ways to lose a run. Do not treat every airdrop as urgent. When an airdrop lands behind a group of enemies, wait briefly, circle around the crowd, and let auto-attacks reduce the closest threats. If the path is still blocked, skip the drop and protect the mission objective instead. A missed reward is better than a failed run. Airdrop Situation · Best Decision Airdrop lands in open space · Collect it immediately Airdrop lands behind Swarmers · Circle once before entering Airdrop lands near Armored Raiders · Clear or weaken the route first Airdrop appears while the mission timer is tight · Take it only if it does not delay the objective Airdrop is blocked by multiple enemy types · Skip it unless you already have strong clearing power First Run Walkthrough Step 1: Move out of the starting pressure. At the beginning of a stage, use the movement slider to guide the captain away from the first enemy cluster. Do not let the opening group surround you before your auto-attacks start creating space. Step 2: Build a safe attack loop. Move close enough for enemies to enter attack range, then guide the captain away before they reach him. This lets the captain deal damage while keeping contact time low. Step 3: Watch the first airdrop. If the first airdrop appears in open space, collect it. If it appears behind enemies, circle around first. The first airdrop is useful, but it is not worth losing half your health. Step 4: Rescue support with an exit route. When a support soldier appears, check both the entry route and the exit route. The rescue is only safe if the captain can leave the area after reaching the support soldier. Step 5: Push the mission objective. Once you have one or two upgrades and at least one support soldier, shift attention back to the mission objective. Do not clear every enemy unless the objective requires it. Stage Progression Tips Stage Phase · What Usually Gets Harder · Best Adjustment Opening wave · Basic movement pressure · Learn attack range and avoid standing still Early pressure · More fast enemies begin to appear · Upgrade Heavy Rounds or Twin Fire Crowded phase · Enemy groups begin blocking rewards · Collect only safe airdrops Support phase · Rescue routes become riskier · Pull enemies away before entering rescue zones Final objective phase · Mission pressure increases · Ignore enemies that are far from the objective Many beginners start losing runs when enemy groups begin blocking rewards and support routes more aggressively. At that point, survival and mission completion matter more than collecting every airdrop on the screen. Advanced Strategy Crowded screen control: When Swarmers and Armored Raiders fill the center of the battlefield, move around the outside edge and let auto-attacks hit the nearest enemies. This reduces contact from multiple directions and keeps your escape path open. Airdrop delay: When a supply crate lands inside or behind an enemy group, wait briefly, circle the group, then collect it from the safer side. Treating every airdrop as an emergency pickup is one of the easiest ways to lose a run. Support rescue routing: When a support soldier is surrounded or placed near a dangerous route, open a path first, then enter and exit quickly. Rescued soldiers help your combat pressure, but only if the captain survives the rescue. Upgrade-based routing: If enemies start surviving long enough to block movement, choose upgrades based on the current problem. Use Heavy Rounds for tough enemies, Extended Barrel for safer spacing, and Twin Fire for enemy groups. Mission-first play: When the objective is nearly complete or the mission timer is becoming a problem, stop chasing enemies far from the mission route and move toward the objective. Common Mistakes Mistake · What It Looks Like · How to Fix It Walking into dense enemy groups · Health drops quickly before rewards can help · Move around the edge and protect your route Chasing airdrops too early · The captain reaches the crate but gets trapped · Delay the pickup until the route opens Weak upgrade priority · Enemies survive long enough to surround you · Start with Heavy Rounds or Extended Barrel Unsafe support rescue · The support soldier is rescued, but the captain cannot escape · Plan the exit before entering Poor timer management · The captain survives but the mission fails · Stay closer to the mission route Ignoring mixed enemy pressure · Fast enemies push you into tougher enemies · Separate enemy groups by moving in wide loops The most common beginner mistake is treating automatic attacks as permission to stand still. The captain can shoot on his own, but he cannot escape danger unless you keep moving and protect a route out of crowded areas. FAQ What is Captain, Don't Throw? Captain, Don't Throw is a casual shooting action game where you guide a captain through short mission-based stages. The game focuses on automatic attacks, movement control, airdrop timing, support rescue, and upgrade choices. Does the mission timer pause when picking up an airdrop? Do not plan around the timer stopping during a pickup. If the mission timer is tight, collect only the airdrops that are already close to your objective route. Which upgrade should I choose first? Choose Heavy Rounds first if enemies survive too long near the captain. Choose Extended Barrel if you need safer spacing, and choose Twin Fire when Swarmers begin stacking up in groups. Do auto-attacks target the closest enemy first? Auto-attacks are most useful when enemies are inside the captain’s active range. For practical play, assume nearby enemies create the most immediate danger and position the captain so the closest threats are cleared before they can surround him. When should I rescue support soldiers? Only when you have secured both an entry and an exit path. Rushing blindly into a crowd to save a soldier is one of the fastest ways to end your run. Why do beginners lose during crowded phases? Crowded phases are where enemy groups begin blocking rewards and support routes more aggressively. Beginners usually lose because they chase airdrops through dangerous areas instead of improving clearing power and protecting their movement route. Editorial Note This page provides a gameplay overview and beginner strategy guide for Captain, Don't Throw. It focuses on movement control, automatic attacks, mission objectives, upgrade choices, airdrop timing, support rescue, and common early mistakes. This guide is based on practical strategy analysis for surviving high-pressure swarms and optimizing upgrade paths in the game.
- Match & Clear Nonstop
Match & Clear Nonstop About This Game Match & Clear Nonstop is a Mahjong-style tile matching puzzle game where players select available tiles, move them into a 7-slot reserve tray, and clear tiles when three identical tiles are collected. The game is not traditional Mahjong. It focuses on stacked tiles, tray management, timed decision-making, and smart tool usage. Your main challenge is to keep the reserve tray from filling with unrelated tiles while opening enough board space to keep clearing matches. How to Play 1. Select available visible tiles from the board. 2. Move tiles into the 7-slot reserve tray. 3. Clear tiles when three identical tiles are collected. 4. Open stacked areas to reveal more useful tiles. 5. Use Shuffle, Flip Card, Clear, and Undo when they solve a specific problem. 6. Finish the level before the timer runs out. The most common beginner mistake is filling the 7-slot reserve tray before a three-tile clear can be made. Beginner Strategy Guide Reserve Tray Strategy The reserve tray is the most important pressure system in Match & Clear Nonstop. Because there are only 7 slots, each tile choice needs a purpose. A strong tray usually contains one or two focused tile groups. A weak tray contains many loose symbols with no clear forming soon. Do not add unrelated tiles unless the move helps a near-term clear. When the Tray Is Almost Full When the tray has only 1 or 2 empty slots left, stop playing normally. Use this recovery order: 1. Look for a tile that completes a three-tile clear. 2. Use Undo if the last move caused the problem. 3. Use Clear if the first tray tile is blocking your options. 4. Use Flip Card only if hidden information is the real issue. 5. Use Shuffle only after checking visible options. Tool Priority Guide Tool · Best Used When · Avoid Undo · Your last move created a tray problem · Using it for every small move Clear · The first tray tile blocks future organization · Using it while the tray is still flexible Flip Card · Hidden or standing tiles may reveal the tile you need · Using it while safe visible clears remain Shuffle · No useful visible route remains · Shuffling before checking the board Opening Strategy Start by scanning the board for visible matches, thick stacks, and blocked sections. Clear safe matches first, but prioritize moves that open more tiles. A move that reveals a new layer is often better than a move that only removes a flat tile. Midgame Strategy Track which tile types are already in the tray. Do not start too many unfinished clears at the same time. If the board has hidden or standing tiles, use Flip Card before committing a tray slot. Endgame Strategy When time is low, choose the clearest available three-tile clear. If the tray is almost full, Clear can be better than Shuffle because Clear directly creates tray space. Shuffle changes the board, but it does not automatically fix a crowded tray. Common Mistakes Mistake · Fix Tapping the first visible tile · Check whether it completes a tray clear or unlocks covered tiles Filling the tray too quickly · Stop adding new types and look for clears using existing tray tiles Wasting Shuffle too early · Check visible matches and blocked areas first Using Flip Card at the wrong time · Use it only when hidden information affects your next move Using Undo too late · Use Undo immediately after a bad tap Playing it like traditional Mahjong · Focus on tray control, stacked layers, and tool timing FAQ What causes most beginners to fail in Match & Clear Nonstop? Most beginners fail because they fill the 7-slot reserve tray with too many unfinished tile groups. The safest approach is to build around tile types already in the tray and avoid starting too many clears at once. What should I do when the reserve tray is almost full? First, look for a tile that completes a three-tile clear. If the last move caused the problem, use Undo. If the first tray tile is blocking your options, use Clear before starting another tile group. How should I prioritize tools when stuck? Fix immediate mistakes with Undo, use Clear for tray blockage, use Flip Card when hidden information matters, and save Shuffle as the last resort after visible options are checked. Is Match & Clear Nonstop traditional Mahjong? No. Match & Clear Nonstop uses Mahjong-style tile visuals, but it does not use traditional Mahjong hands, scoring patterns, or table rules. Editorial Note This independent game page and strategy guide is based on hands-on gameplay review and the game rules described in this article. It is designed to help players understand the core gameplay, 7-slot reserve tray pressure, tool usage, and beginner mistakes. It is not an official game manual. Players should check the in-game interface for exact feature behavior as updates occur.
- Cue Shot Challenge 3D
Cue Shot Challenge 3D About This Game Cue Shot Challenge 3D is a casual 3D pool and billiards challenge game where your goal is to pocket all the balls before your lives run out. Each shot costs 1 life, so the main challenge is not speed, but choosing safer angles, controlling power, and keeping the cue ball in a useful position. The 3D view helps you judge ball spacing, pocket lines, cut angles, cue direction, and possible shot paths before taking a shot. This matters because one careless attempt can waste a life and leave the next angle blocked. Cue Shot Challenge 3D also includes coins, daily rewards, tables, and ball skins as in-game virtual content. These items may change visual progression or appearance, but the core gameplay still depends on aiming, power control, cue ball positioning, and efficient table clearing. How to Play Cue Shot Challenge 3D is mainly about power, precision, and careful shot preparation. Before taking your first shot, look over the full table. Check which balls have open pocket lines, which balls are blocked, and where the cue ball may stop after contact. Control / Rule · What It Does · Practical Tip Broad Aim · Slide on the empty area of the screen to adjust your general shot direction. · Use this first to face the cue toward the target ball or pocket line. Fine-Tuning · Use the right-side dial to make smaller angle adjustments. · Make a final correction before shooting, especially on narrow pocket angles. Power Control · Use the left-side dial to set shot force. · Medium power is often easier to control because it reduces wild cue ball movement, makes rebounds less chaotic, and helps the ball stop in a more useful position. Take the Shot · After setting direction and power, hit the cue ball. · Aim to pocket the target ball while keeping the next shot playable. Life System · Each shot removes 1 life. · Clear all balls before your lives run out to complete the challenge. A good turn usually follows this order: observe the table, set your broad aim, fine-tune the angle, adjust power, then shoot. The more carefully you prepare each shot, the fewer lives you are likely to waste. One useful detail to watch is the cut angle. A straight shot sends the target ball toward the pocket more predictably, while a sharp cut angle requires more precision because the cue ball contacts the target ball from the side. When the angle looks narrow, use the 3D view to check whether the pocket line is truly open before committing the shot. Beginner Strategy Guide Treat your lives as a strict shot budget. A simple pocket is always better than a risky trick shot. Start by choosing the clearest ball on the table. A clean, direct shot is usually more valuable than a difficult angle that might fail or leave the cue ball in a bad position. Use broad aim first, then fine-tune. Sliding on the empty screen area helps you set the main direction, while the right-side dial helps you correct the final angle. Many missed shots come from stopping after the rough aim instead of making a small final adjustment. Control your power with the left-side dial. New players often use too much force because it feels safer, but strong shots can create awkward rebounds and poor cue ball placement. Medium power is often better when you want a cleaner pocket and a more predictable next shot. If the cue ball can fall into a pocket during play, treat that situation carefully. In pool-style games, this is commonly called a scratch. Based on the provided gameplay details, the confirmed penalty is that every shot costs 1 life; no extra scratch penalty has been confirmed. Still, beginners should avoid scratches because they usually ruin cue ball position, waste the value of the shot, and can make the next angle much harder. Think about the next shot before taking the current one. You do not need perfect cue ball control every time, but try to avoid leaving the cue ball trapped near a rail, blocked by another ball, or facing an impossible angle. When you are low on lives, stop choosing shots based on what looks impressive. Choose the clearest pocket line available, even if it is a simple shot. A safe ball that keeps the level alive is better than a difficult angle that may end the run. When a ball is close to the edge or sitting at a difficult cut angle, do not force it too early. Clear easier balls first, open more space, and return to the harder shot when the cue ball position is better. Avoid flashy shots unless they are truly necessary. Rebounds, sharp cuts, and long-distance attempts can be useful in some situations, but beginners will usually make better progress by taking stable, direct routes. Common Mistakes Mistake · Why It Fails · How to Fix It Using maximum power constantly · Strong shots can create wide rebounds and poor cue ball positions. · Use medium power when a clean, controlled shot is enough. Hitting long-distance shots too hard · A powerful long shot can make the cue ball travel too far, bounce unpredictably, or end in a bad position. · Use enough power to reach the target, but avoid over-hitting just because the shot is far away. Ignoring the remaining life count · A risky shot becomes more dangerous when only a few lives remain. · When lives are low, choose the clearest pocket line instead of a sharp cut, rebound, or long-distance attempt. Only looking at the current ball · You may pocket one ball but leave the next shot blocked or awkward. · Think one shot ahead before you shoot. Skipping fine adjustment · Rough aim may look close, but small angle errors can cause missed pockets. · Use the right-side dial before taking narrow or angled shots. Shooting before reading the table · Rushed shots often waste good opportunities. · Pause briefly and check open pocket lines first. Forcing difficult edge shots too early · Rail-side or narrow-angle balls can consume too many attempts. · Clear easier balls first and return when the cue ball position improves. Treating the 3D view as decoration · You may miss useful visual clues about spacing, cut angles, and pocket lines. · Use the 3D perspective to judge shot paths and cue direction. Ignoring power control · Poor force can send the cue ball into an unhelpful position. · Adjust the left-side dial based on distance and table layout. Expecting skins to change performance · Visual unlocks do not replace careful play. · Focus on aim, shot choice, and cue ball control. FAQ How do you aim more accurately in Cue Shot Challenge 3D? Use the empty screen area for broad aim first, then use the right-side dial for smaller corrections. This two-step approach is especially helpful when the target ball needs a narrow cut angle. How should beginners control shot power? Beginners should avoid using full power on every shot. A controlled medium-power shot is often easier to predict, reduces wild cue ball movement, and can leave the cue ball in a better position. Why do I run out of lives so quickly? You usually run out of lives because every shot costs 1 life and missed shots reduce your shot budget quickly. Avoid risky cut angles early, use the right-side dial for final aim correction, and choose open pocket lines before attempting difficult edge balls or long-distance shots. Can you pocket two balls with one shot? Sometimes, a single shot may lead to more than one ball dropping if the table layout allows it. However, beginners should not force double-pocket attempts unless the first pocket line is already safe and clear. What should I do with a difficult edge ball? Do not rush it. Clear easier balls first, create more open space, and return to the edge ball when the cue ball position gives you a cleaner angle. What happens if the cue ball falls into a pocket? Based on the provided gameplay details, each shot costs 1 life, but no additional scratch penalty has been confirmed. Even so, a scratch is usually bad for positioning, so it is better to avoid shots that send the cue ball toward a pocket. Is it better to use the broad aim control or the right-side dial? Use both. Broad aim helps you set the main direction, while the right-side dial is better for fine angle control before the final shot. Do coins, table skins, or ball skins improve gameplay? Coins are an in-game virtual resource used for visual progression such as tables or ball skins. These items should be understood as visual unlocks, not gameplay advantages. Your progress still depends on aiming, shot choice, power control, and cue ball position. Editorial Note This guide is based on the gameplay information provided for Cue Shot Challenge 3D. It is written to help players understand the rules, controls, life system, table-clearing goal, aiming method, power control, and beginner strategy. Coins, daily rewards, gift rewards, tables, and ball skins are described only as in-game virtual content. They should not be understood as real-world rewards, cash-value items, gambling features, or guaranteed gameplay advantages.
- Drop Zone Survivor
Drop Zone Survivor About This Game Drop Zone Survivor is a casual 2D battle royale survival shooter where each match begins with players entering the battlefield from a plane. Your goal is to choose a landing area, stay alive as the safe zone changes, protect your health, and become the final survivor. The main pressure comes from several simple decisions: where to land, when to move, when to fire, when to avoid a fight, when to use speed boost, and when to heal. If your health bar runs out, the match ends for you. If you survive and eliminate the remaining enemies, you win. A match usually moves through three stages. The early match is about finding a safe start. The middle of the match is about moving with the safe zone and choosing smart fights. The final stage is about staying calm, keeping enough health, and avoiding unnecessary risks when only a few enemies remain. How to Play Start each match by watching the plane route and choosing a landing area. A crowded drop can lead to quick action, but it can also end your run early. If you are still learning, choose a quieter area where you have time to move, read the map, and understand where danger may come from. Controls: Movement (WASD/Arrows) | Attack (Left Click) | Boost (Space) | Heal (E/Q) After landing, use the direction keys to control your movement. Move toward useful space instead of wandering randomly. Your first goal is not always to attack. It is to understand your position, the safe zone direction, and whether nearby enemies are worth fighting. Use the fire button when you have a clear reason to attack. Before firing, check four things: 1. Is the enemy close enough for the attack to matter? 2. Do you have enough health to survive the fight? 3. Do you have room to escape if the fight goes badly? 4. Will this fight pull you away from the safe zone? If the answer to several of these questions is no, moving first may be smarter than shooting immediately. Watch your health bar throughout the match. If your health is low, do not keep fighting just because an enemy is nearby. Break away from danger first, then heal when you have enough space. Healing while exposed can waste the opportunity and leave you vulnerable. Use speed boost only when it changes your survival chance. Good uses include reaching the safe zone, escaping pressure, repositioning around an enemy, or chasing a clearly weakened opponent. Poor uses include boosting across open space with no plan or wasting it before the safe zone creates real pressure. When the safe zone refreshes, move early. Many beginner losses happen because a player wins a small fight but loses position. Staying inside the playable area is just as important as defeating enemies. To win, stay alive, manage your health, move with the safe zone, choose fights carefully, and survive until every other enemy has been eliminated. Beginner Strategy Guide Early match: Choose a quieter landing area if you are still learning. A safe start gives you time to read the battlefield, check nearby enemies, and understand where the safe zone is moving. Dropping into the busiest area may feel exciting, but it often forces you into a fight before you are ready. Landing plan: A good landing area should give you space to move, not just a place to start. Try to avoid landing where enemies can surround you immediately. If you land near danger, move first and fight only when your direction, health, and escape path make sense. Mid match: Move with the safe zone instead of chasing every enemy. If an enemy runs away from the safe area, do not automatically follow. One unnecessary chase can put you in a worse position, waste your boost, or force you to heal at the wrong time. Fight selection: A fight is usually worth taking when the enemy is already weakened, you have enough health, you have room to move, and the safe zone is not pulling you away. A fight is usually not worth taking when your health is low, another enemy may attack from the side, or you have no clear escape route. Speed boost: Save it for real problems. Use it to enter the safe zone, escape danger, reposition, or finish a clear opportunity. Do not use it just because it is available. Player tip: the later the match gets, the more valuable a saved boost can become. Healing: Heal after you create space. A good healing moment usually comes after you break contact with an enemy, before you enter another risky area, or when you know the next fight may happen soon. Do not wait until your health is almost gone if you already have a safe moment to recover. Final stage: Do not expose your position too early when only a few enemies remain. Let other enemies make mistakes, keep enough room to move, and avoid chasing into a bad angle just to finish one opponent. In the final moments, survival, health, and position often matter more than aggressive shooting. Use this simple decision table during a match: Situation · Better Choice · Why It Helps You land near several enemies · Move first before fighting · It gives you space and lowers early risk The safe zone moves away · Rotate early · You avoid rushed movement later Your health is low · Break contact and heal · You reduce the chance of losing the next trade An enemy runs away from the zone · Let them go or reposition · Chasing may damage your own position Only a few enemies remain · Stay patient · The final fight is easier when you keep health and space Weapon stats can help you understand different in-game behavior. Instead of treating every weapon the same way, notice whether a weapon feels better for short fights, safer distance, quick movement, or finishing weakened enemies. Use that information to choose a playstyle inside the match. • Scout Weapons: Higher movement speed, moderate damage. • Heavy Weapons: Lower movement speed, high impact. Check the home screen stats to match your chosen landing strategy. A lighter setup may help when you want to move early and avoid pressure, while a heavier setup may feel better when you expect slower, more committed fights. The best beginner mindset is simple: survive first, fight second. Drop Zone Survivor rewards players who move early, avoid bad fights, protect their health, and attack only when the situation is favorable. Common Mistakes Mistake · Why It Hurts · Better Habit Landing in the most crowded area too early · You may lose before you understand the match · Start in a quieter area and learn the flow first Chasing enemies away from the safe zone · You can win a fight but lose your position · Stop chasing if the enemy is pulling you into danger Fighting with low health · One more exchange may end your run · Create space, heal when safe, then decide whether to fight again Healing while exposed · You may be attacked before recovery helps · Move to safer space before healing Wasting speed boost · You may not have it when danger appears · Save boost for escape, safe zone movement, or repositioning Ignoring escape space while firing · You can get trapped if the fight turns bad · Keep room to move before committing Playing only for eliminations · You may forget that survival is the win condition · Take fights that improve your chance to be the last survivor The most common beginner mistake is treating every enemy as an immediate target. Not every fight improves your chance of winning. If a fight damages your health, wastes your boost, or pulls you away from the safe zone, it may be better to reposition. Another common mistake is moving too late. The safe zone should guide your route before it becomes urgent. Moving early gives you more control, more escape space, and better timing for future fights. Still having trouble? Experiment with different landing spots to find your own rhythm between survival and combat. FAQ What is Drop Zone Survivor? Drop Zone Survivor is a casual 2D battle royale survival shooter. Players enter the battlefield from a plane, choose where to land, move through the match, watch the safe zone, and try to become the final survivor. How do you play Drop Zone Survivor? Choose a landing area, use WASD or the arrow keys to move, use left click to attack, watch your health bar, and stay inside the safe zone. Use Space for boost and E or Q for healing when the timing is safe. If your health bar runs out, the match ends for you. What is the best beginner strategy? The best beginner strategy is to land in a quieter area, move early with the safe zone, avoid unnecessary fights, and save speed boost or healing for moments that protect your survival. To win, focus on staying alive first, then take fights when your health and position are favorable. How do you survive the safe zone? Check the safe zone often and move before you are forced to rush. Avoid chasing enemies in the wrong direction. A safe route with room to escape is usually better than a risky fight that leaves you trapped. When should you use speed boost or healing? Use speed boost when you need to enter the safe zone, escape danger, reposition, or chase a weakened enemy. Use healing after you have created distance from danger or before entering a risky area. Do not heal while exposed if an enemy can still pressure you. Do skins, weapon stats, or in-game items have real-world value? Skins, weapon stats, and item information in Drop Zone Survivor should be understood as virtual game content. They may affect appearance or help players understand in-game behavior, but they should not be treated as cash-value rewards, betting features, real-money competition, real weapon advice, or financial guidance. Editorial Note This guide is based on the gameplay information provided for Drop Zone Survivor. It is written to help players understand landing choices, movement, safe zone awareness, health management, speed boost timing, healing decisions, weapon stat differences, and beginner survival strategy. All combat, health, safe zone, boost, healing, skins, weapon stats, and item-related systems discussed here refer only to virtual in-game mechanics. This guide is for gameplay understanding only and should not be used as real-world combat, weapon, gambling, or financial advice.
- Core Adventure
About This Game Core Adventure is a casual drilling adventure and mining upgrade game built around a clear loop: drill down, collect materials while rising back up, return to the surface, and upgrade your equipment for the next run. Each run starts with the drill moving underground until it reaches its current depth limit. The most important moment comes during the upward phase, when you collect materials and try to meet the storage target shown in the upper-left corner. Once that target is reached, the drill returns to the surface and you can spend your in-game resources on upgrades. The main progression systems are Storage Capacity, Drill Depth, and Idle Resource Generation. Storage Capacity helps your runs carry more value, Drill Depth opens deeper collection opportunities, and Idle Resource Generation supports longer-term progress between active runs. Core Adventure also includes drill skins and a collection book. These features add visual variety and completion goals, but the main strategy comes from improving the drilling, collecting, and upgrading cycle. How to Play 1. Start a drilling run and let the drill move underground. 2. Wait until the drill reaches its current depth limit. 3. Collect materials during the upward phase as the drill rises. 4. Watch the storage target shown in the upper-left corner. 5. Once the target is reached, return to the surface. 6. Spend your in-game resources on Storage Capacity, Drill Depth, or Idle Resource Generation. 7. Use later runs to adjust your upgrade plan based on what slowed you down. The most important part of each run is the upward phase. This is when your drill depth turns into useful progress, so avoid treating the return trip as passive downtime. Look for reachable material clusters, stay on a stable route, and avoid chasing every single pickup if it makes you miss a larger group. Beginner Strategy Guide Do not upgrade randomly in the first few runs. Your early goal is to identify the bottleneck: storage, depth, route control, or idle progress. After every return to the surface, ask one question before spending resources: what stopped this run from being better? A practical early upgrade order is: 1. Upgrade Storage Capacity first if you are reaching the target quickly or losing value from collected materials. 2. Upgrade Drill Depth after storage feels stable enough to benefit from deeper runs. 3. Add Idle Resource Generation once your active runs already feel productive. 4. Delay drill skins and collection book goals until the basic upgrade loop feels reliable. A good beginner route is not to maximize one upgrade immediately. First make the drilling loop stable, then push deeper, then use Idle Resource Generation to support longer-term progress. Upgrade Priority List • T0: Storage Capacity • Best when you collect enough materials but feel capped too quickly. • Strong early upgrade because it improves the value of successful upward phases. • T0: Drill Depth • Best when runs feel resource-poor or the upward phase does not offer enough material clusters. • More useful after storage can handle the extra materials from deeper routes. • T1: Idle Resource Generation • Best after your active drilling loop already feels stable. • Useful for players who return across multiple sessions, but it should not replace active upgrade planning. • T2: Drill Skins • Good for visual variety and collection goals. • Not the first priority when your drill still feels weak. • T2: Collection Book • Useful as a long-term completion goal. • Better after you understand the main drilling, collecting, and upgrade cycle. Upgrade Decision Table What you notice during runs · Likely issue · Better focus You reach the storage target quickly · Storage may be limiting the run · Upgrade Storage Capacity The upward phase feels empty · Drill range may be too shallow · Upgrade Drill Depth You collect well but progress feels slow later · Idle gain may be low · Improve Idle Resource Generation You miss many materials during the rise · Route control is weak · Practice upward movement before spending blindly You spend on skins while runs still feel weak · Upgrade priority is misplaced · Improve core equipment first Upward Phase Tips The upward phase is not just the end of a run. It is the part where depth becomes useful progress. Treat it as the main collection window. Prioritize material clusters that are easy to reach. A small group near your path is usually safer than a single piece far on the edge. Do not overcorrect for one isolated pickup if it causes you to miss a larger group that was already within reach. Try to collect in controlled lines instead of drifting back and forth. Wide, panicked movement can make the drill miss more materials than it gains. If the storage target is almost complete, focus on stable pickups instead of chasing risky pieces near the side of the screen. If Core Adventure shows different material colors or values in your current version, use a simple rule: only chase higher-value materials when the route stays stable. A valuable pickup is not worth it if it makes you miss an entire cluster afterward. When progress feels slow, check these problems in order: 1. Are you missing too many materials during the upward phase? 2. Are your runs too shallow to reveal enough useful materials? 3. Are you filling storage too quickly? 4. Are you upgrading the same stat without checking the actual problem? 5. Are you spending too early on skins or collection goals? Common Mistakes Mistake 1: Chasing edge materials too often Edge materials can be tempting, but they are not always worth the movement cost. If you move too far sideways for one small pickup, you may miss a better cluster in the center path. Fix: Stay near reliable material groups. Only move toward the edge when the pickup is clearly worth the detour. Mistake 2: Treating the upward phase like a passive return Some players relax after the drill reaches depth, but the upward phase is where most useful collection happens. Fix: Watch the path early, line up with clusters, and avoid random movement. Your goal is not to touch everything; your goal is to collect consistently. Mistake 3: Upgrading Drill Depth before storage can support it Going deeper feels exciting, but it can create weak runs if Storage Capacity is still too low. Fix: Improve Storage Capacity first when your runs already produce enough materials. Then push Drill Depth when you are ready to benefit from deeper routes. Mistake 4: Overbuilding Storage Capacity without enough depth More storage does not help much if your drill does not reach areas with enough useful materials. Some players keep expanding capacity but still struggle because the upward route does not provide enough to collect. Fix: If your storage is not filling efficiently, improve Drill Depth or focus on better upward-phase route control before buying more capacity. Mistake 5: Buying visual goals before stabilizing equipment Drill skins and the collection book can make Core Adventure more enjoyable over time, but they do not replace basic upgrade progress. Fix: Build a stable loop first: collect well, hit the storage target reliably, and return with enough resources to improve equipment. Mistake 6: Ignoring Idle Resource Generation before a long break If you plan to stop playing for a while, leaving Idle Resource Generation underdeveloped can make your next return feel slower than necessary. Fix: Before ending a longer session, consider whether an Idle Resource Generation upgrade would support your next run better than another short-term upgrade. Mistake 7: Spending without diagnosing the last run Many slow-progress problems come from upgrading out of habit. If every return leads to the same upgrade choice, you may be missing the real bottleneck. Fix: Before spending, identify one clear issue from the last run: storage cap, shallow depth, weak upward route, or low idle gain. FAQ What is Core Adventure? Core Adventure is a casual drilling adventure and mining upgrade game where each run involves drilling down, collecting materials during the upward phase, returning to the surface, and upgrading for the next attempt. How do you play Core Adventure? Start a run, let the drill descend, collect materials as it rises, watch the upper-left storage target, and spend resources on upgrades after returning to the surface. What should I upgrade first in Core Adventure? Start with Storage Capacity if you are collecting materials quickly but feel capped. Choose Drill Depth when your upward phase does not offer enough useful pickups. Add Idle Resource Generation later if you play across multiple sessions. What does Drill Depth do? Drill Depth affects how far the drill can go before the upward collection phase begins. It is most useful when your storage and collection control are strong enough to benefit from deeper runs. What does Storage Capacity do? Storage Capacity helps you carry more useful materials from successful runs. It is especially important when you often reach the storage target quickly or feel limited by capacity. What does Idle Resource Generation mean? Idle Resource Generation is an in-game progression mechanic that supports resource gain between active runs. It should be understood only as a virtual game system, not real-world income. Are drill skins important? Drill skins are better treated as visual or collection goals unless the current game version clearly shows a gameplay effect. Beginners should stabilize Storage Capacity, Drill Depth, and collection control before prioritizing skins. What is the collection book for? The collection book gives completion-focused players a long-term goal beyond basic upgrades. It is useful for progression tracking, but it should not replace core equipment upgrades early on. Editorial Note This Core Adventure guide is based on the available gameplay information and focuses on the drilling loop, upward collection phase, storage target, and main upgrade choices. Specific upgrade costs, skin effects, material values, and collection details may depend on the current in-game version, so players should follow the latest information shown inside the game. Core Adventure is a casual mining upgrade game. Idle Resource Generation, drill skins, materials, and the collection book are virtual in-game systems only and should not be understood as real-world financial activity.
- Doodle Toss Squad
Doodle Toss Squad Doodle Toss Squad is a creative and fast-paced casual game where your drawing choice matters. Instead of selecting pre-made items, you draw your own in-game shapes to knock down the opposing squad. If you are looking for ways to improve your throws or clear challenges more smoothly, this guide breaks down useful beginner shapes, how to adjust your aim, and the common mistakes to avoid. 1. Top 3 Useful Shapes to Draw The game responds best to clear, readable drawings. Complex or messy scribbles can behave unpredictably. Instead, match these three simple shapes to the opposing squad's formation: • The Solid Block (Square/Rectangle) • Best For: Clustered opponents. • Strategy: A solid block has a wide contact area. Use it when multiple opponents are standing close together. Keep your drawing clean and balanced so it travels in a more predictable direction. • The Hook Shape (L-Shape or Curve) • Best For: Different contact angles. • Strategy: If an opponent is standing in a difficult position, a hook or curved shape can help you test a different landing angle. Keep the curve simple so the shape remains easy to control. • The Long Line (Horizontal or Vertical) • Best For: Single, exposed targets. • Strategy: A long line travels in a narrower path and covers less space than a block. Draw a straight line when one squad member is clearly exposed and you do not need a wide contact area. 2. Beginner Tips for Aiming and Throwing Knowing what to draw is only half the process. Improve your throwing technique with these adjustments: • Master the Micro-Adjustment: If you miss, do not make huge up-or-down swipes on your screen. If your previous shape flew slightly too high, lower your angle by a small amount. Gradual corrections usually lead to better control. • Read the Formation First: Never throw before checking the screen. Pause and identify the easiest target. Knocking down one opponent early can reduce pressure on your own squad. • Protect Your Own Squad: You fail the challenge if your squad is completely knocked down. If you are down to your last remaining member, choose a safer shape with a wider contact area rather than attempting a risky narrow throw. Aim Correction Table What Happens · Likely Problem · Better Adjustment Shape flies too high · Angle is too high · Lower aim slightly Shape falls short · Angle is too low · Raise direction gradually Shape reaches target but misses · Target choice may be wrong · Aim at an exposed opponent Shape hits only one opponent in a group · Contact area may be too narrow · Try a solid block Near hit becomes a complete miss · Overcorrection · Use smaller movements 3. Common Mistakes to Avoid • Overcomplicating the Drawing: Highly detailed or uneven shapes can make the object's in-game behavior harder to predict. Fix: Start with simple, balanced shapes, then experiment with more creative drawings after you understand how they move. • Sticking to One Shape: A block shape may work well against grouped opponents, but it may not work as well against widely spread targets. Fix: Change your drawing based on the specific round instead of using the same shape every time. • Assuming Customization Improves Performance: Coins, drawing skins, and pets mainly support customization and collection. Fix: Focus first on shape control, target choice, and aim correction. • Changing Aim Too Aggressively: Large aim changes can turn a near hit into a complete miss. Fix: If your throw was close, adjust gradually and use small up-or-down movements. • Only Focusing on Style: Creative drawings are fun, but a stylish shape is not always the easiest one to aim. Fix: Choose a shape that can make reliable contact first, then add style once your throws feel consistent. 4. FAQ: Troubleshooting Your Throws Q: Why do my drawings often miss the target completely? A: Your shape may be unbalanced, too messy, or aimed at the wrong angle. Try drawing a cleaner shape and raising or lowering your throwing direction slightly. Q: What happens if I run out of squad members? A: If your entire squad is knocked down before the opponents are cleared, the challenge fails. Watch your remaining squad members and choose safer throws when needed. Q: Is there a specific shape that works for every round? A: No. The most useful shape depends on how the opposing squad is positioned in that specific challenge. Adaptability is your best approach. Q: How can I aim more consistently after missing? A: If your throw was close, adjust your aim first with a small up-or-down movement. Watch where the shape landed, make one careful correction, and keep your drawing simple enough to control. If the same shape keeps missing or feels unreliable, switch to a cleaner shape that better matches the opposing squad's formation.
- Stickman Gunfight
Stickman Gunfight About This Game Stickman Gunfight is a landscape-view, cartoon-style stickman squad strategy game where the most important decisions happen before the battle begins. The goal is not to place soldiers randomly and hope the squad wins. Each level asks you to read the enemy side, plan your own formation, and decide which units should protect the front row and which units should support from behind. This beginner guide focuses on enemy checking, placement order, front-line balance, unit selection, formation ideas, and how to adjust your squad after a failed attempt. Your formation starts from the first available position in the first row, so early choices can affect the whole battle. If the first row is too weak, your support units may not have enough time to help. If the back row is too light, your squad may survive the opening but fail to finish the level. Different soldier types fill different roles. A Sword Unit works best as a front-line pressure unit, a Pistol Unit is useful as basic ranged support, and an SMG Unit helps when your squad needs steadier back-row output. As more units become available, the best choice is not always the newest soldier. A good Stickman Gunfight strategy is about choosing the unit that solves the current formation problem. Pre-Battle Checklist: How to Set Up Your Squad Before starting a battle in Stickman Gunfight, use this simple setup process. Step 1: Check the enemy side • Swipe right at the beginning of the level. • Count how many enemy units are waiting. • Look at where the enemy pressure seems strongest. • Decide whether the stage needs a stronger front row, more back-row support, or a balanced mix. Step 2: Build your squad in order • Start from the first available position in the first row. • Think about the next few placements before filling the current slot. • Use Sword Units when the front row needs more stability. • Use Pistol Units when you need flexible ranged support. • Use SMG Units when your squad needs steadier pressure from behind. • Check whether the front row and back row have clear jobs before starting the battle. A useful Stickman Gunfight formation usually has one clear purpose: protect the opening line, spread pressure evenly, or add enough support to finish the level. Unit Comparison Table Unit · Role · Suggested Row · Use When · Avoid When Sword Unit · Front-line pressure and early protection · Front Row · Enemy pressure reaches your squad early · Your squad already survives early but lacks output Pistol Unit · Basic ranged support and flexible filler · Middle or Back Row · You need simple support behind the first row · The front row collapses too quickly SMG Unit · Steadier back-row output · Back Row · Your squad survives the opening but needs more finishing pressure · There is not enough front-line protection These row suggestions are beginner-friendly guidelines, not fixed rules. The best position can change depending on enemy count, available slots, unlocked units, and how quickly your front row falls under pressure. If a recommended unit is not unlocked yet, use the closest role you currently have. The goal is not to copy one exact lineup, but to balance front-line protection and back-row support. Beginner Formation Ideas & Winning Strategies These formation ideas are beginner-friendly examples, not the only correct setups. Use them as starting points and adjust them based on enemy count, unit availability, and battle results. 1. Balanced Formation Recommended idea: Use enough Sword Units to protect the first row, then place Pistol Units or SMG Units behind them for steady support. Use this formation when the enemy side looks balanced and does not create one obvious problem. Why it works: • Sword Units help protect the opening line. • Pistol Units can fill simple support positions. • SMG Units help maintain pressure from behind. • The squad is not too weak in the front or too passive in the back. When not to use it: Do not rely on this setup if the enemy side creates very heavy opening pressure. In that case, strengthen the front row first. 2. Anti-Rush Formation Recommended idea: Add more Sword Units early when the enemy side creates heavy opening pressure, then keep only enough back-row support to finish the fight. Use this formation when your squad keeps losing almost immediately after the battle starts. Why it works: • Extra Sword Units give the first row more stability. • Your back row gets more time to contribute. • The formation is harder to break during the opening clash. When not to use it: Do not use this setup when your squad already survives early but fails to finish enemies. In that case, you may need more SMG or Pistol support instead of more Sword Units. 3. Firing Squad Formation Recommended idea: Use a light front-line anchor with more Pistol Units or SMG Units behind it when the enemy side has fewer early-pressure units. Use this formation when the enemy side has fewer units or when your main problem is not early survival but finishing the level. Why it works: • A small front-line anchor gives your support units time to work. • Pistol Units provide flexible ranged support. • SMG Units add steadier output from the back row. When not to use it: Avoid this setup when the enemy side rushes the front line. Too many back-row units can fail if the first row breaks too quickly. How to Adjust After Losing A failed battle usually shows which part of your formation was weak. If you are not sure what failed, watch the first few seconds of the battle. The first unit group to collapse usually tells you which part of the formation needs adjustment. • If your squad loses almost immediately, strengthen the front row. • If your squad survives early but cannot finish the level, add more back-row support. • If one side collapses first, spread useful units more evenly. • If a new unit makes the result worse, return to a simpler balanced setup. • Change one thing at a time so you can tell which adjustment helped. Quick Tips • Check the enemy side before every battle. • Do not fill the first row without planning the next few placements. • Use Sword Units when the front row collapses early. • Use SMG Units when your squad survives but lacks finishing pressure. • Use Pistol Units when you need flexible support. • Do not use newly unlocked soldiers unless they solve a clear formation problem. • A balanced squad is usually safer than stacking only one unit type. Common Mistakes Putting SMG Units in the first row • Problem: SMG Units are better as support, not as the first line of pressure. • What happens: They can be overwhelmed early if there is no Sword Unit protecting the front. • Fix: Place Sword Units first when the enemy side looks aggressive. Using only Sword Units • Problem: A full Sword lineup may survive the opening better but lack enough support later. • What happens: Your squad can hold at first but lose momentum before clearing the level. • Fix: Add Pistol Units or SMG Units behind the front row. Using every newly unlocked soldier right away • Problem: New units are options, not automatic upgrades. • What happens: Your formation can become unbalanced if the new unit does not fit the stage. • Fix: Use a new soldier only when it solves a visible problem. Ignoring enemy numbers • Problem: Some players focus only on enemy unit types and forget to count how many enemies are waiting. • What happens: A larger enemy group can pressure more positions than expected. • Fix: If the enemy side has many units, spread your useful roles instead of stacking everything in one area. Leaving the front row too weak • Problem: A weak first row gives your support units no time to work. • What happens: The formation can break before the back row becomes useful. • Fix: Reinforce the first row with Sword Units before adding more output behind it. Overloading one side of the formation • Problem: Placing too many useful units in one area leaves other positions exposed. • What happens: One side may hold while the other side falls apart. • Fix: Spread your strongest roles across the formation when the enemy layout is wide. Restarting without changing anything • Problem: Repeating the same layout usually repeats the same result. • What happens: You lose again for the same reason. • Fix: After each failed battle, change one clear thing: the first row, one support unit, or the placement order. FAQ Should I choose SMG Units or Pistol Units in Stickman Gunfight? Choose Pistol Units when you need simple ranged support or a flexible filler. Choose SMG Units when your squad already survives the opening but needs steadier back-row pressure. What should I do if my front-row Sword Units keep falling early? Strengthen the front row before adding more back-row support. If the first row breaks too quickly, your Pistol Units and SMG Units may not have enough time to help. What is the best beginner formation in Stickman Gunfight? The safest beginner idea is usually a Balanced Formation: enough Sword Units to protect the front, with Pistol or SMG support behind them. This gives your squad both early stability and steady follow-up pressure. Why do I keep losing even after unlocking stronger soldiers? You may be using new soldiers without a clear purpose. A stronger-looking unit does not automatically fix a weak formation. Check whether your problem is front-line weakness, poor back-row support, or uneven placement. How do I win more levels in Stickman Gunfight? Check the enemy side first, build around the enemy count, protect your front row, and avoid relying on only one unit type. After losing, adjust one part of the formation instead of rebuilding randomly. Editorial Note This guide discusses Stickman Gunfight as a cartoon-style squad strategy game. All Sword, Pistol, and SMG references describe virtual unit roles and in-game formation decisions only.
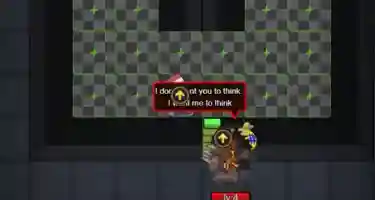 Haunted Hostel
Haunted Hostel About This Game Haunted Hostel is a beginner-friendly room defense strategy game built around Bed income, Coins, Energy, Door upgrades, Repair timing, and defense tools. Haunted Hostel plays more like a survival tower defense challenge than an action escape game. Instead of moving through the hostel to fight directly, you choose a room, build an economy, protect the Door, and survive as pressure increases. The main resource loop is simple: the Bed helps generate Coins, while Energy-related facilities support stronger late-game options. Coins are used for core upgrades such as the Bed, Door, Repair, and basic defense tools. Energy becomes more important once your room is stable and you are ready to add stronger support or advanced defense. The challenge comes from timing. Spending too much on income can leave the Door weak, while spending everything on defense can slow your economy. Good Haunted Hostel strategy is about knowing when to grow, when to repair, and when to stop saving Coins because the Door is under pressure. This guide focuses on the upgrade timing and room-defense decisions that most often decide whether beginners survive or lose early. How to Play Start each round by choosing a room with a strong defensive layout. For beginners, a U-shaped dead-end room, a room with one clear entrance, or a room near other occupied rooms is usually easier to defend. These layouts make the attack path easier to read and may help nearby defenders create shared pressure. A practical beginner opening looks like this: 1. Choose a room with one clear entrance. 2. Close or secure the Door immediately. 3. Build or activate the Bed so Coins start coming in. 4. Upgrade the Bed once early if the next income tier is affordable and the ghost is not already pressuring your Door. 5. Upgrade the Door to the first stronger tier before heavy pressure starts. 6. Build one basic defense tool, such as a Broom or Gun. 7. Watch the Door pressure before spending on another economy upgrade. Use the room upgrade panel to choose between economy, Door durability, Repair, and defense tools. When the ghost starts hitting the Door, stop checking long-term upgrades and focus on Repair or Door durability first. Situation · What You Should Do Safe window: the ghost is away from your room · Upgrade the Bed or improve income Danger window: the ghost is approaching or attacking · Repair the Door, upgrade the Door, or add defense Door is stable but damage is low · Build or upgrade one focused defense tool Coins are low and pressure is light · Improve the Bed first Door is close to breaking · Stop economy upgrades and stabilize defense This window-based thinking is more useful than following the same upgrade order every round. Repair is one of the most important tools in Haunted Hostel. Use it to buy time when the Door is taking damage. A Door upgrade can also be valuable during pressure because it improves your room’s ability to hold back the ghost, but upgrading too early may waste Coins that could have gone into income or a stronger defense tool. Your goal is to keep the room standing until the round objective is complete. In most room defense runs, that means preventing the Door from collapsing while your Bed income, Repair timing, and defense tools scale. If the Door fails and the room can no longer hold the ghost back, the run is lost. Beginner Strategy Guide A safe beginner route is: 1. Pick a U-shaped or one-entrance room. 2. Start the Bed economy immediately. 3. Upgrade the Bed once when the next income tier is affordable. 4. Upgrade the Door before heavy pressure starts. 5. Build one basic defense tool. 6. Use Repair when the Door is under pressure. 7. Add a stronger defensive option after your income is stable. 8. Build Energy-related facilities only when your Coin economy can support them. Do not treat this route as a fixed formula. If the ghost pressure changes early, switch priorities immediately from income to Door safety, Repair, or defense. Room choice matters. A dead-end room gives you a clearer attack path and more time to react. A room placed near other occupied rooms can also be useful because nearby defenses may help pressure the ghost when several rooms are attacked around the same corridor area. Phase · Main Priority · Good Upgrade Choices Opening · Start income · Bed upgrade, basic Door security Early pressure · Prevent collapse · Door upgrade, Repair, first basic defense tool Mid game · Balance income and damage · Better Door, upgraded defense tool, stronger room support Heavy pressure · Survival first · Higher-tier Door, Repair, focused high-level defense Late defense · Scale carefully · Energy-related facility, advanced defense, stronger support tools The exact upgrade names may vary, but the decision logic stays the same: income first during safe time, Door and Repair first during pressure. Do not fill every available slot with weak defenses. One or two upgraded defense tools are often more useful than several weak buildings that drain Coins and block better late-game placement. Treat tools such as Broom, Gun, Shield, or Console by function: basic damage first, stronger defense later, and Energy support only after your room economy is stable. Energy buildings should come after your Coin base is stable. A Console or Energy-related facility can help unlock stronger options, but building it too early may delay Bed upgrades, Door durability, Repair, or your first reliable defense. If the ghost is already focused on your room, protect the Door before investing in Energy. A strong run usually follows this rhythm: Bed for income, Door for time, Repair for emergencies, defense tools for pressure, Energy for late scaling. Common Mistakes Mistake: Upgrading the Door while it still has full durability. Why it fails: If Haunted Hostel's Door upgrade restores or greatly improves durability in your version, upgrading too early can waste emergency value. Better move: Let the Door take some pressure first, use Repair when needed, then upgrade before it breaks. Mistake: Only upgrading the Bed at the start. Why it fails: More Coins do not help if the Door fails before your economy pays off. Better move: Upgrade the Bed early, then check the Door. If the ghost is near, switch to Door durability or Repair. Mistake: Building too many basic defense tools. Why it fails: Several weak Brooms, Guns, or similar low-level tools can fill space without giving enough late-game value. Better move: Build one basic defense early, then focus resources on upgrading 1–2 core defenses instead of spreading Coins too thin. Mistake: Building Energy facilities too early. Why it fails: Energy can support stronger options, but early Energy buildings may delay the Bed, Door, and first defense tool. Better move: Build Energy-related facilities only after your Coin income and Door safety are under control. Mistake: Ignoring Repair during pressure. Why it fails: Buying random upgrades while the Door is under attack can leave the room exposed. Better move: Use Repair to buy time, then decide whether the next priority is Door durability, damage, or income. Mistake: Spending Coins the moment they appear. Why it fails: Small upgrades can block you from reaching the next important Door or defense upgrade. Better move: Save toward the next important Door or defense upgrade instead of buying every cheap option immediately. Mistake: Choosing an exposed room. Why it fails: Rooms with awkward entrances or poor positioning give you less time to react. Better move: Choose a dead-end, U-shaped, or back-to-back room area where the attack path is easier to read. FAQ How do you play Haunted Hostel? Choose a room, secure the Door, build Bed income, and spend Coins on Door upgrades, Repair, and defense tools. What should beginners upgrade first in Haunted Hostel? Start with the Bed for early Coins, then upgrade the Door before serious pressure begins. Add one basic defense tool once your room has a stable opening. Should I upgrade the Door or the Bed first? Upgrade the Bed during safe windows and upgrade or repair the Door during danger windows. If the ghost is already attacking, Door safety comes first. How do you survive longer in Haunted Hostel? Pick a room with a clear entrance, avoid overbuilding weak defenses, use Repair during pressure, and focus on a few strong upgrades instead of spreading resources everywhere. Why do beginners lose early? Most early losses happen because players overbuild income, ignore Door durability, build too many weak defenses, or invest in Energy before the room is stable. Is Haunted Hostel a tower defense game? Yes. Haunted Hostel fits the room defense and survival tower defense style because you defend a single room through income, Door upgrades, Repair, and defense tools. Editorial Note Guide updated by GeevenTech Editors after reviewing Haunted Hostel room defense mechanics, early upgrade flow, and beginner survival patterns. This guide focuses on practical gameplay decisions: room choice, Bed income, Coins, Energy, Door durability, Repair timing, defense tool placement, and common early mistakes. Some interface labels, upgrade names, or values may vary by version, so players should follow the numbers shown in their current build. This article does not claim any official relationship with the developer, publisher, platform, or external franchise.
 Magic Block Pusher
Magic Block Pusher Magic Block Pusher is won by reading the board before pushing. This guide covers safe first moves, block order, narrow-path strategy, pressure plate timing, portal and gate routes, reset decisions, and common mistakes that cause players to get stuck. About This Game Magic Block Pusher is a casual magic-themed block pushing puzzle game where each stage is solved by moving blocks into useful positions while keeping the player’s path open. The challenge is not speed. The challenge is push order, spacing, and knowing when a block should move only one step instead of being pushed as far as possible. The game uses a compact puzzle-board layout where walls, tight paths, target spaces, movable blocks, and magic-themed objects create small but important decisions. A single wrong push can close a hallway, trap a block against a wall, or make the player lose access to the side needed for the next move. The magic theme gives Magic Block Pusher its visual style, but the gameplay is based on practical spatial logic. When a stage uses glowing switches, pressure plates, stone gates, blocked doors, blue portals, teleporters, or other puzzle objects, treat them as part of the route. Their value comes from how they change movement, block placement, or the path available to the player. Magic Block Pusher rewards careful play. The best move is not always the most obvious move. The best move is the one that keeps the next push possible. How to Play The exact control method can vary by device or version, but the core rule is the same: move the character into position, push blocks from the correct side, and keep enough space open for the next move. 1. Read the full level before moving. Find the target space, narrow path, blocked route, glowing switch, pressure plate, gate, or portal before touching a block. 2. Choose the main block. Do not push every block just because it can move. Identify which block actually helps complete the stage. 3. Move to the correct side. A block-pushing puzzle is often decided by where the player can stand. If you cannot reach the pushing side later, the move is unsafe. 4. Push in short steps. A one-step push is safer than sending a block deep into a corridor too early. 5. Keep recovery space open. Before each push, check whether you can still move around the block after it shifts. 6. Use puzzle objects carefully. Glowing switches, pressure plates, stone gates, blocked doors, blue portals, and teleporters should be used only after you understand how they affect the path. 7. Restart early when the route is locked. If a key block is trapped against a wall or the player cannot reach the needed pushing side, use Undo when only one recent move caused the problem. If the layout is fully locked, tap the reset or restart button, commonly shown with a circular arrow or replay icon, and try a cleaner opening route. Before You Push Checklist Check · Ask This Before Moving Goal · Where should this block end up? Standing space · Can I still stand behind it after the push? Route safety · Will this block a hallway or escape route? Recovery · Can I fix this move with one Undo, or would I need a full reset? If one answer is clearly bad, do not push yet. Reposition first. Beginner Strategy Guide Start With the Safest First Move The safest first move in Magic Block Pusher is usually not pushing a block. First, look for the target space, the narrowest route, and the side needed for the final push. Move only after you know which path must stay open. A rushed opening move often creates the first dead end. A careful opening move gives you more space, more angles, and more ways to recover. Work Backward From the Target Instead of asking, “Which block can I push now?” ask, “Where does the important block need to finish?” This makes the puzzle easier because the final position tells you which pushing angle matters. Use this order: 1. Find the final target. 2. Identify the block that should reach it. 3. Check which side the player must stand on for the final push. 4. Clear the route without blocking that side. This reverse-planning method is especially useful when the target is beside a wall, behind a gate, or at the end of a narrow path. Separate Main Blocks From Route Blocks Some blocks are not meant to finish the puzzle. They only open space, press a glowing switch, hold a pressure plate, block a path temporarily, or let the player reach another side of the board. A good rule is: • Move route blocks only as far as needed. • Keep main blocks in open space until the final route is ready. • Do not push secondary blocks into the path needed by the main block. This prevents one of the most common beginner mistakes: moving every block just because it can move. Use Corners Only for Final Placement A corner is usually a trap. Once a block is pushed into a corner, the player may not be able to push it out again. Use a corner only when it is clearly the final target. If the target is beside a wall, line up the block before the final push. Do not push it against the wall first and hope to adjust it later. Wall-side targets are solved by alignment, not force. Read Puzzle Objects by Function When a stage contains magic puzzle objects, judge them by what they do to the board. Puzzle Object · What It Usually Controls · Safe Use Marked target space · The final position for a block or route · Align the block before the final push. Glowing switch · Opens, closes, or changes a route · Step on it only after checking the path it affects. Pressure plate · Often needs a block or player to hold it down · Keep escape space open before placing a block on it. Stone gate or blocked door · Controls access to another area · Open the route before moving the main block into a tight space. Blue portal or teleporter · Moves the player or changes the route flow · Check the exit position before committing. Locked path · Forces a specific push order · Solve the opening route before pushing the goal block. Do not assume a glowing object helps immediately. Use it when it supports the next move. Advanced Puzzle Mechanics Narrow Hallway Strategy Use this strategy when one block is near a corridor and pushing it too far can block the only route. Move pattern: 1. Move beside the block instead of pushing from behind immediately. 2. Push the block one space only if it opens the walking path. 3. Move through the opened route. 4. Return to the correct pushing side. 5. Push toward the target only after the corridor remains open. Avoid this strategy when: the hallway end is clearly the final target and no return path is needed. Why this works: Narrow hallways punish over-pushing. The goal is to create movement space first, then complete the block placement later. Pressure Plate Strategy Use this strategy when a glowing switch or pressure plate is behind a movable block, or when a block needs to stay on the plate. Move pattern: 1. Clear walking space around the pressure plate. 2. Push the blocking block just enough to reach the plate area. 3. Do not trap the player between the block and the wall. 4. Place the block on the pressure plate only when the route remains open. 5. Move the main block after the gate or blocked door has opened. Avoid this strategy when: the player has not cleared enough walking space around the changed route. Why this works: A pressure plate can solve one problem while creating another. Always check both the opened path and the player’s escape path. Wall-Side Target Strategy Use this strategy when the target space is beside a wall and the final push must be straight. Move pattern: 1. Keep the block in open space first. 2. Move around it until the block is lined up with the target. 3. Push straight toward the wall-side target. 4. Stop pushing from the side once the block touches the wall. 5. Finish only when the player still has space to stand. Avoid this strategy when: the block is not aligned yet. Side pushes near a wall can remove the final angle. Why this works: A wall removes one side of control. Once the block touches the wall, your options shrink quickly. Crowded Block Strategy Use this strategy when multiple blocks are close together and the player cannot reach the correct side of the main block. Move pattern: 1. Identify the main block first. 2. Move only the secondary block that opens walking space. 3. Keep at least one open tile beside the main block. 4. Return to the main block from the correct side. 5. Push the main block through the cleared route. Avoid this strategy when: you are moving every block away from the center. That usually creates more problems than it solves. Why this works: Crowded stages are not about clearing everything. They are about creating just enough space to control the important block. Portal and Gate Strategy Use this strategy when the stage includes a blue portal, teleporter, stone gate, magic gate, or blocked door that changes how the player reaches the goal area. Move pattern: 1. Check where the portal sends the player or which route the gate opens. 2. Move the player through first when possible. 3. Keep blocks away from the portal or gate path until the route is clear. 4. Open the route before moving the main block into a tight space. 5. Use Undo if the portal move was only one step wrong; reset the level if the player ends up on the wrong side of the block with no recovery route. Avoid this strategy when: you do not know where the player or block will end up after using the portal, teleporter, or gate. Why this works: Portals and gates are route tools. They should create access before you commit the main block. Common Mistakes Mistake · Why It Hurts · Better Move Pushing before reading the board · The first move can close the route needed later. · Find the target and final push direction first. Moving the closest block first · The closest block may only be blocking space. · Identify the main block before moving anything. Pushing into a corner too early · The block may become impossible to recover. · Use corners only for final placement. Ignoring standing space · The block moves, but the player loses the next pushing side. · Check where the player will stand after the push. Stepping on a glowing switch too early · A gate or route may change before the layout is ready. · Clear walking space before activating it. Dropping a block onto a pressure plate too soon · The block may hold the plate but trap the player’s route. · Check both the opened path and your escape path. Entering a blue portal without checking the exit · The player may land on the wrong side of the block. · Use portals only when the exit position helps the next move. Trying to fix a locked layout too long · Repeating blocked moves wastes time. · Use Undo for one bad move or reset when the route is fully locked. Playing too fast · Speed creates unnecessary dead ends. · Slow down and solve one move ahead. FAQ What is Magic Block Pusher? Magic Block Pusher is a block pushing puzzle game where players solve stages by moving blocks, keeping routes open, and avoiding trapped positions. How do you play Magic Block Pusher? Read the layout, find the target, stand on the correct side of each block, and push in an order that keeps future moves possible. What is the safest first move in Magic Block Pusher? The safest first move is usually not pushing a block. First, find the target, the narrowest route, and the side needed for the final push. Why do I keep getting stuck in Magic Block Pusher? Most stuck situations happen because a block was pushed into a wall, corner, or hallway before the player had enough space for the next push. Should I move the closest block first? Not always. The closest block may only be blocking the route. Find the target first, then decide which block actually matters. How do I solve narrow hallway stages? Push only far enough to open the route. Do not send a block to the end of a hallway unless that end position is part of the solution. What should I do when a block is stuck in a corner? If the corner is not the final target, use Undo if that single move can be reversed. If not, reset the level and keep that block in open space next time. When should I use Undo instead of Reset? Use Undo when you made one recent mistake and the route is still mostly safe. Use Reset when the main block is trapped, the player cannot reach the needed side, or several earlier pushes caused the problem. Can this guide help if I am stuck on a later level? Yes. Later stages in Magic Block Pusher usually become harder because blocks, narrow routes, gates, pressure plates, or portals are combined in tighter spaces. Start from the target, keep the final pushing side open, and reset early when the main block becomes trapped.
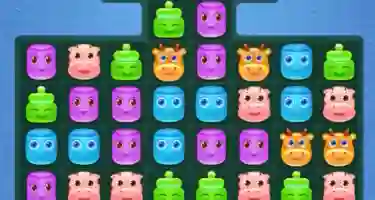 Milk Match Puzzle
Milk Match Puzzle About This Game Milk Match Puzzle is a casual match-3 / elimination puzzle game built around milk-themed tiles, glowing power pieces, and level-based clearing goals. The core loop is easy to understand: match tiles, clear space, create stronger effects, and finish the target shown on the board. The challenge comes from choosing the right move, not from tapping every available match. A basic three-tile clear can help, but a stronger move often creates a power tile, opens a blocked section, or prepares a better follow-up clear. Good play comes from asking what the board will look like after the move, not only what disappears immediately. The game rewards careful board reading. A four-tile match can create a row-clearing or column-clearing glowing tile. A larger pattern can create a stronger special tile that clears a wider area or removes a selected tile type. These enhanced pieces are most useful when they connect with the target area, blocked sections, or hard-to-reach tiles. Milk Match Puzzle is best played with a simple rule: every move should either clear something important, create a stronger tool, or make the next move easier. How to Play Start each level by checking the board layout, the target area, and the number of moves available. Then scan for matching tiles, blocked sections, and possible four-tile or five-tile setups. Do not rush into the first available three-tile clear if another move can create a stronger effect. Clear three matching tiles for a basic elimination. When the board allows a larger match, try to create a glowing special tile and use it where it can hit the most valuable area. Match Combination · Descriptive Result · Visual Description · What It Can Do · Best Use 3 matching tiles · Basic tile clear · Three identical milk-themed tiles disappear from the board · Removes the matched tiles · Use for direct progress, small openings, or simple target clearing 4 matching tiles in a row · Row-clearing glowing tile · A bright horizontal power tile with a glowing stripe effect · Can clear a full horizontal row when activated · Best for targets or obstacles spread across the same row 4 matching tiles in a column · Column-clearing glowing tile · A vertical glowing power tile with an up-and-down clearing effect · Can clear a full vertical column when activated · Best for lower tiles, vertical target paths, or stacked obstacles 5 matching tiles in a straight line · Color-clearing special tile · A bright multi-color special tile that stands out from normal pieces · Can remove one selected tile type from the board · Best when many useful tiles share the same type 5 matching tiles in an L or T shape · Area-clearing special tile · A stronger glowing tile with a bright center and burst-style effect · Can clear a wider area around the activated tile · Best for corners, dense sections, and obstacle clusters Two special tiles combined · Power tile combo · Two glowing special tiles trigger a larger combined effect · Can create a stronger clearing effect than using one tile alone · Best when the combo reaches targets or blocked sections After each clear, watch how tiles fall into place. A good move may create another match automatically, bring target tiles closer together, or place a special tile in a better position. Use boosters when normal matching cannot solve the board efficiently. Booster · Visual Description · What It Does · Best Timing Hammer · A small hammer-style tool icon used for direct tile removal · Removes one chosen tile or obstacle layer · Use on a final target tile, blocked corner, or tile that normal matches cannot reach Horizontal Clear Booster · A wide glowing booster with a left-to-right clearing direction · Clears or creates a horizontal clearing effect · Use when targets or obstacles are spread across one row Vertical Clear Booster · A tall glowing booster with an up-and-down clearing direction · Clears or creates a vertical clearing effect · Use when key tiles are stacked in one column or trapped below other tiles Color-Clearing Booster · A bright multi-color special booster that targets one tile type · Removes one selected tile type · Use when the board has many useful tiles of the same type When Not to Use a Booster Do not use a booster just because it is available. Avoid using a Hammer on a tile that can be cleared by a normal match. Avoid using a Horizontal Clear Booster or Vertical Clear Booster if the clearing path does not touch target tiles, obstacles, or a blocked section. A booster is most valuable when it solves a problem that normal matching cannot solve in time. If the board still has easy matches that lead toward the target, save the booster for a harder moment. Beginner Strategy Guide • Compare moves before clearing. Look at more than one possible match. The first legal move is often weaker than a move that creates a glowing tile or opens the target area. • Use three-tile clears for setup. A basic match is useful when it brings tiles together, opens space, or moves the board toward a stronger combination. • Create four-tile matches when they line up naturally. Row-clearing and column-clearing glowing tiles are reliable tools because they can reach across the board. • Do not force five-tile matches at any cost. A five-tile special is powerful, but wasting several moves to chase one can hurt your progress. Build it when the setup is already close. • Place special tiles near the problem area. A special tile is strongest when it touches targets, obstacles, or dense sections. Activating it in an empty area usually wastes its value. • Use bottom-board clears with purpose. Lower matches can trigger tile drops and chain reactions, but they should still help the target area or create a stronger follow-up move. • Save the Hammer for hard tiles. The Hammer is best for corners, final targets, locked pieces, or obstacle layers that cannot be reached through normal matching. • Use horizontal and vertical clears based on board shape. If the problem stretches across a row, use a horizontal clear. If the problem is stacked in a column, use a vertical clear. • Plan around the final five moves. When only a few moves remain, stop chasing random clears. Count what the level still needs and use every move to finish the target. • Think in two moves. Before clearing a match, ask what the next move will become. The strongest play is often the move that improves the next two turns. Dealing with Blockers (Obstacles) Some levels include obstacles that limit movement, block target tiles, or make certain areas harder to clear. These should be handled early because they become more difficult when only a few moves remain. Obstacle · Visual Description · How It Works · How to Clear It · Best Tool Frozen blocker · A tile covered by a pale ice-like layer · Covers or traps a tile under a frozen layer · Match beside it or hit it with a clearing effect; thicker layers may need repeated hits · Hammer, area-clearing special tile, horizontal clear, vertical clear Layered blocker · A stacked block with multiple visible layers · Takes up board space and needs more than one hit · Clear matches beside it or use power effects to remove layers faster · Area-clearing special tile, horizontal clear, vertical clear Locked tile · A tile held by a lock-style visual element · Holds a tile in place until the lock is broken · Clear nearby matches or hit it with a booster · Hammer, nearby match, row or column clear Corner obstacles should be handled early because fewer matches can reach them. Middle obstacles can often be cleared faster with an area-clearing special tile. Row or column obstacles are good targets for horizontal or vertical clearing boosters. If an obstacle needs multiple hits, do not leave it for the final few moves. Open space around it first, then use a special tile or booster when it can hit the blocked section directly. Common Mistakes Using special tiles in weak positions: A row-clearing or column-clearing tile is much stronger when its path crosses targets or obstacles. Do not activate it through an empty section unless it creates a clear follow-up. Wasting board-clearing effects too early: Do not spend a powerful clear while the real target is still hidden under a multi-layer obstacle. Open the obstacle first, then use the stronger effect when it can actually reach the target. Saving every booster for too long: Boosters should not be wasted, but they also should not sit unused when they can finish a difficult section. Use them when they directly solve the board’s biggest problem. Using the Hammer on an easy tile: Do not spend the Hammer on a tile that a normal match can remove. Save it for corners, locked pieces, final targets, or stubborn obstacle layers. Ignoring obstacles until the end: Frozen blockers, layered blockers, and locked tiles can slow the whole board. Start working on them before the level reaches its final moves. Forcing large matches too often: A five-tile special is useful, but chasing it for too long can waste moves. If a simple match clears the target, take the simple match. Playing only from the top of the board: Top-board matches usually change less of the board. Lower clears and obstacle-side clears often create stronger cascades. FAQ What is Milk Match Puzzle? Milk Match Puzzle is a casual match-3 puzzle game where players clear matching tiles, create glowing power tiles, and complete level targets. How do you play Milk Match Puzzle? Match three or more identical tiles, clear them from the board, build stronger special tiles through larger combinations, and use boosters when normal matches cannot solve the target area. What happens when you match four tiles? A four-tile match can create a row-clearing or column-clearing glowing tile. When activated, it can clear a full row or column. What happens when you match five tiles? A straight five-tile match can create a color-clearing special tile. An L-shaped or T-shaped five-tile match can create an area-clearing special tile. What is the best booster in Milk Match Puzzle? The Color-Clearing Booster is usually the strongest choice when the board has many target tiles of the same type, because it can remove that tile type in one move. The Hammer is better for saving a nearly failed level when only one hard-to-reach tile, locked tile, or obstacle layer is stopping progress. How should I save coins, boosters, and extra moves for harder levels? Save coins and boosters for hard boards, not easy clears. A good rule is to spend resources only when you have fewer than five moves left, one key target remains, or a blocked section cannot be reached by normal matching. Extra moves are most valuable when the level is almost complete, not when the board still needs too much work. How do I deal with frozen blockers? Clear matches beside them or hit them with a booster. If the frozen layer needs repeated hits, use a Hammer, area-clearing special tile, horizontal clear, or vertical clear to break it faster. What is the hardest mechanic in the game? The hardest mechanic is handling obstacles in corners or crowded sections. Open space around them early, then use a special tile or booster when normal matching cannot reach them.
- Chibi Hero Tile Quest
Chibi Hero Tile Quest About This Game Chibi Hero Tile Quest is a chibi hero match-and-battle puzzle game built around hero collection, clickable hero tiles, team deployment, and turn-based battle choices. This Chibi Hero Tile Quest strategy guide helps beginners understand how to build a team, read enemy targets, use hero tiles, and press Go at the right time. The game combines cute pixel-style hero portraits with light puzzle strategy. In battle, enemy targets are shown in the upper area, while available hero tiles appear around the lower and side areas of the screen. Players click hero tiles to prepare actions, then use the Go button to confirm the turn. This makes every round a small decision: check the enemy target, choose the hero tile that fits the situation, and press Go only when the move helps the current turn or sets up the next one. The game also includes a wider hero progression loop. The Hero Collection screen lets players view heroes such as KK Rainbow, Super Kid, and White Dragon, along with their level, upgrade progress, and role labels. The Deploy Hero area is where players choose which heroes to bring into battle. Other sections such as Battle, Trial, Treasure, and Shop support progression. In this game, Treasure is mainly connected with coins, while the Shop is used for hero shards and collection progress. The main skill in Chibi Hero Tile Quest is learning how hero roles, tile clicks, and turn timing work together. A strong player does not simply tap every available tile. They build a useful team, check enemy pressure, click the right hero tile, and confirm with Go only after the action makes sense. How to Play Follow this 6-step flow when starting a stage: 1. Step 1: Check your Hero Collection first. Before entering battle, review your available heroes. Look at characters such as KK Rainbow, Super Kid, and White Dragon, then check their level, upgrade progress, and role label. 2. Step 2: Read each hero’s battle role. Use the role labels to understand your team. Super Kid works as your DPS choice, KK Rainbow works as your support option, and White Dragon works as your control option. 3. Step 3: Build a balanced team before battle. A simple beginner setup is: Super Kid for damage, KK Rainbow for support, and White Dragon for control. This gives you a cleaner structure than choosing heroes only by appearance or level. 4. Step 4: Scan enemy targets before clicking tiles. Once the battle starts, look at the upper battle area first. Count the active enemies, find the most urgent target, and decide whether the next move needs damage, support, or control. 5. Step 5: Click the hero tile that solves the current problem. Hero tile actions are triggered by clicking. Click Super Kid when you need direct pressure, KK Rainbow when the team needs support, and White Dragon when enemy pressure needs to be controlled. 6. Step 6: Confirm with Go only after planning the next turn. The Go button confirms your selected action. Before pressing it, ask whether the clicked tile helps now and whether it leaves you with a playable next turn. After the action resolves, repeat the same loop: read the enemy target, scan your available hero tiles, click the best tile, then press Go. This rhythm is more reliable than tapping randomly because every move has a purpose. Beginner Strategy Guide Beginner Team Formula For early stages, use this simple lineup structure: Optimal Team = 1 DPS (Super Kid) + 1 SUP (KK Rainbow) + 1 CC (White Dragon) This formula gives your team three important tools: damage, stability, and control. It also prevents the common beginner mistake of using only damage heroes and then struggling when enemy pressure builds. Hero Skill Roles Super Kid is your main DPS option. Use Super Kid when you need direct damage pressure or when an enemy target is close enough to finish. KK Rainbow is your support option. Use KK Rainbow when the team needs more stability, safer turn flow, or a better setup before pressing Go. White Dragon is your control option. Use White Dragon when enemy pressure is building and you need to slow the pace of the battle or create a safer next turn. Target Priority Rule When several enemies are visible, do not attack randomly. Use this order: 1. Finish an enemy that is already close to defeat if doing so reduces pressure immediately. 2. Target the enemy that creates the biggest problem for your next turn. 3. Use KK Rainbow or White Dragon before damage if your team is under pressure. 4. Avoid spending Super Kid on a low-threat enemy unless it creates a safer board state. This rule is especially important before pressing Go. A strong move is not always the flashiest move. The best move is the one that makes the next turn easier. Hero Tile Click Rule In Chibi Hero Tile Quest, hero tile actions are triggered by clicking. That means every click should have a reason. Before clicking a hero tile, check: • Which enemy needs attention first? • Do I need damage, support, or control? • Is Super Kid, KK Rainbow, or White Dragon the best answer? • Will this click help the current turn? • Will this click leave better options after Go? Do not click the first tile you see. Tiles on the side of the battle area can be easy to miss, but they may offer a better move than the obvious tile near the bottom. Go Button Checklist Before pressing Go, run this quick check: • Did I look at the enemy area first? • Did I click the hero tile for a clear reason? • Am I solving the most urgent threat? • Will this move leave useful options for the next turn? • Am I using Super Kid, KK Rainbow, or White Dragon at the right moment? If the answer is unclear, pause and scan the board again. Most beginner mistakes happen because the player presses Go before the move has a purpose. Upgrade and Resource Rule Do not spread resources across every hero as soon as you unlock them. Build a small core team first. A practical early upgrade order is: 1. Upgrade Super Kid first if damage is your biggest problem. 2. Upgrade KK Rainbow if your team often loses stability before the battle ends. 3. Upgrade White Dragon if enemy pressure becomes difficult to control. 4. Delay upgrades for heroes you rarely deploy. Treasure is mainly connected with coins, while the Shop is used for hero shards. Use coins and shards to support heroes you actually deploy. The goal is to make your core team stronger, not to make every hero slightly upgraded. Energy Use Rule Energy should be spent on progress that improves your main team. Do not burn energy only because it is available. A practical beginner rule is: • Spend energy on battles that help your core team progress. • Use energy on Trial when it supports upgrades or hero growth. • Avoid repeating low-value stages if they do not help your current lineup. • Check whether you need coins, shards, or upgrade progress before spending energy. The best energy use is not always the fastest stage. It is the stage that gives your team the most useful progress. Common Mistakes Pressing Go before reading the enemy target. The Go button should confirm a decision, not replace one. Always check the enemy area before clicking a hero tile. Clicking the first available hero tile. A tile that can be clicked is not automatically the best tile. Compare the bottom and side tiles before acting, especially when multiple enemies are active. Ignoring the beginner team formula. A simple early team should include 1 DPS, 1 SUP, and 1 CC. Using Super Kid, KK Rainbow, and White Dragon together gives you a cleaner structure than stacking only damage. Using Super Kid on the wrong target. Super Kid should be used when damage matters. Do not waste a strong DPS action on a low-threat enemy unless it improves the next turn. Saving KK Rainbow for too long. Support is most useful before the battle falls apart. Use KK Rainbow when the team needs stability, not only after the situation is already bad. Forgetting White Dragon when enemy pressure builds. White Dragon is your control option. If enemies are creating too much pressure, use White Dragon to help slow the battle pace and create a safer turn. Spending coins or shards without a plan. Treasure gives coins, and the Shop provides hero shards. Focus both on heroes you use often instead of spreading upgrades across every character. Wasting energy on low-value progress. Energy should support your main team. Before spending it, decide whether you need coins, shards, upgrade progress, or battle advancement. FAQ What is Chibi Hero Tile Quest? Chibi Hero Tile Quest is a cute chibi hero match-and-battle puzzle game. It combines hero collection, clickable hero tiles, team deployment, enemy target reading, and turn-based battle decisions. How do you play Chibi Hero Tile Quest? Build a team in Hero Collection or Deploy Hero, enter battle, read the enemy targets, click the hero tile that solves the current problem, then press Go to confirm the action. What is a recommended beginner team in Chibi Hero Tile Quest? A strong beginner formula is 1 DPS + 1 SUP + 1 CC. For the early heroes shown in this guide, that means Super Kid as DPS, KK Rainbow as SUP, and White Dragon as CC. How should I use Super Kid? Use Super Kid when you need direct damage pressure. Super Kid is best used against urgent enemy targets or enemies that are close enough to finish. How should I use KK Rainbow? Use KK Rainbow when your team needs support or a safer turn setup. Do not wait too long to use support, because support is most valuable before the battle becomes unstable. How should I use White Dragon? Use White Dragon when enemy pressure is becoming difficult to manage. White Dragon works best as a control option that helps slow the battle pace and create a safer next turn. How should beginners use Shop items and Energy? Use Shop hero shards and Energy to support your main team first. Prioritize heroes you deploy often, such as Super Kid, KK Rainbow, and White Dragon, instead of spending resources across random characters or low-value stages. Coins, hero shards, Treasure, Shop items, and Energy are virtual in-game systems only. They are not real-world rewards, cash prizes, gambling rewards, or physical items.
 Rainbow Tube Sort
Rainbow Tube Sort Core Logic and Movement Rules Rainbow Tube Sort is a casual color sorting tube puzzle game where the goal is to move colored balls between tubes until each color is grouped cleanly together. The game looks simple at first, but every move changes the board, so careful planning matters more than fast tapping. The main movement rule is simple: a ball can usually be moved only when the destination tube is empty or when the top ball in that tube matches the same color. This means a useful move should do at least one of three things: connect matching colors, reveal a blocked color, or make the next move easier. An empty tube is valuable because it gives you room to rearrange balls. Instead of treating it as a place to drop any random color, think of it as your temporary sorting space. Once that space is gone, every later move becomes harder to control. Before moving a ball, look across the whole board. Check which colors are already close to completion, which colors are trapped near the bottom, and which move will help the next step. The challenge fails when no ball can legally move to another tube, so the safest approach is to keep the board flexible for as long as possible. Quick strategy summary: finish easy color groups first, uncover buried colors before the board gets crowded, protect at least one useful sorting space, and use Manage only when one extra tube clearly opens a safe path forward. Advanced Sorting Strategy A strong Rainbow Tube Sort strategy starts by looking below the top balls. The top ball decides what you can move right now, but the lower balls decide whether the puzzle will stay solvable later. One useful method is the bottom-up check. This simply means looking at the lowest visible colors before making obvious top-level moves. If the same color appears near the bottom of several tubes, do not keep covering it with unrelated balls. Try to uncover one version of that color first, then use it as the starting point for building the full stack. Another common situation is the sandwich pattern. This happens when one color is split by another color inside the same tube, such as Red - Blue - Red. The problem is not just the top Red ball. The real issue is that the Blue ball is separating two matching Red balls. For example, if a tube has Red - Blue - Red from top to bottom, a simple recovery sequence might look like this: 1. Move the top Red to a tube that already has Red on top, if that move is legal. 2. Move the blocking Blue into a safe open tube or a tube with Blue on top. 3. Reconnect the lower Red with the red stack once the path is clear. This kind of sequence teaches an important lesson: do not move a ball just because it can move. Move it only when the next two or three steps still make sense. Color priority means choosing which color should be solved first. A good early target is a color that is already visible in several places and not buried too deeply. A weak target is a color that looks easy to move now but would trap another color underneath it. If two tubes both contain the same color near the top, try to merge them only if the move does not block something more important. A clean 3-ball group may look useful, but it can still be a mistake if it traps the final ball of another color in a tube with no clear exit. Tool Guide Rainbow Tube Sort includes three helpful tools: Undo, Hint, and Manage. These tools work best when they support your own planning. They should not replace the basic skills of reading the board, choosing color priority, and thinking a few moves ahead. Undo is best used right after a bad move. If you just blocked a possible full-color stack, covered a color you needed to uncover, or used your only useful sorting space too soon, Undo can stop that mistake from turning into a dead end. Hint is useful when you cannot see a clear next move. After using it, do not just continue tapping. Look at the suggested move and ask why it helped. Did it reveal a hidden color, connect a color group, or open a better route? Manage adds an extra tube for the current round, and it can only be used once per game. Save it for a board that is crowded but still possible to fix. Do not wait until every useful move is gone, because the extra tube works best when it can still turn a blocked plan into a playable sequence. Do's and Don'ts ✅ Do plan a few moves ahead. Before moving a ball, check what that move opens next. A good move should improve the next step, not just the current tube. ❌ Do not fill every empty tube immediately. Use open space only when the move helps complete a color group, uncover a blocked color, or create a clearer path. ✅ Do protect clean color groups. If several balls of the same color are already stacked together, avoid breaking them apart unless doing so unlocks something important. ❌ Do not group three balls if it traps the fourth ball of another color. A move can look good in one tube but still damage the whole board. Always check what becomes harder after the move. ✅ Do use partial fills carefully. A partly filled tube can help when it still leaves enough room for the next move. This is useful when you need to shift one blocking ball without losing control of the board. ❌ Do not rely on tools instead of planning. Undo, Hint, and Manage can help with mistakes or tight positions, but the main solution still comes from choosing the right move order. ✅ Do choose a color priority. Pick one color that is close to completion or needs to be uncovered soon. Sorting one color with a clear purpose is better than moving several colors randomly. ❌ Do not move only because a move is legal. For example, moving a green ball into an open tube may be legal, but it may still be weak if that tube was the only place available to free a buried red ball. Board Survival Tips On easier boards, look for colors that already appear close together. If the same color is visible in several tubes and not buried too deeply, it may be a good early target because it takes fewer moves to complete. On crowded boards, protect your last useful open tube unless the move clearly completes a color group or opens another tube. The goal is not to keep space forever, but to spend it only when it creates progress. On mixed-color boards, look for buried colors before making obvious top-level moves. Sometimes the top ball is only a distraction. The real problem may be a color hidden two or three layers down. A healthy board usually gives you choices: one color close to completion, one route to uncover a blocked color, or several top balls that can connect with matching colors. A dangerous board gives you only moves that shift clutter around without opening anything. Watch for warning signs before the board locks. If your last open tube is filled, several useful colors are buried near the bottom, and every legal move only makes another tube messier, the puzzle is becoming dangerous. This is the moment to slow down, use Undo if the last move caused the problem, or use Manage if one extra tube can still create a path forward. If the board feels stuck but still has legal moves, look for one of three recovery options: complete one color, empty one tube, or uncover one blocked color. Most good recoveries begin with one of those three choices. FAQ How do I recover from a no-move situation? If no ball can legally move, the challenge may already be failed. Before that point, use Undo to reverse the mistake or Manage if one extra tube can still reopen the puzzle. Is there a time limit in Rainbow Tube Sort? Based on the provided gameplay information, the main challenge is move planning rather than speed. Focus on accuracy and clean sorting instead of rushing. When should I use the extra tube? Use Manage when the board is crowded but still possible to fix. Avoid using it early on a board that still has several safe moves. What is the best beginner strategy? Start by reading the whole board. Finish easy color groups, uncover buried colors, and avoid moves that block the next step. Should I use Hint often? Hint is helpful when you are stuck, but it should be used as a learning tool. After using it, check why that move improved the board. What causes most failed rounds? Most failed rounds come from covering important colors, breaking clean groups, spending open space too early, or making legal moves that do not create progress. Is Rainbow Tube Sort a gambling game? No. Rainbow Tube Sort is a casual color sorting tube puzzle game. Balls, tubes, tools, rewards, and similar elements are virtual game mechanics only. Editorial Note This guide is based on the gameplay information provided for Rainbow Tube Sort. It is designed to help players understand the movement rules, color sorting logic, tool timing, and practical ways to avoid dead ends. Rainbow Tube Sort is treated here as a casual color sorting tube puzzle game. Any balls, tubes, tools, rewards, or similar elements mentioned in this guide refer only to virtual in-game mechanics.
 Build a Boat
Build a Boat About This Game Build a Boat is a relaxing boat assembly puzzle game built around visual matching, level progression, and a simple task-completion loop. In each stage, players assemble a boat by placing puzzle parts into the correct positions based on the shadow outline shown on screen. The game is not only about dragging parts into place. To move forward, you need to complete the full cycle for the current boat: assemble it, fuel it, send it out on a sea mission, wait for it to return, and finish the maintenance step. Once the required steps are complete, the next stage can open with a new boat to build. Build a Boat is designed for players who enjoy casual puzzle games, boat assembly games, and light task-based challenges. The controls are simple, usually based on guided clicks, taps, drags, or sliding actions. The challenge comes from reading the outline correctly, placing parts in a smart order, and paying attention to the prompts after assembly. As the level progression continues, the boats can become more complex. Early stages are usually easier to read, with larger parts and clearer shapes. Later stages may introduce smaller details, similar-looking pieces, and more crowded boat structures. This gives Build a Boat a steady difficulty curve while keeping the gameplay relaxed and easy to understand. How to Play Build a Boat follows a simple five-step gameplay loop: 1. Study the boat shadow. Look at the full outline before moving any part. Identify the base, front, back, and largest visible sections of the boat. 2. Assemble the boat parts. Place the largest or clearest parts first, then match smaller pieces by edge shape, curve, size, and direction. 3. Fuel the completed boat. After the assembly is finished, follow the game prompt to add fuel before the mission begins. 4. Complete the sea mission. Send the boat out and follow any on-screen instructions connected to the mission stage. 5. Finish return and maintenance. After the boat returns, complete the maintenance prompt to finish the stage flow and continue progression. This loop is important because assembly alone is not always enough to move forward. In Build a Boat, the post-assembly steps are part of the stage progression, so slow down and finish the full cycle before expecting the next boat to unlock. Key Progression Expectations Stage Type · Boat Assembly Feel · What Usually Gets Harder · Best Focus Early stages · Larger parts and clearer outlines · Learning the basic drag, snap, and prompt flow · Place the hull or base first Middle stages · More sections and similar-looking pieces · Comparing edges, curves, and part direction · Use anchor pieces and check two visual clues Later stages · More crowded boat structures · Small details, tighter gaps, and confusing part shapes · Leave tiny pieces for the end and use process of elimination This table is best used as a general progression guide, not a fixed level chart. The exact boat names, mission timing, and unlock details may vary by version. Beginner Strategy Guide Best Assembly Order for Beginners A safer beginner order is to build the boat from the largest shape to the smallest details. 1. Start with the longest hull or base piece because it defines the bottom shape of the boat. 2. Use the bow and stern pieces to confirm the front and back direction. 3. Add cabin-like or upper structure parts after the main body is stable. 4. Place small trim pieces and similar-looking parts near the end. 5. If a part only matches one edge of the shadow, skip it and check another gap first. This order works well because the largest parts create a visual frame. Once the main body is correct, the remaining spaces become easier to understand. Two-Point Match Rule Do not place a part only because one side looks correct. A reliable match should usually fit at least two visual clues, such as a long edge plus a corner, a curve plus a short side, or a clean nearby gap. This rule is especially useful when two parts look similar. If a piece matches one side but leaves an awkward gap, overlap, or wrong-facing corner, it may belong somewhere else. For example, a curved hull-style piece should not be placed only because its bottom edge looks close. Check whether the curve direction and nearby corner also match the shadow. If both points line up, the part is much more likely to belong there. The Edge-Snapping Mechanic Build a Boat appears to judge placement by how closely a part matches the shadow outline. When a part is close enough to the correct position, the game may snap or accept it into place. The safest approach is to align the edge, curve, and corner as accurately as possible instead of dropping the part near the general area. A good placement usually has three signs: 1. The part covers the matching shadow area cleanly. 2. The corners and curves point in the same direction as the outline. 3. The piece does not leave an obvious gap or overlap with nearby sections. If the part does not snap into place, do not keep forcing it. Pull it back, compare the edge again, and check whether another larger piece should be placed first. Early-Level Strategy In the early stages, focus on learning the basic rhythm of the game. These levels are usually easier because the boat shapes are clearer and the parts are more recognizable. Use these stages to practice reading the shadow before dragging, placing the base first, and checking whether a part aligns cleanly. Do not rush just because the first boats feel simple. The habits you build early will help later when the boats become more detailed. Later-Level Strategy As the stages become harder, expect more similar-looking parts and smaller spaces. Later boats may have crowded structures, tiny trim pieces, or parts that only fit one specific gap. In these levels, the best approach is to use process of elimination. Place the largest and most unique parts first. Leave tiny or unclear pieces until the end. Once most of the shadow is filled, the remaining gaps will make the smaller pieces easier to identify. Use the Anchor Method on Hard Stages The anchor method means choosing one reliable part to build around. This is usually the longest base piece, the main hull, or another large part with a unique shape. Once that anchor is placed correctly, every other piece becomes easier to compare. On a more complex boat, a large central body section or cabin-like piece can work as the anchor. After that piece is stable, smaller details around it become easier to place because the nearby gaps are clearer. On harder stages, do not start with small parts. They may look correct in multiple places, but they become much easier to place after the main boat structure is stable. Handle Stuck Parts Calmly If a part will not fit, check three things: 1. Is the part facing the correct direction? 2. Does the full edge match the shadow, not just one side? 3. Is another nearby piece supposed to be placed first? If the answer is unclear, stop working on that piece and move to a more obvious part. Returning later often solves the problem because the remaining empty space becomes clearer. Do Not Rush the Post-Assembly Prompts Don't rush the post-assembly prompts. Finish the cycle to unlock the next level. After the boat is built, continue following the game instructions until the current stage is clearly complete. This helps prevent confusion when the next boat does not appear immediately. Common Mistakes Mistake · Why It Causes Problems · Better Approach Starting without checking the full outline · You may place a correct part in the wrong section · Look at the full shadow before dragging Placing small parts too early · Tiny parts can look correct in several gaps · Save them until the larger structure is complete Ignoring the front and back direction · Some pieces may look similar when placed near the wrong end · Confirm the bow and stern before adding details Forcing a piece that does not snap · The part may be misaligned or in the wrong area · Pull it back and compare the full edge again Matching only one edge · One side may fit while the rest of the part is wrong · Use the Two-Point Match Rule Rushing after assembly · You may miss the prompt needed to finish the stage · Follow the post-assembly cycle carefully Expecting every level to feel the same · Later boats may need slower, more careful placement · Adjust your pace as the boat structure gets more complex Forgetting process of elimination · Hard parts become confusing when solved too early · Place obvious pieces first, then solve the remaining gaps FAQ What is Build a Boat? Build a Boat is a casual boat assembly puzzle game where players match boat parts to a shadow outline, then complete fueling, mission, return, and maintenance steps to progress. How does the level system work in Build a Boat? Build a Boat uses a stage-based progression loop. You complete the current boat’s assembly, fueling, mission, return, and maintenance flow before moving on to the next stage. What is the best assembly order for beginners? Start with the longest hull or base piece, confirm the front and back of the boat, add the upper structure, and finish with smaller details. What should I do if a piece will not fit? Pull the piece back and compare its full edge with the shadow. If it still does not fit, place a larger surrounding part first and return to the difficult piece later. How do I progress faster in Build a Boat? Reduce placement mistakes. Study the full shadow, place anchor pieces first, use the Two-Point Match Rule, leave tiny parts for the end, and avoid rushing through post-assembly prompts. Can I skip a difficult level in Build a Boat? No. Progression is strictly linear. You must complete the current boat’s full task loop (assembly, fueling, mission, maintenance) before the next stage unlocks. Will I lose points if I assemble the boat incorrectly? No. There is no penalty for incorrect placement. Treat it as a trial-and-error puzzle—simply pull the part back, recheck the outline, and continue. Do missions continue while I am offline? No. Missions pause when you close the game. You need to actively keep the game open to complete the task flow and follow the game prompts. Editorial Note Note: Build a Boat is a casual virtual puzzle game. All missions, fuel mechanics, and maintenance steps are in-game features, not real-world boating instructions.
- Tank Arena Survivor
Tank Arena Survivor About This Game Tank Arena Survivor is a casual tank arena survival game built around swipe movement, bullet power-ups, and upgrade planning. Your goal is to guide your tank through the arena, avoid being trapped, collect useful boosts, defeat every enemy tank, and keep your own tank active until the round is cleared. The main challenge comes from reading enemy pressure, choosing when to grab a boost, and upgrading health, movement speed, or firepower after each round. How to Play At the start of a round, do not rush straight into the middle cluster. Use the opening moments to move around the outer area, read where enemy pressure is forming, and decide which side gives you the cleanest route. Swipe on the screen to guide your tank’s movement direction. Smooth movement matters more than rushing. A good beginner route is to move in wide curves, avoid sharp panic turns, and keep enough space to escape if enemies start closing in. A practical round flow looks like this: Round Phase · Main Goal · What to Do Early round · Stay active and read the arena · Stay on the perimeter, avoid early crowding, and watch where enemies group First power-up chance · Improve your attack without taking unnecessary risk · Collect bullet multiplier, faster firing, or firepower only if the route is open Mid-round pressure · Clear enemies without getting surrounded · Flank the enemies, keep turning space, and avoid chasing one target too long Low-health situation · Stop forcing direct trades · Create distance, move toward open space, and wait for a better angle Final cleanup · Finish carefully · Do not rush just because only a few enemies remain; keep moving and clear them from controlled angles A simple beginner movement pattern is: 1. Move along the edge of the arena first. 2. Watch which side becomes crowded. 3. Turn away from that side instead of cutting through it. 4. Engage from the outer edges while leaving an exit route. 5. Collect a boost only when you can enter and leave without being boxed in. 6. After the round, upgrade based on what actually caused the loss. Bullet power-ups change the pace of the match. A bullet multiplier is useful when several enemies are still active because it can increase your coverage. Faster firing helps when you need steady pressure while moving. Firepower boosts are better when you already have enough room to aim and reposition. To win, defeat all enemies in the arena. If your tank is defeated by enemy pressure, the challenge fails and you need to try again. After a round ends, choose between health, movement speed, and firepower upgrades depending on your biggest problem. Specific enemy behavior, upgrade limits, reward values, and power-up effects may vary by version, so use the in-game prompts as the final reference. Beginner Strategy Guide The strongest beginner habit is to treat movement as your first defense. Do not start a round by chasing the nearest enemy. First, make room, read the arena, and look for a route that lets you engage without trapping yourself. Opening Movement Strategy At the start of a round, avoid driving straight into the middle. Circle the outside first and watch where enemies begin to gather. This gives you more turning space and helps you choose your first attack angle. A safer beginner pattern is: 1. Circle the outer area during the opening. 2. Identify the most crowded side. 3. Move away from that pressure instead of cutting through it. 4. Flank the enemies instead of charging through the center. 5. Grab a power-up only when the path in and out is clear. This opening reduces early damage and gives you time to understand the round before committing to a fight. Enemy Pressure Patterns Think of enemies by pressure pattern rather than fixed names: Enemy Pressure Pattern · What It Feels Like · Better Response Grouped enemies · Several enemies gather in one area · Stay outside the cluster, flank the enemies, and use bullet multiplier when you have room Slow heavy pressure · A slower enemy still creates danger if you trade directly · Keep distance, turn early, and avoid straight-line fighting Chasing pressure · Enemies follow your movement path · Use wider turns, lead them away from boosts, then circle back Split pressure · Threats approach from more than one direction · Stop chasing and move toward the most open space first End-round pressure · Only a few enemies remain, but one mistake can still end the run · Slow down, avoid greedy boosts, and finish from a controlled angle Power-Up Choices Do not collect every boost just because it appears. A power-up is only valuable if you can use it without giving up your position. Power-Up or Upgrade · Best Use Case · Beginner Tip Bullet multiplier · Several enemies are active or grouped · Strong when you have space to move; risky if you are already trapped Faster firing · You need steady pressure while repositioning · Keep moving; faster firing does not make standing still safe Firepower boost · You survive well but clear enemies slowly · Use it from the outer edges instead of rushing into the center Health upgrade · You lose early or take too much damage · Consider this for your first few upgrade choices if you are still learning Movement speed upgrade · You struggle to dodge, escape, or reach boosts · Useful after you understand basic movement routes Firepower upgrade · You survive most rounds but need faster clears · Better once your movement is already consistent Upgrade Styles Choose upgrades based on your failure pattern, not just what looks strongest. Upgrade Style · Upgrade Focus · Works Well For Survival Build · Health first, then movement speed · Beginners who lose early or take too many hits Kiting Build · Movement speed + faster firing support · Players who prefer circling, dodging, and attacking while moving Clear-Speed Build · Firepower + bullet multiplier value · Players who survive well but take too long to finish rounds Balanced Build · Health, speed, and firepower upgraded evenly · Players who want steady progress without relying on one stat A simple upgrade decision rule: What Went Wrong · Upgrade Direction You were defeated early · Add health You could not escape crowded areas · Add movement speed You survived but enemies took too long to clear · Add firepower You lost after chasing boosts · Improve movement choices before blaming upgrades You lost near the end · Slow down during final cleanup and avoid risky direct trades The best beginner mindset is: survive the opening, collect only useful boosts, clear from the edges, and upgrade for the problem you actually faced. Common Mistakes Wrong Move · Better Move Driving into the center too early · Stay on the perimeter first, read enemy movement, then engage from a side route Standing still while attacking · Keep moving in curves so enemies have less time to surround you Chasing one enemy across the arena · Break off if the chase pulls you into crowded space Grabbing every power-up immediately · Check whether the route is open before committing Taking a bullet multiplier while trapped · Create room first so the extra bullets can actually help Ignoring low health · Stop forcing trades, create distance, and look for a cleaner angle Only upgrading firepower · Add health or speed if your main issue is survival or escape Repeating the same upgrade after every failure · Match the upgrade to the loss: health for early defeat, speed for escape problems, firepower for slow clears Playing too aggressively near the end · Treat the final enemies carefully and avoid unnecessary risks Expecting one power-up to win the round · Combine boosts with movement control, timing, and upgrade planning FAQ Do power-ups stack in Tank Arena Survivor? Current gameplay confirms bullet-related boosts such as bullet multiplier, faster firing, and firepower boosts, but stacking behavior may depend on the version. Watch the in-game effect after collecting a boost, and do not rely on stacking unless your version clearly shows it. Is there a max level for upgrades? A maximum upgrade level may depend on the version. If your version has a cap, it should appear in the upgrade screen. Until then, choose health, movement speed, or firepower based on your latest round result. What is the hardest enemy pattern to deal with? The hardest situation for beginners is usually split pressure, where enemies threaten from more than one direction. When that happens, stop chasing one target and move toward open space before attacking again. Should I always collect a bullet multiplier? No. Bullet multiplier is useful when several enemies are active, but it is not worth taking if the route is too risky. A missed power-up is better than driving into a trap. What should I do when my tank has low health? Stop forcing direct fights. Move away from crowded areas, use wider turns, and attack only when you have a clear escape route. Why do I keep losing near the end of a round? Many players become too aggressive when only a few enemies remain. Final cleanup still requires patience. Keep moving, avoid greedy power-up grabs, and finish enemies from controlled angles. Is faster firing better than stronger firepower? It depends on the situation. Faster firing helps with steady pressure while moving, while stronger firepower helps if enemies take too long to clear. If you are still getting surrounded, movement and positioning matter more than either one. Editorial Note This guide is based on the current version of Tank Arena Survivor. Gameplay mechanics, enemy patterns, and upgrade values may change in future updates.
- I'm Really Good With Tanks
I'm Really Good With Tanks In I'm Really Good With Tanks, survive first, collect second, and upgrade with a purpose. Use the middle lanes to keep escape options open, avoid getting trapped on the edge, skip risky Money Trucks or Fuel Trucks, and prioritize control-focused upgrades before speed-focused upgrades. About This Game I'm Really Good With Tanks is a casual tank driving arcade game built around lane switching, road survival, and quick reactions. You guide a tank along a five-lane road, moving between lanes to avoid traffic and clear selected road targets. The core loop is easy to understand: drive forward, read the traffic grid, avoid collisions, collect in-game cash from safe target clears, then return to the Home page to unlock tanks or improve performance. Money Trucks, Fuel Trucks, other tanks, and road vehicles all work as arcade gameplay elements inside the run. What makes I'm Really Good With Tanks interesting is the lane pressure. A clear lane can become dangerous quickly, especially if you move too late or chase a target into a blocked route. Strong runs come from planning your next lane before the current one becomes unsafe. The Basics • Watch the road across all lanes, not just the lane your tank is using. • Move left or right to avoid vehicles and keep the run alive. • Clear Money Trucks, Fuel Trucks, or other tank targets only when the route stays open. • Do not chase every target; a missed truck is better than an early crash. • Collect in-game cash during the run. • If your tank hits another vehicle, the run ends. • Use the Home page after a run to unlock new tanks or improve performance. The simplest rule is this: the best lane is not always the empty lane now. It is the lane that still gives you a way out two seconds later. Beginner Strategy Guide Read the Traffic Grid, Not Just Your Lane Many new players crash because they react only to the vehicle directly ahead. In I'm Really Good With Tanks, you need to scan the whole road pattern. Check your current lane, the lane you want to enter, and the lane beside that one. If two or three lanes are filling up at the same time, move before the gap disappears. Late lane changes force panic decisions, and panic decisions usually lead to collisions. A good habit is to keep your eyes slightly ahead of the tank instead of staring at the tank itself. This gives you more time to see where the next safe opening will form. Use the Center Lane Strategy The middle area of the road is usually safer for beginners because it gives you more escape options. From the center lanes, you can move left or right depending on where traffic opens. This does not mean you should sit in the center forever. It means you should use the center as a reset point after collecting a target or dodging a tight traffic pattern. Good center-lane moments: • You are unsure where the next target will appear. • Both sides of the road are changing quickly. • You just cleared a truck and need to recover position. • You want to avoid being forced into a single escape direction. The center lanes give you choices. In a lane switching game, choices are often more valuable than speed. Avoid the Edge Lane Trap The outer lanes can look safe, but they are dangerous when traffic closes in. If you move into the far-left or far-right lane, you only have one direction to escape. If that return path is blocked, you are trapped. Use edge lanes for quick moves, not long stays. Enter the edge only when the lane ahead is open and you can return toward the middle before the next traffic cluster arrives. Pro-Tip: Don't skim past targets. Give Money Trucks and Fuel Trucks a full lane's width of clearance, especially when they appear near the edge of the road. That extra space helps you avoid getting pinned with no recovery lane. Know When to Skip Money Trucks and Fuel Trucks Money Trucks and Fuel Trucks are tempting because they can help your in-game cash flow, but they are not worth chasing into a blocked lane. Before moving toward a truck, check three things: 1. Is the lane ahead open? 2. Can you leave that lane after clearing the target? 3. Will the move force you into the edge with no return route? If the answer looks risky, skip the target. The best way to collect more over time is usually to survive longer, not to grab every truck on screen. A strong player does not collect every target. A strong player collects the targets that do not break the route. Control Your Lane Switching Rhythm Fast movement is useful only when it is controlled. Random lane switching makes the tank harder to position and can place you directly in front of traffic you had already avoided. Use this rhythm: • Read the road. • Choose one safe lane. • Move once. • Recheck the pattern. • Move again only if needed. This rhythm keeps your tank stable and gives you time to plan. If you keep crashing early, slow down your decisions and move earlier instead of moving more often. First 3 Runs Practice Focus If you are new to I'm Really Good With Tanks, use your first few runs as practice instead of trying to collect everything immediately. • Run 1: Ignore most targets and focus only on avoiding collisions. • Run 2: Practice early lane changes before a lane becomes blocked. • Run 3: Start collecting safe trucks only when at least one escape lane remains open. After that, you can begin mixing survival, target collection, and upgrades more confidently. Upgrade Priority for Beginners The Home page upgrade system can help future runs, but beginners should avoid spending in-game cash randomly. The best early upgrade plan is to make the tank easier to control before making it faster. A useful beginner priority is: 1. Control-Related Upgrades First Prioritize handling, steering, movement stability, or any upgrade that makes lane changes easier to manage. A tank that responds cleanly is far more useful than a tank that moves fast but feels difficult to place. 2. Survival and Consistency Next Put your next upgrades into anything that helps you last longer or recover from lane pressure more easily. Longer runs create more chances to collect safely. 3. Collection Efficiency After Stability Once your tank feels stable, spend upgrades on anything that improves your ability to collect more from safe runs. Do this only after you can survive long enough to benefit from those upgrades. 4. Speed-Focused Upgrades Later Speed can make the road harder to read if your control is still weak. Choose speed-focused upgrades after you are comfortable handling crowded traffic patterns. 5. New Tanks When They Support Your Playstyle Unlock new tanks when they clearly help your control, comfort, or run consistency. If a new tank mainly changes appearance, it is usually better to improve basic performance first. Beginner rule: control before speed, survival before collection, and safe targets before risky trucks. Common Mistakes Looking only at the current lane The lane ahead may be open now but blocked a moment later. Watch the nearby lanes so you know where to move next. Switching too late Waiting until a vehicle is close gives you fewer options. Move early when the traffic pattern starts closing. Chasing trucks without an escape route Before going for Money Trucks or Fuel Trucks, check whether you can leave the lane afterward. If the target sends you into a dead end, skip it. Staying on the edge too long The far-left and far-right lanes limit your escape direction. Use them briefly, then return toward the center when possible. Choosing speed before control A tank that moves faster than you can steer is a problem, not an upgrade. Driving with high speed but poor control makes every lane change feel rushed, and it is an easy way to crash into the next truck or vehicle. Fix your handling first. Repeating the same crash pattern If you keep failing in the same situation, stop chasing targets for a few runs and focus on lane timing. Fix the route decision before trying to collect more cash. FAQ How can beginners collect more cash safely? Focus on survival time. The game naturally creates more safe target chances the longer you stay alive. Chasing every single truck is a trap that ends runs early. Should I upgrade control or speed first? Upgrade control-related performance first. Better steering, handling, or movement stability makes it easier to dodge traffic, recover from lane pressure, and collect safely. Are Money Trucks and Fuel Trucks always worth chasing? No. They are worth chasing only when the lane ahead is open and you can leave the lane afterward. If a truck pulls you into an edge trap or crowded traffic grid, skip it. Why do I keep crashing early? You are probably moving too late, watching only one lane, or chasing targets before checking escape routes. For a few runs, ignore trucks and practice early lane changes across the traffic grid.
- Little Fox Adventure
Little Fox Adventure About This Game Little Fox Adventure is a casual fox platform puzzle game built around block switching, falling routes, and careful timing. Your fox moves through layered stages where some blocks can stay solid while others become transparent. The challenge is not to rush downward, but to decide when a block should support the fox and when it should open the next path. Solid blocks help create safe pauses, landing points, and jump setups. Transparent blocks open the way to lower layers, but poor timing can drop the fox into the wrong area. This puzzle rewards observation. A clean route, a controlled fall, and a well-timed switch usually matter more than quick reactions. How to Play Before making the first move, scan the full layout. • Find the fox’s starting position. • Check the key location. • Notice where the collectible diamonds are placed. • Identify which blocks can change state. • Look one layer below before opening a drop. The core rule is simple: the key is the level-clear objective, while diamonds are optional in-game collectibles used for star rating improvement. Clear the key route first, then replay the level to improve diamond collection and star rating. A basic move sequence looks like this: 1. Keep a solid block active if the fox needs a safe platform. 2. Wait until the fox is lined up above the next landing. 3. Switch the correct block to transparent. 4. Let the fox drop only when the lower route is useful. 5. Use jumps after checking the current block state. 6. Adjust the next switch based on where the fox lands. Not every open path is a good path. A transparent block may look helpful, but if the fox lands too far from the route, the level becomes harder to control. Beginner Strategy Guide Start With the Route, Not the Reward Before switching the first block, decide where the fox should go. A common beginner mistake is reacting to the nearest object instead of reading the whole screen. Ask three quick questions: • Where should the fox end up? • Which block controls the first safe drop? • What happens one layer below? If the first drop is poorly timed, the rest of the level often becomes unstable. Safe Drop Setup Use this method when the fox is standing above two possible landing areas. 1. Do not switch the transparent block immediately. 2. Watch which lower platform gives the fox more control. 3. Keep a nearby solid block active as a stopping point. 4. Wait until the fox is directly above the intended landing. 5. Open the block only when the drop is lined up. This setup works because the first fall often decides the rest of the route. A slower switch can be safer than an early switch. Side Route Decision A side path is only worth taking when the route stays stable. Take the side route when: • The platform is wide enough to recover. • The jump does not require perfect timing. • The fox can return to the main path after landing. • The block switch does not remove an important support. Skip the side route when: • The landing is too narrow. • The fox must cross several transparent blocks in a row. • One missed jump sends the fox away from the main route. • The route forces you to remove a useful solid block too early. A strong first run is not about perfection. It is about learning which parts of the level are safe and which parts should wait for another attempt. Quick Decision Guide: Should You Go For It? Situation · Safer Choice · Why It Helps The main route is below but a side path is nearby · Follow the main route first · The side path may pull the fox away from the stable route A transparent block opens a long drop · Check the next landing before switching · A long drop can send the fox into a poor position A side platform needs a narrow jump · Skip it on the first clear · A failed jump can ruin the route The fox keeps missing the lower platform · Switch the block later · The fox may not be lined up yet A solid block blocks the path · Do not remove it immediately · It may be needed as a timing stop or jump platform What to Change After a Failed Route Do not repeat the exact same move and hope for a better result. Change one decision per attempt. • If the fox falls too early, delay the transparent block switch. • If the fox misses the platform, wait for better alignment. • If a side route keeps failing, return to the safer main route. • If the level feels unstable, keep more solid blocks active. • If the fox drops into the same wrong path, change the first switch timing. Small timing changes are easier to learn than completely changing the whole route at once. Best First-Clear Plan For the first clear, focus on finishing the route before chasing every side path. 1. Find the safest main route first. 2. Keep support blocks solid until the fox is aligned. 3. Open one transparent block at a time. 4. Skip narrow side jumps on the first attempt. 5. Replay the level after you understand the safe path. This approach helps beginners complete the stage first, then improve collection and star rating later. Advanced Techniques Edge Jumping Timing If the current level gives the fox enough platform control, edge timing can help reach a nearby landing. Let the fox approach the edge, keep the landing block solid, then jump before losing platform control. Avoid switching the next block too early unless the lower landing is already lined up. Solid-Block Guardrail A solid block can work like a guardrail. It can stop the fox from dropping too far, create a short planning window, or prevent a bad fall into a lower route. Use this when the next layer has multiple paths or when a transparent block would create a long uncontrolled drop. Multi-Layer Transparent Rhythm Some layouts require several transparent blocks to be switched in sequence. Do not open every layer at once. Open the first block, wait for the fox to land or align, keep the next support solid, then open the next block only when the fox is ready. Jump and Switch Pairing A jump should solve a position problem. A block switch should solve a route problem. If the fox needs distance, jump first and switch after the landing direction is clear. If the fox needs a lower route, switch first and jump only after the fox stabilizes. Common Layout Patterns The examples below describe common layout patterns that may appear in Little Fox Adventure. Use them as route-planning examples rather than fixed stage names. Two-Landing Split Pattern Problem: The fox stands above a transparent block, and there are two lower platforms. One platform is wide but slightly farther away. The other is narrow and closer. Better route: 1. Keep the upper block solid until the fox reaches the center. 2. Check which lower platform leads to the next stable position. 3. Choose the wider platform if both routes are possible. 4. Switch the block only when the fox is above the safer landing. 5. Use the solid lower platform as a pause point before the next move. Why this works: The wider landing gives more time to recover. The narrow platform may look faster, but it can force a risky jump immediately after the drop. Side Platform Gap Pattern Problem: A side platform looks useful, but reaching it requires a jump away from the main downward path. Better route: 1. Test the main route first. 2. Notice where the fox lands after the side jump. 3. Keep the return platform solid. 4. Do not open the next transparent block until the fox has returned. 5. If the return jump fails repeatedly, leave the side route for another attempt. Why this works: A side platform is only useful if the fox can return safely. A detour that breaks the route is not a good first-run target. Three-Block Drop Stack Pattern Problem: The fox is above several transparent blocks arranged vertically. Switching them too quickly causes a long, uncontrolled fall. Better route: 1. Open only the top block first. 2. Let the fox reach the next layer. 3. Keep the next block solid as a control point. 4. Wait for alignment before opening the second block. 5. Repeat the process instead of clearing all layers at once. Why this works: A stacked drop needs rhythm. Each layer should become a new decision point, not just part of one uncontrolled fall. Common Mistakes Chasing a Side Route Before Reading the Main Route A side route can look tempting, but it may lead away from the stable path. Read the lower layout first, then decide whether the detour is worth it. Switching Before Checking the Landing A transparent block is only useful if the fox lands somewhere helpful. Always look one layer below before opening a path. Removing a Useful Solid Block Too Early Some solid blocks are control tools. They can stop movement, support a jump, or prevent a bad drop. Remove them only when they are no longer needed. Jumping Without Preparing the Block State A jump can fail if the landing block is already transparent or if the next platform is not ready. Set the route first, then jump. Repeating the Same Failed Timing If the same drop fails three times, the timing is probably wrong. Delay the switch, keep support blocks active longer, or choose a safer landing. Treating Every Side Path as Required Not every side route needs to be taken on the first attempt. A cleaner route often teaches more than a forced risky detour. FAQ What should I do if the fox gets stuck in a falling loop? Stop changing blocks as soon as the route feels unstable. On the next attempt, keep more solid blocks active and delay the first transparent switch until the fox is better aligned. How do I improve my star rating more consistently? Learn the safe route first, then improve it. Once you know the stable path, add nearby collectibles one by one instead of forcing the hardest detour immediately. Why does my fox keep missing the lower platform? The block is probably being switched too early or too late. Watch the fox’s position, wait for better alignment, and open the transparent block only when the landing is directly useful. Are solid blocks always obstacles? No. Solid blocks can be safety tools. They help the fox stop, prepare a jump, avoid an uncontrolled drop, or line up the next movement. How should I handle multiple transparent blocks in a row? Do not open all of them at once. Switch one layer, let the fox stabilize, then open the next layer when the landing is ready. When should I restart after a failed route? Restart when the fox is far from the intended route, when an important support block was removed too early, or when repeated movement no longer leads to a useful landing. On the next attempt, change the first mistake instead of repeating the same timing.
- Teddy Glove Arena
Teddy Glove Arena About This Game Teddy Glove Arena is easiest to understand as two connected loops: survive the arena first, then improve your glove setup on the Home page. This is a casual cartoon boxing arena game with simple arena attacks and a glove merge upgrade system. You control a cartoon-style boxer in a match against nine rival boxers, moving around the arena, choosing when to attack, and trying to stay in the round until you are the last boxer standing. The action is built around two virtual attack moves: a quick punch and a heavier hammer swing. The attacks are virtual game mechanics, not real-world fighting instruction. Your success depends less on button mashing and more on reading the arena, choosing safer targets, and repositioning after each attack. The Home page adds the main growth system. You can buy basic gloves and merge matching glove levels to build higher-level gloves step by step. This gives Teddy Glove Arena a light glove merge game feel while keeping the core match focused on movement, attack choice, and arena survival. A good beginner approach is simple: do not treat every opponent as a target. Watch the field, pick one rival boxer you can approach safely, attack once, and move again before the arena closes around you. How to Play When a match begins, take a moment to read the arena. Look for open space, check where rival boxers are gathering, and avoid walking directly into the busiest area. Use the left side of the screen to control your boxer’s movement direction. Smooth swipes are better than sudden random movement because your position decides whether you can attack safely or escape pressure. Use the right side of the screen to choose your attack. The punch is the safer close-range option when a rival boxer is already near you. The hammer swing is a higher-commitment attack option when you have enough space, a clear angle, and a target path that makes sense. To win a match, defeat the other nine opponents and remain as the final boxer in the arena. If your boxer is defeated first, the challenge fails and you need to start another attempt. After the match, return to the Home page to manage glove upgrades. The upgrade system is based on merging gloves of the same level into the next level, so planning your pairs matters more than buying randomly. Quick Beginner Plan 1. Start by moving around the outer area. 2. Watch where opponents gather. 3. Choose one safer, isolated target. 4. Move in only when the angle is clear. 5. Attack once, then reposition. 6. Return to the Home page after the match to merge gloves. Specific button labels, glove stats, attack range, damage values, and reward rules may vary by version, so this guide focuses on the confirmed core loop: move, choose an attack, survive the arena, and upgrade gloves through merging. Beginner Strategy Guide Pro Tip: A good target is not always the closest target. A good target is one you can approach, hit, and leave without getting trapped. At the start of a match, use what can be called The Orbiting Strategy: move around the outer side of the arena instead of cutting straight through the middle. This gives you more time to see where rival boxers are grouping and helps you avoid being squeezed from several directions at once. When you chase a target, do not follow blindly. Choose a rival boxer near open space, move in from an angle, use one attack, and then step away. If the target is standing inside a group, leave it for later and circle toward a safer opponent. If two or more opponents close in on you, move first. New players often attack immediately when they feel pressured, but that usually keeps them in the danger zone. Create distance, reset your angle, and only attack after you have room to leave. When the center becomes crowded, stay near the outside and look for a lone boxer drifting away from the group. This is the safest time to apply the Safe Target Rule: approach only when you have a clear entry path and a clear exit path. Attack Choice Guide Situation · Better Choice · Why It Works Opponent is already close and not protected by nearby rivals · Punch · Fast, simple, and lower commitment There is open space and a clear attack angle · Hammer swing · Better when the angle gives the swing room to work Two or more opponents are nearby · Move first · Escaping pressure is safer than forcing an attack Your attack would place you in the center of a crowd · Do not attack yet · Bad position can cost the round Target is close but surrounded · Wait or change target · The safest target is not always the nearest one The punch is best when the target is already in range and the risk is low. Think of it as your close-range tool for quick moments. The hammer swing should be used more selectively. It works better when you have space, angle, and a clear target route. Do not treat it as a mindless power move. The Home page glove system should be handled with a simple Merge Pair Rule: merge existing pairs first, avoid random purchases, and build toward the next glove level step by step. If you already have one glove close to forming a pair, prioritize completing that pair before starting a new upgrade path. Each higher glove level requires more basic gloves behind the scenes. For example, a Level 2 glove needs two basic gloves, a Level 3 glove effectively needs four basic gloves, and a Level 4 glove effectively needs eight basic gloves if the same two-for-one merge pattern continues. Glove upgrades support your run, but they are not a replacement for arena control. A better glove setup can improve progression, while winning still depends on when you move in, when you back away, and which target you choose. Common Mistakes Pro Tip: Most early losses come from bad positioning before the attack, not from choosing the wrong attack button. Mistake · Fix Rushing into the center at the start · Circle around the outside first and wait for a safer target. Attacking while surrounded · Move away first, then attack after creating space. Spamming hammer swing · Use it only when the distance and angle are favorable. Chasing the closest opponent every time · Choose the safest target, not always the nearest one. Using punch from too far away · Step closer only when you can still retreat after attacking. Swinging into a crowded group · Wait for one opponent to separate from the cluster. Standing still after an attack · Reposition immediately so you are not caught by nearby rivals. Buying gloves randomly · Merge matching levels with a clear upgrade route. Relying only on glove level · Use upgrades as support, not as a substitute for arena decisions. A clean beginner rhythm is: move, check the angle, attack once, and reposition. If you skip the final step, even a good attack can leave your boxer in a bad spot. FAQ What should I do if I get pushed toward a corner? Move along the edge instead of attacking immediately. Look for the nearest opening, escape the pressure, and attack only after you have space again. Avoid forcing a hammer swing here, because it is a higher-commitment move and may leave your boxer exposed. How does glove merging work? The Home page lets you merge two gloves of the same level into one higher-level glove. Plan your upgrade route around matching existing pairs instead of buying random gloves and filling up your available glove space. Why am I losing even with a higher-level glove? A glove upgrade may improve your attack performance or margin of error, but poor movement and bad target choices can still cost you the round. Focus on safe approach paths, single strategic attacks, and quick repositioning. Is Teddy Glove Arena a real boxing or gambling game? No. Teddy Glove Arena is a casual cartoon arena game. Its boxers, gloves, attacks, upgrades, and rewards are virtual gameplay mechanics, not real boxing training, gambling, betting, or real-money rewards. Editorial Note This guide is based on the gameplay information provided for Teddy Glove Arena. It focuses on controls, attack choice, arena survival, target selection, and the glove merge system. All boxing, glove, attack, upgrade, and reward references describe virtual game mechanics only.
 Sheep Ranch Builder
Sheep Ranch Builder About This Game Sheep Ranch Builder is a casual sheep ranch management and idle farm upgrade game about building a virtual ranch, improving production, raising Ranch Level, and unlocking new ranch areas over time. This guide is based on the visible game interface and focuses on practical beginner decisions rather than hidden formulas, fixed reward values, or guaranteed outcomes. The game uses a staged idle-growth economy. Early progress feels simple because small upgrades can quickly move the ranch forward. Later, the game becomes more about choosing the right upgrade path: Ranch Level gates, resource flow, support features, and diamond spending decisions begin to matter more than fast tapping. The main long-term goal is to expand the ranch. New areas or features may require specific Ranch Level requirements, such as a visible Ranch Lv. 10 to Unlock prompt. These level gates are important because they turn the game from a simple collection loop into a progression puzzle: you are not only collecting coins, but deciding which upgrade helps the next unlock arrive sooner. Sheep Ranch Builder also includes side systems such as Explore, Sheepdog, Lucky Spin, Shop, Rich List, Check-in, and Diamond Pack. These features can add variety, but the main value of the game comes from understanding the ranch economy: what improves output, what supports unlock progress, and what only distracts from the next visible requirement. For new players, the most important idea is this: do not treat every button as equal. A ranch-growth upgrade, a collection upgrade, and a side-menu feature can all look important, but they do not carry the same value at the same stage of the game. How to Play The ranch screen gives you several types of information: Ranch Level, resource counters, sheep areas, locked requirements, Upgrade buttons, Claim, Go, and side features. Instead of reading the interface as a list of buttons, read it as a set of economic signals. Key Attributes That Affect Progress Attribute · What It Means · Why It Matters Ranch Level · Your main progression marker. · Unlocks or gates new ranch areas and features. Sheep Quantity · The number or scale of sheep-related production. · Helps expand the visible ranch base and may support broader output. Sheep Value / Efficiency · The value, strength, or efficiency of sheep-related upgrades. · Often matters more when raw quantity stops giving fast progress. Collection Efficiency · How smoothly resources move into your usable balance. · Reduces downtime and keeps upgrades affordable. Unlock Progress · How close you are to the next ranch, area, or feature. · Helps decide which upgrade deserves priority. Support Systems · Features such as Explore or Sheepdog. · Useful only when they clearly help your current bottleneck. Sheep Quantity vs. Sheep Value / Efficiency When choosing upgrades, think in terms of quantity and value. In this guide, “value” or “efficiency” means any clearly shown upgrade that improves sheep value, production strength, collection efficiency, or Ranch Level progress. Sheep quantity helps when the ranch needs broader production or when a new area depends on expanding the visible ranch base. It is useful in the early game because quantity upgrades can make the ranch feel more active and productive. Sheep value or efficiency becomes more important when progress slows. If adding more sheep does not noticeably improve your upgrade pace, look for upgrades that improve value, efficiency, collection, or Ranch Level progress. These upgrades often do more for long-term growth than simply adding more of the same output. A good rule is: use quantity to build the ranch foundation, then use value and efficiency upgrades to push through slower progression points. How to Handle a Ranch Lv. 10 Unlock Requirement When the interface shows a requirement such as Ranch Lv. 10 to Unlock, treat it as a visible progress target. Your next upgrade choices should support that requirement instead of drifting into unrelated side systems. This does not mean there is always a special Lv. 10 bonus or hidden milestone reward. It simply means the game is telling you that Ranch Level progress matters for the next unlock. A good upgrade at this point is one that helps you move closer to the required Ranch Level, improves the ranch economy, or makes future upgrades easier to afford. If an upgrade does not help the current unlock requirement, it can usually wait. Using Go Use Go after a quick upgrade check. If a clearly useful upgrade is available, upgrade first; if not, use Go to continue the next action. Reading Explore and Sheepdog Explore and Sheepdog should be judged by their visible value in your current run. If one of them clearly improves resource flow, support efficiency, or progress toward a locked requirement, it can be worth attention. If the benefit is unclear, focus on Ranch Level and production upgrades first. Beginner Strategy Guide Use the priority rules below only when the related upgrade or benefit is clearly shown in the game interface. Upgrade Priority Tier List Tier · Upgrade Focus · When to Choose It · Why It Matters S · Ranch Level progress or main ranch growth · Choose this when the next ranch or feature is locked by level. · It moves the main progression path forward. A · Sheep value, production, or collection efficiency · Choose this when coins feel slow or upgrades become harder to afford. · It improves the ranch economy instead of only expanding the screen. B · Sheep quantity or visible ranch expansion · Choose this when the ranch still needs a stronger basic foundation. · It helps early growth and makes the ranch more productive. C · Explore or Sheepdog · Choose this when the game clearly shows how it helps your current bottleneck. · It can support progress, but only when the benefit is clear. D · Lucky Spin, Rich List, and unclear shop-side systems · Choose this after the main ranch path is stable. · These systems add variety but should not lead early spending. The best early upgrade is not always the most exciting button. It is the upgrade that moves the ranch closer to the next visible requirement. Lucky Spin Value Check Lucky Spin is best treated as a bonus system. It can be worth using when the game clearly gives a free or low-risk attempt, but it should not become the center of your upgrade plan. The problem with relying on Lucky Spin early is uncertainty. A spin result may not match your current bottleneck. If your ranch needs Ranch Level progress or better production, a random reward may not solve the problem. Use Lucky Spin when it is clearly low-risk. Do not spend important resources on it while a visible Ranch Level requirement is still blocking progress. Diamond Value Check Diamonds should be reserved for clearly shown long-term progression value. The safest diamond use is a clearly shown long-term benefit, such as an upgrade that visibly improves production, collection, or unlock progress. Before using diamonds, ask: Question · Better Decision Does the game clearly show the result? · Spend only when the outcome is clear. Is the benefit long-lasting? · Prefer upgrades with clearly shown ongoing value. Does it help the current Ranch Level or unlock bottleneck? · Use diamonds only when they support real progress. Is it tied to a temporary, unclear, or random system? · Save diamonds. Do not use diamonds for unclear shop actions, random draws, ranking pressure, or short-term curiosity. If the game does not clearly explain the benefit, keeping diamonds is the stronger beginner decision. Mid-Game Slowdown Fix When progress starts slowing down, avoid the common mistake of jumping into every side feature. Slowdown usually means one of three things: Problem · What It Looks Like · Better Response Level gate · The next ranch requires a higher Ranch Level. · Focus on Ranch Level progress and ranch-growth upgrades. Weak economy · Upgrades are visible but feel too expensive. · Improve sheep value, production, or collection efficiency. Unclear support value · Explore, Sheepdog, or Diamond Pack becomes available but does not clearly solve the issue. · Wait until the benefit is visible and relevant. The strongest mid-game habit is to identify whether the ranch needs more scale, more value, or better efficiency. Spending across every system at once usually slows progress. Sheep Quantity vs. Value / Efficiency Decision Rule Use this simple rule when choosing between upgrade types: Situation · Better Upgrade Direction Ranch still feels early and cheap to upgrade · Sheep quantity or basic ranch expansion. Coins are coming in too slowly · Production or collection efficiency. Next area is locked by Ranch Level · Ranch Level progress. More sheep no longer feels helpful · Sheep value or efficiency-style upgrades. A side feature has unclear benefit · Delay it and strengthen the ranch economy first. This gives the guide more practical value than simply saying “upgrade carefully.” The goal is to understand what type of upgrade solves the current problem. Common Mistakes 1. Treating all upgrades as equal Mistake: Spending on whichever Upgrade button appears first. Why it hurts: Some upgrades support progress requirements, while others only add side value. Better move: Choose upgrades based on the current problem: level gate, weak economy, low collection efficiency, or unlock requirement. 2. Adding sheep quantity when the real problem is value Mistake: Expanding the ranch visually while coin progress still feels slow. Why it hurts: More sheep does not always mean better progress if each upgrade adds too little value. Better move: Look for production, value, or collection-efficiency improvements when growth slows. 3. Spending diamonds on unclear benefits Mistake: Using diamonds on a shop, pack, or random system without understanding the result. Why it hurts: Diamonds are harder to replace than coins. Better move: Save diamonds for clearly shown long-term progression value. 4. Expecting Lucky Spin to solve progression Mistake: Treating spin rewards as the main strategy. Why it hurts: Random rewards may not match the ranch’s current bottleneck. Better move: Use Lucky Spin as a bonus, not as the foundation of your ranch economy. 5. Ignoring visible unlock requirements Mistake: Spending on side systems while a visible Ranch Level requirement is blocking the next ranch. Why it hurts: The main path does not move forward. Better move: Treat the visible requirement as your next upgrade target. 6. Opening too many support systems too early Mistake: Jumping between Explore, Sheepdog, Shop, Diamond Pack, and ranking features before the ranch economy is stable. Why it hurts: You lose track of which upgrade actually solves the current slowdown. Better move: Test support systems only after you understand their value in the current run. FAQ What kind of game is Sheep Ranch Builder? Sheep Ranch Builder is a casual sheep ranch management and idle farm upgrade game built around Ranch Level progress, ranch upgrades, resources, and new area unlocks. What should I upgrade first? Prioritize Ranch Level progress, ranch growth, production, or collection efficiency before spending on side systems. Is sheep quantity better than sheep value? Quantity helps early foundation building, while value and efficiency matter more when progress slows. When should I use diamonds? Use diamonds only for clearly shown long-term progression value. Is Lucky Spin worth using? Lucky Spin is worth using as a bonus when the cost is low or free, but it should not replace ranch upgrades. Should I upgrade Explore or Sheepdog early? Only if the game clearly shows that they help your current bottleneck. Otherwise, strengthen the ranch economy first. Editorial Note This guide is written for the game page of Sheep Ranch Builder and focuses on beginner-friendly ranch progression, upgrade choices, resource collection, and common mistakes. Coins, diamonds, spins, draws, rankings, packs, and shop items in this guide refer only to virtual in-game systems. They are not real-world money, financial rewards, gambling, farming advice, or agricultural business guidance. For page layout, keep ads clearly separated from the game iframe and from interactive game buttons such as Play, Claim, Go, Upgrade, Lucky Spin, Shop, and Diamond Pack. Ads should not look like game controls, download buttons, menu buttons, or navigation links.
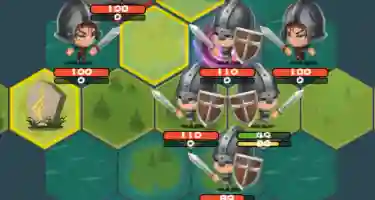 Monster Checkers
Monster Checkers About This Game Monster Checkers is a casual piece placement and board battle strategy game where the most important decisions happen before the fight begins. Instead of rushing into battle, you need to read the board, understand the enemy layout, and place your pieces in positions that can hold pressure, cover routes, and support each other. The core gameplay is simple to understand: place your character pieces, start the battle, watch how both sides collide, and adjust your formation if the result does not work. The depth comes from the map. A narrow choke point rewards tighter route control, while a wide open board requires broader coverage. A divided map may force you to protect two pressure zones at once. This Monster Checkers guide focuses on beginner placement logic: where to place early-contact pieces, how to protect support-style pieces, how to avoid leaving side routes open, and how to improve after losing a battle. Treat each level like a small tactical puzzle. The question is not “Which piece looks strongest?” but “Where does this piece help the formation most?” How to Play Do not place pieces immediately when a level begins. First, look at the whole board. The closest enemy is not always the biggest threat; a side group, a center cluster, or an open lane can become the real reason your formation fails. A practical beginner flow looks like this: 1. Scan the enemy layout. Look for enemy clusters, side groups, and routes that lead toward your pieces. 2. Find the first contact point. This is where your formation is most likely to meet pressure first. On narrow maps, it may be a tight route or choke point. On open maps, it may be the side with the largest enemy group. 3. Place your front anchor. Use a piece that appears better suited for early contact near the first contact point. 4. Protect your safer support position. Support-style or less durable pieces should usually stay slightly behind or diagonally behind the front anchor when the board allows it. 5. Check the side route. Before starting the battle, look for any lane that is completely uncovered. Even a small enemy group can punish an empty side. 6. Keep pieces close enough to help. Your key pieces should be close enough to support each other. If they are too far apart, they may fight as separate weak groups. 7. Start the battle and watch the first clash. The opening moments show whether your front anchor holds, whether support pieces are exposed, and whether enemies are slipping around the side. 8. Change one major thing after a loss. Do not rebuild everything at once. Move the front anchor, protect the support piece, cover the side route, or tighten spacing, then test again. Beginner Strategy Guide The best beginner habit in Monster Checkers is to place with intention. Every piece should have a job: hold the first contact point, support the early-contact piece, cover a side route, or prevent the formation from splitting. The Bottleneck Defense Use The Bottleneck Defense on narrow route maps, especially when the enemy must pass through a tight choke point. Place your front anchor close to the first contact point. Then place support-style pieces slightly behind it or to the side. This creates a simple layered formation: the front piece handles the first pressure, while the support pieces stay safer and contribute from a better position. Do not stack every piece directly on the choke point. If your entire formation is packed into one small area, you may lose flexibility and leave nearby routes uncovered. A better Bottleneck Defense holds the narrow path while keeping at least one piece ready to cover a side opening. The Checkerboard Spread Use The Checkerboard Spread on open maps where enemies can approach from more than one direction. Instead of putting every piece in one corner, spread your pieces across the important lanes while keeping them close enough to support each other. Think of the board like a loose checkerboard: not every space needs a piece, but the important spaces should not be empty. A strong open-map setup usually covers the main enemy direction first, then places one piece toward a side route. Keep your support pieces protected, but do not place them so far away that they stop helping the fight. The Split-Lane Balance Use The Split-Lane Balance on divided maps where enemies are separated into two groups or the board has two pressure zones. Start by deciding which side is more dangerous. The side with the larger enemy group or faster first contact should receive more attention. However, the weaker side should not be completely abandoned. One isolated piece usually cannot hold an entire route alone, so keep it close enough to reconnect with the main formation. If the same side keeps collapsing, do not simply add more pieces to the strongest area. Move one piece toward the broken lane and shorten the distance between groups. Simple Formation Examples These are starting templates, not fixed winning formations. Adjust them after each failed attempt instead of copying them exactly. Balanced Beginner Formation Place one front anchor near the main contact point, one support-style piece behind or diagonally behind it, and one piece watching the side route. This is the safest beginner setup when you are still learning the map. Route Control Formation Use this on narrow maps. Put your front anchor near the choke point, keep support slightly behind it, and avoid overcrowding the entrance. The goal is to slow the enemy at the route instead of letting pressure reach your safer support position too quickly. Wide Coverage Formation Use this on open maps. Cover the main enemy direction, then place one piece toward a side lane. Your pieces should be spread out enough to cover space, but still close enough to help each other. Specific Enemy Layout Examples Enemies grouped near the center lane: Place a front-position piece near the first contact point in the center, then keep support close behind it. Do not send every piece to the exact same small area; leave enough spacing to prevent side pressure. Enemies split into left and right groups: Send more strength toward the larger group, but keep at least one piece or coverage point near the smaller group. If you ignore one side completely, the formation can get pulled apart. A small enemy group appears on the side: Do not dismiss it just because it looks less dangerous. Side enemies often cause losses by reaching unprotected support pieces. Place one piece toward that lane or widen your main formation. One of your pieces falls first every attempt: That piece is probably too exposed. Move it slightly back, place it diagonally behind a front anchor, or shift the first contact point away from it. Beginner Formation Checklist Before you start the battle, check these points: • Did I find the main enemy cluster? • Did I identify the first contact point? • Is my front anchor placed near the correct route? • Are support pieces protected from immediate contact? • Is one side lane completely open? • Are my key pieces close enough to support each other? • Does every piece have a clear job? After-Battle Review Frontline melted immediately Likely problem: your front anchor was too isolated, placed too far from support, or not positioned at the real first contact point. Better adjustment: move support closer, or shift the front piece toward the route where pressure actually begins. Flanked by side-route enemies Likely problem: one side lane was left open. Better adjustment: move one piece toward the side route or widen your formation before starting again. Support piece died instantly Likely problem: it was placed in the first contact position. Better adjustment: move it behind or diagonally behind a front-position piece. Pieces fought separately and lost one by one Likely problem: your formation was spread too far apart. Better adjustment: reduce the gap between key pieces so they can support each other. Formation got crushed in one crowded spot Likely problem: too many pieces were stacked into the same area. Better adjustment: keep the main route covered, but spread one piece toward a nearby lane. Small side group caused the loss Likely problem: you only looked at the largest enemy cluster. Better adjustment: scan the whole board before placing the first piece and assign coverage to side pressure. Change one major issue at a time. If you move every piece after every loss, it becomes difficult to understand which adjustment actually improved the formation. Common Mistakes Placing pieces before reading the map: Rushing placement makes it easy to miss side pressure, choke points, or the real first contact area. Choosing only the strongest-looking pieces: A strong piece still needs the right role. Front anchors, support positions, side coverage, and spacing all matter. Stacking every piece in one corner: This can make your formation look powerful while leaving the rest of the board open. Using the same setup on every map: The Bottleneck Defense may work on narrow maps, but open maps often need The Checkerboard Spread or wider side coverage. Repeating the same failed setup: If the frontline melts, support dies, or side enemies flank you, something specific needs to change. Placing support pieces in the first contact position: Support-style or less durable pieces should usually stay behind or beside the front anchor, not directly in front. Leaving one side route completely open: Even a small side group can break your formation if it reaches a safer support position for free. Spreading pieces too far apart: Wide coverage helps, but isolated pieces often lose before the rest of the formation can assist. Depending too much on one character piece: Do not expect one piece to hold two lanes, protect support pieces, and handle the main enemy group alone. Ignoring small enemy groups on the side of the map: Side enemies are easy to overlook, but they often explain why a formation that looked strong still failed. FAQ What is Monster Checkers? Monster Checkers is a casual piece placement and board battle strategy game where players arrange character pieces before battle and try to defeat opposing pieces on the map. How do you play Monster Checkers? You scan the enemy layout, find the first contact point, place your pieces with a clear role, start the battle, and adjust your formation after failed attempts. Why do my support pieces die instantly at the start of the battle? They are probably too close to the first contact point. Move them slightly behind or diagonally behind a front-position piece. Why does my frontline collapse so quickly? Your front piece may be isolated or placed too far from support. Bring nearby pieces closer so the front line is not fighting alone. What should I do if enemies keep coming around the side? You are leaving a side route open. Move one piece toward that lane or use a wider formation before starting the battle. How should beginners place their pieces in Monster Checkers? Start with one front anchor near the first contact point, protect support pieces behind it, and keep one piece or coverage point ready for side pressure. Do different maps require different strategies? Yes. Narrow maps favor route control, open maps need wider spacing, and divided maps require balanced pressure between lanes. What should I change after losing a battle? Change the first visible failure. If support dies, move it back. If the side lane breaks, widen coverage. If pieces fight alone, tighten the formation. Editorial Note This guide focuses on beginner placement logic for Monster Checkers, including board reading, first contact points, formation spacing, side-route coverage, and after-battle adjustment. Formation names such as Bottleneck Defense, Checkerboard Spread, and Split-Lane Balance are guide labels used to explain placement ideas, not confirmed official in-game terms. This guide does not present unconfirmed character stats, fixed skills, upgrade systems, reward rules, or full level data as facts. Pieces, characters, maps, battles, and rewards are discussed as virtual Monster Checkers game mechanics.
- Zuma Adventure
Zuma Adventure About This Game Zuma Adventure is a marble-shooting color puzzle built around aiming, matching, and pressure control. A moving line of colored marbles travels along a track toward the exit, and your goal is to clear the line before it reaches the end. The main challenge is not only hitting the right color. Good play depends on track pressure, color priority, shot timing, and combo planning. A small clear near the danger zone can be more useful than a large match far away, especially when the foremost group is already close to the exit. As levels become more difficult, players may need to respond to tighter paths, faster movement, denser color mixes, or special elements when they appear. The best approach is to keep the track organized, avoid random shots, and choose clears that give you more space to work with. How to Play Start each level by reading the track. Look at where the marbles enter, where they are moving, and where the exit is. This helps you decide which section is safe and which section needs immediate attention. Basic play flow: 1. Read the track direction and identify where the marble line is moving. 2. Check the launcher color before choosing a target. 3. Aim at a matching color group already on the track. 4. Connect three or more same-colored marbles to clear them. 5. Watch for pull-back clears when separated same-color groups connect after a match. 6. Protect the danger zone whenever the foremost group gets close to the exit. If the marble line reaches the exit, the level fails. If you clear the current line before that happens, the level is completed. Specific buttons, special effects, or booster behavior may vary by version or level, so focus first on clean matching, safe placement, and defensive decision-making. Beginner Strategy Guide The best beginner strategy in Zuma Adventure is to treat every shot as a board-management decision. A shot should either clear marbles, reduce danger, prepare a combo, or keep the track easier to manage. If a shot does none of those things, it may create more trouble than value. Shot Priority Order Use this order when you are not sure where to shoot: 1. Clear marbles near the exit if the line is close to failing. 2. Make a direct three-color match when it helps immediately. 3. Set up a combo only when the critical area is still safe. 4. Place an unmatched marble beside the same color when a direct match is not available. 5. Avoid narrow mixed sections unless the shot clearly improves the position. This priority system helps new players avoid random shooting. A clean small match in the danger zone is often better than a larger match far from the exit. When the Foremost Group Is Close to the Exit If the foremost group is near the finish point, stop chasing stylish clears in the back of the track. Focus on stabilizing the critical area first. Good emergency shots usually do one of these things: • Remove marbles from the front section. • Pull the line backward after a clear. • Open space before the final bend. • Connect a quick combo only if it helps the danger zone. Do not spend several shots building a long setup while the line is already close to failure. In pressure moments, survival comes before score. When the Launcher Color Does Not Match Sometimes the loaded marble will not give you a direct match. The worst response is to fire it into a tight mixed section just to get rid of it. A better approach is: • Place the marble beside the same color if that color is available. • Put it in a low-pressure section if no useful match exists. • Avoid splitting two colors that are close to forming a match. • Use the shot to prepare the next color instead of forcing a weak clear. A color that cannot clear immediately can still be useful if it keeps the track organized. How to Create Better Combos The strongest clears often happen when two same-color groups are separated by one or two marbles of another color. If you clear the blocker between them, the two matching groups may pull together and disappear as a follow-up clear. Example: • A red group is on one side. • Another red group is nearby. • A small blue group sits between them. • Clear the blue group first. • The red groups connect and may trigger another clear. This is the basic logic behind chain-clearing. It works best when the danger zone is under control and you have enough time to set up the middle clear. Safe Shot vs Risky Shot Shot Type · Better Choice Safe shot · Completes a match or reduces pressure near the exit Setup shot · Prepares a combo while the critical area is still safe Risky shot · Adds a random color into a tight mixed section Emergency shot · Clears the foremost group before it reaches the end If a shot does not clear, prepare, or protect, it is probably risky. Special Effects and Booster Timing When a level provides special effects, use them to solve real pressure instead of spending them immediately. A useful effect should either reduce danger near the front, slow down a difficult section, clear a crowded area, open a blocked color group, or help you aim at a narrow gap. Do not waste special effects when the board is already safe. Their best value comes from fixing danger, opening blocked colors, or turning a crowded section into a manageable one. Dealing with Complex Track Layouts If a level includes a more complex path, do not treat every visible marble as equally important. Always prioritize the route or section closest to the exit, because that is where failure is most likely to happen. When part of the line becomes harder to read, focus on the color order you can still see and prepare safer clears near the danger zone. If the track bends sharply or overlaps visually, avoid risky shots into crowded areas unless you are sure the marble will complete a match or reduce pressure. For confusing layouts, divide your attention in a simple order: first check the critical area, then look for direct matches, then consider combo setups. This keeps your decisions stable even when the track becomes harder to read. Strategy for Fast or Confusing Levels When the line moves faster or the colors become more mixed, simplify your decisions: • Clear the critical area first. • Avoid long setup shots unless the track is stable. • Keep colors grouped instead of scattering them. • Use special effects only when they solve an immediate problem. • Watch the next shot if the game shows it, but do not ignore current danger. Fast levels punish messy shooting. Clean, defensive clears usually work better than risky combo attempts. Common Mistakes Only looking at the nearest marbles The closest target is not always the best target. Check the danger zone often, especially when the track bends near the exit. Chasing big matches in the wrong area A large match far from danger may look useful, but it does not help if the foremost group is about to reach the end. Shooting unmatched colors into narrow gaps This can split useful color groups and make future clears harder. If the current color does not match, place it where it causes the least damage. Ignoring separated same-color groups Two groups of the same color with a small blocker between them are often a combo opportunity. Clear the blocker first when the critical area is safe. Using special effects too early Special effects are most valuable when they fix a real problem. Save them for crowded sections, fast movement, blocked colors, or dangerous pressure near the exit. Playing too fast after one successful clear A clear can change the whole track. Pause briefly after each important match and check whether the line pulled together, opened a combo, or created a new danger area. Trying to force combos under pressure Combos are useful, but not when the line is close to the end. In emergency situations, take the safe clear first. Ignoring difficult track shapes Sharp turns, tight paths, or visually crowded sections can hide the real danger. When the layout becomes harder to read, return to the basics: protect the exit, make clean matches, and avoid clutter. FAQ How do you play Zuma Adventure? Aim the launcher at matching colors on the moving track. Connect three or more marbles of the same color to clear them before the line reaches the end. What should beginners focus on first? Beginners should focus on the danger zone, clean three-color matches, and avoiding random shots that make the track harder to manage. What should I do when the launcher color does not match? Place the marble beside the same color if possible. If there is no useful match, put it in a low-pressure area and prepare for the next shot. How do you create chain reactions in Zuma Adventure? Look for two same-color groups separated by a small group of another color. Clear the middle group so the matching sides can pull together and possibly clear again. What is the best strategy for fast-moving levels? Play defensively. Clear the foremost group first, avoid risky setup shots, and use special effects only when they reduce immediate pressure. When should boosters or special effects be used? Use them when the line is close to the end, when colors are badly mixed, or when one effect can open several useful matches. Do not waste them while the board is already under control. How can I improve my level results? Focus on cleaner matches, faster recovery after each clear, and well-timed combos. Completing the stage safely should come before risky high-score attempts. Are boosters, scores, or level results real prizes? No. Boosters, scores, effects, and level progress in Zuma Adventure are virtual in-game elements only. Editorial Note This guide focuses on gameplay explanation and beginner strategy for Zuma Adventure. It describes marble launching, color matching, track pressure, combo planning, and defensive decision-making based on the game-style mechanics discussed on this page. Any scores, boosters, effects, rewards, or level progress mentioned in this guide refer only to virtual in-game elements. This article does not claim an official relationship with any other brand, developer, publisher, or franchise.
- Bubble Shooter
Bubble Shooter About This Game Bubble Shooter is a casual arcade fruit shooter and timing puzzle game. Despite the name, this is not a traditional bubble-matching game. This Fruit Edition is built around a launcher, a fruit target, and a moving spike gate that can block the shot path. Your goal is to launch shots at the fruit until it gradually shrinks and disappears. Each successful hit moves the target closer to being cleared, but every shot must pass safely around the spike gate. If the shot collides with the gate, the attempt fails. The game is less about clicking quickly and more about reading the obstacle pattern. The fruit may be visible, but that does not always mean the shot is safe. The best moment usually comes after the spike gate has moved away from the path. Bubble Shooter also includes launcher upgrades and fruit-themed shot visuals. Upgrades may improve clearing speed or target progress, while different fruit-style shots add variety to the arcade feel. The core challenge remains the same: clear the fruit by timing each shot around the moving obstacle. How to Play Start by watching the fruit target and the moving spike gate. Before taking the first shot, let the gate complete at least one movement cycle so you can understand its rhythm. When the gate moves away from the shot path, click the launcher to send a shot toward the fruit. If the shot reaches the fruit, the fruit becomes smaller. Repeat this process until the fruit disappears completely. Avoid clicking as soon as the fruit appears open. A safe shot depends on the gate position, not just the fruit position. If the gate is entering the path or the opening looks too narrow, wait for the next chance. Use single, deliberate shots instead of rapid clicking. Panic spamming can send a shot into the spike gate even when the previous shot was safe. A slower rhythm often gives you better control. Launcher upgrades can help improve progress, but they do not remove the timing challenge. Even with upgrades, each shot still needs to avoid the moving gate. Tips & Tricks Watch whether the gate is leaving the path or returning into it. A visible fruit target is only safe when the gate is moving away from the shot line. When the fruit becomes smaller, stay patient. The final hit can be the easiest moment to rush and the easiest moment to fail. Treat the last shot like the first one: check the gate, confirm the opening, then launch. If you fail, think about the timing of the shot. Did you click before the gate fully cleared the path? Did you wait too long and let it return? Did you focus on the fruit while ignoring the obstacle? Most failed attempts come from one of these mistakes. The best runs come from patience, not faster clicking. Watch the movement, launch only when the path is clean, and let each safe hit reduce the fruit step by step. Common Mistakes to Avoid • Blind Launching: Failing to watch one full movement cycle of the spike gate before taking the first shot. • Panic Spamming: Using rapid, multi-click bursts instead of single, deliberate shots. • Rushing the Finish Line: Losing patience when the fruit is almost cleared. Treat the final hit with the same caution as the first. Our Verdict / Personal Review Overall Rating: ⭐⭐⭐½ (3.5/5) This Fruit Edition of Bubble Shooter works because the rules are simple, but the timing pressure gives each attempt a real challenge. The fruit-shrinking mechanic makes progress easy to understand, while the moving spike gate keeps the game from becoming a basic click-and-clear routine. The game feels most fair when the gate movement is readable. You can see why a shot worked or failed, which makes each retry feel like a timing adjustment rather than random luck. It becomes frustrating mainly when players click before confirming the opening. If you rush, the spike gate can punish even a nearly completed run. That is also what gives the game its tension: the final hit still matters. Overall, Bubble Shooter is best approached as a fruit target timing game, not a classic bubble shooter. It is a simple arcade puzzle for players who enjoy short rounds, clear goals, and timing-based decisions. Editorial Note This guide is based on visible gameplay mechanics, including the launcher, fruit target, moving spike gate, and in-game upgrade system. It focuses on beginner timing decisions rather than hidden values or guaranteed level outcomes.
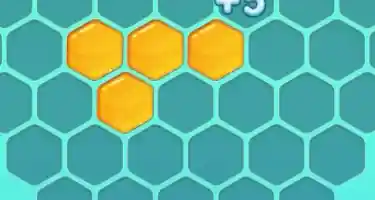 Monster Elimination
Monster Elimination Platform: Mobile / Web Genre: Hex-Puzzle / Block Placement Core Mechanic: Place blocks to deal damage to the monster About This Game Monster Elimination is a casual monster-themed block placement and elimination puzzle game. It plays more like a board-space puzzle than a classic swap-based match-3 game: you choose from block batches at the bottom, drag them onto a hex-style board, create eliminations, and use those clears to attack the monster above the board. The early game layout makes the core loop easy to read. A monster stands above the puzzle board with a health bar, while the player works with three block batches, a Bomb tool, a Change Batch option, a Skin button, a coin counter, and a score-related Double Score button. The tutorial direction is simple: drag blocks onto the board, trigger eliminations, and attack the monster. The real challenge is space control. A piece that fits is not always the right piece to place. A strong move should do at least one of four things: create a clear, protect future space, repair an awkward gap, or help finish the monster. If you fill the center too quickly or leave too many isolated cells, the board can become difficult even when the monster is close to defeat. Feature · Beginner Reading Genre · Casual block placement elimination puzzle Board style · Hex-based block board Core goal · Clear blocks to damage the monster Main risk · Running out of usable board space Board tools · Bomb, Change Batch Other interface options · Skin, coin counter, Double Score Best habit · Protect open space before chasing every clear How to Play Start each round by checking three things: the monster health bar, the open board space, and the three block batches available at the bottom. In the early level screen shown here, the monster health bar makes the goal clear: every useful elimination should move you closer to defeating the monster. To make a move, drag one of the available block batches onto the hex board. Because the board is made of connected hex cells, the shape of each batch matters. A piece may fit near the edge but still leave behind a tiny gap that is hard to use later. A piece may fit in the center but become a bad move if it blocks the most flexible part of the board without creating a clear. After placement, the game can trigger eliminations. Those clears attack the monster and open board space. The best move is not always the largest-looking placement. The best move is the one that keeps the next move playable. A practical beginner priority order is: 1. Keep enough open space to continue placing blocks. 2. Protect the center and lower board. 3. Place awkward shapes before the board becomes crowded. 4. Create clears that open future placement space. 5. Use tools only when they solve a real board problem. The Bomb is best saved for serious board trouble: a blocked center, a dead corner, a crowded lower board, or a final clear that helps finish the monster. Check the in-game effect area before using it so you know what space it will actually remove. Change Batch is useful when the current three pieces do not match the board shape. If the board is still open and at least one piece fits safely, continue building normally. If every available batch makes the board worse, changing the batch can be the safer decision. Use the Double Score button when your board is stable and you are ready to trigger multiple eliminations in a row to maximize your points. Beginner Strategy Guide A practical way to start a round is to check where the largest open area is. If the center is still open, do not fill it with an easy piece unless that move creates a clear or prepares a strong follow-up. The center is usually the most flexible space because more block shapes can fit there. If the center is almost blocked, avoid closing the last useful lane just for a small clear. A small clear is good only when it improves the board. If it creates single-cell holes or breaks connected space, it may make the next placement harder. If an edge or corner develops an isolated empty cell, repair it with a small or narrow batch when possible. Do not waste a large batch on a cramped edge unless it also creates a clear. Large batches need clean open space, so they should be placed before the board becomes too tight. Think of every move as either a space-saving move or a space-wasting move. A space-saving clear opens the board, connects empty areas, removes a blockage, or gives the next batch more room. A space-wasting placement may look useful for the moment but leaves the board harder to manage. When the monster health bar is nearly finished, your priority changes. At that point, an immediate clear can be better than a long setup. If one placement can trigger an elimination and finish the monster, take the clear instead of trying to build a perfect board. Large batches usually belong in clean open space. Small batches are better for repairing edges, filling narrow areas, or setting up precise clears. If you spend all the small pieces randomly, you may have no way to fix awkward gaps later. Tool timing is one of the most important beginner skills in Monster Elimination. Use Bomb when it opens the center, removes a dead zone, or saves a nearly full board. Use Change Batch when the available pieces no longer match the board shape. Do not spend tools early just because they are available. After losing a round, review the board instead of only blaming the final move. Ask yourself: Did I fill the center too early? Did I leave too many single-cell gaps? Did I choose a short-term clear that damaged future space? Did I use Bomb before the board was truly in danger? Did I ignore the monster health bar when the level was close to ending? Common Mistakes • Dragging the first piece that fits: A piece can fit the board and still be weak. Place blocks where they protect future space or create useful clears. • Filling the center too early: The center is the most flexible area. Blocking it with easy pieces can make awkward batches difficult to place later. • Leaving too many single-cell gaps: Isolated holes are hard to use. Keep open cells connected so future batches have more room. • Using Bomb too early: Bomb is most useful when it solves a real space problem. Early use on a minor issue can leave you without a rescue option later. • Chasing score before stability: Score-related features work better when the board is under control. If the board is nearly full, space management comes first. FAQ How many levels are there in Monster Elimination? Monster Elimination uses level-based progression, starting with LV.1 in the early game interface. A fixed total level count is not confirmed, so focus on the current board, monster health bar, and available tools. Does Monster Elimination require WiFi? Offline availability may depend on the version and platform. Features that require online loading may not work without an internet connection. Are tools necessary to win? Tools can help when the board becomes crowded, but the core skill is still board reading, space control, and choosing the right placement order. Bomb and Change Batch are support tools, not replacements for good planning. What should I do when the board is almost full? Stop chasing score and look for space recovery. Try to open the center, repair dead corners, or create any clear that gives you more connected space. If none of the current batches fit well, Change Batch becomes more useful. Should I clear small groups or wait for a bigger clear? Take the clear that improves the board. A small clear is worth using if it opens space, attacks the monster, or sets up the next batch. Waiting for a bigger clear is risky when the board is already crowded. Where should beginners place large block batches? Place large batches in clean open areas before the board becomes tight. Avoid forcing them into narrow corners unless the placement creates a clear. Save flexible center space for awkward shapes whenever possible. Editorial Note This page is an independent gameplay guide and is not an official game manual. It is based on visible gameplay interface details and practical beginner board-reading observations. It does not claim hidden formulas, fixed reward values, official level counts, or guaranteed outcomes. Coins, tools, skins, and score features are described only as virtual in-game mechanics.
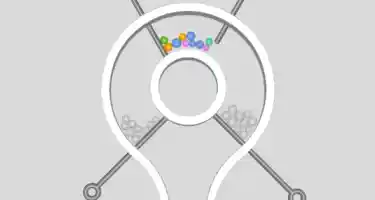 A Master Pin
A Master Pin About This Game A Master Pin is a casual pull-the-pin logic puzzle game where the challenge is to read the route, keep key pins closed, and release the target object only when the path is ready. Core gameplay highlights: • Order-based pin puzzles: Pulling the right pin at the right time is the main challenge. • Route planning: The safest solution usually starts by checking the goal area, not the closest pin. • Casual brain-puzzle pacing: A Master Pin rewards careful observation, simple logic, and clean decision-making. Each level is built around pins, objects, blockers, and a target area. A rushed move can send the object into the wrong chamber, while a planned move can open the route step by step. The key is to understand what each pin controls before removing it. How to Play Look First | Plan the Route | Pull the Right Pin Start by checking where the target object needs to go. Then look at the pins and decide which ones open the route, which ones hold the object back, and which ones may cause trouble if pulled too early. A strong beginner flow is: 1. Check the goal area. 2. Identify what each pin controls. 3. Keep safety pins closed until the route is ready. 4. Pull route-opening pins before release pins when needed. For example, if the target object is held above a closed lower chamber, do not release it first. Open the route near the target area or remove the blocker that would stop progress. If the object can drop straight down but the target area is behind a side opening, check the side pin before releasing the object. A visible target does not always mean the route is safe. Before pulling the release pin, make sure the object will move toward the goal instead of falling into a dead-end chamber. Beginner Strategy Guide A practical beginner approach is simple: solve the level backward. Instead of asking “Which pin can I pull now?”, ask “What needs to happen before the object can reach the goal?” Use this three-step method: 1. Find the target area. Identify the final destination before making the first move. 2. Trace the safe route backward. Follow the path from the target area back to the starting object. Look for blockers, wrong exits, divided chambers, and risky paths. 3. Choose which pins open the route and which pins should stay closed temporarily. Open the path before releasing the object. Keep safety gates closed until they are no longer needed. Pin Role · What It Does · Beginner Decision Route opener · Opens the path toward the goal · Pull it when the object needs a clear route Safety gate · Holds an object back until the route is safe · Keep it closed until the path is prepared Release pin · Starts object movement · Pull it only after checking the next chamber Wrong early pull · Causes falling, blocking, mixing, or a failed route · Avoid pulling it just because it is visible If two pins control the same lower route, open the blocker near the target first before releasing the object from above. This prevents the object from reaching the right direction but stopping one step short of the goal. When the target area is below the object, check the chamber closest to the goal before starting movement. When the target area is on the side, focus on whether the entrance is open and reachable. The target position should guide the first move. If the object reaches the wrong chamber, the mistake usually happened before the object started moving. Check whether a route-opening pin should have been pulled before the release pin. Do not treat every visible pin as urgent. A pin can be useful because it stays closed, not because it gets pulled. Many beginner mistakes happen when a safety gate is opened before the route is prepared. Your first goal should be stable completion, not the fastest possible clear. Once you can read the route consistently, faster and cleaner solutions become easier. Common Mistakes Pulling the release pin before checking the next chamber: The closest pin often feels like the first move, but it can be the wrong move. Check where the object will land before releasing it. Opening a path that looks clear but leads into a separated section: A route can look open while still sending the object away from the target. Always check whether the chamber connects to the final goal. Removing a safety gate too early: Some pins are meant to hold the object in place. Pulling them too soon can make the object fall before the route is ready. Ignoring the target position: A bottom target, side target, and divided chamber require different planning. The target position should decide your first move. Repeating the same failed order: If the same sequence failed once, repeating it usually gives the same result. Change the pin that caused the object to fall, block, or miss the target. FAQ What is A Master Pin? A Master Pin is a casual pull-the-pin logic puzzle game where players solve levels by removing pins in the right order and guiding objects toward the correct target area. How do you play A Master Pin? Check the goal area, study what each pin controls, open the safe route, and release the target object only when the path is ready. How do beginners choose which pin to pull first? Start from the target area and trace the route backward. The first pin should help prepare the route, not simply start movement. What happens if you pull pins in the wrong order? The object can fall into the wrong chamber, become blocked, miss the target, or make the route impossible to complete. How can I avoid getting stuck? Slow down before the first move. Separate route-opening pins from safety gates, check the next chamber before releasing the object, and change your sequence after each failed attempt. Are in-game items real prizes? No. If A Master Pin includes optional in-game items, they are virtual gameplay features only and should not be understood as real-world prizes or cash rewards. Editorial Note This guide is based on visible gameplay behavior, on-screen puzzle layout, and beginner-level route-planning logic. It does not claim hidden formulas, guaranteed solutions for every level, or real-world reward value.
- Battle Monster Island
Battle Monster Island About This Game Battle Monster Island is a casual side-scrolling monster shooter and action adventure game built around stage movement, shooting timing, upgrades, and character growth. At first, the game can look like a title where holding the fire button is enough. Once a narrow platform, a flying butterfly-type monster, a seven-spotted ladybug monster, and a risky coin path appear together, the real lesson becomes clear: positioning matters just as much as firepower. The player controls a character through horizontal monster island stages, clears monster enemies, avoids obstacles, collects coins and items, and prepares for tougher stage pressure. Different themed chapters, including holy coast-style chapter areas, can change the rhythm by adding tighter platform space, denser monster placement, riskier pickup locations, and Boss pressure that forces more movement. The Arms button in the lower-left area opens the weapon upgrade area. In the Arms system, labels such as straight-fire or cutter-style options can represent different in-game firepower paths. A stronger weapon setup can help clear enemies faster, but it still works best when paired with good movement and safe positioning. Battle Monster Island also includes Reform and Research systems. Reform and Research are character growth areas that support survivability, including attributes such as health and defense. If Arms helps you remove threats faster, Reform and Research help you stay alive long enough to handle longer stages, crowded enemy patterns, and Boss encounters. How to Play When a stage begins, do not rush forward immediately. First, read the screen: where enemies are placed, where obstacles move, where coins and items appear, and where your safest landing spots are. In this title, many early failures come from moving into danger before understanding the layout. Mastering the joystick is your first step to survival. Use it to control distance, stop before hazards, retreat when enemies get too close, and create space before attacking. The right-side buttons are generally used for shooting and jumping, so the basic rhythm is simple: move into position, attack briefly, dodge or jump when needed, then reposition. Do not fire while drifting blindly into obstacles. If a monster is standing near a narrow platform or a hazard is directly ahead, settle your character first. A short controlled burst from a safe spot is usually better than jumping forward while shooting and landing with no escape route. For a more specific example, if a venom monster appears near a flame trap, do not run straight toward the coin path. Wait for the trap rhythm, move or jump to a safer platform, then attack the venom monster from a position where you can still retreat. Once the danger is cleared, collect the nearby coins or items if the route is stable. Jumping should always have a purpose. Jump when you can see the landing spot, when you need to cross an obstacle, when an enemy attack forces you to reposition, or when you need to reset your spacing. Avoid jumping inside enemy pressure without knowing where your character will land. Coins and items are useful, but they should not control the whole run. Use this collection order: 1. Clear or avoid the enemy blocking your route. 2. Watch the obstacle timing. 3. Confirm the landing space. 4. Collect coins and items only if the path remains safe. The Arms system is worth upgrading when enemies take too long to clear or when normal stages start dragging on. If your front-fire setup clears straight-line enemies well but struggles when flying monsters pressure you, focus on positioning before assuming another weapon upgrade will solve the stage. If cutter-style firepower appears more useful in close or crowded situations, treat it as a tool for specific pressure rather than a universal answer. Reform and Research become more important when your main problem is survival. If you keep losing health before reaching the later part of a stage, or if a holy coast-style Boss section pressures you before you can learn the pattern, invest in survivability before chasing faster clears. In Boss stages, watch the attack pattern before committing to damage. If the Boss creates a short quiet moment after an attack pattern, use that window for shooting instead of attacking during the dangerous part. The basic Boss rhythm is: observe the pattern, dodge first, attack briefly, then move again before the next pressure arrives. Beginner Strategy Guide Before starting a stage, check five things: enemy position, obstacle timing, safe platforms, coin or item risk, and whether your current upgrades match the problem you are facing. If you failed the same stage several times, do not retry with the same habits. Change one thing: movement, upgrade focus, or collection route. Early Game Upgrade Priority · When to Focus on It · Reason Arms · Monsters take too long to clear · Better firepower can reduce pressure in regular stages. Straight-fire weapon path · You need steady forward fire · Useful when enemies approach from the front or block the route. cutter-style weapon path · Enemies crowd your space · Better for close pressure if the stage gives you less room to stand safely. Reform · You lose health too quickly · Extra survivability gives beginners more time to react. Research · Boss or later-stage pressure ends runs early · Health and defense growth can help you survive long enough to learn patterns. Movement practice · You keep missing jumps or landing in danger · Upgrades cannot fix poor landing choices. Safer collection habits · Coins and items bait you into damage · Finish the route first; collect only when the stage is stable. A practical beginner rule is to diagnose the failure before upgrading. If enemies stay on screen too long, improve Arms. If you are defeated before understanding the pattern, improve Reform or Research. If you fall into hazards or jump into enemy pressure, practice movement before relying on upgrades. When facing a flying butterfly-type monster, avoid chasing it across unsafe platforms. Hold a stable position, fire when it enters your attack line, and move only after checking the next landing spot. When facing a seven-spotted ladybug monster on a narrow path, do not jump forward for coins first. Clear the monster or wait for a safer opening, then move through the platform. If a venom monster appears near a hazard, treat the hazard as the first problem. The monster may be the visible threat, but the trap or obstacle controls your movement. Move to a safer angle, wait for the obstacle rhythm, then attack when you have room to retreat. Boss stages should not be played like normal monster waves. In regular stages, you may be able to clear enemies while moving forward. In Boss stages, the safer pattern is slower: watch the attack, dodge, use the quiet moment for damage, and move again. Do not stand in one position just because your weapon feels strong. If you reach a holy coast-style chapter area or another tighter section, expect the stage to punish greedy movement. Coins may sit closer to danger, enemies may appear in denser groups, and Boss pressure may force more repositioning. When the platform space becomes smaller, your escape route matters more than one extra pickup. For repeated failures, use this troubleshooting table: Failure Pattern · Likely Problem · Better Fix You keep losing health · Standing still too long or jumping too late · Create distance, attack briefly, then reposition. You cannot clear enemies fast enough · Arms may be underdeveloped · Improve weapon firepower, then test the stage again. You lose in Boss stages · Attacking during dangerous patterns · Wait for the quiet moment after a Boss attack. You miss jumps often · Jumping without a visible landing spot · Pause, check the platform, then jump with a clear target. You collect coins but fail the stage · Pickups are pulling you into danger · Clear the route first; collect only safe items. You fail after entering a new chapter · The old tactic no longer fits the layout · Adjust for tighter platforms, denser enemies, and riskier item placement. The strongest beginner habit is controlled rhythm: move, stabilize, shoot, dodge, and reset. When that rhythm feels natural, Arms upgrades, Reform growth, and Research improvements become much more effective. Common Mistakes Common Mistake · What Goes Wrong · Better Approach Standing still while shooting · Enemies and obstacles can trap your character from both sides. · Fire in short bursts, then move before pressure closes in. Upgrading only Arms · More firepower may not help if you lose health too quickly. · Add Reform or Research when survival is the main issue. Chasing every coin or item · Risky pickups can pull you into enemy attacks or bad jumps. · Clear enemies first, then collect only what fits the safe route. Fighting near hazards · A trap or obstacle can block your escape while enemies advance. · Move to a safer platform before attacking. Jumping without a landing plan · Early or late jumps can place your character inside danger. · Jump only when the landing space is visible and useful. Ignoring Boss quiet moments · You waste damage chances or attack during unsafe patterns. · Dodge first, then use the short opening after the pattern. Treating every weapon the same · Straight-fire and cutter-style options may feel useful in different situations. · Match the weapon path to the stage pressure you are facing. Using one tactic in every chapter · Later areas may add tighter platforms, denser monsters, or riskier pickups. · Change your movement and upgrade focus as the stage design changes. Panicking during crowded sections · Random shooting and jumping can make the screen harder to control. · Step back, clear the closest threat, then continue forward. FAQ Should beginners upgrade Arms first or Reform first? Upgrade Arms if enemies take too long to clear. Upgrade Reform or Research if you lose health too quickly or cannot survive long enough to learn the stage. What should I upgrade after losing the same stage several times? If enemies stay on screen too long, improve Arms. If your health drops too fast, improve Reform or Research. If you keep missing jumps, practice movement before spending upgrades as the main solution. Why do I keep losing in Boss stages? You are probably attacking during dangerous patterns or standing still too long. Watch the Boss rhythm, dodge first, attack during the short quiet moment, then reposition. Should I collect every coin and item? No. Collect coins and items only when the route is safe. A risky pickup near a trap, enemy, or narrow platform can ruin a run. What should I do when enemies and obstacles appear together? Handle the obstacle rhythm first. For example, if a venom monster is near a flame trap, wait for the trap timing, move to a safer platform, then attack the monster from a position where you can still retreat. Is it better to keep shooting or keep moving? Keep moving. Shooting is important, but staying in one place makes your character easier to pressure. A better rhythm is move, stabilize, shoot briefly, dodge, and reset. What does the Arms button do? The Arms button opens the weapon upgrade area. Labels such as straight-fire or cutter-style options may appear as in-game weapon paths, depending on what your version shows. Are coins, items, weapons, and upgrades real rewards? No. Coins, items, weapons, and upgrades are virtual game systems only. They are not cash rewards, gambling prizes, real weapon guidance, or real-world benefits.
- Road Killer
Road Killer About This Game Road Killer is a casual hill-climb physics driving game about keeping a car moving across rough roads, slopes, bumps, ramps, and obstacle-heavy terrain. Many failed runs happen because the car reaches a hill crest too fast and lands at a poor angle, not because the player simply lacks speed. Each run follows a clear driving loop: move forward, collect coins, watch the fuel gauge, survive uneven road sections, and use upgrades to improve the next attempt. The fun comes from learning how the car reacts when it climbs, drops, catches air, or lands on an awkward slope. Road Killer rewards patience more than constant acceleration. A clean run with steady throttle control is usually better than a reckless run that ends after one oversized jump. The road constantly asks small questions: do you need more power before the hill, less throttle before the drop, a safer landing line, or a smarter upgrade choice? Coins, fuel, and upgrades give the game its progression rhythm. Coins support upgrades, fuel keeps the run alive, and upgrades help the car handle longer and rougher sections. The strongest beginner mindset is simple: control first, distance second, collection third. This Road Killer guide focuses on practical driving rhythm, hill-climb balance, fuel awareness, upgrade decisions, and common failure patterns that new players run into during early runs. How to Play Start a Road Killer run by watching the first stretch of road instead of flooring the throttle immediately. The opening terrain matters. A flat start gives you room to build momentum, while an early hill or quick bump requires tighter control from the first second. Use throttle control to move forward without throwing the car off balance. Full throttle helps before certain climbs, but holding it too long can launch the car over a hill crest and make the landing harder to recover. The goal is to keep enough speed to progress while maintaining the car’s center of gravity. The brake is useful for more than stopping. Use it to settle the car before a sharp downhill, reduce speed before a bump, or correct a landing that feels too fast. In hill-climb driving games, the brake often works like a balance tool, not just a slowdown button. Fuel management affects every run. Watch the fuel gauge during long climbs and heavy throttle sections, because aggressive driving burns through distance quickly. Plan for fuel pickups early rather than reacting at the last moment. Coins are worth collecting when they fit the driving line. A coin path across flat or stable ground is easy value. A coin placed near a steep drop, awkward ramp, or unstable landing needs a quick risk check. Crashing for one coin usually costs more progress than leaving it behind. Upgrades improve the car’s performance over time. Road Killer progression is strongest when upgrades support the problem you are actually facing: climbing power, vehicle control, grip, fuel support, or similar performance areas shown in the game. Upgrade names may vary by version, so focus on what each upgrade improves: climbing power, stability, grip, or fuel support. A good run follows this pattern: build speed before a hill, ease off near the crest, keep the car level while catching air, land with control, collect safe coins, watch fuel, then upgrade based on the reason the run ended. Road Section · Better Action · Mistake to Avoid Before a hill · Build momentum before the slope · Accelerating too late Hill crest · Ease off before the top · Flying over at full speed Downhill · Control angle and speed · Letting gravity take over Jump or ramp · Prepare for landing · Chasing distance only Coin route · Take safe pickups first · Crashing for one coin Low fuel · Plan early for fuel · Ignoring fuel until the car is nearly empty Beginner Strategy Guide The most important beginner habit in Road Killer is learning the car’s weight. Do not treat the first few runs as serious distance attempts. Use them to feel how quickly the car accelerates, how easily it tilts, and how it lands after catching air. Once you understand the car’s rhythm, every later run becomes easier to control. Avoid full throttle before the first hill crest. A fast launch can feel useful, but it often puts the car into the first slope at a bad angle. Start with steady acceleration, then increase power only when the road ahead needs it. Before a hill, build momentum early. Many new players press harder only after the car has already slowed down on the slope. That is too late. Enter the climb with enough speed, keep the car stable, and reduce throttle slightly before the top so the car does not fly over the crest nose-first. Hill crests are one of the easiest places to flip. The danger is not the climb itself; it is what happens after the car reaches the top. Too much throttle at the crest can launch the car into a blind landing, especially when the next section drops sharply. Ease off before the top and prepare for the road on the other side. Downhill sections require discipline. Gravity already gives the car speed, so extra throttle can turn a safe descent into a rollover. Let the car settle, keep the front from dipping too hard, and use the brake lightly when the car starts outrunning your ability to control it. When the car catches air, stop thinking about distance and start thinking about the landing. The safest landing is not always the longest jump. Try to keep the car level, then match the landing angle to the road below. A clean landing keeps the run alive; a dramatic jump with a bad landing ends progress quickly. Upgrade choices should match failure patterns. New players often buy power too early because a faster car feels stronger. That can make the game harder. More speed means bigger jumps, sharper landings, and less time to react. Early upgrades should support control before raw speed becomes the priority. A strong beginner upgrade path is to improve control and shock absorption first, then add Engine / Power once the car can handle harder road sections. Suspension upgrades help absorb bumps and rough landings. Tires or grip upgrades help the car stay connected to the road. Fuel Capacity becomes more useful when your runs are stable but end before you can push farther. If Your Run Ends Because... · Upgrade Priority The car cannot climb steep hills · Engine / Power The car flips after bumps or ramps · Suspension or control The car slides or loses contact with the road · Tires or traction The run ends while the driving line is still stable · Fuel Capacity The car becomes too fast to control · Stop over-investing in speed Coins should never control the entire run. Take coins along the natural route, but do not force the car into unstable terrain for a single pickup. A safe run that travels farther gives you more chances to collect later. A short run that ends from one greedy coin route teaches very little. Fuel often becomes the hidden limiter for beginners. A player may think the problem is distance or speed, but the real issue is burning too much fuel during long climbs or rough sections. Smooth driving helps fuel last longer because you waste less time fighting bad angles. After each failed attempt, review the cause before restarting. Road Killer becomes easier when you name the mistake clearly. Did you hit the hill too slowly? Did you stay on throttle over the crest? Did you land nose-first? Did you ignore fuel? Did you upgrade speed before control? Fix one issue at a time instead of repeating the same drive. The best beginner goal is not a perfect run. It is a cleaner run than the last one. Travel farther, flip less often, land more smoothly, and upgrade with a reason. Common Mistakes Full throttle before the first hill crest This makes the car harder to control before you understand the road. Start steady, then add speed when the terrain calls for it. Accelerating too late on a hill A car that reaches the slope without momentum can lose speed quickly. Build power before the climb begins instead of reacting halfway up. Flying over a hill crest at full speed The crest is where many runs fall apart. Ease off near the top so the car does not launch into the next section at a bad angle. Over-accelerating during a long downhill Downhill speed builds naturally. Extra throttle can push the car into a flip or make the next obstacle harder to avoid. Landing nose-first after a ramp Catching air is useful only when the landing is controlled. Keep the car level and avoid forcing extra distance at the cost of stability. Buying speed before the car can handle rough landings A faster car is not always a better car. Control, suspension, grip, and fuel support often matter more during early progression. Chasing coins near unstable terrain Coins near dangerous slopes, jumps, or broken rhythm should be treated carefully. A safe route is better than a risky pickup that ends the run. Forgetting fuel during long climbs Heavy throttle burns through a run quickly. Watch fuel before it becomes an emergency, especially during extended uphill sections. Repeating the same failed approach Crashing in the same place means the driving rhythm needs to change. Try less throttle at the crest, a slower downhill entry, or a different upgrade focus. FAQ What is Road Killer? Road Killer is a casual hill-climb physics driving game where you control a car across uneven roads, slopes, bumps, ramps, and obstacles. The main challenge is keeping the car balanced while driving farther and improving through upgrades. How do you play Road Killer? Drive forward with careful throttle control, use the brake to manage speed and balance, collect coins when the route is safe, watch the fuel gauge, and upgrade the car after runs to improve future attempts. Is Road Killer a hill-climb driving game? Yes. Road Killer fits hill-climb driving gameplay because it focuses on slopes, vehicle balance, fuel awareness, rough terrain, jumps, landings, and distance-based progression. How do beginners avoid flipping? Beginners should avoid full throttle over hill crests, slow down before steep downhill sections, keep the car level while catching air, and land smoothly instead of chasing maximum jump distance. What should I upgrade first? Start with upgrades that improve control, grip, suspension, or fuel stability. Engine / Power upgrades help with climbs, but too much speed too early can make the car harder to handle. Are coins, upgrades, and rewards real-world prizes? No. Coins, upgrades, rewards, vehicles, and distance scores are virtual gameplay elements only. Road Killer is a casual arcade driving game, not a real-money reward or gambling product. *Editorial note: This guide is based on visible gameplay mechanics and beginner-facing driving patterns. It focuses on practical control, upgrade decisions, and common mistakes rather than hidden formulas, fixed reward values, or guaranteed outcomes.
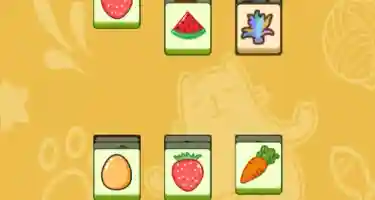 Synthetic Cat
Synthetic Cat About This Game Synthetic Cat is a casual stacked match-3 and card slot puzzle game. You click visible cards, send them into the bottom slot, and clear them by collecting three identical cards. The main risk is the 7-card slot. If the slot fills with too many unmatched patterns, the board can quickly become difficult to recover. Revocation, Luck, and Shuffle are support tools that help with mistakes, pressure, or unclear layouts, but they do not guarantee success. The game is mainly about reading the board before clicking. Strong play comes from choosing the right pattern order, keeping the slot clean, opening useful cards, and saving tools for moments when they solve a real problem. Editorial note: All cats, icons, tools, rewards, and patterns mentioned in this guide refer only to in-game puzzle elements. This guide is based on the visible card-slot rules, tool labels, and beginner decision patterns shown during gameplay. Tool costs, button labels, or reward prompts may change if the game is updated. How to Play When a level begins, scan the visible cards before making your first move. Look for patterns that already appear more than once, such as cats, tennis balls, cat paws, or chicken legs. Clicking a card moves it into the bottom slot. When the slot contains three cards with the same pattern, those three cards clear automatically. For example, if the slot already has two cat cards and a third cat card is visible, clicking the cat is usually the safest move because it clears space immediately. The bottom slot can hold up to seven cards. If the slot reaches seven cards and no useful match can be made, the challenge fails. This makes slot control the most important part of the game. You are not just matching cards; you are protecting limited space. Tool · Cost · Best Use Revocation · 10 tools · Undo the previous move after a misclick or wrong card choice Luck · 20 tools · Move out three cards when the slot is close to full but still recoverable Shuffle · 20 tools · Rearrange the current elements when no clear route is visible Use Revocation only when the last move caused a clear problem. Use Luck when the slot is under real pressure, not just slightly crowded. Use Shuffle when the visible layout is too blocked or confusing to plan a safe route. Beginner Strategy Guide The best beginner strategy in Synthetic Cat is to follow a simple priority order: 1. Complete an immediate three-card clear whenever possible. 2. Build a two-card setup only when the third card looks reachable. 3. Avoid adding a fourth or fifth pattern type into the slot. 4. Save Revocation, Luck, and Shuffle for mistakes, heavy slot pressure, or layouts with no clear route. Do not click just because a card is available. In a card slot puzzle, every card you add takes space. Before clicking, ask whether the move clears a set, builds a useful pair, or opens access to better cards. Layer analysis is also important. In stacked match-3 gameplay, some cards may sit above deeper groups. If a card opens access to several blocked cards, it may be more valuable than a card sitting alone at the edge. Try to uncover dense middle areas when they lead to useful patterns, but do not overload the slot while doing it. Edge cards can become a visual trap. A single exposed edge card may look easy to take, but if it does not match anything in the slot, it may only add pressure. In many stacked puzzles, shallow edge cards are better saved for emergencies, while deeper central stacks can reveal more options. Core rule: Clear useful matches first, open deeper layers carefully, and save single unmatched cards for when they actually support your next move. Slot State · Risk Level · Best Decision 0–3 cards · Low · Build useful pairs and reveal safe cards 4–5 cards · Medium · Keep only two or three active pattern types 6 cards · High · Only click a card that clears or directly prepares a clear 7 cards · Failure risk · Use tools only if they solve the immediate blockage Example Move Sequence Example situation: • Slot: Cat x2, Tennis Ball x1, Paw x1 • Visible cards: Cat, Chicken Leg, Tennis Ball • Best move: Click Cat first • Reason: Cat completes a three-card clear immediately, reduces slot pressure, and leaves more room for the next setup. • Avoid: Clicking Chicken Leg first, because it adds a new pattern and makes the slot harder to control. This example shows the basic logic of the game. The safest move is usually the one that clears space now or prepares a clear with low risk. Adding a new pattern should only happen when it helps your next match plan. Example: When the Slot Has Six Cards Example situation: • Slot: Cat x1, Tennis Ball x2, Paw x1, Chicken Leg x1, Fish x1 • Visible cards: Chicken Leg, Cat, Tennis Ball • Best move: Click Tennis Ball if it completes a three-card clear. • Avoid: Clicking a new pattern that does not match anything in the slot. • Reason: At six cards, one unrelated click can fill the slot and end the attempt. This is the key decision point before a full-slot failure. When the slot has six cards, your next click should either clear three cards immediately or directly prepare a clear that you can finish safely. If the move only adds another unmatched icon, it is usually too risky. Common Mistakes Mistake: Clicking without scanning the board. Fix: Pause for a moment and look for repeated patterns before choosing your first card. Mistake: Adding too many different patterns. Fix: Stop adding new icons and focus on completing one existing pair. Mistake: Ignoring an immediate three-card clear. Fix: If two matching cards are already in the slot and the third is visible, clear that set before starting another pattern. Mistake: Taking edge cards just because they are easy to click. Fix: Check whether the edge card helps your current slot. If it does not match anything, it may be safer to leave it. Mistake: Digging into deep layers without slot space. Fix: Clear at least one set before opening more stacked cards, especially when the slot already has four or more cards. Mistake: Clicking an unmatched card when the slot has six cards. Fix: At six cards, only click if the move clears a set or directly prepares a clear. Mistake: Using Luck or Shuffle too early. Fix: Try normal matching first when the board still has a clear route. Save tools for real pressure. Mistake: Forgetting that Revocation only fixes the previous move. Fix: Use it immediately after a bad click. Do not wait until several more moves have made the slot worse. Mistake: Treating tools as guaranteed clears. Fix: Use Revocation, Luck, and Shuffle as support tools, not as replacements for careful slot management. FAQ What is Synthetic Cat? Synthetic Cat is a casual stacked match-3 and card slot puzzle game. Players click visible cards, move them into a bottom slot, and clear cards by matching three identical patterns. How do you play Synthetic Cat? Scan the visible cards, click in a planned order, and create three-card matches while protecting the 7-card slot. The safest moves are the ones that clear space or prepare a clear without adding too many new patterns. What happens when the card slot reaches 7 cards? If the slot reaches seven cards and no useful clear is available, the challenge fails. This is why slot management matters more than fast clicking. Why does Synthetic Cat suddenly feel harder? Later boards may feel harder because stacked layouts can hide useful cards under other patterns. When that happens, shift from fast matching to layer analysis and focus on opening deeper groups without filling the slot. Are reward prompts required in Synthetic Cat? If your version shows reward prompts, treat them as optional support. They may offer extra tools or recovery options, but they are not required for understanding the core puzzle. Careful slot management is still the main strategy.
 Jigsaw puzzle
Jigsaw Puzzle About This Game Jigsaw Puzzle is a casual shape-fitting puzzle game where you use triangle-based blocks to fill a blank outline. Instead of matching picture fragments like a traditional photo jigsaw, the challenge is about focusing on corners, edges, and how each piece changes the remaining space. Each level gives you a fixed set of pieces below the outline. Your task is to drag them into the empty shape until the entire area is filled. A strong placement should align with the outline border, avoid overlap, and avoid leaving a single-triangle gap that no remaining piece can cover. The game is simple to start, but it rewards careful planning. If you place pieces too quickly, the remaining space may become awkward or impossible to finish. The best approach is to study the outline first, identify the most restrictive areas, and build the solution step by step. How to Play 1. Look at the full outline before placing any piece. 2. Check the outline corners and long edges before moving the first piece. 3. Drag a triangle-based piece from the bottom area into the outline. 4. Place each piece so it stays inside the border and does not overlap other pieces. 5. Continue placing pieces until the full outline is filled. 6. Use every available piece to complete the level. 7. If your layout no longer works, use Reset to clear the board and try a better arrangement. 8. If you are stuck, Tips can help, but it costs 100 in-game diamonds. Diamonds are virtual game resources shown inside the game. Beginner Strategy Guide Start With the Most Restrictive Corners When to use it: At the beginning of every level. Why it works: Sharp corners and narrow angles usually accept fewer pieces than open center areas. What it prevents: It helps prevent awkward leftover spaces that no remaining piece can fill. Look for pointed corners, tight edges, and unusual outline angles first. If a piece has a matching sharp corner or long slanted side, test it there before filling the middle. Corners act like anchors because they limit how many shapes can fit cleanly. Match Long Edges Before Filling the Center When to use it: After you identify the obvious corner pieces. Why it works: Long border sections are easier to judge while the board is still open. What it prevents: It stops you from building a center layout that blocks the correct edge pieces later. A piece with a long straight side often belongs near the outside border. If you save it too long, the remaining outline may become too fragmented, and the piece may no longer have a clean place to fit. Test Large or Awkward Pieces Early When to use it: When one piece is much larger, wider, or harder to place than the others. Why it works: Large pieces need more space and fewer restrictions. What it prevents: It reduces the chance of ending with a big piece that cannot fit anywhere. Do not always save large pieces for last. If a block has an unusual shape, test it near the outline while there is still room to adjust. Once the center is crowded, large pieces become much harder to place. Use Small Pieces to Finish, Not to Start When to use it: After the main border and large spaces are mostly solved. Why it works: Small pieces are flexible and can close gaps more easily. What it prevents: It avoids wasting small pieces in open areas where larger pieces should go. Small triangle groups are useful near the end because they can fill tight spaces. If you use them too early, you may leave behind odd spaces that only those small pieces could have solved. Reset When the Remaining Space Looks Wrong When to use it: When the leftover area no longer matches any unused piece. Why it works: Reset is faster than forcing a layout that cannot be completed. What it prevents: It stops you from spending too long on a broken arrangement. A good sign that you should restart is a tiny triangle gap, a thin strip, or a leftover shape that clearly does not match any piece below. When that happens, the problem is usually an earlier placement, not the final piece. Best Solving Order 1. Find the sharpest corners first. 2. Match long-edge pieces to the outer border. 3. Test large or awkward blocks before the center becomes too fragmented. 4. Use smaller pieces to close remaining spaces. 5. Reset when the leftover space no longer matches any unused piece. This order keeps the most restrictive decisions early and leaves the flexible pieces for the end. Ready to test your spatial skills? Scroll up to the game board and start placing your first corner piece! Common Mistakes 1. Treating It Like a Photo Jigsaw Jigsaw Puzzle is not mainly about matching images. The important clues are shape, border alignment, angles, and how the remaining pieces can fill the outline. 2. Dragging Before Reading the Outline Placing the first piece too quickly can create problems later. Check the corners, long edges, and narrow spaces before making your first move. 3. Starting From the Center Too Early The center gives you more freedom, but that freedom can be misleading. If you fill the middle first, you may block pieces that needed to connect with the outer border. 4. Leaving Awkward Tiny Gaps A single-triangle gap or thin leftover space can break the whole layout. Before placing a piece, look at the shape it leaves behind, not just the space it covers. 5. Saving Large Pieces Too Late Large or unusual pieces need open space. If you wait too long, the board may become too crowded for them to fit naturally. 6. Using Tips Before Testing Obvious Edge Pieces Tips are more useful after you have checked the clear corners and border pieces yourself. If several obvious edge matches remain untested, try those before spending a hint. FAQ Is Jigsaw Puzzle a traditional photo jigsaw game? No. This game focuses on fitting triangle-based pieces into a blank outline. The challenge is shape placement, not rebuilding a picture. What should I place first in Jigsaw Puzzle? Start with the sharpest corners or the pieces that clearly match the outer border. These areas are more restrictive than the center, so solving them early gives you a stronger layout. When should I use Reset? Use Reset when the remaining empty space no longer matches any unused piece. This usually means an earlier piece is in the wrong position, so restarting the layout is faster than forcing the final moves. When is Tips worth using? Use Tips only after you have checked the corners, long edges, and large pieces carefully. It works better as a final nudge than as your first solving method. Is Jigsaw Puzzle a gambling game? No. Jigsaw Puzzle is a shape-fitting puzzle game based on piece placement and outline completion. It does not require betting, wagering, or real-money gambling decisions. Editorial Note This triangle block strategy guide was compiled for players using the visible gameplay mechanics of Jigsaw Puzzle, including outline filling, triangle-based pieces, Reset, Tips, and the 100-diamond Tip system. We regularly review our guides for clarity and accuracy, but this is an independent gameplay resource and not an official developer manual.
- Escape stars
Escape Stars Core goal: Guide your rocket from asteroid to asteroid and keep climbing past the dashed line. Main challenge: Moving asteroids can shift before your rocket reaches them. Best for: Beginners who miss moving asteroids, overshoot close jumps, or rush high-score attempts. Beginner rule: Study the next asteroid before committing to the shot. About This Game Escape Stars is a space-themed casual jumping game where you guide a small rocket upward by landing on one asteroid after another. Each successful landing keeps the run going, while a missed asteroid sends the rocket falling and ends the attempt. The game looks simple at first: choose a launch angle, send the rocket upward, and try to reach the next landing point. The challenge comes from movement. Some asteroids shift across the screen, some show motion trails, and far targets require more patience than quick reaction. The main goal is to cross the dashed line and keep climbing for a higher score. A better run depends on calm timing, controlled launch strength, and knowing when not to click too soon. How to Play 1. Look at the next asteroid and notice whether it is still, moving sideways, or placed at a difficult angle. 2. Adjust the rocket’s launch angle toward a safe landing path. 3. Click to send the rocket forward. 4. Try to settle the rocket onto the next asteroid. 5. Keep moving upward and cross the dashed line to increase your score. 6. If the rocket misses the asteroid, the run ends and you need to start again. Quick Decision Rules • If the asteroid is close, reduce launch strength and focus on control. • If the asteroid is moving sideways, lead the shot in the direction it is traveling. • If the asteroid is far away, wait briefly and study its motion trail. • If your score is high, slow your rhythm instead of clicking faster. Best beginner habit: Before every far jump, wait long enough to see whether the asteroid is moving into your route or away from it. Beginner Strategy Guide Aim Ahead of Moving Asteroids A moving asteroid is rarely safest at the exact spot where you first see it. If it is sliding left or right, aim toward where it will be when the rocket arrives. Most beginner misses happen when the next asteroid is either moving sideways or close enough to overshoot. For a side-moving asteroid, watch the motion trail and give your launch angle a small lead in the same direction. You are not trying to hit the asteroid’s past position; you are trying to meet its future path. For example, if an asteroid is drifting to the right above your rocket, aiming directly at its center may send you behind it. A slight right-side lead gives the rocket a better chance to meet the asteroid as it moves. How to Read Different Asteroid Positions Close asteroid: Treat a close jump as a control test. Use a softer launch and avoid sending the rocket past the target. A nearby asteroid can be easy to miss if you overreact. Far asteroid: Watch at least part of its movement before firing. Far asteroids usually punish rushed timing more than weak aim, so waiting briefly can be part of the strategy. Side-moving asteroid: Follow the movement direction and aim ahead of the path. Motion trails are useful here because they help you judge whether the asteroid is crossing into your route or moving away from it. Diagonal asteroid: Set the launch angle first, then think about strength. A diagonal landing often fails when the angle is slightly wrong, even if the power feels close. Control Launch Power Escape Stars is not only about pointing the rocket in the right direction. Launch strength matters because close and far asteroids need different decisions. For a close jump, a strong launch can carry the rocket over the asteroid before it has a chance to settle. For a far asteroid, a weak shot may drop too early, while an overpowered shot can miss the landing zone completely. Try to match the launch strength to the distance instead of using the same force every time. A common beginner mistake is treating every upward asteroid like a long-distance target. If the next asteroid is only slightly above you, accuracy is more important than power. Use Gravity Pull Carefully If the game shows a slight pull or curve near an asteroid, treat it as a small correction effect, not as a guaranteed rescue mechanic. Aiming near the edge of an asteroid can sometimes help when your approach angle is tight, but it should only support an already reasonable shot. If the rocket is too far away from the asteroid, a small curve will not save the jump. For example, approaching the lower edge of an asteroid may still work if your angle is close. Flying past the asteroid at full speed usually will not. High Score Rhythm High-score attempts often fail because the player starts rushing. After several clean jumps, it is easy to click too quickly and stop checking the next moving asteroid. Keep a steady rhythm as the rocket climbs. Look at the next position, judge the launch angle, then commit. The dashed line may encourage faster play, but safer scoring usually comes from controlled launch choices rather than rushed asteroid launches. Common Mistakes Mistake: Aiming at the Current Position Fix: Lead the shot when the asteroid is moving. Aim toward the place where the asteroid is likely to be when the rocket reaches it. Mistake: Launching Too Early or Too Late Fix: Use the asteroid’s movement as your timing cue. Fire when the target is moving into a safer path, not when it is already drifting away. Mistake: Using Too Much Power on Close Jumps Fix: Treat close asteroids as precision landings. A smaller, cleaner launch is often safer than a forceful shot. Mistake: Ignoring Motion Trails Fix: Use motion trails to read direction and speed. They can help you decide whether to lead the shot, wait, or adjust the launch angle. Mistake: Depending Too Much on Gravity Correction Fix: Start with a sensible angle first. Any visible pull near an asteroid should be treated as a minor helper, not the main plan. FAQ Is it better to wait before launching in Escape Stars? Yes, especially when the next asteroid is far away or moving sideways. A short pause can reveal whether the asteroid is entering a safer path or moving out of reach. How do motion trails help in Escape Stars? Motion trails show the asteroid’s recent direction, making it easier to judge whether to lead the shot or wait. Should I aim at the center or edge of an asteroid? Aim for the center when the path is clean and direct. Aim closer to the edge only when the approach angle is tight and you need a small correction window. What is the safest way to handle far asteroids? Wait until the asteroid path is readable, then choose a launch angle that gives the rocket room to reach it without overshooting. Why do high-score runs usually fail? They often fail when the player’s rhythm speeds up and launches become rushed. Waiting for a readable asteroid path is safer than launching immediately. Editorial Note This guide focuses on visible gameplay behavior in Escape Stars. Game behavior may vary by version or platform, and this article does not claim hidden scoring formulas or guaranteed results.
- New Pixel Cat
New Pixel Cat About This Game New Pixel Cat is a casual pixel cat flying game built around tap-to-fly movement, obstacle dodging, and quick height control. You tap the screen to make the cat rise, then stop tapping to let the cat fall naturally. The challenge is to guide the cat through the open gaps between obstacles without touching them, dropping below the screen, or flying above the top of the screen. Each successful pass through an obstacle group adds to your in-game score. You can also collect virtual coins along the way for extra points, but coin collection works best when it does not pull the cat away from the next gap. The main skill in New Pixel Cat is learning when to tap, when to pause, and how early to adjust before the next obstacle arrives. The game also includes two one-use virtual power-ups. Shield can block one obstacle collision, making it especially useful for beginners or dense obstacle sections. Magnet can attract nearby in-game coins or score items, which helps once you already understand the basic flying rhythm. These power-ups improve your margin for error, but they do not guarantee a high score or replace careful control. New Pixel Cat is best approached as a rhythm-based arcade challenge. Short taps, early gap reading, and simple route decisions matter more than speed. How to Play Tap anywhere on the screen to begin controlling the cat. Each tap lifts the cat upward for a short moment. When you stop tapping, the cat falls. Your goal is to combine these two movements so the cat stays at a useful height while moving toward the next obstacle gap. Before entering each gap, look at where the opening is. If the gap is higher, give the cat a light tap before it arrives, then pause briefly so it does not overshoot. If the gap is lower, stop tapping for a moment and let the cat drop into position before making the next small correction. Try to enter the opening near the center rather than scraping the top or bottom edge. You earn score by passing through obstacle groups. If coins appear close to your path, collect them when it is safe. If a coin is outside the center route and would force a risky movement, keep the cat lined up with the gap instead. Shield can protect the cat from one obstacle hit. Use it before a section that looks tight or uncertain. Magnet helps pull nearby coins or score items toward the cat, so it is better used when you can already fly steadily and want to reduce unnecessary route changes. Ready to find your rhythm? Scroll up to the game screen and start your first flight! Beginner Strategy Guide Learn the basic rhythm first Do not start by tapping as fast as possible. In New Pixel Cat, rapid taps often send the cat too high, while long pauses make it fall too low. A better beginner pattern is: short tap, short pause, check the height, then tap again only when needed. The goal is not to keep the cat perfectly still. The goal is to keep the cat moving within a manageable height range so each obstacle gap is easier to enter. Look ahead before entering each gap Avoid staring only at the cat. Your eyes should move slightly ahead toward the next obstacle opening. When you see the gap early, you can make a small correction before the cat reaches it. Use this simple rule: • If the next gap is higher, tap lightly before the obstacle, then pause before entering. • If the next gap is lower, stop tapping briefly and let the cat fall into position. • If a coin sits outside the center route, skip it and prepare for the obstacle. When two gaps appear at different heights in a row, avoid overcorrecting back to the middle too quickly. Make the first gap safely, then adjust early for the second gap instead of tapping hard at the last moment. Small early adjustments are safer than large last-second movements. Keep the cat near the center line The center of the gap gives you the most room for error. Entering too close to the top edge makes one extra tap dangerous. Entering too close to the bottom edge makes one long pause risky. When you are learning New Pixel Cat, treat the middle of each opening as your main target. Coins and extra score should come after you can pass through obstacles consistently. Beginner Priority Table Priority · What to Focus On · Why It Matters 1 · Keep the cat’s height stable · Prevents sudden climbs, drops, and panic corrections 2 · Pass through the center of each gap · Gives more room for small mistakes 3 · Collect coins only when safe · Adds score without forcing risky movement 4 · Use power-ups at the right time · Expands your margin for error during harder moments Use Shield before risky sections Shield is the better beginner power-up because it can block one obstacle collision. Use it when the next section looks crowded, when the gap feels hard to judge, or when you are still learning the tapping rhythm. Do not wait until the cat is already hitting an obstacle. Shield is most useful when prepared before a risky approach. Use Magnet only after rhythm is stable Magnet is helpful when you already know how to keep the cat moving through gaps. It reduces the need to drift away from the main route for nearby coins or score items. Magnet should not make you fly into unsafe spaces. Let it support your coin collection while your main focus stays on the next obstacle opening. Review each failed run After a run ends, think about the exact mistake. Did you tap too quickly and climb too high? Did you pause too long and drop below the screen? Did you react late because you were watching a coin instead of the next gap? Improving in New Pixel Cat usually comes from fixing one small habit at a time. Common Mistakes • Panic tapping: Rapid taps can push the cat above the safe height. Use short taps with small pauses instead. • Waiting too long: Long pauses can make the cat drop below the screen. Correct the height before the fall becomes too steep. • Watching only the cat: Look ahead to the next gap instead of staring at your character. • Chasing coins at bad angles: Coins are useful only when they fit your route. Magnet can help, but it does not make risky coin paths safe. • Adjusting too late: Last-second height changes often cause overcorrection. Start moving toward the next opening as soon as you see it. • Using Shield too late: Shield works best when prepared before a difficult obstacle section, not after the mistake has already happened. • Expecting one rhythm to work forever: Some gaps require a higher or lower approach. Keep your tapping steady, but adjust based on the next obstacle. FAQ Which power-up is better for beginners? Shield is usually better for beginners because it can block one obstacle collision. It gives new players more room to learn the tap timing and obstacle spacing. When should I use Shield in New Pixel Cat? Use Shield before a section with tight gaps, dense obstacles, or a route you are not confident about. It is a one-use protection tool, so save it for a moment where a mistake is more likely. When should I use Magnet in New Pixel Cat? Use Magnet after you can already keep the cat flying steadily. It is best for attracting nearby virtual coins or score items without forcing the cat away from the main obstacle route. Should I chase every coin? No. Coins can add extra in-game score, but they are optional. If a coin pulls the cat away from the center of the next gap, skip it and focus on passing the obstacle. What ends a run in New Pixel Cat? A run ends if the cat hits an obstacle, falls below the screen, or flies above the top of the screen. If Shield is active, it can protect against one obstacle collision. Is New Pixel Cat a gambling game? No. New Pixel Cat is a casual tap-to-fly arcade game. Its coins, score, Magnet, Shield, and rewards are virtual in-game mechanics only. Editorial Note This New Pixel Cat guide is based on the visible gameplay mechanics described in the game, including tap-to-fly movement, obstacle gaps, virtual coins, Magnet, and Shield. It is written as an independent gameplay resource to help players understand the controls, timing decisions, and power-up use.
- Happy tourist
Happy Tourist About This Game Happy Tourist is a casual planet rolling and star collecting arcade game where you guide a character around a rotating planet surface and collect stars before the missed-star limit catches up with you. You can miss up to nine stars, but the 10th missed star ends the run. Tapping the screen uses a limited flight attempt, letting your character briefly lift off the surface to reach higher or farther stars. Happy Tourist is more than a simple tap-and-collect game. It tests rhythm, impulse control, and risk judgment. The strongest runs usually come from collecting safe surface stars consistently, saving flight for truly unreachable targets, and knowing when a far star is not worth breaking your route. The table below summarizes the rules that matter most for beginners. Gameplay Element · What It Means · Smart Beginner Habit Surface stars · Stars close to the planet route · Collect them first to build a stable run High stars · Stars above your normal path · Use flight only when timing cannot solve it Far stars · Stars that pull you away from the route · Chase only if you can recover quickly Flight attempts · Limited tap-to-fly resource · Save them for pressure moments Missed counter · Tracks stars you failed to collect · Play defensively when it gets high Ball skins · Visual style changes from touching other balls during flight · Treat them as optional bonuses In practice, Happy Tourist rewards target selection more than fast tapping. The game favors players who stay calm after a miss, protect the easy collectibles, and avoid wasting flight on stars that were still reachable through normal movement. How to Play • Watch the next star position before reacting. • Roll around the planet surface and collect nearby stars first. • Tap to fly only when a star is clearly too high or too far to reach from the surface. • If flight attempts run out, keep playing more conservatively and focus on reachable stars. • Touching other balls during flight may change your ball’s visual style, but it should not distract from star collection. • Background scenery is not part of the decision-making; your real focus is star position, flight timing, and missed-star pressure. If a star is only slightly above your route, do not tap instantly. Wait a moment and see whether the planet movement naturally brings your character close enough. Saving one flight attempt early can matter much more later when several difficult stars appear close together. Beginner Strategy Guide Quick Tips • Collect nearby surface stars first. • Save flight for stars that are truly out of reach. • Treat 7–8 missed stars as the danger zone. • Return to the planet surface quickly after flying. • Do not chase skin changes at the cost of important stars. The first skill to learn in Happy Tourist is target priority. Surface stars are your safest pickups, so they should anchor your route. If you repeatedly ignore easy stars while chasing dramatic high targets, your run becomes unstable even if some flights look impressive. A useful beginner benchmark is reaching the early 50-score range if your version shows a score counter. If your version tracks collected stars instead, treat the first 50 collected stars as a basic consistency goal. To reach that stage more consistently, avoid using flight in the opening stretch unless the star is clearly unreachable. Early flight mistakes usually do not feel serious right away, but they reduce your options once the pattern becomes harder. When you miss several stars in a row, the biggest danger is panic tapping. A practical recovery method is to deliberately skip one risky high star and force your route back to the planet surface. This feels conservative, but it often prevents a bad streak from turning into a failed run. Use flight when it solves one of these problems: • A star is clearly above the surface path. • A distant target would push the missed counter into a danger zone. • Two difficult pickups appear close enough that one controlled flight can help stabilize the route. • You can fly out, collect the star, and return without losing the next easy pickup. Do not use flight just because a star looks tempting. If chasing one far target makes you miss two simple pickups afterward, the trade is bad. High-level play is not about collecting the most difficult star on the screen; it is about choosing the star that keeps the run alive. When the missed counter reaches 7 or 8, change your style. Stop taking wide flight paths unless they are necessary. Focus on safe pickups, short corrections, and clean recovery after every tap. At that stage, one calm surface route is better than one flashy flight that leaves you out of position. Skin changes are optional visual bonuses. If a skin change happens during play, treat it as visual only. A clearer-looking skin may be easier to track, but no gameplay or scoring advantage should be assumed. Common Mistakes • Flying too early: Save flight for stars that normal movement cannot reach. • Ignoring safe pickups: Easy surface stars are the foundation of a longer run. • Panic tapping after a miss: Slow your decision-making instead of spending flight immediately. • Overextending in the air: Collect the target, then return to the planet surface quickly. • Forgetting to recover after flight: A successful flight still becomes risky if you land far from the next easy star. • Playing too aggressively in the danger zone: When the missed counter is high, choose safe targets first. • Using the same rhythm after flight runs out: Without flight, you need a more conservative route. • Chasing visual skin changes: A new look is not worth losing important stars. FAQ When should you use flight attempts in Happy Tourist? Use flight when a star is clearly too high or too far for surface movement. If the planet route can still reach it, save the flight attempt. What happens when you miss 10 stars? The run ends when the missed counter reaches 10 stars. You can miss up to nine, but the 10th missed star triggers failure. Does running out of flight attempts end the game? No. Running out of flight does not end the run by itself. It only limits your ability to reach high or distant stars. Is there a confirmed way to reduce missed stars? No confirmed reset or reduction method is described in the visible rules. Beginners should treat each missed star as permanent during the run. Is there a pattern to where the stars spawn? No fixed spawn formula is confirmed. The safer approach is to read each new star position quickly instead of trying to memorize a pattern. How can beginners break the first 50-point range? Collect surface stars first, avoid early flight waste, recover calmly after misses, and use flight only for targets that would otherwise be lost. Editorial Note This guide is based on visible gameplay rules and practical beginner decisions. It does not claim hidden formulas, official scoring data, fixed spawn patterns, or guaranteed results.
- Marksman legend
Marksman Legend About This Game Marksman Legend is a casual archery aiming and target shooting challenge game built around drag-to-aim controls, limited arrows, and simple physics-based shot adjustment. Your goal is to hit the target and clear the level before your arrows run out. The game is easy to understand, but each shot still requires judgment. A close target may only need a short, controlled pull, while a far target usually needs more power and a slightly higher angle because the arrow can drop during flight. The red center of the target gives the highest score, but smart arrow use matters just as much as accuracy. In the current example layout, the upper-right corner shows 5 arrows. That small counter matters because every missed shot reduces your room for correction. Classic Mode is the basic progression mode for learning distance and power control. If Limited Mode appears in your version, treat it as a stricter aiming challenge where quick, clean decisions matter. Obstacle Mode adds blockers between the bow and the target, making the shot more about reading the path before release. How to Play Start each level by checking the target position. Look at the distance, the height of the target, the remaining arrow count, and whether the path is clear. Press and hold the screen, then drag backward to aim. Pulling farther back usually sends the arrow farther and faster. Move your aim to adjust the angle, then release your finger to shoot. For close targets, avoid using maximum power unless the layout clearly requires it. A lighter pull gives you more control and helps prevent overshooting. For distant targets, use more power and lift the angle slightly so the arrow can travel far enough before dropping too low. In Obstacle Mode, look at where the blocker sits before aiming. A blocker near the middle of the path may require a higher arc. A blocker close to the target may require a more precise landing angle. A blocked direct line usually means you should plan the path first instead of firing immediately. Quick start routine: • Check the target distance. • Use controlled power for close targets. • Add power and a slightly higher angle for far targets. • Watch the arrow counter before taking risky shots. • In blocked layouts, plan the arrow path before release. Beginner Strategy Guide The best beginner habit is to treat every shot as feedback. Do not simply repeat the same pull after a miss. Watch where the arrow lands, then adjust one thing at a time. If the arrow lands low, raise the angle slightly or add a little more power. If it flies over the target, lower the angle or reduce pull strength. If it falls short, increase power first before making a major angle change. Small corrections are usually more reliable than dramatic changes. A practical three-arrow plan can help you stay calm: • First arrow: Read the distance and observe the arrow drop. • Middle arrows: Make small corrections to angle and pull strength. • Last arrow: Choose the safest target hit instead of forcing a risky precision shot. Classic Mode teaches distance control, Limited Mode tests decision speed, and Obstacle Mode tests path reading. Use that difference to guide your play: build consistency first, then work on tighter shots and blocked paths. Situation · Better Adjustment The arrow lands low. · Raise the angle slightly or add a little more power. The arrow falls short. · Increase pull strength first, then adjust angle if needed. The arrow flies over the target. · Lower the angle or reduce power. The target is close. · Avoid full power and use a controlled pull. A blocker covers the direct path. · Look for a higher arc or a safer side angle before releasing. Once you can hit the target consistently, aiming closer to the red center becomes a scoring goal rather than a risky guess. Common Mistakes • Using full power on every shot: Stronger shots are not always more accurate. Close targets usually need a lighter pull. • Shooting before checking distance: A nearby target and a far target need different aiming habits. • Aiming too flat at long range: Far targets often need a slightly raised angle to account for arrow drop. • Changing too much after one miss: If the arrow was close, make a small correction instead of rebuilding the whole shot. • Ignoring blockers in Obstacle Mode: A visible target does not always mean the path is open. Read the obstacle position first. • Forgetting the arrow limit: Every level gives you limited attempts, so a careless early miss can make the final shot much harder. • Rushing in Limited Mode: Fast decisions help, but a rushed miss usually costs more than taking a brief moment to line up the shot. FAQ What is Marksman Legend? Marksman Legend is a casual bow-and-arrow aiming game where you drag to aim, release to shoot, and try to hit targets with a limited number of arrows. Why do my arrows fall short on distant targets? Your shot may need more pull strength, a higher angle, or both. Start by adding a little more power, then adjust the angle if the arrow still lands low. How should I adjust after missing a shot? Look at where the arrow landed. If it was low, raise the angle slightly. If it went too far, reduce power or lower the angle. If it was close, make a small correction rather than a large one. What is the best practice order for beginners? Start with close targets and controlled pulls, then practice mid-range angle adjustment, and finally work on long-distance shots or blocked paths. This order helps you build consistency before chasing red-center accuracy. How do obstacles change the way you aim? Obstacles make the shot more about path reading. Instead of aiming directly at the target, look for a clear arc or side angle that avoids the blocker. What is the most important beginner tip? Do not treat power as the answer to every shot. Distance, angle, and remaining arrows all matter, so controlled adjustments are usually better than pulling as hard as possible. Note: Marksman Legend uses virtual bow, arrow, target, score, mode, and reward systems only. This guide is about casual gameplay, not real-world archery instruction, gambling, betting, or real-money rewards.
- General Kitty
General Kitty Quick Strategy Summary General Kitty is a cat-themed tower defense game about route control, smart placement, and wave pressure. Beginners should build one strong chokepoint first, then support it with Backline DPS cats. Coins, upgrades, traps, and Lightning matter most when the enemy wave is actually putting your castle under pressure. About This Game General Kitty is a casual side-scrolling cat tower defense and castle defense strategy game. Your job is to protect the castle by placing cat units along the enemy route and stopping each wave before it breaks through your defense. The game starts on a forest-style map, but the pressure ramps up as later waves become harder to control. Good play is not about placing every cat as soon as you can afford it. It is about reading the route, finding the best defensive section, and making your cats work together around the busiest part of the path. The main roster has clear roles: Samurai cat: your main Frontline Tank for holding the first serious chokepoint. Ninja cat: a flexible Blocker for early pressure, quick lane support, or catching leaks. Machine-gun cat: a steady Backline DPS cat that works best behind a Blocker. Cannon cat: a heavier Backline DPS cat for crowded waves or overloaded route sections. Mines and traps: support items for narrow paths, turns, and backup defense areas. Lightning: a pressure-control skill for dangerous grouped waves. Coin / buff skill: a support option for rebuilding, upgrading, or strengthening a key defense point. General Kitty feels simple at first, but the real strategy comes from lane control. A well-placed Samurai cat and Machine-gun cat can do more than a messy row of random units if they cover the right part of the route. Mastering the Early Game Start every level by looking at the route before spending coins. Do not panic-place cats at the entrance just because enemies are moving. The strongest defense usually begins where enemies stay inside your attack range the longest. Use this simple early-game plan: 1. Find the first busy route section. Look for the first turn, narrow path, or chokepoint where enemies slow down or group together. 2. Place one Frontline Tank or Blocker there. Use a Samurai cat if you need a stronger front line. Use a Ninja cat if you need cheaper early support or a quick fix for a weak lane. 3. Add one Backline DPS cat behind it. A Machine-gun cat gives steady damage. A Cannon cat is better when enemies arrive in tighter groups. 4. Upgrade the core defense. Once your first defensive section is working, upgrade the unit that helps most in that area. Do not spread coins across too many weak cats too early. 5. Keep a small coin reserve. Save enough for one emergency Ninja cat, upgrade, trap, or backup unit. A small reserve can stop one leak from becoming a lost run. 6. Build a backup defense near the castle. After your main chokepoint becomes stable, place one backup defense closer to the castle gate. This catches fast enemies and gives you a second chance if the first line breaks. 7. Use skills when they change the outcome. Lightning is strongest when enemies group together or when your front line is close to failing. A coin or buff skill is most useful when it helps you afford a key upgrade, rebuild pressure, or strengthen a weak point before the next wave. Mines and traps should go where enemies must walk. The best spots are before chokepoints, around turns, or just ahead of your backup defense. If enemies rarely pass a tile, that tile is usually a poor trap location. If your castle keeps taking hits, rebuild your defense from the route instead of adding random units. Ask yourself: Is the first Blocker placed at the real busy route section? Is your Backline DPS covering the same area? Is there a backup defense near the castle? Are coins being saved for one emergency move? Are upgrades going into the units that actually control the busiest lane? Most early failures happen because the defense is spread too thin. Once your main chokepoint becomes reliable, the whole level feels less chaotic. Common Mistakes Placing every unit near the enemy entrance: build a backup defense closer to the castle. Using only Backline DPS cats: add a Samurai cat or Ninja cat to hold enemies in range. Spending coins too quickly: keep enough for one emergency placement, upgrade, or trap. Using Lightning on small waves: save it for grouped enemies or near-collapse moments. Upgrading too many weak units: improve one or two core defense points first. Placing mines or traps on quiet tiles: use turns, narrow paths, and unavoidable route sections. Repeating the same layout on every map: recheck the route whenever stage pressure changes. Ignoring the first leak: treat it as a warning and build backup defense before the next wave. \Editorial Note: This strategy guide is based on the visible gameplay rules and current beginner-facing version of General Kitty. Unit effectiveness and route-control decisions may change if future game updates adjust enemies, skills, maps, or upgrades. Coins, upgrades, traps, units, and Lightning refer to in-game mechanics and progression systems.\ FAQ Why do fast enemies keep slipping through? Fast enemies usually slip through when your first Blocker is too far from the real chokepoint or your Backline DPS is not covering the same area. Move the Blocker closer to the busy route section, then add a backup defense near the castle. What should I do when I get stuck on a Forest map? Rebuild the route step by step. Find the first turn or narrow path, place a Samurai cat or Ninja cat there, add a Machine-gun cat or Cannon cat behind it, keep coins for one emergency move, and create a backup defense before the castle. Should I upgrade Machine-gun cat or Cannon cat first? Upgrade the unit doing the most work in your main defensive section. If enemies arrive steadily, Machine-gun cat is usually the safer first upgrade. If enemies group together in one lane, Cannon cat may give better value. Why do my mines or traps feel useless? They are probably placed on low-traffic tiles. Mines and traps work best on fixed route sections enemies must cross, especially before turns, narrow paths, or backup defense areas. What should I do if my front line collapses too quickly? Strengthen the first busy route section. Move your Samurai cat or Ninja cat to a better chokepoint, upgrade your main Blocker if possible, and make sure your Backline DPS is supporting the same area.
 Conscience farm
Conscience Farm About This Game Conscience Farm is a casual farming simulation and idle farm management game about turning empty land into a stronger farm through planting, harvesting, upgrades, pets, employees, and building development. The main loop is simple: prepare land, plant crops, use the watering can to reduce growth time, harvest when Waiting for harvest appears, and spend coins on the next useful upgrade. Each harvest adds coins and experience progress through the star bar in the upper-left corner. The strategy comes from deciding where your resources should go next. New plots increase planting space, Lv+1 strengthens existing plots, pets can support experience growth, employees help reduce repeated manual actions, and buildings such as shops or larger structures can provide steady virtual coin support through rent. Conscience Farm works best when you treat it as a rhythm game as much as a farm game. A strong farm is not only about unlocking more things. It is about keeping crops moving, collecting on time, and choosing upgrades that solve your current bottleneck. How to Play Start by checking your available land, coin total, and active plots. If you have empty usable land, plant crops. If land is still locked, use the shovel and wait for the progress bar to complete. If crops are still growing, use the watering can when it helps shorten the wait. Once a crop shows Waiting for harvest, collect it with the sickle so that plot can return to the planting cycle. After each harvest, your coins and experience increase. Coins are used for three main types of progress: unlocking new land, upgrading buildings, and improving plots with Lv+1. The best choice depends on what is slowing your farm down. If your current plots are always busy and collected on time, Lv+1 can be a good way to strengthen your core farm. If every plot is active and you clearly need more space, unlocking new land becomes more useful. If manual work is becoming repetitive, employees can help. If you want steadier background progress, buildings and shops can support your farm through virtual rent. The get pet option adds another long-term layer. Pets can provide an experience bonus, which becomes more valuable when your farm already has a steady harvest cycle. A pet does not replace good timing, but it can make repeated crop cycles feel more rewarding over time. Beginner Strategy Guide In the early game, focus on a small number of stable plots. Do not spend coins everywhere just because several buttons are available. A few plots that are planted, watered, harvested, and upgraded consistently are usually better than a wide farm with weak or idle spaces. Pro-Tip: Focus your first Lv+1 upgrades on one reliable plot instead of leveling everything evenly. This creates a stronger core plot that can support expansion more consistently. In the early-mid game, start judging Lv+1 against new land. If your existing plots are almost always active, Lv+1 can make your main farm area stronger. If you keep running out of planting space while still harvesting on time, unlock another plot instead. The key question is simple: are you limited by plot strength or by plot count? Pets are better once your harvest cycle is already working. Because their value comes from supporting experience progress over repeated actions, they are most useful when crops are being collected regularly. If your farm still has long idle gaps, fix the crop rhythm first. Employees make sense when the farm becomes large enough that manual care starts to slow you down. They are not a replacement for basic planning. Use them after your crop loop is stable, not before you understand which plots need the most attention. Buildings and shops are better as mid-game goals. Their rent is a virtual game mechanic that supports coin growth, but it works best when your crop side is already productive. If you invest in buildings too early while your plots are weak, your farm may still feel slow. This priority is not a fixed formula, but it gives beginners a practical order for deciding where coins should go first. Suggested Upgrade Priority Stage · Main Focus · When to Prioritize It · What to Avoid Early Game · Stable crop cycle · Focus on a small number of plots you can plant, water, and harvest consistently. · Do not unlock too much land before your first plots are productive. Early-Mid Game · Lv+1 on key plots · Use Lv+1 when existing plots are active often and harvested on time. · Do not upgrade every system at once if coins feel unstable. Mid Game · Pets and stronger plot planning · Consider pets when the experience bonus supports repeated farming cycles. · Do not delay all farm upgrades just to chase one new feature. Later Mid Game · Employees and buildings · Use employees when manual work becomes repetitive; use buildings when your farm can support passive virtual coin growth. · Do not rely on automation or rent systems before the crop loop is stable. Common Mistakes Your farm feels slow even with several plots. The likely cause is over-expansion. Too many low-level plots can create more work without giving your farm a strong base. Improve one or two reliable plots first, then expand when you can keep the full cycle active. Crops take longer than expected to finish. This usually happens when watering is forgotten or used too late to matter. Use the watering can while crops are still growing so the time reduction actually helps your next harvest cycle. Plots show Waiting for harvest, but progress still feels stuck. The problem is delayed collection. A mature crop that sits unharvested blocks the next planting cycle. Harvest ready crops before focusing on another upgrade. You have coins, but your upgrade path feels scattered. This often means you are switching between land unlocks, Lv+1, pets, employees, and buildings without a clear priority. Spend coins on the system that solves your current bottleneck instead of reacting to every available button. Employees are unlocked, but the farm still needs constant checking. This usually means the manual rhythm was not stable before automation started. Employees work better when they support a clean system, not when they are expected to fix poor planting, watering, and harvesting habits. Buildings are unlocked, but coin growth still feels weak. Passive rent helps more when the crop side of the farm is already moving. If buildings feel underwhelming, check whether your plots are too low-level or your harvest timing is too slow. Pets are available, but level progress still feels slow. A pet bonus helps over time, but it works best when paired with repeated harvests. If crops are not being collected regularly, experience progress will still feel sluggish. FAQ Should I upgrade plots or unlock new land first? Upgrade existing plots when they are already active most of the time and you can harvest them quickly. Unlock new land when your current plots are busy and you clearly need more planting space. When should I use Lv+1? Use Lv+1 on plots that already play an important role in your farm cycle. It is less useful on land that sits idle or is not part of your regular planting and harvest rhythm. Should I unlock a pet or hire an employee first? Choose a pet first if your farm is already producing regular harvests and you want more experience progress over time. Choose an employee first if your farm has become large enough that repeated manual care is slowing you down. When is a pet not worth unlocking yet? A pet may be less useful if your farm still has long idle gaps or crops are not being harvested regularly. Improve the crop cycle first, then use the pet bonus once repeated harvests can support steady experience progress. When do employees become useful? Employees become useful when your farm has enough active plots that manual actions start to interrupt your rhythm. They are best used to support a working farm, not to replace basic planning. How do you maximize passive coin income from buildings? Build a reliable crop cycle first, then add buildings and shops when your coins can support them without weakening your main plots. Passive rent works better when it supports an already stable farm rather than carrying the whole progression system alone. Does the farm grow while I'm offline? Only rely on offline progress if your version of Conscience Farm clearly shows an offline reward, idle progress, or return bonus screen. If no offline reward is shown, treat progress as something you build through active planting, watering, harvesting, and upgrading. Why does my farm feel slow even though I keep unlocking things? Your upgrades may be spread across too many systems. Focus on the biggest bottleneck first: plot level, planting space, harvest timing, pet progress, employee support, or building development. Is building rent real money? No. Building rent in Conscience Farm is a virtual in-game coin source used only for game progress. It does not represent real-world income. Editorial Note This guide is based on visible gameplay systems in Conscience Farm. Coins, rent, pets, employees, buildings, rewards, and upgrades are virtual game mechanics only and do not represent real-world farming, employment, construction, pet care, or financial advice.
 Villagee limination
Villagee limination About This Game Villagee limination is a casual tap-to-clear block elimination puzzle game about completing target goals within a limited number of moves. Each level asks you to remove a required number of target blocks, such as yellow clouds, red moons, or other pattern-based objectives, before the move counter reaches zero. Tap 2 or more connected blocks of the same color to clear them. Once blocks disappear, the blocks above fall into the empty spaces. That falling movement can create new connected groups, open chain reactions, or bring scattered target blocks closer together. The game rewards careful target reading more than fast tapping. A large clear is not always the right move if it does not help the objective. A small clear that removes target blocks, shifts targets downward, or prepares a useful tool can be more valuable than a flashy non-target clear. Larger same-color clears can create virtual in-game tools. Rocket clears a full row or column, Bomb removes a 3×3 area, and Rainbow Block can remove one color from the board after being swapped with that color. Daily check-ins and level chests may also provide virtual in-game items or rewards, but they are part of the puzzle progression system only. Key takeaways: • Read the level target before the first tap. • Lower clears often create stronger board movement. • Use tools for target progress, not just for large visual clears. How to Play Start by checking the target panel. It shows what the level wants you to clear, such as yellow clouds, red moons, or another goal icon. Then check the move counter so you know how many taps you can spend. Tap a group of 2 or more connected same-color blocks to remove it. After the clear, blocks above fall down. Before tapping, look at the spaces that will open and think about whether the falling blocks may connect target pieces or create a better group. Tools are created by clearing larger same-color groups: Tool · Created by · Best use · Avoid using when Rocket · Clearing 4 or more same-color blocks · Several target blocks sit in one row or column · The row or column contains few useful targets Bomb · Clearing 6 or more same-color blocks · Target blocks are packed in a small area but not directly connected · The 3×3 area removes mostly unrelated blocks Rainbow Block · Clearing 8 or more same-color blocks · Many target-color blocks remain across the board · Only a few targets remain and a direct clear can finish the level Choose Rocket when several target blocks sit in the same row or column. After it appears on the board, check the line it can clear before using it. The tool is more valuable when it removes multiple required blocks at once. Choose Bomb when target blocks are close together but separated by other colors. Its 3×3 clearing area can solve a tight cluster that would otherwise take several small moves. Choose Rainbow Block when many target-color blocks remain across the board. In target-based levels, swapping it with the current target color is usually more useful than clearing a random color. To pass a level, complete the target before the move counter reaches zero. If the moves run out while the target is still unfinished, the level fails. Before each move, ask: • Does this tap remove target blocks? • Does it create a useful Rocket, Bomb, or Rainbow Block? • Will falling blocks bring targets closer together? • Is this move still helpful if no chain reaction happens? Beginner Strategy Guide Play toward the target from the first move. Do not clear the largest group automatically. A smaller target clear can be the better choice if it reduces the required count or brings target blocks into a stronger position. Look for target blocks that are already connected. If 3 or more target-related blocks are grouped together, clearing them early reduces pressure and opens the board. If targets are scattered, clear nearby lower blocks to shift the board and help them fall together. Lower clears often create better movement than top clears. Removing blocks near the bottom makes more pieces fall, which can connect separated targets, form larger groups, or create a tool without extra setup. Do not build tools just because the board offers a large group. A Rocket, Bomb, or Rainbow Block is only worth the move if it helps the objective. If the tool would appear far away from useful targets, a direct target clear may be stronger. Best Tool by Situation Situation · Best choice · Why it works Several targets line up horizontally or vertically · Rocket · It can remove multiple targets in one straight clear Targets are close together but split by other colors · Bomb · Its 3×3 area can clear a compact problem zone Many target-color blocks remain across the board · Rainbow Block · It can remove that color from multiple areas Targets are scattered but can fall together · Normal clear · A lower tap may connect them without spending a tool We have all been there: one move left, one red moon trapped in a corner, and no clean group nearby. That situation usually comes from spending too many early moves on clears that looked big but did not move the level goal forward. Use Rocket only after scanning the full row or column. If it clears several targets, it is probably worth using. If it hits mostly unrelated blocks, wait for a better line unless you are almost out of moves. Use Bomb near the center of a compact target cluster. Avoid triggering it on the edge of the problem area, because half of the 3×3 effect may miss the blocks you actually need. Use Rainbow Block before the board becomes too scattered. If the target color is still common across the board, it can create a major swing. If only a few target blocks remain, a Rocket, Bomb, or direct tap may finish more efficiently. Final 5 Moves Checklist When only a few moves remain, stop building long setups. Count what is left and choose the most direct route. • Count how many target blocks remain. • Check whether one tool can finish the target. • Stop building new tools unless the setup also clears targets. • Use Rainbow Block before the board becomes too scattered. • Prefer a direct target clear over a large non-target clear. The beginner goal is consistency. Clear targets first, use falling blocks to improve the board, create tools only when they support the objective, and spend the final moves on finishing the level. Common Mistakes • Tapping before reading the target: Always check the required goal first. If the level asks for yellow clouds or red moons, early moves should help remove those blocks or bring them closer together. • Clearing large groups that do not matter: Big clears are not automatically good. Before tapping, ask whether the move removes targets, creates a useful tool, or improves the board position. • Building tools in the wrong area: A tool created far away from the target zone may not help. Build Rocket, Bomb, or Rainbow Block only when the setup supports the objective. • Using tools at the wrong time: Do not fire Rocket before targets line up, but do not save a strong tool until there are no moves left. Use tools when they remove several targets or set up the final clear. • Choosing the wrong tool target: Bomb should hit a valuable 3×3 area, and Rainbow Block should usually be swapped with the target color. Match the tool to the level goal, not to the flashiest effect. • Ignoring how blocks fall: The board changes after every clear. Look at the empty spaces that will open and predict whether new blocks may connect after falling. • Mistaking non-target icons for target blocks: Do not treat Green Leaf blocks, or any other similar-looking block, as targets unless the goal icon specifically shows them. • Relying on tiny clears near the end: With 3–5 moves left, small manual clears may not be enough. Count the remaining targets and use a tool if it gives the clearest path to finish. • Misunderstanding check-ins and chests: Daily check-ins, chests, tools, moves, blocks, and rewards are virtual in-game mechanics. Treat them as part of puzzle progression only. Editorial Note: This guide is an independent player resource and is not affiliated with the official developers of Villagee limination. It is based on visible gameplay rules and beginner-level puzzle decisions. It does not claim hidden formulas, official drop rates, guaranteed level outcomes, or real-world rewards. Check-ins, chests, tools, and rewards mentioned here refer only to virtual in-game mechanics. FAQ What is Villagee limination? Villagee limination is a casual tap-to-clear puzzle where players remove connected same-color blocks, complete target goals, and manage limited moves. How do you play the game? Check the target, tap 2 or more connected same-color blocks, watch how the board falls, and use tools when they help complete the objective. What is the goal of each level? Each level asks you to clear a specific target, such as a required number of yellow clouds, red moons, or another pattern block shown in the target panel. What happens when you run out of moves? If the move counter reaches zero before the target is complete, the level fails. Planning each tap matters more than clearing quickly. When should I use tools instead of normal clears? Use a tool when it removes more target blocks than a normal tap or creates a direct path to finish the level. What should I do if target blocks are scattered? Clear lower blocks near the target area to make the board fall. This can bring scattered targets closer together and create better connected groups. Are the rewards in Villagee limination only in-game items? Yes. Daily check-ins, chests, tools, moves, blocks, and rewards are virtual gameplay mechanics used only inside the game. They are not real-world prizes or cash rewards.
 Critical Seeker
Critical Seeker About This Game Critical Seeker is a casual cat-themed spot-the-difference puzzle game built around comparing two nearly identical illustrations. Each level asks you to find a set number of hidden differences. Tap the correct spots, complete the target, and the level is cleared. What makes the game work is that it does not ask for complicated controls. It asks you to notice what changed. One difference may be obvious, while another may hide in a tiny facial detail, a shifted outline, or a small decorative object near the edge of the picture. That “wait, how did I miss that?” moment is the main charm of the game. Each level uses 1 point of Stamina when you begin. Stamina is the game’s internal energy system and recovers over time, so focused play matters more than repeated careless attempts. The question mark icon in the upper-right corner works as a hint button and can highlight one remaining difference when you are stuck. Critical Seeker may also include daily sign-in and shop features. Depending on the version, these may provide in-game support such as Stamina, virtual coins, or extra hints. These systems help with progression, but the real gameplay is still careful observation. Verdict: Critical Seeker is strongest when you want a quiet visual puzzle with a cute cat theme, simple rules, and satisfying “found it” moments. The main drawback is that the final hidden difference can slow the pace when a tiny change blends into the artwork. Players who enjoy relaxing cat-themed puzzle games or careful observation challenges will understand the appeal quickly. How to Play When you enter a level in Critical Seeker, first check how many differences the stage asks you to find. That number is your level goal. Compare both illustrations at the same time. Start with larger visual changes before moving into smaller details. A changed shape, missing decoration, color mismatch, or shifted object is usually easier to confirm than a tiny expression change. Tap only after you confirm that the same spot is different in the two images. Do not tap just because an area feels unusual. A calm comparison keeps your attention sharper and helps you avoid wasted actions. If you cannot find the remaining difference after a careful search, use the question mark icon in the upper-right corner. The hint highlights one hidden difference, so it is most useful after you have already found the easier changes. The main screen may include daily sign-in rewards and a shop. Sign-in may provide in-game resources, while virtual coins may be used for extra hints. Exact recovery speed, shop prices, hint costs, and interface labels may vary by version, so avoid assuming fixed values unless they are shown in your game. Beginner Strategy Guide The best way to improve in Critical Seeker is to search in passes. Do not try to solve the whole image at once. A level becomes much easier when you know what kind of difference you are looking for at each stage. In spot-the-difference levels like this, difficulty usually increases when differences become smaller and blend into the cat outline, expression, or surrounding decorations. The final difference is often not in the center of the image. Repeated background patterns, corners, edge decorations, and small changes around the cat outline are usually worth checking before using a hint. Use this priority order: Pass · What to Focus On · Why It Helps First pass · Large visible changes · These are faster to confirm and help you build early progress. Second pass · Cat shape and accessories · Small changes near the main character often blend into the artwork. Third pass · Background layout · Repeated visual elements can hide missing or moved details. Final pass · Tiny color, number, position, and shape changes · These are often the last differences players overlook. For a more practical check, use this comparison map: Where to Check · What to Compare Cat outline · Ear shape, tail curve, paw position, body edge Face area · Eyes, mouth curve, whisker count, expression Accessories · Bow color, headband pattern, hair decoration shape Background · Leaves, petals, bubbles, butterflies, repeated patterns Corners · Small missing or moved objects A useful habit is to compare the same corner in both images before moving to the next area. This prevents your eyes from jumping randomly and makes it easier to catch small changes. Some levels may hide the hardest difference in a tiny cat detail. For example, the number of whiskers can be more difficult to notice than a changed accessory because both images still look “correct” at first glance. Paw shape, tail outline, and a small mouth curve can create the same problem. When Stamina is limited, treat each level like a short focus session. Try to clear the current puzzle carefully before starting another one. Daily sign-in and shop resources can support your progress, but they should not replace the basic skill of comparing the two images closely. Common Mistakes Mistake: Searching without a clear order. Why it hurts: The image starts to feel busy, and your eyes keep jumping between unrelated details. Better habit: Search in passes: large changes first, character details second, background layout third, tiny differences last. Mistake: Tapping before confirming the difference. Why it hurts: Guessing breaks concentration and can make the remaining differences harder to track. Better habit: Compare the exact same spot in both illustrations before tapping. Mistake: Watching only the center of the image. Why it hurts: The final difference is often placed near an edge, corner, accessory, or repeated pattern. Better habit: After checking the main cat, move outward and inspect the surrounding artwork. Mistake: Using a hint too early. Why it hurts: If several clear differences are still available, the hint may solve something you could have found yourself. Better habit: Use the hint when your own search has slowed down and only a small number of differences remain. Mistake: Treating support systems as the main strategy. Why it hurts: Stamina, virtual coins, hints, and sign-in rewards can help you continue playing, but they do not solve the observation challenge by themselves. Better habit: Use these systems as backup tools while keeping your main focus on careful comparison. Editorial Note: This guide is based on visible gameplay mechanics and beginner play patterns. Exact Stamina recovery time, shop prices, hint costs, reward details, and interface labels may vary by version. FAQ What does Stamina do in Critical Seeker? Stamina controls how often you can start levels. Since each attempt uses this in-game resource, it is better to play with focus instead of entering a level and tapping around casually. When should I use a hint? Use a hint after you have already made a serious second pass and still cannot find the remaining difference. The hint is most valuable when it saves you from staring at the same image for too long. What should I do when only one difference is left? Stop scanning randomly. Check the edges, corners, repeated background patterns, and small cat details such as whisker count, paw shape, tail outline, eye position, or mouth curve. If none of those areas reveal the answer, using a hint is reasonable. Are coins, Stamina, or hints real-world items? No. Virtual coins, Stamina, hints, sign-in bonuses, shop items, and level progress are only part of the in-game progression and do not represent real-world value. Is Critical Seeker a gambling game? No. Critical Seeker is a casual visual puzzle game about finding hidden differences in cat illustrations. Its resources and rewards are virtual game systems used for puzzle progression.
 Flip Blocks
Flip Blocks About This Game Flip Blocks is a casual sliding number merge puzzle game about board control, matching numbers, and smart movement. Each swipe moves the blocks in one shared direction, and matching number blocks can merge when they touch. The goal is not simply to create the biggest number possible. The real challenge is to reduce board pressure, clear useful space, and complete the current level objective through planned merges. A strong Flip Blocks run usually comes from calm movement rather than fast swiping. You need to decide which blocks should merge first, where larger blocks should stay, and how each swipe affects the next turn. Low-number blocks are often easier to remove from the board, while higher-number blocks need safer positioning so they do not get trapped in the middle. For beginners, the three most useful habits are simple: do not swipe randomly, clear easy low-number matches before they become clutter, and protect larger blocks near stable edges or corners when possible. Once the board becomes crowded, every move matters more because one careless swipe can separate matching blocks or block a future merge route. Gameplay note: This guide focuses on visible gameplay behavior, including block movement, matching, board pressure, and beginner decision-making. It does not claim hidden scoring formulas, exact internal calculations, official level data, or guaranteed outcomes. How to Play Start each level by checking the full board. Look for matching number blocks, open spaces, low-number blocks that can be cleared early, and any higher-number block that may become hard to move later. Swipe the screen to move all blocks in the same direction. When matching number blocks touch, they can merge. Based on the provided rules, matching number blocks appear to merge toward clearing or completing the level objective, so each merge should help reduce pressure on the board. If the board runs out of usable space or you can no longer create a practical merge route, the level may become stuck or fail. The safest approach is to keep the board open, guide matching numbers together, and avoid moves that scatter blocks across opposite sides. Beginner Strategy Guide The best beginner strategy in Flip Blocks is to treat every swipe as a board-shaping decision. Do not move just because a merge is available. Move because the merge improves the next position. Use Corner Locking carefully. Corner Locking means keeping a higher-number block near a stable corner or edge so it does not drift into the center. This gives you an anchor point, but it only works when the corner stays clean and support blocks can still reach it. If a corner is filled with low-number clutter, clear the clutter before trying to lock a higher-number block there. Use the Snake Pattern as a guide, not a rule. The Snake Pattern means moving blocks in a controlled flow, such as compressing them toward one side, then guiding them down or across in a predictable path. This can help beginners avoid chaotic left-right-up-down swiping, but it should not force every move. Break the pattern when a direct merge or space-saving move is clearly better. Clear low-number blocks before they become clutter. Number 1 blocks and other low numbers are often easier to resolve early. If you leave them scattered across the board, they can block movement paths later and make higher-number merges harder to set up. Think one move ahead. Before merging two blocks, ask whether the next move will still be playable. A merge is not always good if it pushes a key block into the center or removes the only open route. Use chain reactions, but do not depend on luck. A chain reaction can happen when one merge creates another useful match nearby. These are valuable because they reduce pressure quickly, but they work best when your board is already organized. Before You Swipe • Will this move create a real merge or improve a merge path? • Will it leave enough open space afterward? • Will it protect important high-number blocks? • Will the next move still be playable? • Will this swipe make the board more organized or more scattered? Situation · Recommended Swipe Control · Why It Helps Early board with several low-number blocks · Compress toward one side, then use a secondary direction · Helps bring easy matches together without scattering the board A higher-number block is already near a corner · Avoid breaking that corner unless the move creates a clear merge · Keeps the block stable and easier to support later The board is getting crowded · Return to one main edge or corner pattern · Reduces chaos and creates more predictable merge paths Two low-number blocks can merge near one side · Make the merge only if it does not pull a high-number block into the center · Clears space without damaging long-term structure A chain reaction is possible · Swipe in the direction that keeps the next matching pair close · Lets one merge set up the next instead of resetting the board For example, if two small blocks can merge on the right side but that swipe would pull a high-number block out of a safe corner, delay the small merge and protect the corner first. A short-term match is not worth losing your best anchor point. Common Mistakes Mistake: Swiping without a board goal. Fix: Before moving, identify one merge route or one space-saving goal. Even a simple plan is better than moving just to see what happens. Mistake: Clearing every visible match immediately. Fix: A merge should improve the board, not just reduce one pair. If a quick merge breaks a corner anchor, separates future matches, or fills open space, it may be better to prepare the board first. Mistake: Letting low-number blocks spread everywhere. Fix: Handle easy low-number matches early. Small blocks become dangerous when they occupy corners, block movement lanes, or separate higher-number pairs. Mistake: Pushing high-number blocks into the middle. Fix: Use edges and corners as anchors. A high-number block in the center can block several movement paths at once and become difficult to reconnect with a match. Mistake: Overusing one direction without checking the result. Fix: A main swipe direction is helpful, but it should not become automatic. For example, repeated upward movement can leave the lower rows cluttered if you never compress or clean them. Mistake: Changing direction every move. Fix: Use controlled direction changes. A good pattern should gather blocks into readable groups, not send them to opposite sides of the board. Mistake: Waiting until the board is almost full to plan. Fix: Start managing space from the first few moves. Once the board is crowded, fixing a bad layout takes more effort and fewer mistakes are allowed. Fair Play Note: All numbers, blocks, scores, levels, and objectives in Flip Blocks are virtual in-game puzzle mechanics. They are part of gameplay progress only and should not be understood as outside-game value, betting, or gambling activity. FAQ What is Flip Blocks? Flip Blocks is a casual sliding number merge puzzle game where players move blocks, merge matching numbers, and manage board space. Is Flip Blocks the same as 2048? No. Flip Blocks uses number merging, but it should not be treated as a standard 2048 game. The focus is more on reducing board pressure, clearing blocks, and completing level objectives than simply building the largest number. How do you merge blocks in Flip Blocks? Swipe to move blocks in one direction. When matching number blocks touch, they can merge. Should you merge blocks as soon as possible? Not always. A fast merge is useful only if it improves the board. If it breaks a corner anchor, separates future matches, or fills open space, it may be better to prepare the board first. What should you do when a high-number block is trapped? Stop swiping randomly and rebuild space around it. Try to compress nearby blocks toward a stable edge, open a path for matching numbers, and avoid moves that push the trapped block deeper into the center. When should you change swipe direction? Change direction when it creates a real merge, restores open space, or protects an important block. Avoid changing direction just because the board looks temporarily stuck. What causes most failed boards in Flip Blocks? Most failed boards come from poor space management: scattered low-number blocks, high-number blocks stuck in the center, and repeated swipes that do not create future merge paths. What is the safest beginner goal? The safest beginner goal is to keep a small buffer of open space while building predictable merge paths. Do not merge only for short-term progress if the move makes the next turn harder.
 Prison Escape
Prison Escape About This Game Prison Escape has a simple idea that becomes challenging once you start reading each level like a small logic map. The main challenge comes from reading a blocked route, making one careful cut, and seeing whether the stickman now has a safer way forward. It is not about rushing your finger across every dotted line. Better solutions often come from removing less paper than expected and keeping the right support in place. Prison Escape is a casual paper cutting and stickman escape game built around logic-based pathfinding. Your job is to cut yellow paper and create a safe route toward the EXIT on the right side of the stage. The stickman does not need the widest possible opening. He needs a connected path that stays stable from start to finish. Each cut changes the level. Removing yellow paper can open a useful passage, smooth a step, or connect two parts of the route. It can also break the ground the stickman needs to stand on. That is why the game is less about fast swiping and more about careful planning. Every level gives you a limited number of cuts, shown through the scissors at the bottom of the screen. This adds a light resource management layer: you need to decide which obstacles are worth cutting and which pieces of paper should stay in place. A strong route usually comes from three habits: protect the walking surface first, open the path second, and restart with a better plan when your first route clearly does not work. How to Play Start each level by observing the stickman, the yellow paper, the dotted cut lines, and the EXIT. The exit is usually the most important clue because it tells you which direction the final route must connect to. Swipe along a dotted line to cut the yellow paper. The removed section disappears and reveals the path underneath. The most useful cuts usually remove a real obstacle, smooth a step, or connect two parts of the route. A cut is less useful if it only clears extra space without helping the stickman move closer to EXIT. Do not cut away the area under the stickman unless you are sure the route will remain safe. In this kind of paper cutting puzzle, support matters as much as open space. A path that looks clear but has no stable walking surface can fail quickly. Watch the remaining cuts at the bottom of the interface. Since each level has limited cutting chances, avoid spending them on paper that does not affect the route. Resource management is part of the puzzle: the question is not “Can I cut this?” but “Does this cut solve the next real problem?” A simple beginner habit is to follow this order: 1. Find EXIT first. 2. Trace the safest possible route from the stickman to the exit. 3. Identify which yellow paper is actually blocking that route. 4. Cut only the blocking sections. 5. Keep enough support under the stickman and along the walking path. 6. Keep one cut available when the route ahead is still uncertain. 7. Use Restart if the route becomes broken, blocked, or impossible to repair. Route Check: Before cutting, scan the level in this order: EXIT → final approach → middle path → stickman’s starting point. This helps you avoid opening a path that looks good at first but fails near the end. If the stickman gets stuck, falls, or cannot reach EXIT, use Restart to reset the level. Treat Restart as a planning tool rather than a punishment. A failed attempt often shows exactly which piece of paper should have stayed in place. Beginner Strategy Guide The most useful beginner strategy is to plan from the EXIT backward. Instead of cutting the first dotted line you notice, look at where the stickman needs to end up. Then imagine the route in reverse: exit area, final approach, middle path, starting point. This makes it easier to see which paper truly blocks progress. Avoid large cuts at the start. Removing a big section may feel efficient, but it can create gaps, steep drops, or missing support. Smaller cuts are often safer because they let you adjust the route step by step. Focus on obstacles in front of the stickman or above the walking route before cutting the ground below him. Yellow paper under the character may be part of the support structure. If you remove it too early, the level can fail before the main route is even open. Before making a cut, ask three quick questions: does this remove a real obstacle, does it keep enough support under the stickman, and does it leave enough cuts for the next problem? If the answer is unclear, study the route again before swiping. Pro Tip: The cleanest solution is often not the biggest cut. In many layouts, a small cut that connects two surfaces is better than a large cut that creates empty space. For diagonal obstacles, think about building a gentle slope. A smoother angled route is usually easier for the stickman to cross than a sharp drop or broken platform. You do not need to remove every nearby piece of paper. You only need enough space for a stable path. For step-like barriers, divide the route into sections. First open the lower approach, then connect the middle platform, then clear the final path toward EXIT. This prevents the route from becoming disconnected halfway through. Here is a practical strategy matrix for common situations: Situation · Better First Move · What to Avoid Paper blocks the path directly ahead · Cut the blocking section while keeping the floor intact · Cutting the support under the stickman A diagonal wall blocks movement · Create a smooth slope or angled opening · Making a steep gap that breaks the route A tall step stops progress · Build a connected path in sections · Removing too much paper at once The route ahead is unclear · Save a cut and study the layout again · Spending every cut early The path is already broken · Use Restart and adjust the first cut · Forcing a route that cannot connect Some layouts can be understood as common puzzle patterns: Simple Drop: If the stickman needs to move from a higher surface to a lower path, do not remove all the paper between them. Cut only enough to open the landing area while keeping a surface that prevents an unsafe fall. Zig-Zag Route: If the path changes direction more than once, solve one turn at a time. Open the first turn, check whether the middle path stays connected, then use the next cut for the final approach. Scissors Trap: If several dotted lines look tempting, pause before cutting. The trap is spending all cuts on visible paper while leaving the final obstacle untouched. In uncertain layouts, keep one cut available until the route to EXIT is clear. One helpful way to improve is to think in smaller route decisions. Instead of thinking “remove this whole area,” think “remove only the part that blocks movement.” That mindset protects support and reduces wasted cuts. Your first goal should be simple: help the stickman reach EXIT safely. After you understand how the paper, support, and route connection work, you can start looking for cleaner solutions with fewer unnecessary cuts. Common Mistakes • Cutting away too much yellow paper: Removing extra paper can destroy support and make the route unsafe. Cut only what blocks progress. • Opening space without preserving a path: A wide empty area is not helpful if the stickman has no connected surface to walk on. • Following every dotted line automatically: Dotted lines show possible cuts, not required cuts. Judge whether each section actually affects the route. • Ignoring the EXIT position: Cutting before checking the exit can send your plan in the wrong direction and waste limited cuts. • Using all cuts too early: If the route ahead is still uncertain, save a cut for the next obstacle instead of clearing minor details. • Removing support under the stickman first: Cutting below the character too soon can break the level before the main puzzle begins. • Forcing a clearly failed route: If the path is blocked, broken, or impossible to repair with the cuts left, use Restart and rebuild the plan. • Reading the virtual theme too literally: Prison Escape is only a paper cutting stickman puzzle game. Its prison setting, scissors, rewards, paths, Restart button, and EXIT are in-game mechanics, not real-world escape advice, tool guidance, gambling content, or cash-value rewards. FAQ How do I decide which yellow paper to cut first? Start with the paper that directly blocks the safest route to EXIT. If a section does not stop the stickman from moving forward, leave it alone until you know it matters. Should I plan from the stickman or from EXIT? Planning from EXIT backward is usually safer. It helps you understand where the final route must connect before you spend cuts near the starting point. Do scissors refill over time? The provided gameplay information only confirms that the scissors at the bottom show the remaining cuts for the current level. Treat them as limited resources and plan each cut carefully instead of assuming they will refill. How should I handle moving platforms in later stages? If your version includes moving platforms or shifting support areas, wait to read their movement before cutting nearby paper. The safest cut is one that keeps the route connected when the platform is in a usable position. Why does the stickman fall after I open the path? This usually happens when too much support has been removed. A route needs both open space and stable ground, so avoid cutting away the paper directly under the stickman unless the next surface is clearly safe. What should I do with diagonal obstacles? Try to create a gentle slope or angled opening instead of a sharp drop. A smoother route gives the stickman a better chance to continue toward EXIT without getting stuck. When should I use Restart? Use Restart when you cut the wrong section, remove necessary support, run out of useful cuts, or create a route that no longer connects to EXIT. Restarting helps you replan with a cleaner cutting order. Is Prison Escape a real escape guide or gambling game? No. Prison Escape is a virtual paper cutting stickman puzzle. Its prison theme, scissors, rewards, Restart button, and EXIT are gameplay mechanics only, not real-world escape instructions, tool guidance, betting content, or cash-value rewards.
Puzzle
- Match & Clear Nonstop
Match & Clear Nonstop About This Game Match & Clear Nonstop is a Mahjong-style tile matching puzzle game where players select available tiles, move them into a 7-slot reserve tray, and clear tiles when three identical tiles are collected. The game is not traditional Mahjong. It focuses on stacked tiles, tray management, timed decision-making, and smart tool usage. Your main challenge is to keep the reserve tray from filling with unrelated tiles while opening enough board space to keep clearing matches. How to Play 1. Select available visible tiles from the board. 2. Move tiles into the 7-slot reserve tray. 3. Clear tiles when three identical tiles are collected. 4. Open stacked areas to reveal more useful tiles. 5. Use Shuffle, Flip Card, Clear, and Undo when they solve a specific problem. 6. Finish the level before the timer runs out. The most common beginner mistake is filling the 7-slot reserve tray before a three-tile clear can be made. Beginner Strategy Guide Reserve Tray Strategy The reserve tray is the most important pressure system in Match & Clear Nonstop. Because there are only 7 slots, each tile choice needs a purpose. A strong tray usually contains one or two focused tile groups. A weak tray contains many loose symbols with no clear forming soon. Do not add unrelated tiles unless the move helps a near-term clear. When the Tray Is Almost Full When the tray has only 1 or 2 empty slots left, stop playing normally. Use this recovery order: 1. Look for a tile that completes a three-tile clear. 2. Use Undo if the last move caused the problem. 3. Use Clear if the first tray tile is blocking your options. 4. Use Flip Card only if hidden information is the real issue. 5. Use Shuffle only after checking visible options. Tool Priority Guide Tool · Best Used When · Avoid Undo · Your last move created a tray problem · Using it for every small move Clear · The first tray tile blocks future organization · Using it while the tray is still flexible Flip Card · Hidden or standing tiles may reveal the tile you need · Using it while safe visible clears remain Shuffle · No useful visible route remains · Shuffling before checking the board Opening Strategy Start by scanning the board for visible matches, thick stacks, and blocked sections. Clear safe matches first, but prioritize moves that open more tiles. A move that reveals a new layer is often better than a move that only removes a flat tile. Midgame Strategy Track which tile types are already in the tray. Do not start too many unfinished clears at the same time. If the board has hidden or standing tiles, use Flip Card before committing a tray slot. Endgame Strategy When time is low, choose the clearest available three-tile clear. If the tray is almost full, Clear can be better than Shuffle because Clear directly creates tray space. Shuffle changes the board, but it does not automatically fix a crowded tray. Common Mistakes Mistake · Fix Tapping the first visible tile · Check whether it completes a tray clear or unlocks covered tiles Filling the tray too quickly · Stop adding new types and look for clears using existing tray tiles Wasting Shuffle too early · Check visible matches and blocked areas first Using Flip Card at the wrong time · Use it only when hidden information affects your next move Using Undo too late · Use Undo immediately after a bad tap Playing it like traditional Mahjong · Focus on tray control, stacked layers, and tool timing FAQ What causes most beginners to fail in Match & Clear Nonstop? Most beginners fail because they fill the 7-slot reserve tray with too many unfinished tile groups. The safest approach is to build around tile types already in the tray and avoid starting too many clears at once. What should I do when the reserve tray is almost full? First, look for a tile that completes a three-tile clear. If the last move caused the problem, use Undo. If the first tray tile is blocking your options, use Clear before starting another tile group. How should I prioritize tools when stuck? Fix immediate mistakes with Undo, use Clear for tray blockage, use Flip Card when hidden information matters, and save Shuffle as the last resort after visible options are checked. Is Match & Clear Nonstop traditional Mahjong? No. Match & Clear Nonstop uses Mahjong-style tile visuals, but it does not use traditional Mahjong hands, scoring patterns, or table rules. Editorial Note This independent game page and strategy guide is based on hands-on gameplay review and the game rules described in this article. It is designed to help players understand the core gameplay, 7-slot reserve tray pressure, tool usage, and beginner mistakes. It is not an official game manual. Players should check the in-game interface for exact feature behavior as updates occur.
- Cue Shot Challenge 3D
Cue Shot Challenge 3D About This Game Cue Shot Challenge 3D is a casual 3D pool and billiards challenge game where your goal is to pocket all the balls before your lives run out. Each shot costs 1 life, so the main challenge is not speed, but choosing safer angles, controlling power, and keeping the cue ball in a useful position. The 3D view helps you judge ball spacing, pocket lines, cut angles, cue direction, and possible shot paths before taking a shot. This matters because one careless attempt can waste a life and leave the next angle blocked. Cue Shot Challenge 3D also includes coins, daily rewards, tables, and ball skins as in-game virtual content. These items may change visual progression or appearance, but the core gameplay still depends on aiming, power control, cue ball positioning, and efficient table clearing. How to Play Cue Shot Challenge 3D is mainly about power, precision, and careful shot preparation. Before taking your first shot, look over the full table. Check which balls have open pocket lines, which balls are blocked, and where the cue ball may stop after contact. Control / Rule · What It Does · Practical Tip Broad Aim · Slide on the empty area of the screen to adjust your general shot direction. · Use this first to face the cue toward the target ball or pocket line. Fine-Tuning · Use the right-side dial to make smaller angle adjustments. · Make a final correction before shooting, especially on narrow pocket angles. Power Control · Use the left-side dial to set shot force. · Medium power is often easier to control because it reduces wild cue ball movement, makes rebounds less chaotic, and helps the ball stop in a more useful position. Take the Shot · After setting direction and power, hit the cue ball. · Aim to pocket the target ball while keeping the next shot playable. Life System · Each shot removes 1 life. · Clear all balls before your lives run out to complete the challenge. A good turn usually follows this order: observe the table, set your broad aim, fine-tune the angle, adjust power, then shoot. The more carefully you prepare each shot, the fewer lives you are likely to waste. One useful detail to watch is the cut angle. A straight shot sends the target ball toward the pocket more predictably, while a sharp cut angle requires more precision because the cue ball contacts the target ball from the side. When the angle looks narrow, use the 3D view to check whether the pocket line is truly open before committing the shot. Beginner Strategy Guide Treat your lives as a strict shot budget. A simple pocket is always better than a risky trick shot. Start by choosing the clearest ball on the table. A clean, direct shot is usually more valuable than a difficult angle that might fail or leave the cue ball in a bad position. Use broad aim first, then fine-tune. Sliding on the empty screen area helps you set the main direction, while the right-side dial helps you correct the final angle. Many missed shots come from stopping after the rough aim instead of making a small final adjustment. Control your power with the left-side dial. New players often use too much force because it feels safer, but strong shots can create awkward rebounds and poor cue ball placement. Medium power is often better when you want a cleaner pocket and a more predictable next shot. If the cue ball can fall into a pocket during play, treat that situation carefully. In pool-style games, this is commonly called a scratch. Based on the provided gameplay details, the confirmed penalty is that every shot costs 1 life; no extra scratch penalty has been confirmed. Still, beginners should avoid scratches because they usually ruin cue ball position, waste the value of the shot, and can make the next angle much harder. Think about the next shot before taking the current one. You do not need perfect cue ball control every time, but try to avoid leaving the cue ball trapped near a rail, blocked by another ball, or facing an impossible angle. When you are low on lives, stop choosing shots based on what looks impressive. Choose the clearest pocket line available, even if it is a simple shot. A safe ball that keeps the level alive is better than a difficult angle that may end the run. When a ball is close to the edge or sitting at a difficult cut angle, do not force it too early. Clear easier balls first, open more space, and return to the harder shot when the cue ball position is better. Avoid flashy shots unless they are truly necessary. Rebounds, sharp cuts, and long-distance attempts can be useful in some situations, but beginners will usually make better progress by taking stable, direct routes. Common Mistakes Mistake · Why It Fails · How to Fix It Using maximum power constantly · Strong shots can create wide rebounds and poor cue ball positions. · Use medium power when a clean, controlled shot is enough. Hitting long-distance shots too hard · A powerful long shot can make the cue ball travel too far, bounce unpredictably, or end in a bad position. · Use enough power to reach the target, but avoid over-hitting just because the shot is far away. Ignoring the remaining life count · A risky shot becomes more dangerous when only a few lives remain. · When lives are low, choose the clearest pocket line instead of a sharp cut, rebound, or long-distance attempt. Only looking at the current ball · You may pocket one ball but leave the next shot blocked or awkward. · Think one shot ahead before you shoot. Skipping fine adjustment · Rough aim may look close, but small angle errors can cause missed pockets. · Use the right-side dial before taking narrow or angled shots. Shooting before reading the table · Rushed shots often waste good opportunities. · Pause briefly and check open pocket lines first. Forcing difficult edge shots too early · Rail-side or narrow-angle balls can consume too many attempts. · Clear easier balls first and return when the cue ball position improves. Treating the 3D view as decoration · You may miss useful visual clues about spacing, cut angles, and pocket lines. · Use the 3D perspective to judge shot paths and cue direction. Ignoring power control · Poor force can send the cue ball into an unhelpful position. · Adjust the left-side dial based on distance and table layout. Expecting skins to change performance · Visual unlocks do not replace careful play. · Focus on aim, shot choice, and cue ball control. FAQ How do you aim more accurately in Cue Shot Challenge 3D? Use the empty screen area for broad aim first, then use the right-side dial for smaller corrections. This two-step approach is especially helpful when the target ball needs a narrow cut angle. How should beginners control shot power? Beginners should avoid using full power on every shot. A controlled medium-power shot is often easier to predict, reduces wild cue ball movement, and can leave the cue ball in a better position. Why do I run out of lives so quickly? You usually run out of lives because every shot costs 1 life and missed shots reduce your shot budget quickly. Avoid risky cut angles early, use the right-side dial for final aim correction, and choose open pocket lines before attempting difficult edge balls or long-distance shots. Can you pocket two balls with one shot? Sometimes, a single shot may lead to more than one ball dropping if the table layout allows it. However, beginners should not force double-pocket attempts unless the first pocket line is already safe and clear. What should I do with a difficult edge ball? Do not rush it. Clear easier balls first, create more open space, and return to the edge ball when the cue ball position gives you a cleaner angle. What happens if the cue ball falls into a pocket? Based on the provided gameplay details, each shot costs 1 life, but no additional scratch penalty has been confirmed. Even so, a scratch is usually bad for positioning, so it is better to avoid shots that send the cue ball toward a pocket. Is it better to use the broad aim control or the right-side dial? Use both. Broad aim helps you set the main direction, while the right-side dial is better for fine angle control before the final shot. Do coins, table skins, or ball skins improve gameplay? Coins are an in-game virtual resource used for visual progression such as tables or ball skins. These items should be understood as visual unlocks, not gameplay advantages. Your progress still depends on aiming, shot choice, power control, and cue ball position. Editorial Note This guide is based on the gameplay information provided for Cue Shot Challenge 3D. It is written to help players understand the rules, controls, life system, table-clearing goal, aiming method, power control, and beginner strategy. Coins, daily rewards, gift rewards, tables, and ball skins are described only as in-game virtual content. They should not be understood as real-world rewards, cash-value items, gambling features, or guaranteed gameplay advantages.
- Doodle Toss Squad
Doodle Toss Squad Doodle Toss Squad is a creative and fast-paced casual game where your drawing choice matters. Instead of selecting pre-made items, you draw your own in-game shapes to knock down the opposing squad. If you are looking for ways to improve your throws or clear challenges more smoothly, this guide breaks down useful beginner shapes, how to adjust your aim, and the common mistakes to avoid. 1. Top 3 Useful Shapes to Draw The game responds best to clear, readable drawings. Complex or messy scribbles can behave unpredictably. Instead, match these three simple shapes to the opposing squad's formation: • The Solid Block (Square/Rectangle) • Best For: Clustered opponents. • Strategy: A solid block has a wide contact area. Use it when multiple opponents are standing close together. Keep your drawing clean and balanced so it travels in a more predictable direction. • The Hook Shape (L-Shape or Curve) • Best For: Different contact angles. • Strategy: If an opponent is standing in a difficult position, a hook or curved shape can help you test a different landing angle. Keep the curve simple so the shape remains easy to control. • The Long Line (Horizontal or Vertical) • Best For: Single, exposed targets. • Strategy: A long line travels in a narrower path and covers less space than a block. Draw a straight line when one squad member is clearly exposed and you do not need a wide contact area. 2. Beginner Tips for Aiming and Throwing Knowing what to draw is only half the process. Improve your throwing technique with these adjustments: • Master the Micro-Adjustment: If you miss, do not make huge up-or-down swipes on your screen. If your previous shape flew slightly too high, lower your angle by a small amount. Gradual corrections usually lead to better control. • Read the Formation First: Never throw before checking the screen. Pause and identify the easiest target. Knocking down one opponent early can reduce pressure on your own squad. • Protect Your Own Squad: You fail the challenge if your squad is completely knocked down. If you are down to your last remaining member, choose a safer shape with a wider contact area rather than attempting a risky narrow throw. Aim Correction Table What Happens · Likely Problem · Better Adjustment Shape flies too high · Angle is too high · Lower aim slightly Shape falls short · Angle is too low · Raise direction gradually Shape reaches target but misses · Target choice may be wrong · Aim at an exposed opponent Shape hits only one opponent in a group · Contact area may be too narrow · Try a solid block Near hit becomes a complete miss · Overcorrection · Use smaller movements 3. Common Mistakes to Avoid • Overcomplicating the Drawing: Highly detailed or uneven shapes can make the object's in-game behavior harder to predict. Fix: Start with simple, balanced shapes, then experiment with more creative drawings after you understand how they move. • Sticking to One Shape: A block shape may work well against grouped opponents, but it may not work as well against widely spread targets. Fix: Change your drawing based on the specific round instead of using the same shape every time. • Assuming Customization Improves Performance: Coins, drawing skins, and pets mainly support customization and collection. Fix: Focus first on shape control, target choice, and aim correction. • Changing Aim Too Aggressively: Large aim changes can turn a near hit into a complete miss. Fix: If your throw was close, adjust gradually and use small up-or-down movements. • Only Focusing on Style: Creative drawings are fun, but a stylish shape is not always the easiest one to aim. Fix: Choose a shape that can make reliable contact first, then add style once your throws feel consistent. 4. FAQ: Troubleshooting Your Throws Q: Why do my drawings often miss the target completely? A: Your shape may be unbalanced, too messy, or aimed at the wrong angle. Try drawing a cleaner shape and raising or lowering your throwing direction slightly. Q: What happens if I run out of squad members? A: If your entire squad is knocked down before the opponents are cleared, the challenge fails. Watch your remaining squad members and choose safer throws when needed. Q: Is there a specific shape that works for every round? A: No. The most useful shape depends on how the opposing squad is positioned in that specific challenge. Adaptability is your best approach. Q: How can I aim more consistently after missing? A: If your throw was close, adjust your aim first with a small up-or-down movement. Watch where the shape landed, make one careful correction, and keep your drawing simple enough to control. If the same shape keeps missing or feels unreliable, switch to a cleaner shape that better matches the opposing squad's formation.
- Magic Block Pusher
Magic Block Pusher Magic Block Pusher is won by reading the board before pushing. This guide covers safe first moves, block order, narrow-path strategy, pressure plate timing, portal and gate routes, reset decisions, and common mistakes that cause players to get stuck. About This Game Magic Block Pusher is a casual magic-themed block pushing puzzle game where each stage is solved by moving blocks into useful positions while keeping the player’s path open. The challenge is not speed. The challenge is push order, spacing, and knowing when a block should move only one step instead of being pushed as far as possible. The game uses a compact puzzle-board layout where walls, tight paths, target spaces, movable blocks, and magic-themed objects create small but important decisions. A single wrong push can close a hallway, trap a block against a wall, or make the player lose access to the side needed for the next move. The magic theme gives Magic Block Pusher its visual style, but the gameplay is based on practical spatial logic. When a stage uses glowing switches, pressure plates, stone gates, blocked doors, blue portals, teleporters, or other puzzle objects, treat them as part of the route. Their value comes from how they change movement, block placement, or the path available to the player. Magic Block Pusher rewards careful play. The best move is not always the most obvious move. The best move is the one that keeps the next push possible. How to Play The exact control method can vary by device or version, but the core rule is the same: move the character into position, push blocks from the correct side, and keep enough space open for the next move. 1. Read the full level before moving. Find the target space, narrow path, blocked route, glowing switch, pressure plate, gate, or portal before touching a block. 2. Choose the main block. Do not push every block just because it can move. Identify which block actually helps complete the stage. 3. Move to the correct side. A block-pushing puzzle is often decided by where the player can stand. If you cannot reach the pushing side later, the move is unsafe. 4. Push in short steps. A one-step push is safer than sending a block deep into a corridor too early. 5. Keep recovery space open. Before each push, check whether you can still move around the block after it shifts. 6. Use puzzle objects carefully. Glowing switches, pressure plates, stone gates, blocked doors, blue portals, and teleporters should be used only after you understand how they affect the path. 7. Restart early when the route is locked. If a key block is trapped against a wall or the player cannot reach the needed pushing side, use Undo when only one recent move caused the problem. If the layout is fully locked, tap the reset or restart button, commonly shown with a circular arrow or replay icon, and try a cleaner opening route. Before You Push Checklist Check · Ask This Before Moving Goal · Where should this block end up? Standing space · Can I still stand behind it after the push? Route safety · Will this block a hallway or escape route? Recovery · Can I fix this move with one Undo, or would I need a full reset? If one answer is clearly bad, do not push yet. Reposition first. Beginner Strategy Guide Start With the Safest First Move The safest first move in Magic Block Pusher is usually not pushing a block. First, look for the target space, the narrowest route, and the side needed for the final push. Move only after you know which path must stay open. A rushed opening move often creates the first dead end. A careful opening move gives you more space, more angles, and more ways to recover. Work Backward From the Target Instead of asking, “Which block can I push now?” ask, “Where does the important block need to finish?” This makes the puzzle easier because the final position tells you which pushing angle matters. Use this order: 1. Find the final target. 2. Identify the block that should reach it. 3. Check which side the player must stand on for the final push. 4. Clear the route without blocking that side. This reverse-planning method is especially useful when the target is beside a wall, behind a gate, or at the end of a narrow path. Separate Main Blocks From Route Blocks Some blocks are not meant to finish the puzzle. They only open space, press a glowing switch, hold a pressure plate, block a path temporarily, or let the player reach another side of the board. A good rule is: • Move route blocks only as far as needed. • Keep main blocks in open space until the final route is ready. • Do not push secondary blocks into the path needed by the main block. This prevents one of the most common beginner mistakes: moving every block just because it can move. Use Corners Only for Final Placement A corner is usually a trap. Once a block is pushed into a corner, the player may not be able to push it out again. Use a corner only when it is clearly the final target. If the target is beside a wall, line up the block before the final push. Do not push it against the wall first and hope to adjust it later. Wall-side targets are solved by alignment, not force. Read Puzzle Objects by Function When a stage contains magic puzzle objects, judge them by what they do to the board. Puzzle Object · What It Usually Controls · Safe Use Marked target space · The final position for a block or route · Align the block before the final push. Glowing switch · Opens, closes, or changes a route · Step on it only after checking the path it affects. Pressure plate · Often needs a block or player to hold it down · Keep escape space open before placing a block on it. Stone gate or blocked door · Controls access to another area · Open the route before moving the main block into a tight space. Blue portal or teleporter · Moves the player or changes the route flow · Check the exit position before committing. Locked path · Forces a specific push order · Solve the opening route before pushing the goal block. Do not assume a glowing object helps immediately. Use it when it supports the next move. Advanced Puzzle Mechanics Narrow Hallway Strategy Use this strategy when one block is near a corridor and pushing it too far can block the only route. Move pattern: 1. Move beside the block instead of pushing from behind immediately. 2. Push the block one space only if it opens the walking path. 3. Move through the opened route. 4. Return to the correct pushing side. 5. Push toward the target only after the corridor remains open. Avoid this strategy when: the hallway end is clearly the final target and no return path is needed. Why this works: Narrow hallways punish over-pushing. The goal is to create movement space first, then complete the block placement later. Pressure Plate Strategy Use this strategy when a glowing switch or pressure plate is behind a movable block, or when a block needs to stay on the plate. Move pattern: 1. Clear walking space around the pressure plate. 2. Push the blocking block just enough to reach the plate area. 3. Do not trap the player between the block and the wall. 4. Place the block on the pressure plate only when the route remains open. 5. Move the main block after the gate or blocked door has opened. Avoid this strategy when: the player has not cleared enough walking space around the changed route. Why this works: A pressure plate can solve one problem while creating another. Always check both the opened path and the player’s escape path. Wall-Side Target Strategy Use this strategy when the target space is beside a wall and the final push must be straight. Move pattern: 1. Keep the block in open space first. 2. Move around it until the block is lined up with the target. 3. Push straight toward the wall-side target. 4. Stop pushing from the side once the block touches the wall. 5. Finish only when the player still has space to stand. Avoid this strategy when: the block is not aligned yet. Side pushes near a wall can remove the final angle. Why this works: A wall removes one side of control. Once the block touches the wall, your options shrink quickly. Crowded Block Strategy Use this strategy when multiple blocks are close together and the player cannot reach the correct side of the main block. Move pattern: 1. Identify the main block first. 2. Move only the secondary block that opens walking space. 3. Keep at least one open tile beside the main block. 4. Return to the main block from the correct side. 5. Push the main block through the cleared route. Avoid this strategy when: you are moving every block away from the center. That usually creates more problems than it solves. Why this works: Crowded stages are not about clearing everything. They are about creating just enough space to control the important block. Portal and Gate Strategy Use this strategy when the stage includes a blue portal, teleporter, stone gate, magic gate, or blocked door that changes how the player reaches the goal area. Move pattern: 1. Check where the portal sends the player or which route the gate opens. 2. Move the player through first when possible. 3. Keep blocks away from the portal or gate path until the route is clear. 4. Open the route before moving the main block into a tight space. 5. Use Undo if the portal move was only one step wrong; reset the level if the player ends up on the wrong side of the block with no recovery route. Avoid this strategy when: you do not know where the player or block will end up after using the portal, teleporter, or gate. Why this works: Portals and gates are route tools. They should create access before you commit the main block. Common Mistakes Mistake · Why It Hurts · Better Move Pushing before reading the board · The first move can close the route needed later. · Find the target and final push direction first. Moving the closest block first · The closest block may only be blocking space. · Identify the main block before moving anything. Pushing into a corner too early · The block may become impossible to recover. · Use corners only for final placement. Ignoring standing space · The block moves, but the player loses the next pushing side. · Check where the player will stand after the push. Stepping on a glowing switch too early · A gate or route may change before the layout is ready. · Clear walking space before activating it. Dropping a block onto a pressure plate too soon · The block may hold the plate but trap the player’s route. · Check both the opened path and your escape path. Entering a blue portal without checking the exit · The player may land on the wrong side of the block. · Use portals only when the exit position helps the next move. Trying to fix a locked layout too long · Repeating blocked moves wastes time. · Use Undo for one bad move or reset when the route is fully locked. Playing too fast · Speed creates unnecessary dead ends. · Slow down and solve one move ahead. FAQ What is Magic Block Pusher? Magic Block Pusher is a block pushing puzzle game where players solve stages by moving blocks, keeping routes open, and avoiding trapped positions. How do you play Magic Block Pusher? Read the layout, find the target, stand on the correct side of each block, and push in an order that keeps future moves possible. What is the safest first move in Magic Block Pusher? The safest first move is usually not pushing a block. First, find the target, the narrowest route, and the side needed for the final push. Why do I keep getting stuck in Magic Block Pusher? Most stuck situations happen because a block was pushed into a wall, corner, or hallway before the player had enough space for the next push. Should I move the closest block first? Not always. The closest block may only be blocking the route. Find the target first, then decide which block actually matters. How do I solve narrow hallway stages? Push only far enough to open the route. Do not send a block to the end of a hallway unless that end position is part of the solution. What should I do when a block is stuck in a corner? If the corner is not the final target, use Undo if that single move can be reversed. If not, reset the level and keep that block in open space next time. When should I use Undo instead of Reset? Use Undo when you made one recent mistake and the route is still mostly safe. Use Reset when the main block is trapped, the player cannot reach the needed side, or several earlier pushes caused the problem. Can this guide help if I am stuck on a later level? Yes. Later stages in Magic Block Pusher usually become harder because blocks, narrow routes, gates, pressure plates, or portals are combined in tighter spaces. Start from the target, keep the final pushing side open, and reset early when the main block becomes trapped.
- Milk Match Puzzle
Milk Match Puzzle About This Game Milk Match Puzzle is a casual match-3 / elimination puzzle game built around milk-themed tiles, glowing power pieces, and level-based clearing goals. The core loop is easy to understand: match tiles, clear space, create stronger effects, and finish the target shown on the board. The challenge comes from choosing the right move, not from tapping every available match. A basic three-tile clear can help, but a stronger move often creates a power tile, opens a blocked section, or prepares a better follow-up clear. Good play comes from asking what the board will look like after the move, not only what disappears immediately. The game rewards careful board reading. A four-tile match can create a row-clearing or column-clearing glowing tile. A larger pattern can create a stronger special tile that clears a wider area or removes a selected tile type. These enhanced pieces are most useful when they connect with the target area, blocked sections, or hard-to-reach tiles. Milk Match Puzzle is best played with a simple rule: every move should either clear something important, create a stronger tool, or make the next move easier. How to Play Start each level by checking the board layout, the target area, and the number of moves available. Then scan for matching tiles, blocked sections, and possible four-tile or five-tile setups. Do not rush into the first available three-tile clear if another move can create a stronger effect. Clear three matching tiles for a basic elimination. When the board allows a larger match, try to create a glowing special tile and use it where it can hit the most valuable area. Match Combination · Descriptive Result · Visual Description · What It Can Do · Best Use 3 matching tiles · Basic tile clear · Three identical milk-themed tiles disappear from the board · Removes the matched tiles · Use for direct progress, small openings, or simple target clearing 4 matching tiles in a row · Row-clearing glowing tile · A bright horizontal power tile with a glowing stripe effect · Can clear a full horizontal row when activated · Best for targets or obstacles spread across the same row 4 matching tiles in a column · Column-clearing glowing tile · A vertical glowing power tile with an up-and-down clearing effect · Can clear a full vertical column when activated · Best for lower tiles, vertical target paths, or stacked obstacles 5 matching tiles in a straight line · Color-clearing special tile · A bright multi-color special tile that stands out from normal pieces · Can remove one selected tile type from the board · Best when many useful tiles share the same type 5 matching tiles in an L or T shape · Area-clearing special tile · A stronger glowing tile with a bright center and burst-style effect · Can clear a wider area around the activated tile · Best for corners, dense sections, and obstacle clusters Two special tiles combined · Power tile combo · Two glowing special tiles trigger a larger combined effect · Can create a stronger clearing effect than using one tile alone · Best when the combo reaches targets or blocked sections After each clear, watch how tiles fall into place. A good move may create another match automatically, bring target tiles closer together, or place a special tile in a better position. Use boosters when normal matching cannot solve the board efficiently. Booster · Visual Description · What It Does · Best Timing Hammer · A small hammer-style tool icon used for direct tile removal · Removes one chosen tile or obstacle layer · Use on a final target tile, blocked corner, or tile that normal matches cannot reach Horizontal Clear Booster · A wide glowing booster with a left-to-right clearing direction · Clears or creates a horizontal clearing effect · Use when targets or obstacles are spread across one row Vertical Clear Booster · A tall glowing booster with an up-and-down clearing direction · Clears or creates a vertical clearing effect · Use when key tiles are stacked in one column or trapped below other tiles Color-Clearing Booster · A bright multi-color special booster that targets one tile type · Removes one selected tile type · Use when the board has many useful tiles of the same type When Not to Use a Booster Do not use a booster just because it is available. Avoid using a Hammer on a tile that can be cleared by a normal match. Avoid using a Horizontal Clear Booster or Vertical Clear Booster if the clearing path does not touch target tiles, obstacles, or a blocked section. A booster is most valuable when it solves a problem that normal matching cannot solve in time. If the board still has easy matches that lead toward the target, save the booster for a harder moment. Beginner Strategy Guide • Compare moves before clearing. Look at more than one possible match. The first legal move is often weaker than a move that creates a glowing tile or opens the target area. • Use three-tile clears for setup. A basic match is useful when it brings tiles together, opens space, or moves the board toward a stronger combination. • Create four-tile matches when they line up naturally. Row-clearing and column-clearing glowing tiles are reliable tools because they can reach across the board. • Do not force five-tile matches at any cost. A five-tile special is powerful, but wasting several moves to chase one can hurt your progress. Build it when the setup is already close. • Place special tiles near the problem area. A special tile is strongest when it touches targets, obstacles, or dense sections. Activating it in an empty area usually wastes its value. • Use bottom-board clears with purpose. Lower matches can trigger tile drops and chain reactions, but they should still help the target area or create a stronger follow-up move. • Save the Hammer for hard tiles. The Hammer is best for corners, final targets, locked pieces, or obstacle layers that cannot be reached through normal matching. • Use horizontal and vertical clears based on board shape. If the problem stretches across a row, use a horizontal clear. If the problem is stacked in a column, use a vertical clear. • Plan around the final five moves. When only a few moves remain, stop chasing random clears. Count what the level still needs and use every move to finish the target. • Think in two moves. Before clearing a match, ask what the next move will become. The strongest play is often the move that improves the next two turns. Dealing with Blockers (Obstacles) Some levels include obstacles that limit movement, block target tiles, or make certain areas harder to clear. These should be handled early because they become more difficult when only a few moves remain. Obstacle · Visual Description · How It Works · How to Clear It · Best Tool Frozen blocker · A tile covered by a pale ice-like layer · Covers or traps a tile under a frozen layer · Match beside it or hit it with a clearing effect; thicker layers may need repeated hits · Hammer, area-clearing special tile, horizontal clear, vertical clear Layered blocker · A stacked block with multiple visible layers · Takes up board space and needs more than one hit · Clear matches beside it or use power effects to remove layers faster · Area-clearing special tile, horizontal clear, vertical clear Locked tile · A tile held by a lock-style visual element · Holds a tile in place until the lock is broken · Clear nearby matches or hit it with a booster · Hammer, nearby match, row or column clear Corner obstacles should be handled early because fewer matches can reach them. Middle obstacles can often be cleared faster with an area-clearing special tile. Row or column obstacles are good targets for horizontal or vertical clearing boosters. If an obstacle needs multiple hits, do not leave it for the final few moves. Open space around it first, then use a special tile or booster when it can hit the blocked section directly. Common Mistakes Using special tiles in weak positions: A row-clearing or column-clearing tile is much stronger when its path crosses targets or obstacles. Do not activate it through an empty section unless it creates a clear follow-up. Wasting board-clearing effects too early: Do not spend a powerful clear while the real target is still hidden under a multi-layer obstacle. Open the obstacle first, then use the stronger effect when it can actually reach the target. Saving every booster for too long: Boosters should not be wasted, but they also should not sit unused when they can finish a difficult section. Use them when they directly solve the board’s biggest problem. Using the Hammer on an easy tile: Do not spend the Hammer on a tile that a normal match can remove. Save it for corners, locked pieces, final targets, or stubborn obstacle layers. Ignoring obstacles until the end: Frozen blockers, layered blockers, and locked tiles can slow the whole board. Start working on them before the level reaches its final moves. Forcing large matches too often: A five-tile special is useful, but chasing it for too long can waste moves. If a simple match clears the target, take the simple match. Playing only from the top of the board: Top-board matches usually change less of the board. Lower clears and obstacle-side clears often create stronger cascades. FAQ What is Milk Match Puzzle? Milk Match Puzzle is a casual match-3 puzzle game where players clear matching tiles, create glowing power tiles, and complete level targets. How do you play Milk Match Puzzle? Match three or more identical tiles, clear them from the board, build stronger special tiles through larger combinations, and use boosters when normal matches cannot solve the target area. What happens when you match four tiles? A four-tile match can create a row-clearing or column-clearing glowing tile. When activated, it can clear a full row or column. What happens when you match five tiles? A straight five-tile match can create a color-clearing special tile. An L-shaped or T-shaped five-tile match can create an area-clearing special tile. What is the best booster in Milk Match Puzzle? The Color-Clearing Booster is usually the strongest choice when the board has many target tiles of the same type, because it can remove that tile type in one move. The Hammer is better for saving a nearly failed level when only one hard-to-reach tile, locked tile, or obstacle layer is stopping progress. How should I save coins, boosters, and extra moves for harder levels? Save coins and boosters for hard boards, not easy clears. A good rule is to spend resources only when you have fewer than five moves left, one key target remains, or a blocked section cannot be reached by normal matching. Extra moves are most valuable when the level is almost complete, not when the board still needs too much work. How do I deal with frozen blockers? Clear matches beside them or hit them with a booster. If the frozen layer needs repeated hits, use a Hammer, area-clearing special tile, horizontal clear, or vertical clear to break it faster. What is the hardest mechanic in the game? The hardest mechanic is handling obstacles in corners or crowded sections. Open space around them early, then use a special tile or booster when normal matching cannot reach them.
- Chibi Hero Tile Quest
Chibi Hero Tile Quest About This Game Chibi Hero Tile Quest is a chibi hero match-and-battle puzzle game built around hero collection, clickable hero tiles, team deployment, and turn-based battle choices. This Chibi Hero Tile Quest strategy guide helps beginners understand how to build a team, read enemy targets, use hero tiles, and press Go at the right time. The game combines cute pixel-style hero portraits with light puzzle strategy. In battle, enemy targets are shown in the upper area, while available hero tiles appear around the lower and side areas of the screen. Players click hero tiles to prepare actions, then use the Go button to confirm the turn. This makes every round a small decision: check the enemy target, choose the hero tile that fits the situation, and press Go only when the move helps the current turn or sets up the next one. The game also includes a wider hero progression loop. The Hero Collection screen lets players view heroes such as KK Rainbow, Super Kid, and White Dragon, along with their level, upgrade progress, and role labels. The Deploy Hero area is where players choose which heroes to bring into battle. Other sections such as Battle, Trial, Treasure, and Shop support progression. In this game, Treasure is mainly connected with coins, while the Shop is used for hero shards and collection progress. The main skill in Chibi Hero Tile Quest is learning how hero roles, tile clicks, and turn timing work together. A strong player does not simply tap every available tile. They build a useful team, check enemy pressure, click the right hero tile, and confirm with Go only after the action makes sense. How to Play Follow this 6-step flow when starting a stage: 1. Step 1: Check your Hero Collection first. Before entering battle, review your available heroes. Look at characters such as KK Rainbow, Super Kid, and White Dragon, then check their level, upgrade progress, and role label. 2. Step 2: Read each hero’s battle role. Use the role labels to understand your team. Super Kid works as your DPS choice, KK Rainbow works as your support option, and White Dragon works as your control option. 3. Step 3: Build a balanced team before battle. A simple beginner setup is: Super Kid for damage, KK Rainbow for support, and White Dragon for control. This gives you a cleaner structure than choosing heroes only by appearance or level. 4. Step 4: Scan enemy targets before clicking tiles. Once the battle starts, look at the upper battle area first. Count the active enemies, find the most urgent target, and decide whether the next move needs damage, support, or control. 5. Step 5: Click the hero tile that solves the current problem. Hero tile actions are triggered by clicking. Click Super Kid when you need direct pressure, KK Rainbow when the team needs support, and White Dragon when enemy pressure needs to be controlled. 6. Step 6: Confirm with Go only after planning the next turn. The Go button confirms your selected action. Before pressing it, ask whether the clicked tile helps now and whether it leaves you with a playable next turn. After the action resolves, repeat the same loop: read the enemy target, scan your available hero tiles, click the best tile, then press Go. This rhythm is more reliable than tapping randomly because every move has a purpose. Beginner Strategy Guide Beginner Team Formula For early stages, use this simple lineup structure: Optimal Team = 1 DPS (Super Kid) + 1 SUP (KK Rainbow) + 1 CC (White Dragon) This formula gives your team three important tools: damage, stability, and control. It also prevents the common beginner mistake of using only damage heroes and then struggling when enemy pressure builds. Hero Skill Roles Super Kid is your main DPS option. Use Super Kid when you need direct damage pressure or when an enemy target is close enough to finish. KK Rainbow is your support option. Use KK Rainbow when the team needs more stability, safer turn flow, or a better setup before pressing Go. White Dragon is your control option. Use White Dragon when enemy pressure is building and you need to slow the pace of the battle or create a safer next turn. Target Priority Rule When several enemies are visible, do not attack randomly. Use this order: 1. Finish an enemy that is already close to defeat if doing so reduces pressure immediately. 2. Target the enemy that creates the biggest problem for your next turn. 3. Use KK Rainbow or White Dragon before damage if your team is under pressure. 4. Avoid spending Super Kid on a low-threat enemy unless it creates a safer board state. This rule is especially important before pressing Go. A strong move is not always the flashiest move. The best move is the one that makes the next turn easier. Hero Tile Click Rule In Chibi Hero Tile Quest, hero tile actions are triggered by clicking. That means every click should have a reason. Before clicking a hero tile, check: • Which enemy needs attention first? • Do I need damage, support, or control? • Is Super Kid, KK Rainbow, or White Dragon the best answer? • Will this click help the current turn? • Will this click leave better options after Go? Do not click the first tile you see. Tiles on the side of the battle area can be easy to miss, but they may offer a better move than the obvious tile near the bottom. Go Button Checklist Before pressing Go, run this quick check: • Did I look at the enemy area first? • Did I click the hero tile for a clear reason? • Am I solving the most urgent threat? • Will this move leave useful options for the next turn? • Am I using Super Kid, KK Rainbow, or White Dragon at the right moment? If the answer is unclear, pause and scan the board again. Most beginner mistakes happen because the player presses Go before the move has a purpose. Upgrade and Resource Rule Do not spread resources across every hero as soon as you unlock them. Build a small core team first. A practical early upgrade order is: 1. Upgrade Super Kid first if damage is your biggest problem. 2. Upgrade KK Rainbow if your team often loses stability before the battle ends. 3. Upgrade White Dragon if enemy pressure becomes difficult to control. 4. Delay upgrades for heroes you rarely deploy. Treasure is mainly connected with coins, while the Shop is used for hero shards. Use coins and shards to support heroes you actually deploy. The goal is to make your core team stronger, not to make every hero slightly upgraded. Energy Use Rule Energy should be spent on progress that improves your main team. Do not burn energy only because it is available. A practical beginner rule is: • Spend energy on battles that help your core team progress. • Use energy on Trial when it supports upgrades or hero growth. • Avoid repeating low-value stages if they do not help your current lineup. • Check whether you need coins, shards, or upgrade progress before spending energy. The best energy use is not always the fastest stage. It is the stage that gives your team the most useful progress. Common Mistakes Pressing Go before reading the enemy target. The Go button should confirm a decision, not replace one. Always check the enemy area before clicking a hero tile. Clicking the first available hero tile. A tile that can be clicked is not automatically the best tile. Compare the bottom and side tiles before acting, especially when multiple enemies are active. Ignoring the beginner team formula. A simple early team should include 1 DPS, 1 SUP, and 1 CC. Using Super Kid, KK Rainbow, and White Dragon together gives you a cleaner structure than stacking only damage. Using Super Kid on the wrong target. Super Kid should be used when damage matters. Do not waste a strong DPS action on a low-threat enemy unless it improves the next turn. Saving KK Rainbow for too long. Support is most useful before the battle falls apart. Use KK Rainbow when the team needs stability, not only after the situation is already bad. Forgetting White Dragon when enemy pressure builds. White Dragon is your control option. If enemies are creating too much pressure, use White Dragon to help slow the battle pace and create a safer turn. Spending coins or shards without a plan. Treasure gives coins, and the Shop provides hero shards. Focus both on heroes you use often instead of spreading upgrades across every character. Wasting energy on low-value progress. Energy should support your main team. Before spending it, decide whether you need coins, shards, upgrade progress, or battle advancement. FAQ What is Chibi Hero Tile Quest? Chibi Hero Tile Quest is a cute chibi hero match-and-battle puzzle game. It combines hero collection, clickable hero tiles, team deployment, enemy target reading, and turn-based battle decisions. How do you play Chibi Hero Tile Quest? Build a team in Hero Collection or Deploy Hero, enter battle, read the enemy targets, click the hero tile that solves the current problem, then press Go to confirm the action. What is a recommended beginner team in Chibi Hero Tile Quest? A strong beginner formula is 1 DPS + 1 SUP + 1 CC. For the early heroes shown in this guide, that means Super Kid as DPS, KK Rainbow as SUP, and White Dragon as CC. How should I use Super Kid? Use Super Kid when you need direct damage pressure. Super Kid is best used against urgent enemy targets or enemies that are close enough to finish. How should I use KK Rainbow? Use KK Rainbow when your team needs support or a safer turn setup. Do not wait too long to use support, because support is most valuable before the battle becomes unstable. How should I use White Dragon? Use White Dragon when enemy pressure is becoming difficult to manage. White Dragon works best as a control option that helps slow the battle pace and create a safer next turn. How should beginners use Shop items and Energy? Use Shop hero shards and Energy to support your main team first. Prioritize heroes you deploy often, such as Super Kid, KK Rainbow, and White Dragon, instead of spending resources across random characters or low-value stages. Coins, hero shards, Treasure, Shop items, and Energy are virtual in-game systems only. They are not real-world rewards, cash prizes, gambling rewards, or physical items.
- Rainbow Tube Sort
Rainbow Tube Sort Core Logic and Movement Rules Rainbow Tube Sort is a casual color sorting tube puzzle game where the goal is to move colored balls between tubes until each color is grouped cleanly together. The game looks simple at first, but every move changes the board, so careful planning matters more than fast tapping. The main movement rule is simple: a ball can usually be moved only when the destination tube is empty or when the top ball in that tube matches the same color. This means a useful move should do at least one of three things: connect matching colors, reveal a blocked color, or make the next move easier. An empty tube is valuable because it gives you room to rearrange balls. Instead of treating it as a place to drop any random color, think of it as your temporary sorting space. Once that space is gone, every later move becomes harder to control. Before moving a ball, look across the whole board. Check which colors are already close to completion, which colors are trapped near the bottom, and which move will help the next step. The challenge fails when no ball can legally move to another tube, so the safest approach is to keep the board flexible for as long as possible. Quick strategy summary: finish easy color groups first, uncover buried colors before the board gets crowded, protect at least one useful sorting space, and use Manage only when one extra tube clearly opens a safe path forward. Advanced Sorting Strategy A strong Rainbow Tube Sort strategy starts by looking below the top balls. The top ball decides what you can move right now, but the lower balls decide whether the puzzle will stay solvable later. One useful method is the bottom-up check. This simply means looking at the lowest visible colors before making obvious top-level moves. If the same color appears near the bottom of several tubes, do not keep covering it with unrelated balls. Try to uncover one version of that color first, then use it as the starting point for building the full stack. Another common situation is the sandwich pattern. This happens when one color is split by another color inside the same tube, such as Red - Blue - Red. The problem is not just the top Red ball. The real issue is that the Blue ball is separating two matching Red balls. For example, if a tube has Red - Blue - Red from top to bottom, a simple recovery sequence might look like this: 1. Move the top Red to a tube that already has Red on top, if that move is legal. 2. Move the blocking Blue into a safe open tube or a tube with Blue on top. 3. Reconnect the lower Red with the red stack once the path is clear. This kind of sequence teaches an important lesson: do not move a ball just because it can move. Move it only when the next two or three steps still make sense. Color priority means choosing which color should be solved first. A good early target is a color that is already visible in several places and not buried too deeply. A weak target is a color that looks easy to move now but would trap another color underneath it. If two tubes both contain the same color near the top, try to merge them only if the move does not block something more important. A clean 3-ball group may look useful, but it can still be a mistake if it traps the final ball of another color in a tube with no clear exit. Tool Guide Rainbow Tube Sort includes three helpful tools: Undo, Hint, and Manage. These tools work best when they support your own planning. They should not replace the basic skills of reading the board, choosing color priority, and thinking a few moves ahead. Undo is best used right after a bad move. If you just blocked a possible full-color stack, covered a color you needed to uncover, or used your only useful sorting space too soon, Undo can stop that mistake from turning into a dead end. Hint is useful when you cannot see a clear next move. After using it, do not just continue tapping. Look at the suggested move and ask why it helped. Did it reveal a hidden color, connect a color group, or open a better route? Manage adds an extra tube for the current round, and it can only be used once per game. Save it for a board that is crowded but still possible to fix. Do not wait until every useful move is gone, because the extra tube works best when it can still turn a blocked plan into a playable sequence. Do's and Don'ts ✅ Do plan a few moves ahead. Before moving a ball, check what that move opens next. A good move should improve the next step, not just the current tube. ❌ Do not fill every empty tube immediately. Use open space only when the move helps complete a color group, uncover a blocked color, or create a clearer path. ✅ Do protect clean color groups. If several balls of the same color are already stacked together, avoid breaking them apart unless doing so unlocks something important. ❌ Do not group three balls if it traps the fourth ball of another color. A move can look good in one tube but still damage the whole board. Always check what becomes harder after the move. ✅ Do use partial fills carefully. A partly filled tube can help when it still leaves enough room for the next move. This is useful when you need to shift one blocking ball without losing control of the board. ❌ Do not rely on tools instead of planning. Undo, Hint, and Manage can help with mistakes or tight positions, but the main solution still comes from choosing the right move order. ✅ Do choose a color priority. Pick one color that is close to completion or needs to be uncovered soon. Sorting one color with a clear purpose is better than moving several colors randomly. ❌ Do not move only because a move is legal. For example, moving a green ball into an open tube may be legal, but it may still be weak if that tube was the only place available to free a buried red ball. Board Survival Tips On easier boards, look for colors that already appear close together. If the same color is visible in several tubes and not buried too deeply, it may be a good early target because it takes fewer moves to complete. On crowded boards, protect your last useful open tube unless the move clearly completes a color group or opens another tube. The goal is not to keep space forever, but to spend it only when it creates progress. On mixed-color boards, look for buried colors before making obvious top-level moves. Sometimes the top ball is only a distraction. The real problem may be a color hidden two or three layers down. A healthy board usually gives you choices: one color close to completion, one route to uncover a blocked color, or several top balls that can connect with matching colors. A dangerous board gives you only moves that shift clutter around without opening anything. Watch for warning signs before the board locks. If your last open tube is filled, several useful colors are buried near the bottom, and every legal move only makes another tube messier, the puzzle is becoming dangerous. This is the moment to slow down, use Undo if the last move caused the problem, or use Manage if one extra tube can still create a path forward. If the board feels stuck but still has legal moves, look for one of three recovery options: complete one color, empty one tube, or uncover one blocked color. Most good recoveries begin with one of those three choices. FAQ How do I recover from a no-move situation? If no ball can legally move, the challenge may already be failed. Before that point, use Undo to reverse the mistake or Manage if one extra tube can still reopen the puzzle. Is there a time limit in Rainbow Tube Sort? Based on the provided gameplay information, the main challenge is move planning rather than speed. Focus on accuracy and clean sorting instead of rushing. When should I use the extra tube? Use Manage when the board is crowded but still possible to fix. Avoid using it early on a board that still has several safe moves. What is the best beginner strategy? Start by reading the whole board. Finish easy color groups, uncover buried colors, and avoid moves that block the next step. Should I use Hint often? Hint is helpful when you are stuck, but it should be used as a learning tool. After using it, check why that move improved the board. What causes most failed rounds? Most failed rounds come from covering important colors, breaking clean groups, spending open space too early, or making legal moves that do not create progress. Is Rainbow Tube Sort a gambling game? No. Rainbow Tube Sort is a casual color sorting tube puzzle game. Balls, tubes, tools, rewards, and similar elements are virtual game mechanics only. Editorial Note This guide is based on the gameplay information provided for Rainbow Tube Sort. It is designed to help players understand the movement rules, color sorting logic, tool timing, and practical ways to avoid dead ends. Rainbow Tube Sort is treated here as a casual color sorting tube puzzle game. Any balls, tubes, tools, rewards, or similar elements mentioned in this guide refer only to virtual in-game mechanics.
- Build a Boat
Build a Boat About This Game Build a Boat is a relaxing boat assembly puzzle game built around visual matching, level progression, and a simple task-completion loop. In each stage, players assemble a boat by placing puzzle parts into the correct positions based on the shadow outline shown on screen. The game is not only about dragging parts into place. To move forward, you need to complete the full cycle for the current boat: assemble it, fuel it, send it out on a sea mission, wait for it to return, and finish the maintenance step. Once the required steps are complete, the next stage can open with a new boat to build. Build a Boat is designed for players who enjoy casual puzzle games, boat assembly games, and light task-based challenges. The controls are simple, usually based on guided clicks, taps, drags, or sliding actions. The challenge comes from reading the outline correctly, placing parts in a smart order, and paying attention to the prompts after assembly. As the level progression continues, the boats can become more complex. Early stages are usually easier to read, with larger parts and clearer shapes. Later stages may introduce smaller details, similar-looking pieces, and more crowded boat structures. This gives Build a Boat a steady difficulty curve while keeping the gameplay relaxed and easy to understand. How to Play Build a Boat follows a simple five-step gameplay loop: 1. Study the boat shadow. Look at the full outline before moving any part. Identify the base, front, back, and largest visible sections of the boat. 2. Assemble the boat parts. Place the largest or clearest parts first, then match smaller pieces by edge shape, curve, size, and direction. 3. Fuel the completed boat. After the assembly is finished, follow the game prompt to add fuel before the mission begins. 4. Complete the sea mission. Send the boat out and follow any on-screen instructions connected to the mission stage. 5. Finish return and maintenance. After the boat returns, complete the maintenance prompt to finish the stage flow and continue progression. This loop is important because assembly alone is not always enough to move forward. In Build a Boat, the post-assembly steps are part of the stage progression, so slow down and finish the full cycle before expecting the next boat to unlock. Key Progression Expectations Stage Type · Boat Assembly Feel · What Usually Gets Harder · Best Focus Early stages · Larger parts and clearer outlines · Learning the basic drag, snap, and prompt flow · Place the hull or base first Middle stages · More sections and similar-looking pieces · Comparing edges, curves, and part direction · Use anchor pieces and check two visual clues Later stages · More crowded boat structures · Small details, tighter gaps, and confusing part shapes · Leave tiny pieces for the end and use process of elimination This table is best used as a general progression guide, not a fixed level chart. The exact boat names, mission timing, and unlock details may vary by version. Beginner Strategy Guide Best Assembly Order for Beginners A safer beginner order is to build the boat from the largest shape to the smallest details. 1. Start with the longest hull or base piece because it defines the bottom shape of the boat. 2. Use the bow and stern pieces to confirm the front and back direction. 3. Add cabin-like or upper structure parts after the main body is stable. 4. Place small trim pieces and similar-looking parts near the end. 5. If a part only matches one edge of the shadow, skip it and check another gap first. This order works well because the largest parts create a visual frame. Once the main body is correct, the remaining spaces become easier to understand. Two-Point Match Rule Do not place a part only because one side looks correct. A reliable match should usually fit at least two visual clues, such as a long edge plus a corner, a curve plus a short side, or a clean nearby gap. This rule is especially useful when two parts look similar. If a piece matches one side but leaves an awkward gap, overlap, or wrong-facing corner, it may belong somewhere else. For example, a curved hull-style piece should not be placed only because its bottom edge looks close. Check whether the curve direction and nearby corner also match the shadow. If both points line up, the part is much more likely to belong there. The Edge-Snapping Mechanic Build a Boat appears to judge placement by how closely a part matches the shadow outline. When a part is close enough to the correct position, the game may snap or accept it into place. The safest approach is to align the edge, curve, and corner as accurately as possible instead of dropping the part near the general area. A good placement usually has three signs: 1. The part covers the matching shadow area cleanly. 2. The corners and curves point in the same direction as the outline. 3. The piece does not leave an obvious gap or overlap with nearby sections. If the part does not snap into place, do not keep forcing it. Pull it back, compare the edge again, and check whether another larger piece should be placed first. Early-Level Strategy In the early stages, focus on learning the basic rhythm of the game. These levels are usually easier because the boat shapes are clearer and the parts are more recognizable. Use these stages to practice reading the shadow before dragging, placing the base first, and checking whether a part aligns cleanly. Do not rush just because the first boats feel simple. The habits you build early will help later when the boats become more detailed. Later-Level Strategy As the stages become harder, expect more similar-looking parts and smaller spaces. Later boats may have crowded structures, tiny trim pieces, or parts that only fit one specific gap. In these levels, the best approach is to use process of elimination. Place the largest and most unique parts first. Leave tiny or unclear pieces until the end. Once most of the shadow is filled, the remaining gaps will make the smaller pieces easier to identify. Use the Anchor Method on Hard Stages The anchor method means choosing one reliable part to build around. This is usually the longest base piece, the main hull, or another large part with a unique shape. Once that anchor is placed correctly, every other piece becomes easier to compare. On a more complex boat, a large central body section or cabin-like piece can work as the anchor. After that piece is stable, smaller details around it become easier to place because the nearby gaps are clearer. On harder stages, do not start with small parts. They may look correct in multiple places, but they become much easier to place after the main boat structure is stable. Handle Stuck Parts Calmly If a part will not fit, check three things: 1. Is the part facing the correct direction? 2. Does the full edge match the shadow, not just one side? 3. Is another nearby piece supposed to be placed first? If the answer is unclear, stop working on that piece and move to a more obvious part. Returning later often solves the problem because the remaining empty space becomes clearer. Do Not Rush the Post-Assembly Prompts Don't rush the post-assembly prompts. Finish the cycle to unlock the next level. After the boat is built, continue following the game instructions until the current stage is clearly complete. This helps prevent confusion when the next boat does not appear immediately. Common Mistakes Mistake · Why It Causes Problems · Better Approach Starting without checking the full outline · You may place a correct part in the wrong section · Look at the full shadow before dragging Placing small parts too early · Tiny parts can look correct in several gaps · Save them until the larger structure is complete Ignoring the front and back direction · Some pieces may look similar when placed near the wrong end · Confirm the bow and stern before adding details Forcing a piece that does not snap · The part may be misaligned or in the wrong area · Pull it back and compare the full edge again Matching only one edge · One side may fit while the rest of the part is wrong · Use the Two-Point Match Rule Rushing after assembly · You may miss the prompt needed to finish the stage · Follow the post-assembly cycle carefully Expecting every level to feel the same · Later boats may need slower, more careful placement · Adjust your pace as the boat structure gets more complex Forgetting process of elimination · Hard parts become confusing when solved too early · Place obvious pieces first, then solve the remaining gaps FAQ What is Build a Boat? Build a Boat is a casual boat assembly puzzle game where players match boat parts to a shadow outline, then complete fueling, mission, return, and maintenance steps to progress. How does the level system work in Build a Boat? Build a Boat uses a stage-based progression loop. You complete the current boat’s assembly, fueling, mission, return, and maintenance flow before moving on to the next stage. What is the best assembly order for beginners? Start with the longest hull or base piece, confirm the front and back of the boat, add the upper structure, and finish with smaller details. What should I do if a piece will not fit? Pull the piece back and compare its full edge with the shadow. If it still does not fit, place a larger surrounding part first and return to the difficult piece later. How do I progress faster in Build a Boat? Reduce placement mistakes. Study the full shadow, place anchor pieces first, use the Two-Point Match Rule, leave tiny parts for the end, and avoid rushing through post-assembly prompts. Can I skip a difficult level in Build a Boat? No. Progression is strictly linear. You must complete the current boat’s full task loop (assembly, fueling, mission, maintenance) before the next stage unlocks. Will I lose points if I assemble the boat incorrectly? No. There is no penalty for incorrect placement. Treat it as a trial-and-error puzzle—simply pull the part back, recheck the outline, and continue. Do missions continue while I am offline? No. Missions pause when you close the game. You need to actively keep the game open to complete the task flow and follow the game prompts. Editorial Note Note: Build a Boat is a casual virtual puzzle game. All missions, fuel mechanics, and maintenance steps are in-game features, not real-world boating instructions.
- Little Fox Adventure
Little Fox Adventure About This Game Little Fox Adventure is a casual fox platform puzzle game built around block switching, falling routes, and careful timing. Your fox moves through layered stages where some blocks can stay solid while others become transparent. The challenge is not to rush downward, but to decide when a block should support the fox and when it should open the next path. Solid blocks help create safe pauses, landing points, and jump setups. Transparent blocks open the way to lower layers, but poor timing can drop the fox into the wrong area. This puzzle rewards observation. A clean route, a controlled fall, and a well-timed switch usually matter more than quick reactions. How to Play Before making the first move, scan the full layout. • Find the fox’s starting position. • Check the key location. • Notice where the collectible diamonds are placed. • Identify which blocks can change state. • Look one layer below before opening a drop. The core rule is simple: the key is the level-clear objective, while diamonds are optional in-game collectibles used for star rating improvement. Clear the key route first, then replay the level to improve diamond collection and star rating. A basic move sequence looks like this: 1. Keep a solid block active if the fox needs a safe platform. 2. Wait until the fox is lined up above the next landing. 3. Switch the correct block to transparent. 4. Let the fox drop only when the lower route is useful. 5. Use jumps after checking the current block state. 6. Adjust the next switch based on where the fox lands. Not every open path is a good path. A transparent block may look helpful, but if the fox lands too far from the route, the level becomes harder to control. Beginner Strategy Guide Start With the Route, Not the Reward Before switching the first block, decide where the fox should go. A common beginner mistake is reacting to the nearest object instead of reading the whole screen. Ask three quick questions: • Where should the fox end up? • Which block controls the first safe drop? • What happens one layer below? If the first drop is poorly timed, the rest of the level often becomes unstable. Safe Drop Setup Use this method when the fox is standing above two possible landing areas. 1. Do not switch the transparent block immediately. 2. Watch which lower platform gives the fox more control. 3. Keep a nearby solid block active as a stopping point. 4. Wait until the fox is directly above the intended landing. 5. Open the block only when the drop is lined up. This setup works because the first fall often decides the rest of the route. A slower switch can be safer than an early switch. Side Route Decision A side path is only worth taking when the route stays stable. Take the side route when: • The platform is wide enough to recover. • The jump does not require perfect timing. • The fox can return to the main path after landing. • The block switch does not remove an important support. Skip the side route when: • The landing is too narrow. • The fox must cross several transparent blocks in a row. • One missed jump sends the fox away from the main route. • The route forces you to remove a useful solid block too early. A strong first run is not about perfection. It is about learning which parts of the level are safe and which parts should wait for another attempt. Quick Decision Guide: Should You Go For It? Situation · Safer Choice · Why It Helps The main route is below but a side path is nearby · Follow the main route first · The side path may pull the fox away from the stable route A transparent block opens a long drop · Check the next landing before switching · A long drop can send the fox into a poor position A side platform needs a narrow jump · Skip it on the first clear · A failed jump can ruin the route The fox keeps missing the lower platform · Switch the block later · The fox may not be lined up yet A solid block blocks the path · Do not remove it immediately · It may be needed as a timing stop or jump platform What to Change After a Failed Route Do not repeat the exact same move and hope for a better result. Change one decision per attempt. • If the fox falls too early, delay the transparent block switch. • If the fox misses the platform, wait for better alignment. • If a side route keeps failing, return to the safer main route. • If the level feels unstable, keep more solid blocks active. • If the fox drops into the same wrong path, change the first switch timing. Small timing changes are easier to learn than completely changing the whole route at once. Best First-Clear Plan For the first clear, focus on finishing the route before chasing every side path. 1. Find the safest main route first. 2. Keep support blocks solid until the fox is aligned. 3. Open one transparent block at a time. 4. Skip narrow side jumps on the first attempt. 5. Replay the level after you understand the safe path. This approach helps beginners complete the stage first, then improve collection and star rating later. Advanced Techniques Edge Jumping Timing If the current level gives the fox enough platform control, edge timing can help reach a nearby landing. Let the fox approach the edge, keep the landing block solid, then jump before losing platform control. Avoid switching the next block too early unless the lower landing is already lined up. Solid-Block Guardrail A solid block can work like a guardrail. It can stop the fox from dropping too far, create a short planning window, or prevent a bad fall into a lower route. Use this when the next layer has multiple paths or when a transparent block would create a long uncontrolled drop. Multi-Layer Transparent Rhythm Some layouts require several transparent blocks to be switched in sequence. Do not open every layer at once. Open the first block, wait for the fox to land or align, keep the next support solid, then open the next block only when the fox is ready. Jump and Switch Pairing A jump should solve a position problem. A block switch should solve a route problem. If the fox needs distance, jump first and switch after the landing direction is clear. If the fox needs a lower route, switch first and jump only after the fox stabilizes. Common Layout Patterns The examples below describe common layout patterns that may appear in Little Fox Adventure. Use them as route-planning examples rather than fixed stage names. Two-Landing Split Pattern Problem: The fox stands above a transparent block, and there are two lower platforms. One platform is wide but slightly farther away. The other is narrow and closer. Better route: 1. Keep the upper block solid until the fox reaches the center. 2. Check which lower platform leads to the next stable position. 3. Choose the wider platform if both routes are possible. 4. Switch the block only when the fox is above the safer landing. 5. Use the solid lower platform as a pause point before the next move. Why this works: The wider landing gives more time to recover. The narrow platform may look faster, but it can force a risky jump immediately after the drop. Side Platform Gap Pattern Problem: A side platform looks useful, but reaching it requires a jump away from the main downward path. Better route: 1. Test the main route first. 2. Notice where the fox lands after the side jump. 3. Keep the return platform solid. 4. Do not open the next transparent block until the fox has returned. 5. If the return jump fails repeatedly, leave the side route for another attempt. Why this works: A side platform is only useful if the fox can return safely. A detour that breaks the route is not a good first-run target. Three-Block Drop Stack Pattern Problem: The fox is above several transparent blocks arranged vertically. Switching them too quickly causes a long, uncontrolled fall. Better route: 1. Open only the top block first. 2. Let the fox reach the next layer. 3. Keep the next block solid as a control point. 4. Wait for alignment before opening the second block. 5. Repeat the process instead of clearing all layers at once. Why this works: A stacked drop needs rhythm. Each layer should become a new decision point, not just part of one uncontrolled fall. Common Mistakes Chasing a Side Route Before Reading the Main Route A side route can look tempting, but it may lead away from the stable path. Read the lower layout first, then decide whether the detour is worth it. Switching Before Checking the Landing A transparent block is only useful if the fox lands somewhere helpful. Always look one layer below before opening a path. Removing a Useful Solid Block Too Early Some solid blocks are control tools. They can stop movement, support a jump, or prevent a bad drop. Remove them only when they are no longer needed. Jumping Without Preparing the Block State A jump can fail if the landing block is already transparent or if the next platform is not ready. Set the route first, then jump. Repeating the Same Failed Timing If the same drop fails three times, the timing is probably wrong. Delay the switch, keep support blocks active longer, or choose a safer landing. Treating Every Side Path as Required Not every side route needs to be taken on the first attempt. A cleaner route often teaches more than a forced risky detour. FAQ What should I do if the fox gets stuck in a falling loop? Stop changing blocks as soon as the route feels unstable. On the next attempt, keep more solid blocks active and delay the first transparent switch until the fox is better aligned. How do I improve my star rating more consistently? Learn the safe route first, then improve it. Once you know the stable path, add nearby collectibles one by one instead of forcing the hardest detour immediately. Why does my fox keep missing the lower platform? The block is probably being switched too early or too late. Watch the fox’s position, wait for better alignment, and open the transparent block only when the landing is directly useful. Are solid blocks always obstacles? No. Solid blocks can be safety tools. They help the fox stop, prepare a jump, avoid an uncontrolled drop, or line up the next movement. How should I handle multiple transparent blocks in a row? Do not open all of them at once. Switch one layer, let the fox stabilize, then open the next layer when the landing is ready. When should I restart after a failed route? Restart when the fox is far from the intended route, when an important support block was removed too early, or when repeated movement no longer leads to a useful landing. On the next attempt, change the first mistake instead of repeating the same timing.
- Monster Checkers
Monster Checkers About This Game Monster Checkers is a casual piece placement and board battle strategy game where the most important decisions happen before the fight begins. Instead of rushing into battle, you need to read the board, understand the enemy layout, and place your pieces in positions that can hold pressure, cover routes, and support each other. The core gameplay is simple to understand: place your character pieces, start the battle, watch how both sides collide, and adjust your formation if the result does not work. The depth comes from the map. A narrow choke point rewards tighter route control, while a wide open board requires broader coverage. A divided map may force you to protect two pressure zones at once. This Monster Checkers guide focuses on beginner placement logic: where to place early-contact pieces, how to protect support-style pieces, how to avoid leaving side routes open, and how to improve after losing a battle. Treat each level like a small tactical puzzle. The question is not “Which piece looks strongest?” but “Where does this piece help the formation most?” How to Play Do not place pieces immediately when a level begins. First, look at the whole board. The closest enemy is not always the biggest threat; a side group, a center cluster, or an open lane can become the real reason your formation fails. A practical beginner flow looks like this: 1. Scan the enemy layout. Look for enemy clusters, side groups, and routes that lead toward your pieces. 2. Find the first contact point. This is where your formation is most likely to meet pressure first. On narrow maps, it may be a tight route or choke point. On open maps, it may be the side with the largest enemy group. 3. Place your front anchor. Use a piece that appears better suited for early contact near the first contact point. 4. Protect your safer support position. Support-style or less durable pieces should usually stay slightly behind or diagonally behind the front anchor when the board allows it. 5. Check the side route. Before starting the battle, look for any lane that is completely uncovered. Even a small enemy group can punish an empty side. 6. Keep pieces close enough to help. Your key pieces should be close enough to support each other. If they are too far apart, they may fight as separate weak groups. 7. Start the battle and watch the first clash. The opening moments show whether your front anchor holds, whether support pieces are exposed, and whether enemies are slipping around the side. 8. Change one major thing after a loss. Do not rebuild everything at once. Move the front anchor, protect the support piece, cover the side route, or tighten spacing, then test again. Beginner Strategy Guide The best beginner habit in Monster Checkers is to place with intention. Every piece should have a job: hold the first contact point, support the early-contact piece, cover a side route, or prevent the formation from splitting. The Bottleneck Defense Use The Bottleneck Defense on narrow route maps, especially when the enemy must pass through a tight choke point. Place your front anchor close to the first contact point. Then place support-style pieces slightly behind it or to the side. This creates a simple layered formation: the front piece handles the first pressure, while the support pieces stay safer and contribute from a better position. Do not stack every piece directly on the choke point. If your entire formation is packed into one small area, you may lose flexibility and leave nearby routes uncovered. A better Bottleneck Defense holds the narrow path while keeping at least one piece ready to cover a side opening. The Checkerboard Spread Use The Checkerboard Spread on open maps where enemies can approach from more than one direction. Instead of putting every piece in one corner, spread your pieces across the important lanes while keeping them close enough to support each other. Think of the board like a loose checkerboard: not every space needs a piece, but the important spaces should not be empty. A strong open-map setup usually covers the main enemy direction first, then places one piece toward a side route. Keep your support pieces protected, but do not place them so far away that they stop helping the fight. The Split-Lane Balance Use The Split-Lane Balance on divided maps where enemies are separated into two groups or the board has two pressure zones. Start by deciding which side is more dangerous. The side with the larger enemy group or faster first contact should receive more attention. However, the weaker side should not be completely abandoned. One isolated piece usually cannot hold an entire route alone, so keep it close enough to reconnect with the main formation. If the same side keeps collapsing, do not simply add more pieces to the strongest area. Move one piece toward the broken lane and shorten the distance between groups. Simple Formation Examples These are starting templates, not fixed winning formations. Adjust them after each failed attempt instead of copying them exactly. Balanced Beginner Formation Place one front anchor near the main contact point, one support-style piece behind or diagonally behind it, and one piece watching the side route. This is the safest beginner setup when you are still learning the map. Route Control Formation Use this on narrow maps. Put your front anchor near the choke point, keep support slightly behind it, and avoid overcrowding the entrance. The goal is to slow the enemy at the route instead of letting pressure reach your safer support position too quickly. Wide Coverage Formation Use this on open maps. Cover the main enemy direction, then place one piece toward a side lane. Your pieces should be spread out enough to cover space, but still close enough to help each other. Specific Enemy Layout Examples Enemies grouped near the center lane: Place a front-position piece near the first contact point in the center, then keep support close behind it. Do not send every piece to the exact same small area; leave enough spacing to prevent side pressure. Enemies split into left and right groups: Send more strength toward the larger group, but keep at least one piece or coverage point near the smaller group. If you ignore one side completely, the formation can get pulled apart. A small enemy group appears on the side: Do not dismiss it just because it looks less dangerous. Side enemies often cause losses by reaching unprotected support pieces. Place one piece toward that lane or widen your main formation. One of your pieces falls first every attempt: That piece is probably too exposed. Move it slightly back, place it diagonally behind a front anchor, or shift the first contact point away from it. Beginner Formation Checklist Before you start the battle, check these points: • Did I find the main enemy cluster? • Did I identify the first contact point? • Is my front anchor placed near the correct route? • Are support pieces protected from immediate contact? • Is one side lane completely open? • Are my key pieces close enough to support each other? • Does every piece have a clear job? After-Battle Review Frontline melted immediately Likely problem: your front anchor was too isolated, placed too far from support, or not positioned at the real first contact point. Better adjustment: move support closer, or shift the front piece toward the route where pressure actually begins. Flanked by side-route enemies Likely problem: one side lane was left open. Better adjustment: move one piece toward the side route or widen your formation before starting again. Support piece died instantly Likely problem: it was placed in the first contact position. Better adjustment: move it behind or diagonally behind a front-position piece. Pieces fought separately and lost one by one Likely problem: your formation was spread too far apart. Better adjustment: reduce the gap between key pieces so they can support each other. Formation got crushed in one crowded spot Likely problem: too many pieces were stacked into the same area. Better adjustment: keep the main route covered, but spread one piece toward a nearby lane. Small side group caused the loss Likely problem: you only looked at the largest enemy cluster. Better adjustment: scan the whole board before placing the first piece and assign coverage to side pressure. Change one major issue at a time. If you move every piece after every loss, it becomes difficult to understand which adjustment actually improved the formation. Common Mistakes Placing pieces before reading the map: Rushing placement makes it easy to miss side pressure, choke points, or the real first contact area. Choosing only the strongest-looking pieces: A strong piece still needs the right role. Front anchors, support positions, side coverage, and spacing all matter. Stacking every piece in one corner: This can make your formation look powerful while leaving the rest of the board open. Using the same setup on every map: The Bottleneck Defense may work on narrow maps, but open maps often need The Checkerboard Spread or wider side coverage. Repeating the same failed setup: If the frontline melts, support dies, or side enemies flank you, something specific needs to change. Placing support pieces in the first contact position: Support-style or less durable pieces should usually stay behind or beside the front anchor, not directly in front. Leaving one side route completely open: Even a small side group can break your formation if it reaches a safer support position for free. Spreading pieces too far apart: Wide coverage helps, but isolated pieces often lose before the rest of the formation can assist. Depending too much on one character piece: Do not expect one piece to hold two lanes, protect support pieces, and handle the main enemy group alone. Ignoring small enemy groups on the side of the map: Side enemies are easy to overlook, but they often explain why a formation that looked strong still failed. FAQ What is Monster Checkers? Monster Checkers is a casual piece placement and board battle strategy game where players arrange character pieces before battle and try to defeat opposing pieces on the map. How do you play Monster Checkers? You scan the enemy layout, find the first contact point, place your pieces with a clear role, start the battle, and adjust your formation after failed attempts. Why do my support pieces die instantly at the start of the battle? They are probably too close to the first contact point. Move them slightly behind or diagonally behind a front-position piece. Why does my frontline collapse so quickly? Your front piece may be isolated or placed too far from support. Bring nearby pieces closer so the front line is not fighting alone. What should I do if enemies keep coming around the side? You are leaving a side route open. Move one piece toward that lane or use a wider formation before starting the battle. How should beginners place their pieces in Monster Checkers? Start with one front anchor near the first contact point, protect support pieces behind it, and keep one piece or coverage point ready for side pressure. Do different maps require different strategies? Yes. Narrow maps favor route control, open maps need wider spacing, and divided maps require balanced pressure between lanes. What should I change after losing a battle? Change the first visible failure. If support dies, move it back. If the side lane breaks, widen coverage. If pieces fight alone, tighten the formation. Editorial Note This guide focuses on beginner placement logic for Monster Checkers, including board reading, first contact points, formation spacing, side-route coverage, and after-battle adjustment. Formation names such as Bottleneck Defense, Checkerboard Spread, and Split-Lane Balance are guide labels used to explain placement ideas, not confirmed official in-game terms. This guide does not present unconfirmed character stats, fixed skills, upgrade systems, reward rules, or full level data as facts. Pieces, characters, maps, battles, and rewards are discussed as virtual Monster Checkers game mechanics.
- Zuma Adventure
Zuma Adventure About This Game Zuma Adventure is a marble-shooting color puzzle built around aiming, matching, and pressure control. A moving line of colored marbles travels along a track toward the exit, and your goal is to clear the line before it reaches the end. The main challenge is not only hitting the right color. Good play depends on track pressure, color priority, shot timing, and combo planning. A small clear near the danger zone can be more useful than a large match far away, especially when the foremost group is already close to the exit. As levels become more difficult, players may need to respond to tighter paths, faster movement, denser color mixes, or special elements when they appear. The best approach is to keep the track organized, avoid random shots, and choose clears that give you more space to work with. How to Play Start each level by reading the track. Look at where the marbles enter, where they are moving, and where the exit is. This helps you decide which section is safe and which section needs immediate attention. Basic play flow: 1. Read the track direction and identify where the marble line is moving. 2. Check the launcher color before choosing a target. 3. Aim at a matching color group already on the track. 4. Connect three or more same-colored marbles to clear them. 5. Watch for pull-back clears when separated same-color groups connect after a match. 6. Protect the danger zone whenever the foremost group gets close to the exit. If the marble line reaches the exit, the level fails. If you clear the current line before that happens, the level is completed. Specific buttons, special effects, or booster behavior may vary by version or level, so focus first on clean matching, safe placement, and defensive decision-making. Beginner Strategy Guide The best beginner strategy in Zuma Adventure is to treat every shot as a board-management decision. A shot should either clear marbles, reduce danger, prepare a combo, or keep the track easier to manage. If a shot does none of those things, it may create more trouble than value. Shot Priority Order Use this order when you are not sure where to shoot: 1. Clear marbles near the exit if the line is close to failing. 2. Make a direct three-color match when it helps immediately. 3. Set up a combo only when the critical area is still safe. 4. Place an unmatched marble beside the same color when a direct match is not available. 5. Avoid narrow mixed sections unless the shot clearly improves the position. This priority system helps new players avoid random shooting. A clean small match in the danger zone is often better than a larger match far from the exit. When the Foremost Group Is Close to the Exit If the foremost group is near the finish point, stop chasing stylish clears in the back of the track. Focus on stabilizing the critical area first. Good emergency shots usually do one of these things: • Remove marbles from the front section. • Pull the line backward after a clear. • Open space before the final bend. • Connect a quick combo only if it helps the danger zone. Do not spend several shots building a long setup while the line is already close to failure. In pressure moments, survival comes before score. When the Launcher Color Does Not Match Sometimes the loaded marble will not give you a direct match. The worst response is to fire it into a tight mixed section just to get rid of it. A better approach is: • Place the marble beside the same color if that color is available. • Put it in a low-pressure section if no useful match exists. • Avoid splitting two colors that are close to forming a match. • Use the shot to prepare the next color instead of forcing a weak clear. A color that cannot clear immediately can still be useful if it keeps the track organized. How to Create Better Combos The strongest clears often happen when two same-color groups are separated by one or two marbles of another color. If you clear the blocker between them, the two matching groups may pull together and disappear as a follow-up clear. Example: • A red group is on one side. • Another red group is nearby. • A small blue group sits between them. • Clear the blue group first. • The red groups connect and may trigger another clear. This is the basic logic behind chain-clearing. It works best when the danger zone is under control and you have enough time to set up the middle clear. Safe Shot vs Risky Shot Shot Type · Better Choice Safe shot · Completes a match or reduces pressure near the exit Setup shot · Prepares a combo while the critical area is still safe Risky shot · Adds a random color into a tight mixed section Emergency shot · Clears the foremost group before it reaches the end If a shot does not clear, prepare, or protect, it is probably risky. Special Effects and Booster Timing When a level provides special effects, use them to solve real pressure instead of spending them immediately. A useful effect should either reduce danger near the front, slow down a difficult section, clear a crowded area, open a blocked color group, or help you aim at a narrow gap. Do not waste special effects when the board is already safe. Their best value comes from fixing danger, opening blocked colors, or turning a crowded section into a manageable one. Dealing with Complex Track Layouts If a level includes a more complex path, do not treat every visible marble as equally important. Always prioritize the route or section closest to the exit, because that is where failure is most likely to happen. When part of the line becomes harder to read, focus on the color order you can still see and prepare safer clears near the danger zone. If the track bends sharply or overlaps visually, avoid risky shots into crowded areas unless you are sure the marble will complete a match or reduce pressure. For confusing layouts, divide your attention in a simple order: first check the critical area, then look for direct matches, then consider combo setups. This keeps your decisions stable even when the track becomes harder to read. Strategy for Fast or Confusing Levels When the line moves faster or the colors become more mixed, simplify your decisions: • Clear the critical area first. • Avoid long setup shots unless the track is stable. • Keep colors grouped instead of scattering them. • Use special effects only when they solve an immediate problem. • Watch the next shot if the game shows it, but do not ignore current danger. Fast levels punish messy shooting. Clean, defensive clears usually work better than risky combo attempts. Common Mistakes Only looking at the nearest marbles The closest target is not always the best target. Check the danger zone often, especially when the track bends near the exit. Chasing big matches in the wrong area A large match far from danger may look useful, but it does not help if the foremost group is about to reach the end. Shooting unmatched colors into narrow gaps This can split useful color groups and make future clears harder. If the current color does not match, place it where it causes the least damage. Ignoring separated same-color groups Two groups of the same color with a small blocker between them are often a combo opportunity. Clear the blocker first when the critical area is safe. Using special effects too early Special effects are most valuable when they fix a real problem. Save them for crowded sections, fast movement, blocked colors, or dangerous pressure near the exit. Playing too fast after one successful clear A clear can change the whole track. Pause briefly after each important match and check whether the line pulled together, opened a combo, or created a new danger area. Trying to force combos under pressure Combos are useful, but not when the line is close to the end. In emergency situations, take the safe clear first. Ignoring difficult track shapes Sharp turns, tight paths, or visually crowded sections can hide the real danger. When the layout becomes harder to read, return to the basics: protect the exit, make clean matches, and avoid clutter. FAQ How do you play Zuma Adventure? Aim the launcher at matching colors on the moving track. Connect three or more marbles of the same color to clear them before the line reaches the end. What should beginners focus on first? Beginners should focus on the danger zone, clean three-color matches, and avoiding random shots that make the track harder to manage. What should I do when the launcher color does not match? Place the marble beside the same color if possible. If there is no useful match, put it in a low-pressure area and prepare for the next shot. How do you create chain reactions in Zuma Adventure? Look for two same-color groups separated by a small group of another color. Clear the middle group so the matching sides can pull together and possibly clear again. What is the best strategy for fast-moving levels? Play defensively. Clear the foremost group first, avoid risky setup shots, and use special effects only when they reduce immediate pressure. When should boosters or special effects be used? Use them when the line is close to the end, when colors are badly mixed, or when one effect can open several useful matches. Do not waste them while the board is already under control. How can I improve my level results? Focus on cleaner matches, faster recovery after each clear, and well-timed combos. Completing the stage safely should come before risky high-score attempts. Are boosters, scores, or level results real prizes? No. Boosters, scores, effects, and level progress in Zuma Adventure are virtual in-game elements only. Editorial Note This guide focuses on gameplay explanation and beginner strategy for Zuma Adventure. It describes marble launching, color matching, track pressure, combo planning, and defensive decision-making based on the game-style mechanics discussed on this page. Any scores, boosters, effects, rewards, or level progress mentioned in this guide refer only to virtual in-game elements. This article does not claim an official relationship with any other brand, developer, publisher, or franchise.
- Bubble Shooter
Bubble Shooter About This Game Bubble Shooter is a casual arcade fruit shooter and timing puzzle game. Despite the name, this is not a traditional bubble-matching game. This Fruit Edition is built around a launcher, a fruit target, and a moving spike gate that can block the shot path. Your goal is to launch shots at the fruit until it gradually shrinks and disappears. Each successful hit moves the target closer to being cleared, but every shot must pass safely around the spike gate. If the shot collides with the gate, the attempt fails. The game is less about clicking quickly and more about reading the obstacle pattern. The fruit may be visible, but that does not always mean the shot is safe. The best moment usually comes after the spike gate has moved away from the path. Bubble Shooter also includes launcher upgrades and fruit-themed shot visuals. Upgrades may improve clearing speed or target progress, while different fruit-style shots add variety to the arcade feel. The core challenge remains the same: clear the fruit by timing each shot around the moving obstacle. How to Play Start by watching the fruit target and the moving spike gate. Before taking the first shot, let the gate complete at least one movement cycle so you can understand its rhythm. When the gate moves away from the shot path, click the launcher to send a shot toward the fruit. If the shot reaches the fruit, the fruit becomes smaller. Repeat this process until the fruit disappears completely. Avoid clicking as soon as the fruit appears open. A safe shot depends on the gate position, not just the fruit position. If the gate is entering the path or the opening looks too narrow, wait for the next chance. Use single, deliberate shots instead of rapid clicking. Panic spamming can send a shot into the spike gate even when the previous shot was safe. A slower rhythm often gives you better control. Launcher upgrades can help improve progress, but they do not remove the timing challenge. Even with upgrades, each shot still needs to avoid the moving gate. Tips & Tricks Watch whether the gate is leaving the path or returning into it. A visible fruit target is only safe when the gate is moving away from the shot line. When the fruit becomes smaller, stay patient. The final hit can be the easiest moment to rush and the easiest moment to fail. Treat the last shot like the first one: check the gate, confirm the opening, then launch. If you fail, think about the timing of the shot. Did you click before the gate fully cleared the path? Did you wait too long and let it return? Did you focus on the fruit while ignoring the obstacle? Most failed attempts come from one of these mistakes. The best runs come from patience, not faster clicking. Watch the movement, launch only when the path is clean, and let each safe hit reduce the fruit step by step. Common Mistakes to Avoid • Blind Launching: Failing to watch one full movement cycle of the spike gate before taking the first shot. • Panic Spamming: Using rapid, multi-click bursts instead of single, deliberate shots. • Rushing the Finish Line: Losing patience when the fruit is almost cleared. Treat the final hit with the same caution as the first. Our Verdict / Personal Review Overall Rating: ⭐⭐⭐½ (3.5/5) This Fruit Edition of Bubble Shooter works because the rules are simple, but the timing pressure gives each attempt a real challenge. The fruit-shrinking mechanic makes progress easy to understand, while the moving spike gate keeps the game from becoming a basic click-and-clear routine. The game feels most fair when the gate movement is readable. You can see why a shot worked or failed, which makes each retry feel like a timing adjustment rather than random luck. It becomes frustrating mainly when players click before confirming the opening. If you rush, the spike gate can punish even a nearly completed run. That is also what gives the game its tension: the final hit still matters. Overall, Bubble Shooter is best approached as a fruit target timing game, not a classic bubble shooter. It is a simple arcade puzzle for players who enjoy short rounds, clear goals, and timing-based decisions. Editorial Note This guide is based on visible gameplay mechanics, including the launcher, fruit target, moving spike gate, and in-game upgrade system. It focuses on beginner timing decisions rather than hidden values or guaranteed level outcomes.
- Monster Elimination
Monster Elimination Platform: Mobile / Web Genre: Hex-Puzzle / Block Placement Core Mechanic: Place blocks to deal damage to the monster About This Game Monster Elimination is a casual monster-themed block placement and elimination puzzle game. It plays more like a board-space puzzle than a classic swap-based match-3 game: you choose from block batches at the bottom, drag them onto a hex-style board, create eliminations, and use those clears to attack the monster above the board. The early game layout makes the core loop easy to read. A monster stands above the puzzle board with a health bar, while the player works with three block batches, a Bomb tool, a Change Batch option, a Skin button, a coin counter, and a score-related Double Score button. The tutorial direction is simple: drag blocks onto the board, trigger eliminations, and attack the monster. The real challenge is space control. A piece that fits is not always the right piece to place. A strong move should do at least one of four things: create a clear, protect future space, repair an awkward gap, or help finish the monster. If you fill the center too quickly or leave too many isolated cells, the board can become difficult even when the monster is close to defeat. Feature · Beginner Reading Genre · Casual block placement elimination puzzle Board style · Hex-based block board Core goal · Clear blocks to damage the monster Main risk · Running out of usable board space Board tools · Bomb, Change Batch Other interface options · Skin, coin counter, Double Score Best habit · Protect open space before chasing every clear How to Play Start each round by checking three things: the monster health bar, the open board space, and the three block batches available at the bottom. In the early level screen shown here, the monster health bar makes the goal clear: every useful elimination should move you closer to defeating the monster. To make a move, drag one of the available block batches onto the hex board. Because the board is made of connected hex cells, the shape of each batch matters. A piece may fit near the edge but still leave behind a tiny gap that is hard to use later. A piece may fit in the center but become a bad move if it blocks the most flexible part of the board without creating a clear. After placement, the game can trigger eliminations. Those clears attack the monster and open board space. The best move is not always the largest-looking placement. The best move is the one that keeps the next move playable. A practical beginner priority order is: 1. Keep enough open space to continue placing blocks. 2. Protect the center and lower board. 3. Place awkward shapes before the board becomes crowded. 4. Create clears that open future placement space. 5. Use tools only when they solve a real board problem. The Bomb is best saved for serious board trouble: a blocked center, a dead corner, a crowded lower board, or a final clear that helps finish the monster. Check the in-game effect area before using it so you know what space it will actually remove. Change Batch is useful when the current three pieces do not match the board shape. If the board is still open and at least one piece fits safely, continue building normally. If every available batch makes the board worse, changing the batch can be the safer decision. Use the Double Score button when your board is stable and you are ready to trigger multiple eliminations in a row to maximize your points. Beginner Strategy Guide A practical way to start a round is to check where the largest open area is. If the center is still open, do not fill it with an easy piece unless that move creates a clear or prepares a strong follow-up. The center is usually the most flexible space because more block shapes can fit there. If the center is almost blocked, avoid closing the last useful lane just for a small clear. A small clear is good only when it improves the board. If it creates single-cell holes or breaks connected space, it may make the next placement harder. If an edge or corner develops an isolated empty cell, repair it with a small or narrow batch when possible. Do not waste a large batch on a cramped edge unless it also creates a clear. Large batches need clean open space, so they should be placed before the board becomes too tight. Think of every move as either a space-saving move or a space-wasting move. A space-saving clear opens the board, connects empty areas, removes a blockage, or gives the next batch more room. A space-wasting placement may look useful for the moment but leaves the board harder to manage. When the monster health bar is nearly finished, your priority changes. At that point, an immediate clear can be better than a long setup. If one placement can trigger an elimination and finish the monster, take the clear instead of trying to build a perfect board. Large batches usually belong in clean open space. Small batches are better for repairing edges, filling narrow areas, or setting up precise clears. If you spend all the small pieces randomly, you may have no way to fix awkward gaps later. Tool timing is one of the most important beginner skills in Monster Elimination. Use Bomb when it opens the center, removes a dead zone, or saves a nearly full board. Use Change Batch when the available pieces no longer match the board shape. Do not spend tools early just because they are available. After losing a round, review the board instead of only blaming the final move. Ask yourself: Did I fill the center too early? Did I leave too many single-cell gaps? Did I choose a short-term clear that damaged future space? Did I use Bomb before the board was truly in danger? Did I ignore the monster health bar when the level was close to ending? Common Mistakes • Dragging the first piece that fits: A piece can fit the board and still be weak. Place blocks where they protect future space or create useful clears. • Filling the center too early: The center is the most flexible area. Blocking it with easy pieces can make awkward batches difficult to place later. • Leaving too many single-cell gaps: Isolated holes are hard to use. Keep open cells connected so future batches have more room. • Using Bomb too early: Bomb is most useful when it solves a real space problem. Early use on a minor issue can leave you without a rescue option later. • Chasing score before stability: Score-related features work better when the board is under control. If the board is nearly full, space management comes first. FAQ How many levels are there in Monster Elimination? Monster Elimination uses level-based progression, starting with LV.1 in the early game interface. A fixed total level count is not confirmed, so focus on the current board, monster health bar, and available tools. Does Monster Elimination require WiFi? Offline availability may depend on the version and platform. Features that require online loading may not work without an internet connection. Are tools necessary to win? Tools can help when the board becomes crowded, but the core skill is still board reading, space control, and choosing the right placement order. Bomb and Change Batch are support tools, not replacements for good planning. What should I do when the board is almost full? Stop chasing score and look for space recovery. Try to open the center, repair dead corners, or create any clear that gives you more connected space. If none of the current batches fit well, Change Batch becomes more useful. Should I clear small groups or wait for a bigger clear? Take the clear that improves the board. A small clear is worth using if it opens space, attacks the monster, or sets up the next batch. Waiting for a bigger clear is risky when the board is already crowded. Where should beginners place large block batches? Place large batches in clean open areas before the board becomes tight. Avoid forcing them into narrow corners unless the placement creates a clear. Save flexible center space for awkward shapes whenever possible. Editorial Note This page is an independent gameplay guide and is not an official game manual. It is based on visible gameplay interface details and practical beginner board-reading observations. It does not claim hidden formulas, fixed reward values, official level counts, or guaranteed outcomes. Coins, tools, skins, and score features are described only as virtual in-game mechanics.
- A Master Pin
A Master Pin Category: Logic Puzzle | Format: HTML5 Game Page | Style: Pull-the-Pin Puzzle About This Game A Master Pin is a casual pull-the-pin logic puzzle game where the challenge is to read the route, keep key pins closed, and release the target object only when the path is ready. Core gameplay highlights: • Order-based pin puzzles: Pulling the right pin at the right time is the main challenge. • Route planning: The safest solution usually starts by checking the goal area, not the closest pin. • Casual brain-puzzle pacing: A Master Pin rewards careful observation, simple logic, and clean decision-making. Each level is built around pins, objects, blockers, and a target area. A rushed move can send the object into the wrong chamber, while a planned move can open the route step by step. The key is to understand what each pin controls before removing it. How to Play Look First | Plan the Route | Pull the Right Pin Start by checking where the target object needs to go. Then look at the pins and decide which ones open the route, which ones hold the object back, and which ones may cause trouble if pulled too early. A strong beginner flow is: 1. Check the goal area. 2. Identify what each pin controls. 3. Keep safety pins closed until the route is ready. 4. Pull route-opening pins before release pins when needed. For example, if the target object is held above a closed lower chamber, do not release it first. Open the route near the target area or remove the blocker that would stop progress. If the object can drop straight down but the target area is behind a side opening, check the side pin before releasing the object. A visible target does not always mean the route is safe. Before pulling the release pin, make sure the object will move toward the goal instead of falling into a dead-end chamber. Beginner Strategy Guide A practical beginner approach is simple: solve the level backward. Instead of asking “Which pin can I pull now?”, ask “What needs to happen before the object can reach the goal?” Use this three-step method: 1. Find the target area. Identify the final destination before making the first move. 2. Trace the safe route backward. Follow the path from the target area back to the starting object. Look for blockers, wrong exits, divided chambers, and risky paths. 3. Choose which pins open the route and which pins should stay closed temporarily. Open the path before releasing the object. Keep safety gates closed until they are no longer needed. Pin Role · What It Does · Beginner Decision Route opener · Opens the path toward the goal · Pull it when the object needs a clear route Safety gate · Holds an object back until the route is safe · Keep it closed until the path is prepared Release pin · Starts object movement · Pull it only after checking the next chamber Wrong early pull · Causes falling, blocking, mixing, or a failed route · Avoid pulling it just because it is visible If two pins control the same lower route, open the blocker near the target first before releasing the object from above. This prevents the object from reaching the right direction but stopping one step short of the goal. When the target area is below the object, check the chamber closest to the goal before starting movement. When the target area is on the side, focus on whether the entrance is open and reachable. The target position should guide the first move. If the object reaches the wrong chamber, the mistake usually happened before the object started moving. Check whether a route-opening pin should have been pulled before the release pin. Do not treat every visible pin as urgent. A pin can be useful because it stays closed, not because it gets pulled. Many beginner mistakes happen when a safety gate is opened before the route is prepared. Your first goal should be stable completion, not the fastest possible clear. Once you can read the route consistently, faster and cleaner solutions become easier. Common Mistakes Pulling the release pin before checking the next chamber: The closest pin often feels like the first move, but it can be the wrong move. Check where the object will land before releasing it. Opening a path that looks clear but leads into a separated section: A route can look open while still sending the object away from the target. Always check whether the chamber connects to the final goal. Removing a safety gate too early: Some pins are meant to hold the object in place. Pulling them too soon can make the object fall before the route is ready. Ignoring the target position: A bottom target, side target, and divided chamber require different planning. The target position should decide your first move. Repeating the same failed order: If the same sequence failed once, repeating it usually gives the same result. Change the pin that caused the object to fall, block, or miss the target. FAQ What is A Master Pin? A Master Pin is a casual pull-the-pin logic puzzle game where players solve levels by removing pins in the right order and guiding objects toward the correct target area. How do you play A Master Pin? Check the goal area, study what each pin controls, open the safe route, and release the target object only when the path is ready. How do beginners choose which pin to pull first? Start from the target area and trace the route backward. The first pin should help prepare the route, not simply start movement. What happens if you pull pins in the wrong order? The object can fall into the wrong chamber, become blocked, miss the target, or make the route impossible to complete. How can I avoid getting stuck? Slow down before the first move. Separate route-opening pins from safety gates, check the next chamber before releasing the object, and change your sequence after each failed attempt. Are in-game items real prizes? No. If A Master Pin includes optional in-game items, they are virtual gameplay features only and should not be understood as real-world prizes or cash rewards. Editorial Note This guide is based on visible gameplay behavior, on-screen puzzle layout, and beginner-level route-planning logic. It does not claim hidden formulas, guaranteed solutions for every level, or real-world reward value.
- Synthetic Cat
Synthetic Cat About This Game Synthetic Cat is a casual stacked match-3 and card slot puzzle game. You click visible cards, send them into the bottom slot, and clear them by collecting three identical cards. The main risk is the 7-card slot. If the slot fills with too many unmatched patterns, the board can quickly become difficult to recover. Revocation, Luck, and Shuffle are support tools that help with mistakes, pressure, or unclear layouts, but they do not guarantee success. The game is mainly about reading the board before clicking. Strong play comes from choosing the right pattern order, keeping the slot clean, opening useful cards, and saving tools for moments when they solve a real problem. Editorial note: All cats, icons, tools, rewards, and patterns mentioned in this guide refer only to in-game puzzle elements. This guide is based on the visible card-slot rules, tool labels, and beginner decision patterns shown during gameplay. Tool costs, button labels, or reward prompts may change if the game is updated. How to Play When a level begins, scan the visible cards before making your first move. Look for patterns that already appear more than once, such as cats, tennis balls, cat paws, or chicken legs. Clicking a card moves it into the bottom slot. When the slot contains three cards with the same pattern, those three cards clear automatically. For example, if the slot already has two cat cards and a third cat card is visible, clicking the cat is usually the safest move because it clears space immediately. The bottom slot can hold up to seven cards. If the slot reaches seven cards and no useful match can be made, the challenge fails. This makes slot control the most important part of the game. You are not just matching cards; you are protecting limited space. Tool · Cost · Best Use Revocation · 10 tools · Undo the previous move after a misclick or wrong card choice Luck · 20 tools · Move out three cards when the slot is close to full but still recoverable Shuffle · 20 tools · Rearrange the current elements when no clear route is visible Use Revocation only when the last move caused a clear problem. Use Luck when the slot is under real pressure, not just slightly crowded. Use Shuffle when the visible layout is too blocked or confusing to plan a safe route. Beginner Strategy Guide The best beginner strategy in Synthetic Cat is to follow a simple priority order: 1. Complete an immediate three-card clear whenever possible. 2. Build a two-card setup only when the third card looks reachable. 3. Avoid adding a fourth or fifth pattern type into the slot. 4. Save Revocation, Luck, and Shuffle for mistakes, heavy slot pressure, or layouts with no clear route. Do not click just because a card is available. In a card slot puzzle, every card you add takes space. Before clicking, ask whether the move clears a set, builds a useful pair, or opens access to better cards. Layer analysis is also important. In stacked match-3 gameplay, some cards may sit above deeper groups. If a card opens access to several blocked cards, it may be more valuable than a card sitting alone at the edge. Try to uncover dense middle areas when they lead to useful patterns, but do not overload the slot while doing it. Edge cards can become a visual trap. A single exposed edge card may look easy to take, but if it does not match anything in the slot, it may only add pressure. In many stacked puzzles, shallow edge cards are better saved for emergencies, while deeper central stacks can reveal more options. Core rule: Clear useful matches first, open deeper layers carefully, and save single unmatched cards for when they actually support your next move. Slot State · Risk Level · Best Decision 0–3 cards · Low · Build useful pairs and reveal safe cards 4–5 cards · Medium · Keep only two or three active pattern types 6 cards · High · Only click a card that clears or directly prepares a clear 7 cards · Failure risk · Use tools only if they solve the immediate blockage Example Move Sequence Example situation: • Slot: Cat x2, Tennis Ball x1, Paw x1 • Visible cards: Cat, Chicken Leg, Tennis Ball • Best move: Click Cat first • Reason: Cat completes a three-card clear immediately, reduces slot pressure, and leaves more room for the next setup. • Avoid: Clicking Chicken Leg first, because it adds a new pattern and makes the slot harder to control. This example shows the basic logic of the game. The safest move is usually the one that clears space now or prepares a clear with low risk. Adding a new pattern should only happen when it helps your next match plan. Example: When the Slot Has Six Cards Example situation: • Slot: Cat x1, Tennis Ball x2, Paw x1, Chicken Leg x1, Fish x1 • Visible cards: Chicken Leg, Cat, Tennis Ball • Best move: Click Tennis Ball if it completes a three-card clear. • Avoid: Clicking a new pattern that does not match anything in the slot. • Reason: At six cards, one unrelated click can fill the slot and end the attempt. This is the key decision point before a full-slot failure. When the slot has six cards, your next click should either clear three cards immediately or directly prepare a clear that you can finish safely. If the move only adds another unmatched icon, it is usually too risky. Common Mistakes Mistake: Clicking without scanning the board. Fix: Pause for a moment and look for repeated patterns before choosing your first card. Mistake: Adding too many different patterns. Fix: Stop adding new icons and focus on completing one existing pair. Mistake: Ignoring an immediate three-card clear. Fix: If two matching cards are already in the slot and the third is visible, clear that set before starting another pattern. Mistake: Taking edge cards just because they are easy to click. Fix: Check whether the edge card helps your current slot. If it does not match anything, it may be safer to leave it. Mistake: Digging into deep layers without slot space. Fix: Clear at least one set before opening more stacked cards, especially when the slot already has four or more cards. Mistake: Clicking an unmatched card when the slot has six cards. Fix: At six cards, only click if the move clears a set or directly prepares a clear. Mistake: Using Luck or Shuffle too early. Fix: Try normal matching first when the board still has a clear route. Save tools for real pressure. Mistake: Forgetting that Revocation only fixes the previous move. Fix: Use it immediately after a bad click. Do not wait until several more moves have made the slot worse. Mistake: Treating tools as guaranteed clears. Fix: Use Revocation, Luck, and Shuffle as support tools, not as replacements for careful slot management. FAQ What is Synthetic Cat? Synthetic Cat is a casual stacked match-3 and card slot puzzle game. Players click visible cards, move them into a bottom slot, and clear cards by matching three identical patterns. How do you play Synthetic Cat? Scan the visible cards, click in a planned order, and create three-card matches while protecting the 7-card slot. The safest moves are the ones that clear space or prepare a clear without adding too many new patterns. What happens when the card slot reaches 7 cards? If the slot reaches seven cards and no useful clear is available, the challenge fails. This is why slot management matters more than fast clicking. Why does Synthetic Cat suddenly feel harder? Later boards may feel harder because stacked layouts can hide useful cards under other patterns. When that happens, shift from fast matching to layer analysis and focus on opening deeper groups without filling the slot. Are reward prompts required in Synthetic Cat? If your version shows reward prompts, treat them as optional support. They may offer extra tools or recovery options, but they are not required for understanding the core puzzle. Careful slot management is still the main strategy.
- Jigsaw puzzle
Jigsaw Puzzle About This Game Jigsaw Puzzle is a casual shape-fitting puzzle game where you use triangle-based blocks to fill a blank outline. Instead of matching picture fragments like a traditional photo jigsaw, the challenge is about focusing on corners, edges, and how each piece changes the remaining space. Each level gives you a fixed set of pieces below the outline. Your task is to drag them into the empty shape until the entire area is filled. A strong placement should align with the outline border, avoid overlap, and avoid leaving a single-triangle gap that no remaining piece can cover. The game is simple to start, but it rewards careful planning. If you place pieces too quickly, the remaining space may become awkward or impossible to finish. The best approach is to study the outline first, identify the most restrictive areas, and build the solution step by step. How to Play 1. Look at the full outline before placing any piece. 2. Check the outline corners and long edges before moving the first piece. 3. Drag a triangle-based piece from the bottom area into the outline. 4. Place each piece so it stays inside the border and does not overlap other pieces. 5. Continue placing pieces until the full outline is filled. 6. Use every available piece to complete the level. 7. If your layout no longer works, use Reset to clear the board and try a better arrangement. 8. If you are stuck, Tips can help, but it costs 100 in-game diamonds. Diamonds are virtual game resources shown inside the game. Beginner Strategy Guide Start With the Most Restrictive Corners When to use it: At the beginning of every level. Why it works: Sharp corners and narrow angles usually accept fewer pieces than open center areas. What it prevents: It helps prevent awkward leftover spaces that no remaining piece can fill. Look for pointed corners, tight edges, and unusual outline angles first. If a piece has a matching sharp corner or long slanted side, test it there before filling the middle. Corners act like anchors because they limit how many shapes can fit cleanly. Match Long Edges Before Filling the Center When to use it: After you identify the obvious corner pieces. Why it works: Long border sections are easier to judge while the board is still open. What it prevents: It stops you from building a center layout that blocks the correct edge pieces later. A piece with a long straight side often belongs near the outside border. If you save it too long, the remaining outline may become too fragmented, and the piece may no longer have a clean place to fit. Test Large or Awkward Pieces Early When to use it: When one piece is much larger, wider, or harder to place than the others. Why it works: Large pieces need more space and fewer restrictions. What it prevents: It reduces the chance of ending with a big piece that cannot fit anywhere. Do not always save large pieces for last. If a block has an unusual shape, test it near the outline while there is still room to adjust. Once the center is crowded, large pieces become much harder to place. Use Small Pieces to Finish, Not to Start When to use it: After the main border and large spaces are mostly solved. Why it works: Small pieces are flexible and can close gaps more easily. What it prevents: It avoids wasting small pieces in open areas where larger pieces should go. Small triangle groups are useful near the end because they can fill tight spaces. If you use them too early, you may leave behind odd spaces that only those small pieces could have solved. Reset When the Remaining Space Looks Wrong When to use it: When the leftover area no longer matches any unused piece. Why it works: Reset is faster than forcing a layout that cannot be completed. What it prevents: It stops you from spending too long on a broken arrangement. A good sign that you should restart is a tiny triangle gap, a thin strip, or a leftover shape that clearly does not match any piece below. When that happens, the problem is usually an earlier placement, not the final piece. Best Solving Order 1. Find the sharpest corners first. 2. Match long-edge pieces to the outer border. 3. Test large or awkward blocks before the center becomes too fragmented. 4. Use smaller pieces to close remaining spaces. 5. Reset when the leftover space no longer matches any unused piece. This order keeps the most restrictive decisions early and leaves the flexible pieces for the end. Ready to test your spatial skills? Scroll up to the game board and start placing your first corner piece! Common Mistakes 1. Treating It Like a Photo Jigsaw Jigsaw Puzzle is not mainly about matching images. The important clues are shape, border alignment, angles, and how the remaining pieces can fill the outline. 2. Dragging Before Reading the Outline Placing the first piece too quickly can create problems later. Check the corners, long edges, and narrow spaces before making your first move. 3. Starting From the Center Too Early The center gives you more freedom, but that freedom can be misleading. If you fill the middle first, you may block pieces that needed to connect with the outer border. 4. Leaving Awkward Tiny Gaps A single-triangle gap or thin leftover space can break the whole layout. Before placing a piece, look at the shape it leaves behind, not just the space it covers. 5. Saving Large Pieces Too Late Large or unusual pieces need open space. If you wait too long, the board may become too crowded for them to fit naturally. 6. Using Tips Before Testing Obvious Edge Pieces Tips are more useful after you have checked the clear corners and border pieces yourself. If several obvious edge matches remain untested, try those before spending a hint. FAQ Is Jigsaw Puzzle a traditional photo jigsaw game? No. This game focuses on fitting triangle-based pieces into a blank outline. The challenge is shape placement, not rebuilding a picture. What should I place first in Jigsaw Puzzle? Start with the sharpest corners or the pieces that clearly match the outer border. These areas are more restrictive than the center, so solving them early gives you a stronger layout. When should I use Reset? Use Reset when the remaining empty space no longer matches any unused piece. This usually means an earlier piece is in the wrong position, so restarting the layout is faster than forcing the final moves. When is Tips worth using? Use Tips only after you have checked the corners, long edges, and large pieces carefully. It works better as a final nudge than as your first solving method. Is Jigsaw Puzzle a gambling game? No. Jigsaw Puzzle is a shape-fitting puzzle game based on piece placement and outline completion. It does not require betting, wagering, or real-money gambling decisions. Editorial Note This triangle block strategy guide was compiled for players using the visible gameplay mechanics of Jigsaw Puzzle, including outline filling, triangle-based pieces, Reset, Tips, and the 100-diamond Tip system. We regularly review our guides for clarity and accuracy, but this is an independent gameplay resource and not an official developer manual.
- Escape stars
Escape Stars Core goal: Guide your rocket from asteroid to asteroid and keep climbing past the dashed line. Main challenge: Moving asteroids can shift before your rocket reaches them. Best for: Beginners who miss moving asteroids, overshoot close jumps, or rush high-score attempts. Beginner rule: Study the next asteroid before committing to the shot. About This Game Escape Stars is a space-themed casual jumping game where you guide a small rocket upward by landing on one asteroid after another. Each successful landing keeps the run going, while a missed asteroid sends the rocket falling and ends the attempt. The game looks simple at first: choose a launch angle, send the rocket upward, and try to reach the next landing point. The challenge comes from movement. Some asteroids shift across the screen, some show motion trails, and far targets require more patience than quick reaction. The main goal is to cross the dashed line and keep climbing for a higher score. A better run depends on calm timing, controlled launch strength, and knowing when not to click too soon. How to Play 1. Look at the next asteroid and notice whether it is still, moving sideways, or placed at a difficult angle. 2. Adjust the rocket’s launch angle toward a safe landing path. 3. Click to send the rocket forward. 4. Try to settle the rocket onto the next asteroid. 5. Keep moving upward and cross the dashed line to increase your score. 6. If the rocket misses the asteroid, the run ends and you need to start again. Quick Decision Rules • If the asteroid is close, reduce launch strength and focus on control. • If the asteroid is moving sideways, lead the shot in the direction it is traveling. • If the asteroid is far away, wait briefly and study its motion trail. • If your score is high, slow your rhythm instead of clicking faster. Best beginner habit: Before every far jump, wait long enough to see whether the asteroid is moving into your route or away from it. Beginner Strategy Guide Aim Ahead of Moving Asteroids A moving asteroid is rarely safest at the exact spot where you first see it. If it is sliding left or right, aim toward where it will be when the rocket arrives. Most beginner misses happen when the next asteroid is either moving sideways or close enough to overshoot. For a side-moving asteroid, watch the motion trail and give your launch angle a small lead in the same direction. You are not trying to hit the asteroid’s past position; you are trying to meet its future path. For example, if an asteroid is drifting to the right above your rocket, aiming directly at its center may send you behind it. A slight right-side lead gives the rocket a better chance to meet the asteroid as it moves. How to Read Different Asteroid Positions Close asteroid: Treat a close jump as a control test. Use a softer launch and avoid sending the rocket past the target. A nearby asteroid can be easy to miss if you overreact. Far asteroid: Watch at least part of its movement before firing. Far asteroids usually punish rushed timing more than weak aim, so waiting briefly can be part of the strategy. Side-moving asteroid: Follow the movement direction and aim ahead of the path. Motion trails are useful here because they help you judge whether the asteroid is crossing into your route or moving away from it. Diagonal asteroid: Set the launch angle first, then think about strength. A diagonal landing often fails when the angle is slightly wrong, even if the power feels close. Control Launch Power Escape Stars is not only about pointing the rocket in the right direction. Launch strength matters because close and far asteroids need different decisions. For a close jump, a strong launch can carry the rocket over the asteroid before it has a chance to settle. For a far asteroid, a weak shot may drop too early, while an overpowered shot can miss the landing zone completely. Try to match the launch strength to the distance instead of using the same force every time. A common beginner mistake is treating every upward asteroid like a long-distance target. If the next asteroid is only slightly above you, accuracy is more important than power. Use Gravity Pull Carefully If the game shows a slight pull or curve near an asteroid, treat it as a small correction effect, not as a guaranteed rescue mechanic. Aiming near the edge of an asteroid can sometimes help when your approach angle is tight, but it should only support an already reasonable shot. If the rocket is too far away from the asteroid, a small curve will not save the jump. For example, approaching the lower edge of an asteroid may still work if your angle is close. Flying past the asteroid at full speed usually will not. High Score Rhythm High-score attempts often fail because the player starts rushing. After several clean jumps, it is easy to click too quickly and stop checking the next moving asteroid. Keep a steady rhythm as the rocket climbs. Look at the next position, judge the launch angle, then commit. The dashed line may encourage faster play, but safer scoring usually comes from controlled launch choices rather than rushed asteroid launches. Common Mistakes Mistake: Aiming at the Current Position Fix: Lead the shot when the asteroid is moving. Aim toward the place where the asteroid is likely to be when the rocket reaches it. Mistake: Launching Too Early or Too Late Fix: Use the asteroid’s movement as your timing cue. Fire when the target is moving into a safer path, not when it is already drifting away. Mistake: Using Too Much Power on Close Jumps Fix: Treat close asteroids as precision landings. A smaller, cleaner launch is often safer than a forceful shot. Mistake: Ignoring Motion Trails Fix: Use motion trails to read direction and speed. They can help you decide whether to lead the shot, wait, or adjust the launch angle. Mistake: Depending Too Much on Gravity Correction Fix: Start with a sensible angle first. Any visible pull near an asteroid should be treated as a minor helper, not the main plan. FAQ Is it better to wait before launching in Escape Stars? Yes, especially when the next asteroid is far away or moving sideways. A short pause can reveal whether the asteroid is entering a safer path or moving out of reach. How do motion trails help in Escape Stars? Motion trails show the asteroid’s recent direction, making it easier to judge whether to lead the shot or wait. Should I aim at the center or edge of an asteroid? Aim for the center when the path is clean and direct. Aim closer to the edge only when the approach angle is tight and you need a small correction window. What is the safest way to handle far asteroids? Wait until the asteroid path is readable, then choose a launch angle that gives the rocket room to reach it without overshooting. Why do high-score runs usually fail? They often fail when the player’s rhythm speeds up and launches become rushed. Waiting for a readable asteroid path is safer than launching immediately. Editorial Note This guide focuses on visible gameplay behavior in Escape Stars. Game behavior may vary by version or platform, and this article does not claim hidden scoring formulas or guaranteed results.
- Villagee limination
Villagee limination About This Game Villagee limination is a casual tap-to-clear block elimination puzzle game about completing target goals within a limited number of moves. Each level asks you to remove a required number of target blocks, such as yellow clouds, red moons, or other pattern-based objectives, before the move counter reaches zero. Tap 2 or more connected blocks of the same color to clear them. Once blocks disappear, the blocks above fall into the empty spaces. That falling movement can create new connected groups, open chain reactions, or bring scattered target blocks closer together. The game rewards careful target reading more than fast tapping. A large clear is not always the right move if it does not help the objective. A small clear that removes target blocks, shifts targets downward, or prepares a useful tool can be more valuable than a flashy non-target clear. Larger same-color clears can create virtual in-game tools. Rocket clears a full row or column, Bomb removes a 3×3 area, and Rainbow Block can remove one color from the board after being swapped with that color. Daily check-ins and level chests may also provide virtual in-game items or rewards, but they are part of the puzzle progression system only. Key takeaways: • Read the level target before the first tap. • Lower clears often create stronger board movement. • Use tools for target progress, not just for large visual clears. How to Play Start by checking the target panel. It shows what the level wants you to clear, such as yellow clouds, red moons, or another goal icon. Then check the move counter so you know how many taps you can spend. Tap a group of 2 or more connected same-color blocks to remove it. After the clear, blocks above fall down. Before tapping, look at the spaces that will open and think about whether the falling blocks may connect target pieces or create a better group. Tools are created by clearing larger same-color groups: Tool · Created by · Best use · Avoid using when Rocket · Clearing 4 or more same-color blocks · Several target blocks sit in one row or column · The row or column contains few useful targets Bomb · Clearing 6 or more same-color blocks · Target blocks are packed in a small area but not directly connected · The 3×3 area removes mostly unrelated blocks Rainbow Block · Clearing 8 or more same-color blocks · Many target-color blocks remain across the board · Only a few targets remain and a direct clear can finish the level Choose Rocket when several target blocks sit in the same row or column. After it appears on the board, check the line it can clear before using it. The tool is more valuable when it removes multiple required blocks at once. Choose Bomb when target blocks are close together but separated by other colors. Its 3×3 clearing area can solve a tight cluster that would otherwise take several small moves. Choose Rainbow Block when many target-color blocks remain across the board. In target-based levels, swapping it with the current target color is usually more useful than clearing a random color. To pass a level, complete the target before the move counter reaches zero. If the moves run out while the target is still unfinished, the level fails. Before each move, ask: • Does this tap remove target blocks? • Does it create a useful Rocket, Bomb, or Rainbow Block? • Will falling blocks bring targets closer together? • Is this move still helpful if no chain reaction happens? Beginner Strategy Guide Play toward the target from the first move. Do not clear the largest group automatically. A smaller target clear can be the better choice if it reduces the required count or brings target blocks into a stronger position. Look for target blocks that are already connected. If 3 or more target-related blocks are grouped together, clearing them early reduces pressure and opens the board. If targets are scattered, clear nearby lower blocks to shift the board and help them fall together. Lower clears often create better movement than top clears. Removing blocks near the bottom makes more pieces fall, which can connect separated targets, form larger groups, or create a tool without extra setup. Do not build tools just because the board offers a large group. A Rocket, Bomb, or Rainbow Block is only worth the move if it helps the objective. If the tool would appear far away from useful targets, a direct target clear may be stronger. Best Tool by Situation Situation · Best choice · Why it works Several targets line up horizontally or vertically · Rocket · It can remove multiple targets in one straight clear Targets are close together but split by other colors · Bomb · Its 3×3 area can clear a compact problem zone Many target-color blocks remain across the board · Rainbow Block · It can remove that color from multiple areas Targets are scattered but can fall together · Normal clear · A lower tap may connect them without spending a tool We have all been there: one move left, one red moon trapped in a corner, and no clean group nearby. That situation usually comes from spending too many early moves on clears that looked big but did not move the level goal forward. Use Rocket only after scanning the full row or column. If it clears several targets, it is probably worth using. If it hits mostly unrelated blocks, wait for a better line unless you are almost out of moves. Use Bomb near the center of a compact target cluster. Avoid triggering it on the edge of the problem area, because half of the 3×3 effect may miss the blocks you actually need. Use Rainbow Block before the board becomes too scattered. If the target color is still common across the board, it can create a major swing. If only a few target blocks remain, a Rocket, Bomb, or direct tap may finish more efficiently. Final 5 Moves Checklist When only a few moves remain, stop building long setups. Count what is left and choose the most direct route. • Count how many target blocks remain. • Check whether one tool can finish the target. • Stop building new tools unless the setup also clears targets. • Use Rainbow Block before the board becomes too scattered. • Prefer a direct target clear over a large non-target clear. The beginner goal is consistency. Clear targets first, use falling blocks to improve the board, create tools only when they support the objective, and spend the final moves on finishing the level. Common Mistakes • Tapping before reading the target: Always check the required goal first. If the level asks for yellow clouds or red moons, early moves should help remove those blocks or bring them closer together. • Clearing large groups that do not matter: Big clears are not automatically good. Before tapping, ask whether the move removes targets, creates a useful tool, or improves the board position. • Building tools in the wrong area: A tool created far away from the target zone may not help. Build Rocket, Bomb, or Rainbow Block only when the setup supports the objective. • Using tools at the wrong time: Do not fire Rocket before targets line up, but do not save a strong tool until there are no moves left. Use tools when they remove several targets or set up the final clear. • Choosing the wrong tool target: Bomb should hit a valuable 3×3 area, and Rainbow Block should usually be swapped with the target color. Match the tool to the level goal, not to the flashiest effect. • Ignoring how blocks fall: The board changes after every clear. Look at the empty spaces that will open and predict whether new blocks may connect after falling. • Mistaking non-target icons for target blocks: Do not treat Green Leaf blocks, or any other similar-looking block, as targets unless the goal icon specifically shows them. • Relying on tiny clears near the end: With 3–5 moves left, small manual clears may not be enough. Count the remaining targets and use a tool if it gives the clearest path to finish. • Misunderstanding check-ins and chests: Daily check-ins, chests, tools, moves, blocks, and rewards are virtual in-game mechanics. Treat them as part of puzzle progression only. Editorial Note: This guide is an independent player resource and is not affiliated with the official developers of Villagee limination. It is based on visible gameplay rules and beginner-level puzzle decisions. It does not claim hidden formulas, official drop rates, guaranteed level outcomes, or real-world rewards. Check-ins, chests, tools, and rewards mentioned here refer only to virtual in-game mechanics. FAQ What is Villagee limination? Villagee limination is a casual tap-to-clear puzzle where players remove connected same-color blocks, complete target goals, and manage limited moves. How do you play the game? Check the target, tap 2 or more connected same-color blocks, watch how the board falls, and use tools when they help complete the objective. What is the goal of each level? Each level asks you to clear a specific target, such as a required number of yellow clouds, red moons, or another pattern block shown in the target panel. What happens when you run out of moves? If the move counter reaches zero before the target is complete, the level fails. Planning each tap matters more than clearing quickly. When should I use tools instead of normal clears? Use a tool when it removes more target blocks than a normal tap or creates a direct path to finish the level. What should I do if target blocks are scattered? Clear lower blocks near the target area to make the board fall. This can bring scattered targets closer together and create better connected groups. Are the rewards in Villagee limination only in-game items? Yes. Daily check-ins, chests, tools, moves, blocks, and rewards are virtual gameplay mechanics used only inside the game. They are not real-world prizes or cash rewards.
- Critical Seeker
Critical Seeker About This Game Critical Seeker is a casual cat-themed spot-the-difference puzzle game built around comparing two nearly identical illustrations. Each level asks you to find a set number of hidden differences. Tap the correct spots, complete the target, and the level is cleared. What makes the game work is that it does not ask for complicated controls. It asks you to notice what changed. One difference may be obvious, while another may hide in a tiny facial detail, a shifted outline, or a small decorative object near the edge of the picture. That “wait, how did I miss that?” moment is the main charm of the game. Each level uses 1 point of Stamina when you begin. Stamina is the game’s internal energy system and recovers over time, so focused play matters more than repeated careless attempts. The question mark icon in the upper-right corner works as a hint button and can highlight one remaining difference when you are stuck. Critical Seeker may also include daily sign-in and shop features. Depending on the version, these may provide in-game support such as Stamina, virtual coins, or extra hints. These systems help with progression, but the real gameplay is still careful observation. Verdict: Critical Seeker is strongest when you want a quiet visual puzzle with a cute cat theme, simple rules, and satisfying “found it” moments. The main drawback is that the final hidden difference can slow the pace when a tiny change blends into the artwork. Players who enjoy relaxing cat-themed puzzle games or careful observation challenges will understand the appeal quickly. How to Play When you enter a level in Critical Seeker, first check how many differences the stage asks you to find. That number is your level goal. Compare both illustrations at the same time. Start with larger visual changes before moving into smaller details. A changed shape, missing decoration, color mismatch, or shifted object is usually easier to confirm than a tiny expression change. Tap only after you confirm that the same spot is different in the two images. Do not tap just because an area feels unusual. A calm comparison keeps your attention sharper and helps you avoid wasted actions. If you cannot find the remaining difference after a careful search, use the question mark icon in the upper-right corner. The hint highlights one hidden difference, so it is most useful after you have already found the easier changes. The main screen may include daily sign-in rewards and a shop. Sign-in may provide in-game resources, while virtual coins may be used for extra hints. Exact recovery speed, shop prices, hint costs, and interface labels may vary by version, so avoid assuming fixed values unless they are shown in your game. Beginner Strategy Guide The best way to improve in Critical Seeker is to search in passes. Do not try to solve the whole image at once. A level becomes much easier when you know what kind of difference you are looking for at each stage. In spot-the-difference levels like this, difficulty usually increases when differences become smaller and blend into the cat outline, expression, or surrounding decorations. The final difference is often not in the center of the image. Repeated background patterns, corners, edge decorations, and small changes around the cat outline are usually worth checking before using a hint. Use this priority order: Pass · What to Focus On · Why It Helps First pass · Large visible changes · These are faster to confirm and help you build early progress. Second pass · Cat shape and accessories · Small changes near the main character often blend into the artwork. Third pass · Background layout · Repeated visual elements can hide missing or moved details. Final pass · Tiny color, number, position, and shape changes · These are often the last differences players overlook. For a more practical check, use this comparison map: Where to Check · What to Compare Cat outline · Ear shape, tail curve, paw position, body edge Face area · Eyes, mouth curve, whisker count, expression Accessories · Bow color, headband pattern, hair decoration shape Background · Leaves, petals, bubbles, butterflies, repeated patterns Corners · Small missing or moved objects A useful habit is to compare the same corner in both images before moving to the next area. This prevents your eyes from jumping randomly and makes it easier to catch small changes. Some levels may hide the hardest difference in a tiny cat detail. For example, the number of whiskers can be more difficult to notice than a changed accessory because both images still look “correct” at first glance. Paw shape, tail outline, and a small mouth curve can create the same problem. When Stamina is limited, treat each level like a short focus session. Try to clear the current puzzle carefully before starting another one. Daily sign-in and shop resources can support your progress, but they should not replace the basic skill of comparing the two images closely. Common Mistakes Mistake: Searching without a clear order. Why it hurts: The image starts to feel busy, and your eyes keep jumping between unrelated details. Better habit: Search in passes: large changes first, character details second, background layout third, tiny differences last. Mistake: Tapping before confirming the difference. Why it hurts: Guessing breaks concentration and can make the remaining differences harder to track. Better habit: Compare the exact same spot in both illustrations before tapping. Mistake: Watching only the center of the image. Why it hurts: The final difference is often placed near an edge, corner, accessory, or repeated pattern. Better habit: After checking the main cat, move outward and inspect the surrounding artwork. Mistake: Using a hint too early. Why it hurts: If several clear differences are still available, the hint may solve something you could have found yourself. Better habit: Use the hint when your own search has slowed down and only a small number of differences remain. Mistake: Treating support systems as the main strategy. Why it hurts: Stamina, virtual coins, hints, and sign-in rewards can help you continue playing, but they do not solve the observation challenge by themselves. Better habit: Use these systems as backup tools while keeping your main focus on careful comparison. Editorial Note: This guide is based on visible gameplay mechanics and beginner play patterns. Exact Stamina recovery time, shop prices, hint costs, reward details, and interface labels may vary by version. FAQ What does Stamina do in Critical Seeker? Stamina controls how often you can start levels. Since each attempt uses this in-game resource, it is better to play with focus instead of entering a level and tapping around casually. When should I use a hint? Use a hint after you have already made a serious second pass and still cannot find the remaining difference. The hint is most valuable when it saves you from staring at the same image for too long. What should I do when only one difference is left? Stop scanning randomly. Check the edges, corners, repeated background patterns, and small cat details such as whisker count, paw shape, tail outline, eye position, or mouth curve. If none of those areas reveal the answer, using a hint is reasonable. Are coins, Stamina, or hints real-world items? No. Virtual coins, Stamina, hints, sign-in bonuses, shop items, and level progress are only part of the in-game progression and do not represent real-world value. Is Critical Seeker a gambling game? No. Critical Seeker is a casual visual puzzle game about finding hidden differences in cat illustrations. Its resources and rewards are virtual game systems used for puzzle progression.
- Flip Blocks
Flip Blocks About This Game Flip Blocks is a casual sliding number merge puzzle game about board control, matching numbers, and smart movement. Each swipe moves the blocks in one shared direction, and matching number blocks can merge when they touch. The goal is not simply to create the biggest number possible. The real challenge is to reduce board pressure, clear useful space, and complete the current level objective through planned merges. A strong Flip Blocks run usually comes from calm movement rather than fast swiping. You need to decide which blocks should merge first, where larger blocks should stay, and how each swipe affects the next turn. Low-number blocks are often easier to remove from the board, while higher-number blocks need safer positioning so they do not get trapped in the middle. For beginners, the three most useful habits are simple: do not swipe randomly, clear easy low-number matches before they become clutter, and protect larger blocks near stable edges or corners when possible. Once the board becomes crowded, every move matters more because one careless swipe can separate matching blocks or block a future merge route. Gameplay note: This guide focuses on visible gameplay behavior, including block movement, matching, board pressure, and beginner decision-making. It does not claim hidden scoring formulas, exact internal calculations, official level data, or guaranteed outcomes. How to Play Start each level by checking the full board. Look for matching number blocks, open spaces, low-number blocks that can be cleared early, and any higher-number block that may become hard to move later. Swipe the screen to move all blocks in the same direction. When matching number blocks touch, they can merge. Based on the provided rules, matching number blocks appear to merge toward clearing or completing the level objective, so each merge should help reduce pressure on the board. If the board runs out of usable space or you can no longer create a practical merge route, the level may become stuck or fail. The safest approach is to keep the board open, guide matching numbers together, and avoid moves that scatter blocks across opposite sides. Beginner Strategy Guide The best beginner strategy in Flip Blocks is to treat every swipe as a board-shaping decision. Do not move just because a merge is available. Move because the merge improves the next position. Use Corner Locking carefully. Corner Locking means keeping a higher-number block near a stable corner or edge so it does not drift into the center. This gives you an anchor point, but it only works when the corner stays clean and support blocks can still reach it. If a corner is filled with low-number clutter, clear the clutter before trying to lock a higher-number block there. Use the Snake Pattern as a guide, not a rule. The Snake Pattern means moving blocks in a controlled flow, such as compressing them toward one side, then guiding them down or across in a predictable path. This can help beginners avoid chaotic left-right-up-down swiping, but it should not force every move. Break the pattern when a direct merge or space-saving move is clearly better. Clear low-number blocks before they become clutter. Number 1 blocks and other low numbers are often easier to resolve early. If you leave them scattered across the board, they can block movement paths later and make higher-number merges harder to set up. Think one move ahead. Before merging two blocks, ask whether the next move will still be playable. A merge is not always good if it pushes a key block into the center or removes the only open route. Use chain reactions, but do not depend on luck. A chain reaction can happen when one merge creates another useful match nearby. These are valuable because they reduce pressure quickly, but they work best when your board is already organized. Before You Swipe • Will this move create a real merge or improve a merge path? • Will it leave enough open space afterward? • Will it protect important high-number blocks? • Will the next move still be playable? • Will this swipe make the board more organized or more scattered? Situation · Recommended Swipe Control · Why It Helps Early board with several low-number blocks · Compress toward one side, then use a secondary direction · Helps bring easy matches together without scattering the board A higher-number block is already near a corner · Avoid breaking that corner unless the move creates a clear merge · Keeps the block stable and easier to support later The board is getting crowded · Return to one main edge or corner pattern · Reduces chaos and creates more predictable merge paths Two low-number blocks can merge near one side · Make the merge only if it does not pull a high-number block into the center · Clears space without damaging long-term structure A chain reaction is possible · Swipe in the direction that keeps the next matching pair close · Lets one merge set up the next instead of resetting the board For example, if two small blocks can merge on the right side but that swipe would pull a high-number block out of a safe corner, delay the small merge and protect the corner first. A short-term match is not worth losing your best anchor point. Common Mistakes Mistake: Swiping without a board goal. Fix: Before moving, identify one merge route or one space-saving goal. Even a simple plan is better than moving just to see what happens. Mistake: Clearing every visible match immediately. Fix: A merge should improve the board, not just reduce one pair. If a quick merge breaks a corner anchor, separates future matches, or fills open space, it may be better to prepare the board first. Mistake: Letting low-number blocks spread everywhere. Fix: Handle easy low-number matches early. Small blocks become dangerous when they occupy corners, block movement lanes, or separate higher-number pairs. Mistake: Pushing high-number blocks into the middle. Fix: Use edges and corners as anchors. A high-number block in the center can block several movement paths at once and become difficult to reconnect with a match. Mistake: Overusing one direction without checking the result. Fix: A main swipe direction is helpful, but it should not become automatic. For example, repeated upward movement can leave the lower rows cluttered if you never compress or clean them. Mistake: Changing direction every move. Fix: Use controlled direction changes. A good pattern should gather blocks into readable groups, not send them to opposite sides of the board. Mistake: Waiting until the board is almost full to plan. Fix: Start managing space from the first few moves. Once the board is crowded, fixing a bad layout takes more effort and fewer mistakes are allowed. Fair Play Note: All numbers, blocks, scores, levels, and objectives in Flip Blocks are virtual in-game puzzle mechanics. They are part of gameplay progress only and should not be understood as outside-game value, betting, or gambling activity. FAQ What is Flip Blocks? Flip Blocks is a casual sliding number merge puzzle game where players move blocks, merge matching numbers, and manage board space. Is Flip Blocks the same as 2048? No. Flip Blocks uses number merging, but it should not be treated as a standard 2048 game. The focus is more on reducing board pressure, clearing blocks, and completing level objectives than simply building the largest number. How do you merge blocks in Flip Blocks? Swipe to move blocks in one direction. When matching number blocks touch, they can merge. Should you merge blocks as soon as possible? Not always. A fast merge is useful only if it improves the board. If it breaks a corner anchor, separates future matches, or fills open space, it may be better to prepare the board first. What should you do when a high-number block is trapped? Stop swiping randomly and rebuild space around it. Try to compress nearby blocks toward a stable edge, open a path for matching numbers, and avoid moves that push the trapped block deeper into the center. When should you change swipe direction? Change direction when it creates a real merge, restores open space, or protects an important block. Avoid changing direction just because the board looks temporarily stuck. What causes most failed boards in Flip Blocks? Most failed boards come from poor space management: scattered low-number blocks, high-number blocks stuck in the center, and repeated swipes that do not create future merge paths. What is the safest beginner goal? The safest beginner goal is to keep a small buffer of open space while building predictable merge paths. Do not merge only for short-term progress if the move makes the next turn harder.
- Prison Escape
Prison Escape About This Game Prison Escape has a simple idea that becomes challenging once you start reading each level like a small logic map. The main challenge comes from reading a blocked route, making one careful cut, and seeing whether the stickman now has a safer way forward. It is not about rushing your finger across every dotted line. Better solutions often come from removing less paper than expected and keeping the right support in place. Prison Escape is a casual paper cutting and stickman escape game built around logic-based pathfinding. Your job is to cut yellow paper and create a safe route toward the EXIT on the right side of the stage. The stickman does not need the widest possible opening. He needs a connected path that stays stable from start to finish. Each cut changes the level. Removing yellow paper can open a useful passage, smooth a step, or connect two parts of the route. It can also break the ground the stickman needs to stand on. That is why the game is less about fast swiping and more about careful planning. Every level gives you a limited number of cuts, shown through the scissors at the bottom of the screen. This adds a light resource management layer: you need to decide which obstacles are worth cutting and which pieces of paper should stay in place. A strong route usually comes from three habits: protect the walking surface first, open the path second, and restart with a better plan when your first route clearly does not work. How to Play Start each level by observing the stickman, the yellow paper, the dotted cut lines, and the EXIT. The exit is usually the most important clue because it tells you which direction the final route must connect to. Swipe along a dotted line to cut the yellow paper. The removed section disappears and reveals the path underneath. The most useful cuts usually remove a real obstacle, smooth a step, or connect two parts of the route. A cut is less useful if it only clears extra space without helping the stickman move closer to EXIT. Do not cut away the area under the stickman unless you are sure the route will remain safe. In this kind of paper cutting puzzle, support matters as much as open space. A path that looks clear but has no stable walking surface can fail quickly. Watch the remaining cuts at the bottom of the interface. Since each level has limited cutting chances, avoid spending them on paper that does not affect the route. Resource management is part of the puzzle: the question is not “Can I cut this?” but “Does this cut solve the next real problem?” A simple beginner habit is to follow this order: 1. Find EXIT first. 2. Trace the safest possible route from the stickman to the exit. 3. Identify which yellow paper is actually blocking that route. 4. Cut only the blocking sections. 5. Keep enough support under the stickman and along the walking path. 6. Keep one cut available when the route ahead is still uncertain. 7. Use Restart if the route becomes broken, blocked, or impossible to repair. Route Check: Before cutting, scan the level in this order: EXIT → final approach → middle path → stickman’s starting point. This helps you avoid opening a path that looks good at first but fails near the end. If the stickman gets stuck, falls, or cannot reach EXIT, use Restart to reset the level. Treat Restart as a planning tool rather than a punishment. A failed attempt often shows exactly which piece of paper should have stayed in place. Beginner Strategy Guide The most useful beginner strategy is to plan from the EXIT backward. Instead of cutting the first dotted line you notice, look at where the stickman needs to end up. Then imagine the route in reverse: exit area, final approach, middle path, starting point. This makes it easier to see which paper truly blocks progress. Avoid large cuts at the start. Removing a big section may feel efficient, but it can create gaps, steep drops, or missing support. Smaller cuts are often safer because they let you adjust the route step by step. Focus on obstacles in front of the stickman or above the walking route before cutting the ground below him. Yellow paper under the character may be part of the support structure. If you remove it too early, the level can fail before the main route is even open. Before making a cut, ask three quick questions: does this remove a real obstacle, does it keep enough support under the stickman, and does it leave enough cuts for the next problem? If the answer is unclear, study the route again before swiping. Pro Tip: The cleanest solution is often not the biggest cut. In many layouts, a small cut that connects two surfaces is better than a large cut that creates empty space. For diagonal obstacles, think about building a gentle slope. A smoother angled route is usually easier for the stickman to cross than a sharp drop or broken platform. You do not need to remove every nearby piece of paper. You only need enough space for a stable path. For step-like barriers, divide the route into sections. First open the lower approach, then connect the middle platform, then clear the final path toward EXIT. This prevents the route from becoming disconnected halfway through. Here is a practical strategy matrix for common situations: Situation · Better First Move · What to Avoid Paper blocks the path directly ahead · Cut the blocking section while keeping the floor intact · Cutting the support under the stickman A diagonal wall blocks movement · Create a smooth slope or angled opening · Making a steep gap that breaks the route A tall step stops progress · Build a connected path in sections · Removing too much paper at once The route ahead is unclear · Save a cut and study the layout again · Spending every cut early The path is already broken · Use Restart and adjust the first cut · Forcing a route that cannot connect Some layouts can be understood as common puzzle patterns: Simple Drop: If the stickman needs to move from a higher surface to a lower path, do not remove all the paper between them. Cut only enough to open the landing area while keeping a surface that prevents an unsafe fall. Zig-Zag Route: If the path changes direction more than once, solve one turn at a time. Open the first turn, check whether the middle path stays connected, then use the next cut for the final approach. Scissors Trap: If several dotted lines look tempting, pause before cutting. The trap is spending all cuts on visible paper while leaving the final obstacle untouched. In uncertain layouts, keep one cut available until the route to EXIT is clear. One helpful way to improve is to think in smaller route decisions. Instead of thinking “remove this whole area,” think “remove only the part that blocks movement.” That mindset protects support and reduces wasted cuts. Your first goal should be simple: help the stickman reach EXIT safely. After you understand how the paper, support, and route connection work, you can start looking for cleaner solutions with fewer unnecessary cuts. Common Mistakes • Cutting away too much yellow paper: Removing extra paper can destroy support and make the route unsafe. Cut only what blocks progress. • Opening space without preserving a path: A wide empty area is not helpful if the stickman has no connected surface to walk on. • Following every dotted line automatically: Dotted lines show possible cuts, not required cuts. Judge whether each section actually affects the route. • Ignoring the EXIT position: Cutting before checking the exit can send your plan in the wrong direction and waste limited cuts. • Using all cuts too early: If the route ahead is still uncertain, save a cut for the next obstacle instead of clearing minor details. • Removing support under the stickman first: Cutting below the character too soon can break the level before the main puzzle begins. • Forcing a clearly failed route: If the path is blocked, broken, or impossible to repair with the cuts left, use Restart and rebuild the plan. • Reading the virtual theme too literally: Prison Escape is only a paper cutting stickman puzzle game. Its prison setting, scissors, rewards, paths, Restart button, and EXIT are in-game mechanics, not real-world escape advice, tool guidance, gambling content, or cash-value rewards. FAQ How do I decide which yellow paper to cut first? Start with the paper that directly blocks the safest route to EXIT. If a section does not stop the stickman from moving forward, leave it alone until you know it matters. Should I plan from the stickman or from EXIT? Planning from EXIT backward is usually safer. It helps you understand where the final route must connect before you spend cuts near the starting point. Do scissors refill over time? The provided gameplay information only confirms that the scissors at the bottom show the remaining cuts for the current level. Treat them as limited resources and plan each cut carefully instead of assuming they will refill. How should I handle moving platforms in later stages? If your version includes moving platforms or shifting support areas, wait to read their movement before cutting nearby paper. The safest cut is one that keeps the route connected when the platform is in a usable position. Why does the stickman fall after I open the path? This usually happens when too much support has been removed. A route needs both open space and stable ground, so avoid cutting away the paper directly under the stickman unless the next surface is clearly safe. What should I do with diagonal obstacles? Try to create a gentle slope or angled opening instead of a sharp drop. A smoother route gives the stickman a better chance to continue toward EXIT without getting stuck. When should I use Restart? Use Restart when you cut the wrong section, remove necessary support, run out of useful cuts, or create a route that no longer connects to EXIT. Restarting helps you replan with a cleaner cutting order. Is Prison Escape a real escape guide or gambling game? No. Prison Escape is a virtual paper cutting stickman puzzle. Its prison theme, scissors, rewards, Restart button, and EXIT are gameplay mechanics only, not real-world escape instructions, tool guidance, betting content, or cash-value rewards.
Simulation
- Cue Shot Challenge 3D
Cue Shot Challenge 3D About This Game Cue Shot Challenge 3D is a casual 3D pool and billiards challenge game where your goal is to pocket all the balls before your lives run out. Each shot costs 1 life, so the main challenge is not speed, but choosing safer angles, controlling power, and keeping the cue ball in a useful position. The 3D view helps you judge ball spacing, pocket lines, cut angles, cue direction, and possible shot paths before taking a shot. This matters because one careless attempt can waste a life and leave the next angle blocked. Cue Shot Challenge 3D also includes coins, daily rewards, tables, and ball skins as in-game virtual content. These items may change visual progression or appearance, but the core gameplay still depends on aiming, power control, cue ball positioning, and efficient table clearing. How to Play Cue Shot Challenge 3D is mainly about power, precision, and careful shot preparation. Before taking your first shot, look over the full table. Check which balls have open pocket lines, which balls are blocked, and where the cue ball may stop after contact. Control / Rule · What It Does · Practical Tip Broad Aim · Slide on the empty area of the screen to adjust your general shot direction. · Use this first to face the cue toward the target ball or pocket line. Fine-Tuning · Use the right-side dial to make smaller angle adjustments. · Make a final correction before shooting, especially on narrow pocket angles. Power Control · Use the left-side dial to set shot force. · Medium power is often easier to control because it reduces wild cue ball movement, makes rebounds less chaotic, and helps the ball stop in a more useful position. Take the Shot · After setting direction and power, hit the cue ball. · Aim to pocket the target ball while keeping the next shot playable. Life System · Each shot removes 1 life. · Clear all balls before your lives run out to complete the challenge. A good turn usually follows this order: observe the table, set your broad aim, fine-tune the angle, adjust power, then shoot. The more carefully you prepare each shot, the fewer lives you are likely to waste. One useful detail to watch is the cut angle. A straight shot sends the target ball toward the pocket more predictably, while a sharp cut angle requires more precision because the cue ball contacts the target ball from the side. When the angle looks narrow, use the 3D view to check whether the pocket line is truly open before committing the shot. Beginner Strategy Guide Treat your lives as a strict shot budget. A simple pocket is always better than a risky trick shot. Start by choosing the clearest ball on the table. A clean, direct shot is usually more valuable than a difficult angle that might fail or leave the cue ball in a bad position. Use broad aim first, then fine-tune. Sliding on the empty screen area helps you set the main direction, while the right-side dial helps you correct the final angle. Many missed shots come from stopping after the rough aim instead of making a small final adjustment. Control your power with the left-side dial. New players often use too much force because it feels safer, but strong shots can create awkward rebounds and poor cue ball placement. Medium power is often better when you want a cleaner pocket and a more predictable next shot. If the cue ball can fall into a pocket during play, treat that situation carefully. In pool-style games, this is commonly called a scratch. Based on the provided gameplay details, the confirmed penalty is that every shot costs 1 life; no extra scratch penalty has been confirmed. Still, beginners should avoid scratches because they usually ruin cue ball position, waste the value of the shot, and can make the next angle much harder. Think about the next shot before taking the current one. You do not need perfect cue ball control every time, but try to avoid leaving the cue ball trapped near a rail, blocked by another ball, or facing an impossible angle. When you are low on lives, stop choosing shots based on what looks impressive. Choose the clearest pocket line available, even if it is a simple shot. A safe ball that keeps the level alive is better than a difficult angle that may end the run. When a ball is close to the edge or sitting at a difficult cut angle, do not force it too early. Clear easier balls first, open more space, and return to the harder shot when the cue ball position is better. Avoid flashy shots unless they are truly necessary. Rebounds, sharp cuts, and long-distance attempts can be useful in some situations, but beginners will usually make better progress by taking stable, direct routes. Common Mistakes Mistake · Why It Fails · How to Fix It Using maximum power constantly · Strong shots can create wide rebounds and poor cue ball positions. · Use medium power when a clean, controlled shot is enough. Hitting long-distance shots too hard · A powerful long shot can make the cue ball travel too far, bounce unpredictably, or end in a bad position. · Use enough power to reach the target, but avoid over-hitting just because the shot is far away. Ignoring the remaining life count · A risky shot becomes more dangerous when only a few lives remain. · When lives are low, choose the clearest pocket line instead of a sharp cut, rebound, or long-distance attempt. Only looking at the current ball · You may pocket one ball but leave the next shot blocked or awkward. · Think one shot ahead before you shoot. Skipping fine adjustment · Rough aim may look close, but small angle errors can cause missed pockets. · Use the right-side dial before taking narrow or angled shots. Shooting before reading the table · Rushed shots often waste good opportunities. · Pause briefly and check open pocket lines first. Forcing difficult edge shots too early · Rail-side or narrow-angle balls can consume too many attempts. · Clear easier balls first and return when the cue ball position improves. Treating the 3D view as decoration · You may miss useful visual clues about spacing, cut angles, and pocket lines. · Use the 3D perspective to judge shot paths and cue direction. Ignoring power control · Poor force can send the cue ball into an unhelpful position. · Adjust the left-side dial based on distance and table layout. Expecting skins to change performance · Visual unlocks do not replace careful play. · Focus on aim, shot choice, and cue ball control. FAQ How do you aim more accurately in Cue Shot Challenge 3D? Use the empty screen area for broad aim first, then use the right-side dial for smaller corrections. This two-step approach is especially helpful when the target ball needs a narrow cut angle. How should beginners control shot power? Beginners should avoid using full power on every shot. A controlled medium-power shot is often easier to predict, reduces wild cue ball movement, and can leave the cue ball in a better position. Why do I run out of lives so quickly? You usually run out of lives because every shot costs 1 life and missed shots reduce your shot budget quickly. Avoid risky cut angles early, use the right-side dial for final aim correction, and choose open pocket lines before attempting difficult edge balls or long-distance shots. Can you pocket two balls with one shot? Sometimes, a single shot may lead to more than one ball dropping if the table layout allows it. However, beginners should not force double-pocket attempts unless the first pocket line is already safe and clear. What should I do with a difficult edge ball? Do not rush it. Clear easier balls first, create more open space, and return to the edge ball when the cue ball position gives you a cleaner angle. What happens if the cue ball falls into a pocket? Based on the provided gameplay details, each shot costs 1 life, but no additional scratch penalty has been confirmed. Even so, a scratch is usually bad for positioning, so it is better to avoid shots that send the cue ball toward a pocket. Is it better to use the broad aim control or the right-side dial? Use both. Broad aim helps you set the main direction, while the right-side dial is better for fine angle control before the final shot. Do coins, table skins, or ball skins improve gameplay? Coins are an in-game virtual resource used for visual progression such as tables or ball skins. These items should be understood as visual unlocks, not gameplay advantages. Your progress still depends on aiming, shot choice, power control, and cue ball position. Editorial Note This guide is based on the gameplay information provided for Cue Shot Challenge 3D. It is written to help players understand the rules, controls, life system, table-clearing goal, aiming method, power control, and beginner strategy. Coins, daily rewards, gift rewards, tables, and ball skins are described only as in-game virtual content. They should not be understood as real-world rewards, cash-value items, gambling features, or guaranteed gameplay advantages.
- Core Adventure
About This Game Core Adventure is a casual drilling adventure and mining upgrade game built around a clear loop: drill down, collect materials while rising back up, return to the surface, and upgrade your equipment for the next run. Each run starts with the drill moving underground until it reaches its current depth limit. The most important moment comes during the upward phase, when you collect materials and try to meet the storage target shown in the upper-left corner. Once that target is reached, the drill returns to the surface and you can spend your in-game resources on upgrades. The main progression systems are Storage Capacity, Drill Depth, and Idle Resource Generation. Storage Capacity helps your runs carry more value, Drill Depth opens deeper collection opportunities, and Idle Resource Generation supports longer-term progress between active runs. Core Adventure also includes drill skins and a collection book. These features add visual variety and completion goals, but the main strategy comes from improving the drilling, collecting, and upgrading cycle. How to Play 1. Start a drilling run and let the drill move underground. 2. Wait until the drill reaches its current depth limit. 3. Collect materials during the upward phase as the drill rises. 4. Watch the storage target shown in the upper-left corner. 5. Once the target is reached, return to the surface. 6. Spend your in-game resources on Storage Capacity, Drill Depth, or Idle Resource Generation. 7. Use later runs to adjust your upgrade plan based on what slowed you down. The most important part of each run is the upward phase. This is when your drill depth turns into useful progress, so avoid treating the return trip as passive downtime. Look for reachable material clusters, stay on a stable route, and avoid chasing every single pickup if it makes you miss a larger group. Beginner Strategy Guide Do not upgrade randomly in the first few runs. Your early goal is to identify the bottleneck: storage, depth, route control, or idle progress. After every return to the surface, ask one question before spending resources: what stopped this run from being better? A practical early upgrade order is: 1. Upgrade Storage Capacity first if you are reaching the target quickly or losing value from collected materials. 2. Upgrade Drill Depth after storage feels stable enough to benefit from deeper runs. 3. Add Idle Resource Generation once your active runs already feel productive. 4. Delay drill skins and collection book goals until the basic upgrade loop feels reliable. A good beginner route is not to maximize one upgrade immediately. First make the drilling loop stable, then push deeper, then use Idle Resource Generation to support longer-term progress. Upgrade Priority List • T0: Storage Capacity • Best when you collect enough materials but feel capped too quickly. • Strong early upgrade because it improves the value of successful upward phases. • T0: Drill Depth • Best when runs feel resource-poor or the upward phase does not offer enough material clusters. • More useful after storage can handle the extra materials from deeper routes. • T1: Idle Resource Generation • Best after your active drilling loop already feels stable. • Useful for players who return across multiple sessions, but it should not replace active upgrade planning. • T2: Drill Skins • Good for visual variety and collection goals. • Not the first priority when your drill still feels weak. • T2: Collection Book • Useful as a long-term completion goal. • Better after you understand the main drilling, collecting, and upgrade cycle. Upgrade Decision Table What you notice during runs · Likely issue · Better focus You reach the storage target quickly · Storage may be limiting the run · Upgrade Storage Capacity The upward phase feels empty · Drill range may be too shallow · Upgrade Drill Depth You collect well but progress feels slow later · Idle gain may be low · Improve Idle Resource Generation You miss many materials during the rise · Route control is weak · Practice upward movement before spending blindly You spend on skins while runs still feel weak · Upgrade priority is misplaced · Improve core equipment first Upward Phase Tips The upward phase is not just the end of a run. It is the part where depth becomes useful progress. Treat it as the main collection window. Prioritize material clusters that are easy to reach. A small group near your path is usually safer than a single piece far on the edge. Do not overcorrect for one isolated pickup if it causes you to miss a larger group that was already within reach. Try to collect in controlled lines instead of drifting back and forth. Wide, panicked movement can make the drill miss more materials than it gains. If the storage target is almost complete, focus on stable pickups instead of chasing risky pieces near the side of the screen. If Core Adventure shows different material colors or values in your current version, use a simple rule: only chase higher-value materials when the route stays stable. A valuable pickup is not worth it if it makes you miss an entire cluster afterward. When progress feels slow, check these problems in order: 1. Are you missing too many materials during the upward phase? 2. Are your runs too shallow to reveal enough useful materials? 3. Are you filling storage too quickly? 4. Are you upgrading the same stat without checking the actual problem? 5. Are you spending too early on skins or collection goals? Common Mistakes Mistake 1: Chasing edge materials too often Edge materials can be tempting, but they are not always worth the movement cost. If you move too far sideways for one small pickup, you may miss a better cluster in the center path. Fix: Stay near reliable material groups. Only move toward the edge when the pickup is clearly worth the detour. Mistake 2: Treating the upward phase like a passive return Some players relax after the drill reaches depth, but the upward phase is where most useful collection happens. Fix: Watch the path early, line up with clusters, and avoid random movement. Your goal is not to touch everything; your goal is to collect consistently. Mistake 3: Upgrading Drill Depth before storage can support it Going deeper feels exciting, but it can create weak runs if Storage Capacity is still too low. Fix: Improve Storage Capacity first when your runs already produce enough materials. Then push Drill Depth when you are ready to benefit from deeper routes. Mistake 4: Overbuilding Storage Capacity without enough depth More storage does not help much if your drill does not reach areas with enough useful materials. Some players keep expanding capacity but still struggle because the upward route does not provide enough to collect. Fix: If your storage is not filling efficiently, improve Drill Depth or focus on better upward-phase route control before buying more capacity. Mistake 5: Buying visual goals before stabilizing equipment Drill skins and the collection book can make Core Adventure more enjoyable over time, but they do not replace basic upgrade progress. Fix: Build a stable loop first: collect well, hit the storage target reliably, and return with enough resources to improve equipment. Mistake 6: Ignoring Idle Resource Generation before a long break If you plan to stop playing for a while, leaving Idle Resource Generation underdeveloped can make your next return feel slower than necessary. Fix: Before ending a longer session, consider whether an Idle Resource Generation upgrade would support your next run better than another short-term upgrade. Mistake 7: Spending without diagnosing the last run Many slow-progress problems come from upgrading out of habit. If every return leads to the same upgrade choice, you may be missing the real bottleneck. Fix: Before spending, identify one clear issue from the last run: storage cap, shallow depth, weak upward route, or low idle gain. FAQ What is Core Adventure? Core Adventure is a casual drilling adventure and mining upgrade game where each run involves drilling down, collecting materials during the upward phase, returning to the surface, and upgrading for the next attempt. How do you play Core Adventure? Start a run, let the drill descend, collect materials as it rises, watch the upper-left storage target, and spend resources on upgrades after returning to the surface. What should I upgrade first in Core Adventure? Start with Storage Capacity if you are collecting materials quickly but feel capped. Choose Drill Depth when your upward phase does not offer enough useful pickups. Add Idle Resource Generation later if you play across multiple sessions. What does Drill Depth do? Drill Depth affects how far the drill can go before the upward collection phase begins. It is most useful when your storage and collection control are strong enough to benefit from deeper runs. What does Storage Capacity do? Storage Capacity helps you carry more useful materials from successful runs. It is especially important when you often reach the storage target quickly or feel limited by capacity. What does Idle Resource Generation mean? Idle Resource Generation is an in-game progression mechanic that supports resource gain between active runs. It should be understood only as a virtual game system, not real-world income. Are drill skins important? Drill skins are better treated as visual or collection goals unless the current game version clearly shows a gameplay effect. Beginners should stabilize Storage Capacity, Drill Depth, and collection control before prioritizing skins. What is the collection book for? The collection book gives completion-focused players a long-term goal beyond basic upgrades. It is useful for progression tracking, but it should not replace core equipment upgrades early on. Editorial Note This Core Adventure guide is based on the available gameplay information and focuses on the drilling loop, upward collection phase, storage target, and main upgrade choices. Specific upgrade costs, skin effects, material values, and collection details may depend on the current in-game version, so players should follow the latest information shown inside the game. Core Adventure is a casual mining upgrade game. Idle Resource Generation, drill skins, materials, and the collection book are virtual in-game systems only and should not be understood as real-world financial activity.
- Haunted Hostel
Haunted Hostel About This Game Haunted Hostel is a beginner-friendly room defense strategy game built around Bed income, Coins, Energy, Door upgrades, Repair timing, and defense tools. Haunted Hostel plays more like a survival tower defense challenge than an action escape game. Instead of moving through the hostel to fight directly, you choose a room, build an economy, protect the Door, and survive as pressure increases. The main resource loop is simple: the Bed helps generate Coins, while Energy-related facilities support stronger late-game options. Coins are used for core upgrades such as the Bed, Door, Repair, and basic defense tools. Energy becomes more important once your room is stable and you are ready to add stronger support or advanced defense. The challenge comes from timing. Spending too much on income can leave the Door weak, while spending everything on defense can slow your economy. Good Haunted Hostel strategy is about knowing when to grow, when to repair, and when to stop saving Coins because the Door is under pressure. This guide focuses on the upgrade timing and room-defense decisions that most often decide whether beginners survive or lose early. How to Play Start each round by choosing a room with a strong defensive layout. For beginners, a U-shaped dead-end room, a room with one clear entrance, or a room near other occupied rooms is usually easier to defend. These layouts make the attack path easier to read and may help nearby defenders create shared pressure. A practical beginner opening looks like this: 1. Choose a room with one clear entrance. 2. Close or secure the Door immediately. 3. Build or activate the Bed so Coins start coming in. 4. Upgrade the Bed once early if the next income tier is affordable and the ghost is not already pressuring your Door. 5. Upgrade the Door to the first stronger tier before heavy pressure starts. 6. Build one basic defense tool, such as a Broom or Gun. 7. Watch the Door pressure before spending on another economy upgrade. Use the room upgrade panel to choose between economy, Door durability, Repair, and defense tools. When the ghost starts hitting the Door, stop checking long-term upgrades and focus on Repair or Door durability first. Situation · What You Should Do Safe window: the ghost is away from your room · Upgrade the Bed or improve income Danger window: the ghost is approaching or attacking · Repair the Door, upgrade the Door, or add defense Door is stable but damage is low · Build or upgrade one focused defense tool Coins are low and pressure is light · Improve the Bed first Door is close to breaking · Stop economy upgrades and stabilize defense This window-based thinking is more useful than following the same upgrade order every round. Repair is one of the most important tools in Haunted Hostel. Use it to buy time when the Door is taking damage. A Door upgrade can also be valuable during pressure because it improves your room’s ability to hold back the ghost, but upgrading too early may waste Coins that could have gone into income or a stronger defense tool. Your goal is to keep the room standing until the round objective is complete. In most room defense runs, that means preventing the Door from collapsing while your Bed income, Repair timing, and defense tools scale. If the Door fails and the room can no longer hold the ghost back, the run is lost. Beginner Strategy Guide A safe beginner route is: 1. Pick a U-shaped or one-entrance room. 2. Start the Bed economy immediately. 3. Upgrade the Bed once when the next income tier is affordable. 4. Upgrade the Door before heavy pressure starts. 5. Build one basic defense tool. 6. Use Repair when the Door is under pressure. 7. Add a stronger defensive option after your income is stable. 8. Build Energy-related facilities only when your Coin economy can support them. Do not treat this route as a fixed formula. If the ghost pressure changes early, switch priorities immediately from income to Door safety, Repair, or defense. Room choice matters. A dead-end room gives you a clearer attack path and more time to react. A room placed near other occupied rooms can also be useful because nearby defenses may help pressure the ghost when several rooms are attacked around the same corridor area. Phase · Main Priority · Good Upgrade Choices Opening · Start income · Bed upgrade, basic Door security Early pressure · Prevent collapse · Door upgrade, Repair, first basic defense tool Mid game · Balance income and damage · Better Door, upgraded defense tool, stronger room support Heavy pressure · Survival first · Higher-tier Door, Repair, focused high-level defense Late defense · Scale carefully · Energy-related facility, advanced defense, stronger support tools The exact upgrade names may vary, but the decision logic stays the same: income first during safe time, Door and Repair first during pressure. Do not fill every available slot with weak defenses. One or two upgraded defense tools are often more useful than several weak buildings that drain Coins and block better late-game placement. Treat tools such as Broom, Gun, Shield, or Console by function: basic damage first, stronger defense later, and Energy support only after your room economy is stable. Energy buildings should come after your Coin base is stable. A Console or Energy-related facility can help unlock stronger options, but building it too early may delay Bed upgrades, Door durability, Repair, or your first reliable defense. If the ghost is already focused on your room, protect the Door before investing in Energy. A strong run usually follows this rhythm: Bed for income, Door for time, Repair for emergencies, defense tools for pressure, Energy for late scaling. Common Mistakes Mistake: Upgrading the Door while it still has full durability. Why it fails: If Haunted Hostel's Door upgrade restores or greatly improves durability in your version, upgrading too early can waste emergency value. Better move: Let the Door take some pressure first, use Repair when needed, then upgrade before it breaks. Mistake: Only upgrading the Bed at the start. Why it fails: More Coins do not help if the Door fails before your economy pays off. Better move: Upgrade the Bed early, then check the Door. If the ghost is near, switch to Door durability or Repair. Mistake: Building too many basic defense tools. Why it fails: Several weak Brooms, Guns, or similar low-level tools can fill space without giving enough late-game value. Better move: Build one basic defense early, then focus resources on upgrading 1–2 core defenses instead of spreading Coins too thin. Mistake: Building Energy facilities too early. Why it fails: Energy can support stronger options, but early Energy buildings may delay the Bed, Door, and first defense tool. Better move: Build Energy-related facilities only after your Coin income and Door safety are under control. Mistake: Ignoring Repair during pressure. Why it fails: Buying random upgrades while the Door is under attack can leave the room exposed. Better move: Use Repair to buy time, then decide whether the next priority is Door durability, damage, or income. Mistake: Spending Coins the moment they appear. Why it fails: Small upgrades can block you from reaching the next important Door or defense upgrade. Better move: Save toward the next important Door or defense upgrade instead of buying every cheap option immediately. Mistake: Choosing an exposed room. Why it fails: Rooms with awkward entrances or poor positioning give you less time to react. Better move: Choose a dead-end, U-shaped, or back-to-back room area where the attack path is easier to read. FAQ How do you play Haunted Hostel? Choose a room, secure the Door, build Bed income, and spend Coins on Door upgrades, Repair, and defense tools. What should beginners upgrade first in Haunted Hostel? Start with the Bed for early Coins, then upgrade the Door before serious pressure begins. Add one basic defense tool once your room has a stable opening. Should I upgrade the Door or the Bed first? Upgrade the Bed during safe windows and upgrade or repair the Door during danger windows. If the ghost is already attacking, Door safety comes first. How do you survive longer in Haunted Hostel? Pick a room with a clear entrance, avoid overbuilding weak defenses, use Repair during pressure, and focus on a few strong upgrades instead of spreading resources everywhere. Why do beginners lose early? Most early losses happen because players overbuild income, ignore Door durability, build too many weak defenses, or invest in Energy before the room is stable. Is Haunted Hostel a tower defense game? Yes. Haunted Hostel fits the room defense and survival tower defense style because you defend a single room through income, Door upgrades, Repair, and defense tools. Editorial Note Guide updated by GeevenTech Editors after reviewing Haunted Hostel room defense mechanics, early upgrade flow, and beginner survival patterns. This guide focuses on practical gameplay decisions: room choice, Bed income, Coins, Energy, Door durability, Repair timing, defense tool placement, and common early mistakes. Some interface labels, upgrade names, or values may vary by version, so players should follow the numbers shown in their current build. This article does not claim any official relationship with the developer, publisher, platform, or external franchise.
- Build a Boat
Build a Boat About This Game Build a Boat is a relaxing boat assembly puzzle game built around visual matching, level progression, and a simple task-completion loop. In each stage, players assemble a boat by placing puzzle parts into the correct positions based on the shadow outline shown on screen. The game is not only about dragging parts into place. To move forward, you need to complete the full cycle for the current boat: assemble it, fuel it, send it out on a sea mission, wait for it to return, and finish the maintenance step. Once the required steps are complete, the next stage can open with a new boat to build. Build a Boat is designed for players who enjoy casual puzzle games, boat assembly games, and light task-based challenges. The controls are simple, usually based on guided clicks, taps, drags, or sliding actions. The challenge comes from reading the outline correctly, placing parts in a smart order, and paying attention to the prompts after assembly. As the level progression continues, the boats can become more complex. Early stages are usually easier to read, with larger parts and clearer shapes. Later stages may introduce smaller details, similar-looking pieces, and more crowded boat structures. This gives Build a Boat a steady difficulty curve while keeping the gameplay relaxed and easy to understand. How to Play Build a Boat follows a simple five-step gameplay loop: 1. Study the boat shadow. Look at the full outline before moving any part. Identify the base, front, back, and largest visible sections of the boat. 2. Assemble the boat parts. Place the largest or clearest parts first, then match smaller pieces by edge shape, curve, size, and direction. 3. Fuel the completed boat. After the assembly is finished, follow the game prompt to add fuel before the mission begins. 4. Complete the sea mission. Send the boat out and follow any on-screen instructions connected to the mission stage. 5. Finish return and maintenance. After the boat returns, complete the maintenance prompt to finish the stage flow and continue progression. This loop is important because assembly alone is not always enough to move forward. In Build a Boat, the post-assembly steps are part of the stage progression, so slow down and finish the full cycle before expecting the next boat to unlock. Key Progression Expectations Stage Type · Boat Assembly Feel · What Usually Gets Harder · Best Focus Early stages · Larger parts and clearer outlines · Learning the basic drag, snap, and prompt flow · Place the hull or base first Middle stages · More sections and similar-looking pieces · Comparing edges, curves, and part direction · Use anchor pieces and check two visual clues Later stages · More crowded boat structures · Small details, tighter gaps, and confusing part shapes · Leave tiny pieces for the end and use process of elimination This table is best used as a general progression guide, not a fixed level chart. The exact boat names, mission timing, and unlock details may vary by version. Beginner Strategy Guide Best Assembly Order for Beginners A safer beginner order is to build the boat from the largest shape to the smallest details. 1. Start with the longest hull or base piece because it defines the bottom shape of the boat. 2. Use the bow and stern pieces to confirm the front and back direction. 3. Add cabin-like or upper structure parts after the main body is stable. 4. Place small trim pieces and similar-looking parts near the end. 5. If a part only matches one edge of the shadow, skip it and check another gap first. This order works well because the largest parts create a visual frame. Once the main body is correct, the remaining spaces become easier to understand. Two-Point Match Rule Do not place a part only because one side looks correct. A reliable match should usually fit at least two visual clues, such as a long edge plus a corner, a curve plus a short side, or a clean nearby gap. This rule is especially useful when two parts look similar. If a piece matches one side but leaves an awkward gap, overlap, or wrong-facing corner, it may belong somewhere else. For example, a curved hull-style piece should not be placed only because its bottom edge looks close. Check whether the curve direction and nearby corner also match the shadow. If both points line up, the part is much more likely to belong there. The Edge-Snapping Mechanic Build a Boat appears to judge placement by how closely a part matches the shadow outline. When a part is close enough to the correct position, the game may snap or accept it into place. The safest approach is to align the edge, curve, and corner as accurately as possible instead of dropping the part near the general area. A good placement usually has three signs: 1. The part covers the matching shadow area cleanly. 2. The corners and curves point in the same direction as the outline. 3. The piece does not leave an obvious gap or overlap with nearby sections. If the part does not snap into place, do not keep forcing it. Pull it back, compare the edge again, and check whether another larger piece should be placed first. Early-Level Strategy In the early stages, focus on learning the basic rhythm of the game. These levels are usually easier because the boat shapes are clearer and the parts are more recognizable. Use these stages to practice reading the shadow before dragging, placing the base first, and checking whether a part aligns cleanly. Do not rush just because the first boats feel simple. The habits you build early will help later when the boats become more detailed. Later-Level Strategy As the stages become harder, expect more similar-looking parts and smaller spaces. Later boats may have crowded structures, tiny trim pieces, or parts that only fit one specific gap. In these levels, the best approach is to use process of elimination. Place the largest and most unique parts first. Leave tiny or unclear pieces until the end. Once most of the shadow is filled, the remaining gaps will make the smaller pieces easier to identify. Use the Anchor Method on Hard Stages The anchor method means choosing one reliable part to build around. This is usually the longest base piece, the main hull, or another large part with a unique shape. Once that anchor is placed correctly, every other piece becomes easier to compare. On a more complex boat, a large central body section or cabin-like piece can work as the anchor. After that piece is stable, smaller details around it become easier to place because the nearby gaps are clearer. On harder stages, do not start with small parts. They may look correct in multiple places, but they become much easier to place after the main boat structure is stable. Handle Stuck Parts Calmly If a part will not fit, check three things: 1. Is the part facing the correct direction? 2. Does the full edge match the shadow, not just one side? 3. Is another nearby piece supposed to be placed first? If the answer is unclear, stop working on that piece and move to a more obvious part. Returning later often solves the problem because the remaining empty space becomes clearer. Do Not Rush the Post-Assembly Prompts Don't rush the post-assembly prompts. Finish the cycle to unlock the next level. After the boat is built, continue following the game instructions until the current stage is clearly complete. This helps prevent confusion when the next boat does not appear immediately. Common Mistakes Mistake · Why It Causes Problems · Better Approach Starting without checking the full outline · You may place a correct part in the wrong section · Look at the full shadow before dragging Placing small parts too early · Tiny parts can look correct in several gaps · Save them until the larger structure is complete Ignoring the front and back direction · Some pieces may look similar when placed near the wrong end · Confirm the bow and stern before adding details Forcing a piece that does not snap · The part may be misaligned or in the wrong area · Pull it back and compare the full edge again Matching only one edge · One side may fit while the rest of the part is wrong · Use the Two-Point Match Rule Rushing after assembly · You may miss the prompt needed to finish the stage · Follow the post-assembly cycle carefully Expecting every level to feel the same · Later boats may need slower, more careful placement · Adjust your pace as the boat structure gets more complex Forgetting process of elimination · Hard parts become confusing when solved too early · Place obvious pieces first, then solve the remaining gaps FAQ What is Build a Boat? Build a Boat is a casual boat assembly puzzle game where players match boat parts to a shadow outline, then complete fueling, mission, return, and maintenance steps to progress. How does the level system work in Build a Boat? Build a Boat uses a stage-based progression loop. You complete the current boat’s assembly, fueling, mission, return, and maintenance flow before moving on to the next stage. What is the best assembly order for beginners? Start with the longest hull or base piece, confirm the front and back of the boat, add the upper structure, and finish with smaller details. What should I do if a piece will not fit? Pull the piece back and compare its full edge with the shadow. If it still does not fit, place a larger surrounding part first and return to the difficult piece later. How do I progress faster in Build a Boat? Reduce placement mistakes. Study the full shadow, place anchor pieces first, use the Two-Point Match Rule, leave tiny parts for the end, and avoid rushing through post-assembly prompts. Can I skip a difficult level in Build a Boat? No. Progression is strictly linear. You must complete the current boat’s full task loop (assembly, fueling, mission, maintenance) before the next stage unlocks. Will I lose points if I assemble the boat incorrectly? No. There is no penalty for incorrect placement. Treat it as a trial-and-error puzzle—simply pull the part back, recheck the outline, and continue. Do missions continue while I am offline? No. Missions pause when you close the game. You need to actively keep the game open to complete the task flow and follow the game prompts. Editorial Note Note: Build a Boat is a casual virtual puzzle game. All missions, fuel mechanics, and maintenance steps are in-game features, not real-world boating instructions.
- I'm Really Good With Tanks
I'm Really Good With Tanks In I'm Really Good With Tanks, survive first, collect second, and upgrade with a purpose. Use the middle lanes to keep escape options open, avoid getting trapped on the edge, skip risky Money Trucks or Fuel Trucks, and prioritize control-focused upgrades before speed-focused upgrades. About This Game I'm Really Good With Tanks is a casual tank driving arcade game built around lane switching, road survival, and quick reactions. You guide a tank along a five-lane road, moving between lanes to avoid traffic and clear selected road targets. The core loop is easy to understand: drive forward, read the traffic grid, avoid collisions, collect in-game cash from safe target clears, then return to the Home page to unlock tanks or improve performance. Money Trucks, Fuel Trucks, other tanks, and road vehicles all work as arcade gameplay elements inside the run. What makes I'm Really Good With Tanks interesting is the lane pressure. A clear lane can become dangerous quickly, especially if you move too late or chase a target into a blocked route. Strong runs come from planning your next lane before the current one becomes unsafe. The Basics • Watch the road across all lanes, not just the lane your tank is using. • Move left or right to avoid vehicles and keep the run alive. • Clear Money Trucks, Fuel Trucks, or other tank targets only when the route stays open. • Do not chase every target; a missed truck is better than an early crash. • Collect in-game cash during the run. • If your tank hits another vehicle, the run ends. • Use the Home page after a run to unlock new tanks or improve performance. The simplest rule is this: the best lane is not always the empty lane now. It is the lane that still gives you a way out two seconds later. Beginner Strategy Guide Read the Traffic Grid, Not Just Your Lane Many new players crash because they react only to the vehicle directly ahead. In I'm Really Good With Tanks, you need to scan the whole road pattern. Check your current lane, the lane you want to enter, and the lane beside that one. If two or three lanes are filling up at the same time, move before the gap disappears. Late lane changes force panic decisions, and panic decisions usually lead to collisions. A good habit is to keep your eyes slightly ahead of the tank instead of staring at the tank itself. This gives you more time to see where the next safe opening will form. Use the Center Lane Strategy The middle area of the road is usually safer for beginners because it gives you more escape options. From the center lanes, you can move left or right depending on where traffic opens. This does not mean you should sit in the center forever. It means you should use the center as a reset point after collecting a target or dodging a tight traffic pattern. Good center-lane moments: • You are unsure where the next target will appear. • Both sides of the road are changing quickly. • You just cleared a truck and need to recover position. • You want to avoid being forced into a single escape direction. The center lanes give you choices. In a lane switching game, choices are often more valuable than speed. Avoid the Edge Lane Trap The outer lanes can look safe, but they are dangerous when traffic closes in. If you move into the far-left or far-right lane, you only have one direction to escape. If that return path is blocked, you are trapped. Use edge lanes for quick moves, not long stays. Enter the edge only when the lane ahead is open and you can return toward the middle before the next traffic cluster arrives. Pro-Tip: Don't skim past targets. Give Money Trucks and Fuel Trucks a full lane's width of clearance, especially when they appear near the edge of the road. That extra space helps you avoid getting pinned with no recovery lane. Know When to Skip Money Trucks and Fuel Trucks Money Trucks and Fuel Trucks are tempting because they can help your in-game cash flow, but they are not worth chasing into a blocked lane. Before moving toward a truck, check three things: 1. Is the lane ahead open? 2. Can you leave that lane after clearing the target? 3. Will the move force you into the edge with no return route? If the answer looks risky, skip the target. The best way to collect more over time is usually to survive longer, not to grab every truck on screen. A strong player does not collect every target. A strong player collects the targets that do not break the route. Control Your Lane Switching Rhythm Fast movement is useful only when it is controlled. Random lane switching makes the tank harder to position and can place you directly in front of traffic you had already avoided. Use this rhythm: • Read the road. • Choose one safe lane. • Move once. • Recheck the pattern. • Move again only if needed. This rhythm keeps your tank stable and gives you time to plan. If you keep crashing early, slow down your decisions and move earlier instead of moving more often. First 3 Runs Practice Focus If you are new to I'm Really Good With Tanks, use your first few runs as practice instead of trying to collect everything immediately. • Run 1: Ignore most targets and focus only on avoiding collisions. • Run 2: Practice early lane changes before a lane becomes blocked. • Run 3: Start collecting safe trucks only when at least one escape lane remains open. After that, you can begin mixing survival, target collection, and upgrades more confidently. Upgrade Priority for Beginners The Home page upgrade system can help future runs, but beginners should avoid spending in-game cash randomly. The best early upgrade plan is to make the tank easier to control before making it faster. A useful beginner priority is: 1. Control-Related Upgrades First Prioritize handling, steering, movement stability, or any upgrade that makes lane changes easier to manage. A tank that responds cleanly is far more useful than a tank that moves fast but feels difficult to place. 2. Survival and Consistency Next Put your next upgrades into anything that helps you last longer or recover from lane pressure more easily. Longer runs create more chances to collect safely. 3. Collection Efficiency After Stability Once your tank feels stable, spend upgrades on anything that improves your ability to collect more from safe runs. Do this only after you can survive long enough to benefit from those upgrades. 4. Speed-Focused Upgrades Later Speed can make the road harder to read if your control is still weak. Choose speed-focused upgrades after you are comfortable handling crowded traffic patterns. 5. New Tanks When They Support Your Playstyle Unlock new tanks when they clearly help your control, comfort, or run consistency. If a new tank mainly changes appearance, it is usually better to improve basic performance first. Beginner rule: control before speed, survival before collection, and safe targets before risky trucks. Common Mistakes Looking only at the current lane The lane ahead may be open now but blocked a moment later. Watch the nearby lanes so you know where to move next. Switching too late Waiting until a vehicle is close gives you fewer options. Move early when the traffic pattern starts closing. Chasing trucks without an escape route Before going for Money Trucks or Fuel Trucks, check whether you can leave the lane afterward. If the target sends you into a dead end, skip it. Staying on the edge too long The far-left and far-right lanes limit your escape direction. Use them briefly, then return toward the center when possible. Choosing speed before control A tank that moves faster than you can steer is a problem, not an upgrade. Driving with high speed but poor control makes every lane change feel rushed, and it is an easy way to crash into the next truck or vehicle. Fix your handling first. Repeating the same crash pattern If you keep failing in the same situation, stop chasing targets for a few runs and focus on lane timing. Fix the route decision before trying to collect more cash. FAQ How can beginners collect more cash safely? Focus on survival time. The game naturally creates more safe target chances the longer you stay alive. Chasing every single truck is a trap that ends runs early. Should I upgrade control or speed first? Upgrade control-related performance first. Better steering, handling, or movement stability makes it easier to dodge traffic, recover from lane pressure, and collect safely. Are Money Trucks and Fuel Trucks always worth chasing? No. They are worth chasing only when the lane ahead is open and you can leave the lane afterward. If a truck pulls you into an edge trap or crowded traffic grid, skip it. Why do I keep crashing early? You are probably moving too late, watching only one lane, or chasing targets before checking escape routes. For a few runs, ignore trucks and practice early lane changes across the traffic grid.
- Sheep Ranch Builder
Sheep Ranch Builder About This Game Sheep Ranch Builder is a casual sheep ranch management and idle farm upgrade game about building a virtual ranch, improving production, raising Ranch Level, and unlocking new ranch areas over time. This guide is based on the visible game interface and focuses on practical beginner decisions rather than hidden formulas, fixed reward values, or guaranteed outcomes. The game uses a staged idle-growth economy. Early progress feels simple because small upgrades can quickly move the ranch forward. Later, the game becomes more about choosing the right upgrade path: Ranch Level gates, resource flow, support features, and diamond spending decisions begin to matter more than fast tapping. The main long-term goal is to expand the ranch. New areas or features may require specific Ranch Level requirements, such as a visible Ranch Lv. 10 to Unlock prompt. These level gates are important because they turn the game from a simple collection loop into a progression puzzle: you are not only collecting coins, but deciding which upgrade helps the next unlock arrive sooner. Sheep Ranch Builder also includes side systems such as Explore, Sheepdog, Lucky Spin, Shop, Rich List, Check-in, and Diamond Pack. These features can add variety, but the main value of the game comes from understanding the ranch economy: what improves output, what supports unlock progress, and what only distracts from the next visible requirement. For new players, the most important idea is this: do not treat every button as equal. A ranch-growth upgrade, a collection upgrade, and a side-menu feature can all look important, but they do not carry the same value at the same stage of the game. How to Play The ranch screen gives you several types of information: Ranch Level, resource counters, sheep areas, locked requirements, Upgrade buttons, Claim, Go, and side features. Instead of reading the interface as a list of buttons, read it as a set of economic signals. Key Attributes That Affect Progress Attribute · What It Means · Why It Matters Ranch Level · Your main progression marker. · Unlocks or gates new ranch areas and features. Sheep Quantity · The number or scale of sheep-related production. · Helps expand the visible ranch base and may support broader output. Sheep Value / Efficiency · The value, strength, or efficiency of sheep-related upgrades. · Often matters more when raw quantity stops giving fast progress. Collection Efficiency · How smoothly resources move into your usable balance. · Reduces downtime and keeps upgrades affordable. Unlock Progress · How close you are to the next ranch, area, or feature. · Helps decide which upgrade deserves priority. Support Systems · Features such as Explore or Sheepdog. · Useful only when they clearly help your current bottleneck. Sheep Quantity vs. Sheep Value / Efficiency When choosing upgrades, think in terms of quantity and value. In this guide, “value” or “efficiency” means any clearly shown upgrade that improves sheep value, production strength, collection efficiency, or Ranch Level progress. Sheep quantity helps when the ranch needs broader production or when a new area depends on expanding the visible ranch base. It is useful in the early game because quantity upgrades can make the ranch feel more active and productive. Sheep value or efficiency becomes more important when progress slows. If adding more sheep does not noticeably improve your upgrade pace, look for upgrades that improve value, efficiency, collection, or Ranch Level progress. These upgrades often do more for long-term growth than simply adding more of the same output. A good rule is: use quantity to build the ranch foundation, then use value and efficiency upgrades to push through slower progression points. How to Handle a Ranch Lv. 10 Unlock Requirement When the interface shows a requirement such as Ranch Lv. 10 to Unlock, treat it as a visible progress target. Your next upgrade choices should support that requirement instead of drifting into unrelated side systems. This does not mean there is always a special Lv. 10 bonus or hidden milestone reward. It simply means the game is telling you that Ranch Level progress matters for the next unlock. A good upgrade at this point is one that helps you move closer to the required Ranch Level, improves the ranch economy, or makes future upgrades easier to afford. If an upgrade does not help the current unlock requirement, it can usually wait. Using Go Use Go after a quick upgrade check. If a clearly useful upgrade is available, upgrade first; if not, use Go to continue the next action. Reading Explore and Sheepdog Explore and Sheepdog should be judged by their visible value in your current run. If one of them clearly improves resource flow, support efficiency, or progress toward a locked requirement, it can be worth attention. If the benefit is unclear, focus on Ranch Level and production upgrades first. Beginner Strategy Guide Use the priority rules below only when the related upgrade or benefit is clearly shown in the game interface. Upgrade Priority Tier List Tier · Upgrade Focus · When to Choose It · Why It Matters S · Ranch Level progress or main ranch growth · Choose this when the next ranch or feature is locked by level. · It moves the main progression path forward. A · Sheep value, production, or collection efficiency · Choose this when coins feel slow or upgrades become harder to afford. · It improves the ranch economy instead of only expanding the screen. B · Sheep quantity or visible ranch expansion · Choose this when the ranch still needs a stronger basic foundation. · It helps early growth and makes the ranch more productive. C · Explore or Sheepdog · Choose this when the game clearly shows how it helps your current bottleneck. · It can support progress, but only when the benefit is clear. D · Lucky Spin, Rich List, and unclear shop-side systems · Choose this after the main ranch path is stable. · These systems add variety but should not lead early spending. The best early upgrade is not always the most exciting button. It is the upgrade that moves the ranch closer to the next visible requirement. Lucky Spin Value Check Lucky Spin is best treated as a bonus system. It can be worth using when the game clearly gives a free or low-risk attempt, but it should not become the center of your upgrade plan. The problem with relying on Lucky Spin early is uncertainty. A spin result may not match your current bottleneck. If your ranch needs Ranch Level progress or better production, a random reward may not solve the problem. Use Lucky Spin when it is clearly low-risk. Do not spend important resources on it while a visible Ranch Level requirement is still blocking progress. Diamond Value Check Diamonds should be reserved for clearly shown long-term progression value. The safest diamond use is a clearly shown long-term benefit, such as an upgrade that visibly improves production, collection, or unlock progress. Before using diamonds, ask: Question · Better Decision Does the game clearly show the result? · Spend only when the outcome is clear. Is the benefit long-lasting? · Prefer upgrades with clearly shown ongoing value. Does it help the current Ranch Level or unlock bottleneck? · Use diamonds only when they support real progress. Is it tied to a temporary, unclear, or random system? · Save diamonds. Do not use diamonds for unclear shop actions, random draws, ranking pressure, or short-term curiosity. If the game does not clearly explain the benefit, keeping diamonds is the stronger beginner decision. Mid-Game Slowdown Fix When progress starts slowing down, avoid the common mistake of jumping into every side feature. Slowdown usually means one of three things: Problem · What It Looks Like · Better Response Level gate · The next ranch requires a higher Ranch Level. · Focus on Ranch Level progress and ranch-growth upgrades. Weak economy · Upgrades are visible but feel too expensive. · Improve sheep value, production, or collection efficiency. Unclear support value · Explore, Sheepdog, or Diamond Pack becomes available but does not clearly solve the issue. · Wait until the benefit is visible and relevant. The strongest mid-game habit is to identify whether the ranch needs more scale, more value, or better efficiency. Spending across every system at once usually slows progress. Sheep Quantity vs. Value / Efficiency Decision Rule Use this simple rule when choosing between upgrade types: Situation · Better Upgrade Direction Ranch still feels early and cheap to upgrade · Sheep quantity or basic ranch expansion. Coins are coming in too slowly · Production or collection efficiency. Next area is locked by Ranch Level · Ranch Level progress. More sheep no longer feels helpful · Sheep value or efficiency-style upgrades. A side feature has unclear benefit · Delay it and strengthen the ranch economy first. This gives the guide more practical value than simply saying “upgrade carefully.” The goal is to understand what type of upgrade solves the current problem. Common Mistakes 1. Treating all upgrades as equal Mistake: Spending on whichever Upgrade button appears first. Why it hurts: Some upgrades support progress requirements, while others only add side value. Better move: Choose upgrades based on the current problem: level gate, weak economy, low collection efficiency, or unlock requirement. 2. Adding sheep quantity when the real problem is value Mistake: Expanding the ranch visually while coin progress still feels slow. Why it hurts: More sheep does not always mean better progress if each upgrade adds too little value. Better move: Look for production, value, or collection-efficiency improvements when growth slows. 3. Spending diamonds on unclear benefits Mistake: Using diamonds on a shop, pack, or random system without understanding the result. Why it hurts: Diamonds are harder to replace than coins. Better move: Save diamonds for clearly shown long-term progression value. 4. Expecting Lucky Spin to solve progression Mistake: Treating spin rewards as the main strategy. Why it hurts: Random rewards may not match the ranch’s current bottleneck. Better move: Use Lucky Spin as a bonus, not as the foundation of your ranch economy. 5. Ignoring visible unlock requirements Mistake: Spending on side systems while a visible Ranch Level requirement is blocking the next ranch. Why it hurts: The main path does not move forward. Better move: Treat the visible requirement as your next upgrade target. 6. Opening too many support systems too early Mistake: Jumping between Explore, Sheepdog, Shop, Diamond Pack, and ranking features before the ranch economy is stable. Why it hurts: You lose track of which upgrade actually solves the current slowdown. Better move: Test support systems only after you understand their value in the current run. FAQ What kind of game is Sheep Ranch Builder? Sheep Ranch Builder is a casual sheep ranch management and idle farm upgrade game built around Ranch Level progress, ranch upgrades, resources, and new area unlocks. What should I upgrade first? Prioritize Ranch Level progress, ranch growth, production, or collection efficiency before spending on side systems. Is sheep quantity better than sheep value? Quantity helps early foundation building, while value and efficiency matter more when progress slows. When should I use diamonds? Use diamonds only for clearly shown long-term progression value. Is Lucky Spin worth using? Lucky Spin is worth using as a bonus when the cost is low or free, but it should not replace ranch upgrades. Should I upgrade Explore or Sheepdog early? Only if the game clearly shows that they help your current bottleneck. Otherwise, strengthen the ranch economy first. Editorial Note This guide is written for the game page of Sheep Ranch Builder and focuses on beginner-friendly ranch progression, upgrade choices, resource collection, and common mistakes. Coins, diamonds, spins, draws, rankings, packs, and shop items in this guide refer only to virtual in-game systems. They are not real-world money, financial rewards, gambling, farming advice, or agricultural business guidance. For page layout, keep ads clearly separated from the game iframe and from interactive game buttons such as Play, Claim, Go, Upgrade, Lucky Spin, Shop, and Diamond Pack. Ads should not look like game controls, download buttons, menu buttons, or navigation links.
- Road Killer
Road Killer About This Game Road Killer is a casual hill-climb physics driving game about keeping a car moving across rough roads, slopes, bumps, ramps, and obstacle-heavy terrain. Many failed runs happen because the car reaches a hill crest too fast and lands at a poor angle, not because the player simply lacks speed. Each run follows a clear driving loop: move forward, collect coins, watch the fuel gauge, survive uneven road sections, and use upgrades to improve the next attempt. The fun comes from learning how the car reacts when it climbs, drops, catches air, or lands on an awkward slope. Road Killer rewards patience more than constant acceleration. A clean run with steady throttle control is usually better than a reckless run that ends after one oversized jump. The road constantly asks small questions: do you need more power before the hill, less throttle before the drop, a safer landing line, or a smarter upgrade choice? Coins, fuel, and upgrades give the game its progression rhythm. Coins support upgrades, fuel keeps the run alive, and upgrades help the car handle longer and rougher sections. The strongest beginner mindset is simple: control first, distance second, collection third. This Road Killer guide focuses on practical driving rhythm, hill-climb balance, fuel awareness, upgrade decisions, and common failure patterns that new players run into during early runs. How to Play Start a Road Killer run by watching the first stretch of road instead of flooring the throttle immediately. The opening terrain matters. A flat start gives you room to build momentum, while an early hill or quick bump requires tighter control from the first second. Use throttle control to move forward without throwing the car off balance. Full throttle helps before certain climbs, but holding it too long can launch the car over a hill crest and make the landing harder to recover. The goal is to keep enough speed to progress while maintaining the car’s center of gravity. The brake is useful for more than stopping. Use it to settle the car before a sharp downhill, reduce speed before a bump, or correct a landing that feels too fast. In hill-climb driving games, the brake often works like a balance tool, not just a slowdown button. Fuel management affects every run. Watch the fuel gauge during long climbs and heavy throttle sections, because aggressive driving burns through distance quickly. Plan for fuel pickups early rather than reacting at the last moment. Coins are worth collecting when they fit the driving line. A coin path across flat or stable ground is easy value. A coin placed near a steep drop, awkward ramp, or unstable landing needs a quick risk check. Crashing for one coin usually costs more progress than leaving it behind. Upgrades improve the car’s performance over time. Road Killer progression is strongest when upgrades support the problem you are actually facing: climbing power, vehicle control, grip, fuel support, or similar performance areas shown in the game. Upgrade names may vary by version, so focus on what each upgrade improves: climbing power, stability, grip, or fuel support. A good run follows this pattern: build speed before a hill, ease off near the crest, keep the car level while catching air, land with control, collect safe coins, watch fuel, then upgrade based on the reason the run ended. Road Section · Better Action · Mistake to Avoid Before a hill · Build momentum before the slope · Accelerating too late Hill crest · Ease off before the top · Flying over at full speed Downhill · Control angle and speed · Letting gravity take over Jump or ramp · Prepare for landing · Chasing distance only Coin route · Take safe pickups first · Crashing for one coin Low fuel · Plan early for fuel · Ignoring fuel until the car is nearly empty Beginner Strategy Guide The most important beginner habit in Road Killer is learning the car’s weight. Do not treat the first few runs as serious distance attempts. Use them to feel how quickly the car accelerates, how easily it tilts, and how it lands after catching air. Once you understand the car’s rhythm, every later run becomes easier to control. Avoid full throttle before the first hill crest. A fast launch can feel useful, but it often puts the car into the first slope at a bad angle. Start with steady acceleration, then increase power only when the road ahead needs it. Before a hill, build momentum early. Many new players press harder only after the car has already slowed down on the slope. That is too late. Enter the climb with enough speed, keep the car stable, and reduce throttle slightly before the top so the car does not fly over the crest nose-first. Hill crests are one of the easiest places to flip. The danger is not the climb itself; it is what happens after the car reaches the top. Too much throttle at the crest can launch the car into a blind landing, especially when the next section drops sharply. Ease off before the top and prepare for the road on the other side. Downhill sections require discipline. Gravity already gives the car speed, so extra throttle can turn a safe descent into a rollover. Let the car settle, keep the front from dipping too hard, and use the brake lightly when the car starts outrunning your ability to control it. When the car catches air, stop thinking about distance and start thinking about the landing. The safest landing is not always the longest jump. Try to keep the car level, then match the landing angle to the road below. A clean landing keeps the run alive; a dramatic jump with a bad landing ends progress quickly. Upgrade choices should match failure patterns. New players often buy power too early because a faster car feels stronger. That can make the game harder. More speed means bigger jumps, sharper landings, and less time to react. Early upgrades should support control before raw speed becomes the priority. A strong beginner upgrade path is to improve control and shock absorption first, then add Engine / Power once the car can handle harder road sections. Suspension upgrades help absorb bumps and rough landings. Tires or grip upgrades help the car stay connected to the road. Fuel Capacity becomes more useful when your runs are stable but end before you can push farther. If Your Run Ends Because... · Upgrade Priority The car cannot climb steep hills · Engine / Power The car flips after bumps or ramps · Suspension or control The car slides or loses contact with the road · Tires or traction The run ends while the driving line is still stable · Fuel Capacity The car becomes too fast to control · Stop over-investing in speed Coins should never control the entire run. Take coins along the natural route, but do not force the car into unstable terrain for a single pickup. A safe run that travels farther gives you more chances to collect later. A short run that ends from one greedy coin route teaches very little. Fuel often becomes the hidden limiter for beginners. A player may think the problem is distance or speed, but the real issue is burning too much fuel during long climbs or rough sections. Smooth driving helps fuel last longer because you waste less time fighting bad angles. After each failed attempt, review the cause before restarting. Road Killer becomes easier when you name the mistake clearly. Did you hit the hill too slowly? Did you stay on throttle over the crest? Did you land nose-first? Did you ignore fuel? Did you upgrade speed before control? Fix one issue at a time instead of repeating the same drive. The best beginner goal is not a perfect run. It is a cleaner run than the last one. Travel farther, flip less often, land more smoothly, and upgrade with a reason. Common Mistakes Full throttle before the first hill crest This makes the car harder to control before you understand the road. Start steady, then add speed when the terrain calls for it. Accelerating too late on a hill A car that reaches the slope without momentum can lose speed quickly. Build power before the climb begins instead of reacting halfway up. Flying over a hill crest at full speed The crest is where many runs fall apart. Ease off near the top so the car does not launch into the next section at a bad angle. Over-accelerating during a long downhill Downhill speed builds naturally. Extra throttle can push the car into a flip or make the next obstacle harder to avoid. Landing nose-first after a ramp Catching air is useful only when the landing is controlled. Keep the car level and avoid forcing extra distance at the cost of stability. Buying speed before the car can handle rough landings A faster car is not always a better car. Control, suspension, grip, and fuel support often matter more during early progression. Chasing coins near unstable terrain Coins near dangerous slopes, jumps, or broken rhythm should be treated carefully. A safe route is better than a risky pickup that ends the run. Forgetting fuel during long climbs Heavy throttle burns through a run quickly. Watch fuel before it becomes an emergency, especially during extended uphill sections. Repeating the same failed approach Crashing in the same place means the driving rhythm needs to change. Try less throttle at the crest, a slower downhill entry, or a different upgrade focus. FAQ What is Road Killer? Road Killer is a casual hill-climb physics driving game where you control a car across uneven roads, slopes, bumps, ramps, and obstacles. The main challenge is keeping the car balanced while driving farther and improving through upgrades. How do you play Road Killer? Drive forward with careful throttle control, use the brake to manage speed and balance, collect coins when the route is safe, watch the fuel gauge, and upgrade the car after runs to improve future attempts. Is Road Killer a hill-climb driving game? Yes. Road Killer fits hill-climb driving gameplay because it focuses on slopes, vehicle balance, fuel awareness, rough terrain, jumps, landings, and distance-based progression. How do beginners avoid flipping? Beginners should avoid full throttle over hill crests, slow down before steep downhill sections, keep the car level while catching air, and land smoothly instead of chasing maximum jump distance. What should I upgrade first? Start with upgrades that improve control, grip, suspension, or fuel stability. Engine / Power upgrades help with climbs, but too much speed too early can make the car harder to handle. Are coins, upgrades, and rewards real-world prizes? No. Coins, upgrades, rewards, vehicles, and distance scores are virtual gameplay elements only. Road Killer is a casual arcade driving game, not a real-money reward or gambling product. *Editorial note: This guide is based on visible gameplay mechanics and beginner-facing driving patterns. It focuses on practical control, upgrade decisions, and common mistakes rather than hidden formulas, fixed reward values, or guaranteed outcomes.
- Conscience farm
Conscience Farm About This Game Conscience Farm is a casual farming simulation and idle farm management game about turning empty land into a stronger farm through planting, harvesting, upgrades, pets, employees, and building development. The main loop is simple: prepare land, plant crops, use the watering can to reduce growth time, harvest when Waiting for harvest appears, and spend coins on the next useful upgrade. Each harvest adds coins and experience progress through the star bar in the upper-left corner. The strategy comes from deciding where your resources should go next. New plots increase planting space, Lv+1 strengthens existing plots, pets can support experience growth, employees help reduce repeated manual actions, and buildings such as shops or larger structures can provide steady virtual coin support through rent. Conscience Farm works best when you treat it as a rhythm game as much as a farm game. A strong farm is not only about unlocking more things. It is about keeping crops moving, collecting on time, and choosing upgrades that solve your current bottleneck. How to Play Start by checking your available land, coin total, and active plots. If you have empty usable land, plant crops. If land is still locked, use the shovel and wait for the progress bar to complete. If crops are still growing, use the watering can when it helps shorten the wait. Once a crop shows Waiting for harvest, collect it with the sickle so that plot can return to the planting cycle. After each harvest, your coins and experience increase. Coins are used for three main types of progress: unlocking new land, upgrading buildings, and improving plots with Lv+1. The best choice depends on what is slowing your farm down. If your current plots are always busy and collected on time, Lv+1 can be a good way to strengthen your core farm. If every plot is active and you clearly need more space, unlocking new land becomes more useful. If manual work is becoming repetitive, employees can help. If you want steadier background progress, buildings and shops can support your farm through virtual rent. The get pet option adds another long-term layer. Pets can provide an experience bonus, which becomes more valuable when your farm already has a steady harvest cycle. A pet does not replace good timing, but it can make repeated crop cycles feel more rewarding over time. Beginner Strategy Guide In the early game, focus on a small number of stable plots. Do not spend coins everywhere just because several buttons are available. A few plots that are planted, watered, harvested, and upgraded consistently are usually better than a wide farm with weak or idle spaces. Pro-Tip: Focus your first Lv+1 upgrades on one reliable plot instead of leveling everything evenly. This creates a stronger core plot that can support expansion more consistently. In the early-mid game, start judging Lv+1 against new land. If your existing plots are almost always active, Lv+1 can make your main farm area stronger. If you keep running out of planting space while still harvesting on time, unlock another plot instead. The key question is simple: are you limited by plot strength or by plot count? Pets are better once your harvest cycle is already working. Because their value comes from supporting experience progress over repeated actions, they are most useful when crops are being collected regularly. If your farm still has long idle gaps, fix the crop rhythm first. Employees make sense when the farm becomes large enough that manual care starts to slow you down. They are not a replacement for basic planning. Use them after your crop loop is stable, not before you understand which plots need the most attention. Buildings and shops are better as mid-game goals. Their rent is a virtual game mechanic that supports coin growth, but it works best when your crop side is already productive. If you invest in buildings too early while your plots are weak, your farm may still feel slow. This priority is not a fixed formula, but it gives beginners a practical order for deciding where coins should go first. Suggested Upgrade Priority Stage · Main Focus · When to Prioritize It · What to Avoid Early Game · Stable crop cycle · Focus on a small number of plots you can plant, water, and harvest consistently. · Do not unlock too much land before your first plots are productive. Early-Mid Game · Lv+1 on key plots · Use Lv+1 when existing plots are active often and harvested on time. · Do not upgrade every system at once if coins feel unstable. Mid Game · Pets and stronger plot planning · Consider pets when the experience bonus supports repeated farming cycles. · Do not delay all farm upgrades just to chase one new feature. Later Mid Game · Employees and buildings · Use employees when manual work becomes repetitive; use buildings when your farm can support passive virtual coin growth. · Do not rely on automation or rent systems before the crop loop is stable. Common Mistakes Your farm feels slow even with several plots. The likely cause is over-expansion. Too many low-level plots can create more work without giving your farm a strong base. Improve one or two reliable plots first, then expand when you can keep the full cycle active. Crops take longer than expected to finish. This usually happens when watering is forgotten or used too late to matter. Use the watering can while crops are still growing so the time reduction actually helps your next harvest cycle. Plots show Waiting for harvest, but progress still feels stuck. The problem is delayed collection. A mature crop that sits unharvested blocks the next planting cycle. Harvest ready crops before focusing on another upgrade. You have coins, but your upgrade path feels scattered. This often means you are switching between land unlocks, Lv+1, pets, employees, and buildings without a clear priority. Spend coins on the system that solves your current bottleneck instead of reacting to every available button. Employees are unlocked, but the farm still needs constant checking. This usually means the manual rhythm was not stable before automation started. Employees work better when they support a clean system, not when they are expected to fix poor planting, watering, and harvesting habits. Buildings are unlocked, but coin growth still feels weak. Passive rent helps more when the crop side of the farm is already moving. If buildings feel underwhelming, check whether your plots are too low-level or your harvest timing is too slow. Pets are available, but level progress still feels slow. A pet bonus helps over time, but it works best when paired with repeated harvests. If crops are not being collected regularly, experience progress will still feel sluggish. FAQ Should I upgrade plots or unlock new land first? Upgrade existing plots when they are already active most of the time and you can harvest them quickly. Unlock new land when your current plots are busy and you clearly need more planting space. When should I use Lv+1? Use Lv+1 on plots that already play an important role in your farm cycle. It is less useful on land that sits idle or is not part of your regular planting and harvest rhythm. Should I unlock a pet or hire an employee first? Choose a pet first if your farm is already producing regular harvests and you want more experience progress over time. Choose an employee first if your farm has become large enough that repeated manual care is slowing you down. When is a pet not worth unlocking yet? A pet may be less useful if your farm still has long idle gaps or crops are not being harvested regularly. Improve the crop cycle first, then use the pet bonus once repeated harvests can support steady experience progress. When do employees become useful? Employees become useful when your farm has enough active plots that manual actions start to interrupt your rhythm. They are best used to support a working farm, not to replace basic planning. How do you maximize passive coin income from buildings? Build a reliable crop cycle first, then add buildings and shops when your coins can support them without weakening your main plots. Passive rent works better when it supports an already stable farm rather than carrying the whole progression system alone. Does the farm grow while I'm offline? Only rely on offline progress if your version of Conscience Farm clearly shows an offline reward, idle progress, or return bonus screen. If no offline reward is shown, treat progress as something you build through active planting, watering, harvesting, and upgrading. Why does my farm feel slow even though I keep unlocking things? Your upgrades may be spread across too many systems. Focus on the biggest bottleneck first: plot level, planting space, harvest timing, pet progress, employee support, or building development. Is building rent real money? No. Building rent in Conscience Farm is a virtual in-game coin source used only for game progress. It does not represent real-world income. Editorial Note This guide is based on visible gameplay systems in Conscience Farm. Coins, rent, pets, employees, buildings, rewards, and upgrades are virtual game mechanics only and do not represent real-world farming, employment, construction, pet care, or financial advice.
Strategy
- Captain, Don't Throw
Captain, Don't Throw About This Game Captain, Don't Throw is a casual shooting action game built around movement control, automatic attacks, mission objectives, airdrop timing, support rescue, and upgrade choices. You control a captain through short battlefield stages where enemy groups close in from different directions and pressure the player into making fast route decisions. The captain attacks automatically when hostile units enter range, so the core skill is not manual aiming. The real challenge is guiding the captain with the movement slider, keeping enough space to avoid being surrounded, collecting airdrops at the right moment, and rescuing support soldiers without walking into a trap. A typical stage is short and objective-driven. Some missions ask you to survive enemy pressure, while others require you to rescue support soldiers or finish the objective before a timed mission condition is missed. The safest early approach is to improve clearing power first, keep your escape route open, and avoid chasing rewards through dense enemy groups. The main danger is not one enemy by itself. Problems usually begin when fast enemies push the captain toward tougher enemies and cut off the route to airdrops or support soldiers. Strong play comes from managing space, choosing upgrades that solve the current pressure, and finishing the mission instead of trying to clear everything on screen. How to Play Use the movement slider to guide the captain around the battlefield. When enemies enter the captain’s attack range, the captain fires automatically. Your job is to control spacing, choose safe routes, collect useful airdrops, rescue support soldiers, and complete the mission objective before the captain is defeated or a timed objective is missed. In the opening seconds, move away from the first enemy cluster instead of standing in place. Let the captain’s auto-attacks thin out the closest threats while you guide him along the edge of the enemy group. When the screen becomes crowded, circle around the outside of the group instead of cutting through the center. The round becomes dangerous when Swarmers and Armored Raiders appear together. Swarmers close distance quickly, while Armored Raiders take longer to defeat and can block the path to supplies or support soldiers. Mechanic · How It Works · Practical Use Movement · Use the movement slider to guide the captain · Move in wide routes and avoid tight corners Auto-attacks · The captain fires when enemies enter range · Stay close enough to trigger attacks, then reposition Airdrops · Supply crates appear during the stage · Collect them after clearing a safe route Support soldiers · Rescued allies add combat pressure · Reach them with both an entry path and an exit path Mission timer · Some stages have timed objectives · Do not chase low-value enemies far from the goal Failure condition · The captain is defeated, or a timed mission objective is missed · Protect health and mission progress at the same time Beginner Strategy Guide Upgrade Priorities Combat upgrades decide how safely the captain can handle crowded stages. Do not upgrade randomly in the early game. Choose the upgrade that solves the problem you are actually facing. Priority · Upgrade · Best Use Case · Why It Helps 1 · Heavy Rounds · Enemies survive too long near the captain · Increases clearing power and opens safer routes 2 · Extended Barrel · You need more space while kiting enemies · Expands useful attack range so you can fight from safer positions 3 · Twin Fire · Groups are stacking up too quickly · Adds multi-target pressure and helps thin Swarmers 4 · Field Armor · You are moving better but still losing health too fast · Gives more room for small positioning mistakes 5 · Supply Magnet · Airdrops are hard to reach without risk · Makes reward collection safer after your damage is stable Choose Heavy Rounds first when enemies remain alive too long near the captain. Choose Extended Barrel when you need more distance to control enemy groups. Choose Field Armor when your route planning is improving but you still lose health too quickly during crowded stages. Support Soldiers Support soldiers are not just bonus characters. In rescue missions, they are part of the main objective rather than optional rewards. After being rescued, support soldiers increase your combat pressure and make it easier to thin enemy groups. The danger is not the rescue itself. The danger is entering the rescue area without a safe exit path. Before moving toward a support soldier, pull nearby enemies away from the route, open a gap, then enter and leave quickly. A strong rescue pattern is: 1. Move near the support route. 2. Pull Swarmers away from the direct path. 3. Let auto-attacks clear the closest group. 4. Move in when the route opens. 5. Exit before Armored Raiders close the gap. Airdrop Timing Airdrops can give valuable resources and combat advantages, but they are also one of the easiest ways to lose a run. Do not treat every airdrop as urgent. When an airdrop lands behind a group of enemies, wait briefly, circle around the crowd, and let auto-attacks reduce the closest threats. If the path is still blocked, skip the drop and protect the mission objective instead. A missed reward is better than a failed run. Airdrop Situation · Best Decision Airdrop lands in open space · Collect it immediately Airdrop lands behind Swarmers · Circle once before entering Airdrop lands near Armored Raiders · Clear or weaken the route first Airdrop appears while the mission timer is tight · Take it only if it does not delay the objective Airdrop is blocked by multiple enemy types · Skip it unless you already have strong clearing power First Run Walkthrough Step 1: Move out of the starting pressure. At the beginning of a stage, use the movement slider to guide the captain away from the first enemy cluster. Do not let the opening group surround you before your auto-attacks start creating space. Step 2: Build a safe attack loop. Move close enough for enemies to enter attack range, then guide the captain away before they reach him. This lets the captain deal damage while keeping contact time low. Step 3: Watch the first airdrop. If the first airdrop appears in open space, collect it. If it appears behind enemies, circle around first. The first airdrop is useful, but it is not worth losing half your health. Step 4: Rescue support with an exit route. When a support soldier appears, check both the entry route and the exit route. The rescue is only safe if the captain can leave the area after reaching the support soldier. Step 5: Push the mission objective. Once you have one or two upgrades and at least one support soldier, shift attention back to the mission objective. Do not clear every enemy unless the objective requires it. Stage Progression Tips Stage Phase · What Usually Gets Harder · Best Adjustment Opening wave · Basic movement pressure · Learn attack range and avoid standing still Early pressure · More fast enemies begin to appear · Upgrade Heavy Rounds or Twin Fire Crowded phase · Enemy groups begin blocking rewards · Collect only safe airdrops Support phase · Rescue routes become riskier · Pull enemies away before entering rescue zones Final objective phase · Mission pressure increases · Ignore enemies that are far from the objective Many beginners start losing runs when enemy groups begin blocking rewards and support routes more aggressively. At that point, survival and mission completion matter more than collecting every airdrop on the screen. Advanced Strategy Crowded screen control: When Swarmers and Armored Raiders fill the center of the battlefield, move around the outside edge and let auto-attacks hit the nearest enemies. This reduces contact from multiple directions and keeps your escape path open. Airdrop delay: When a supply crate lands inside or behind an enemy group, wait briefly, circle the group, then collect it from the safer side. Treating every airdrop as an emergency pickup is one of the easiest ways to lose a run. Support rescue routing: When a support soldier is surrounded or placed near a dangerous route, open a path first, then enter and exit quickly. Rescued soldiers help your combat pressure, but only if the captain survives the rescue. Upgrade-based routing: If enemies start surviving long enough to block movement, choose upgrades based on the current problem. Use Heavy Rounds for tough enemies, Extended Barrel for safer spacing, and Twin Fire for enemy groups. Mission-first play: When the objective is nearly complete or the mission timer is becoming a problem, stop chasing enemies far from the mission route and move toward the objective. Common Mistakes Mistake · What It Looks Like · How to Fix It Walking into dense enemy groups · Health drops quickly before rewards can help · Move around the edge and protect your route Chasing airdrops too early · The captain reaches the crate but gets trapped · Delay the pickup until the route opens Weak upgrade priority · Enemies survive long enough to surround you · Start with Heavy Rounds or Extended Barrel Unsafe support rescue · The support soldier is rescued, but the captain cannot escape · Plan the exit before entering Poor timer management · The captain survives but the mission fails · Stay closer to the mission route Ignoring mixed enemy pressure · Fast enemies push you into tougher enemies · Separate enemy groups by moving in wide loops The most common beginner mistake is treating automatic attacks as permission to stand still. The captain can shoot on his own, but he cannot escape danger unless you keep moving and protect a route out of crowded areas. FAQ What is Captain, Don't Throw? Captain, Don't Throw is a casual shooting action game where you guide a captain through short mission-based stages. The game focuses on automatic attacks, movement control, airdrop timing, support rescue, and upgrade choices. Does the mission timer pause when picking up an airdrop? Do not plan around the timer stopping during a pickup. If the mission timer is tight, collect only the airdrops that are already close to your objective route. Which upgrade should I choose first? Choose Heavy Rounds first if enemies survive too long near the captain. Choose Extended Barrel if you need safer spacing, and choose Twin Fire when Swarmers begin stacking up in groups. Do auto-attacks target the closest enemy first? Auto-attacks are most useful when enemies are inside the captain’s active range. For practical play, assume nearby enemies create the most immediate danger and position the captain so the closest threats are cleared before they can surround him. When should I rescue support soldiers? Only when you have secured both an entry and an exit path. Rushing blindly into a crowd to save a soldier is one of the fastest ways to end your run. Why do beginners lose during crowded phases? Crowded phases are where enemy groups begin blocking rewards and support routes more aggressively. Beginners usually lose because they chase airdrops through dangerous areas instead of improving clearing power and protecting their movement route. Editorial Note This page provides a gameplay overview and beginner strategy guide for Captain, Don't Throw. It focuses on movement control, automatic attacks, mission objectives, upgrade choices, airdrop timing, support rescue, and common early mistakes. This guide is based on practical strategy analysis for surviving high-pressure swarms and optimizing upgrade paths in the game.
- Match & Clear Nonstop
Match & Clear Nonstop About This Game Match & Clear Nonstop is a Mahjong-style tile matching puzzle game where players select available tiles, move them into a 7-slot reserve tray, and clear tiles when three identical tiles are collected. The game is not traditional Mahjong. It focuses on stacked tiles, tray management, timed decision-making, and smart tool usage. Your main challenge is to keep the reserve tray from filling with unrelated tiles while opening enough board space to keep clearing matches. How to Play 1. Select available visible tiles from the board. 2. Move tiles into the 7-slot reserve tray. 3. Clear tiles when three identical tiles are collected. 4. Open stacked areas to reveal more useful tiles. 5. Use Shuffle, Flip Card, Clear, and Undo when they solve a specific problem. 6. Finish the level before the timer runs out. The most common beginner mistake is filling the 7-slot reserve tray before a three-tile clear can be made. Beginner Strategy Guide Reserve Tray Strategy The reserve tray is the most important pressure system in Match & Clear Nonstop. Because there are only 7 slots, each tile choice needs a purpose. A strong tray usually contains one or two focused tile groups. A weak tray contains many loose symbols with no clear forming soon. Do not add unrelated tiles unless the move helps a near-term clear. When the Tray Is Almost Full When the tray has only 1 or 2 empty slots left, stop playing normally. Use this recovery order: 1. Look for a tile that completes a three-tile clear. 2. Use Undo if the last move caused the problem. 3. Use Clear if the first tray tile is blocking your options. 4. Use Flip Card only if hidden information is the real issue. 5. Use Shuffle only after checking visible options. Tool Priority Guide Tool · Best Used When · Avoid Undo · Your last move created a tray problem · Using it for every small move Clear · The first tray tile blocks future organization · Using it while the tray is still flexible Flip Card · Hidden or standing tiles may reveal the tile you need · Using it while safe visible clears remain Shuffle · No useful visible route remains · Shuffling before checking the board Opening Strategy Start by scanning the board for visible matches, thick stacks, and blocked sections. Clear safe matches first, but prioritize moves that open more tiles. A move that reveals a new layer is often better than a move that only removes a flat tile. Midgame Strategy Track which tile types are already in the tray. Do not start too many unfinished clears at the same time. If the board has hidden or standing tiles, use Flip Card before committing a tray slot. Endgame Strategy When time is low, choose the clearest available three-tile clear. If the tray is almost full, Clear can be better than Shuffle because Clear directly creates tray space. Shuffle changes the board, but it does not automatically fix a crowded tray. Common Mistakes Mistake · Fix Tapping the first visible tile · Check whether it completes a tray clear or unlocks covered tiles Filling the tray too quickly · Stop adding new types and look for clears using existing tray tiles Wasting Shuffle too early · Check visible matches and blocked areas first Using Flip Card at the wrong time · Use it only when hidden information affects your next move Using Undo too late · Use Undo immediately after a bad tap Playing it like traditional Mahjong · Focus on tray control, stacked layers, and tool timing FAQ What causes most beginners to fail in Match & Clear Nonstop? Most beginners fail because they fill the 7-slot reserve tray with too many unfinished tile groups. The safest approach is to build around tile types already in the tray and avoid starting too many clears at once. What should I do when the reserve tray is almost full? First, look for a tile that completes a three-tile clear. If the last move caused the problem, use Undo. If the first tray tile is blocking your options, use Clear before starting another tile group. How should I prioritize tools when stuck? Fix immediate mistakes with Undo, use Clear for tray blockage, use Flip Card when hidden information matters, and save Shuffle as the last resort after visible options are checked. Is Match & Clear Nonstop traditional Mahjong? No. Match & Clear Nonstop uses Mahjong-style tile visuals, but it does not use traditional Mahjong hands, scoring patterns, or table rules. Editorial Note This independent game page and strategy guide is based on hands-on gameplay review and the game rules described in this article. It is designed to help players understand the core gameplay, 7-slot reserve tray pressure, tool usage, and beginner mistakes. It is not an official game manual. Players should check the in-game interface for exact feature behavior as updates occur.
- Drop Zone Survivor
Drop Zone Survivor About This Game Drop Zone Survivor is a casual 2D battle royale survival shooter where each match begins with players entering the battlefield from a plane. Your goal is to choose a landing area, stay alive as the safe zone changes, protect your health, and become the final survivor. The main pressure comes from several simple decisions: where to land, when to move, when to fire, when to avoid a fight, when to use speed boost, and when to heal. If your health bar runs out, the match ends for you. If you survive and eliminate the remaining enemies, you win. A match usually moves through three stages. The early match is about finding a safe start. The middle of the match is about moving with the safe zone and choosing smart fights. The final stage is about staying calm, keeping enough health, and avoiding unnecessary risks when only a few enemies remain. How to Play Start each match by watching the plane route and choosing a landing area. A crowded drop can lead to quick action, but it can also end your run early. If you are still learning, choose a quieter area where you have time to move, read the map, and understand where danger may come from. Controls: Movement (WASD/Arrows) | Attack (Left Click) | Boost (Space) | Heal (E/Q) After landing, use the direction keys to control your movement. Move toward useful space instead of wandering randomly. Your first goal is not always to attack. It is to understand your position, the safe zone direction, and whether nearby enemies are worth fighting. Use the fire button when you have a clear reason to attack. Before firing, check four things: 1. Is the enemy close enough for the attack to matter? 2. Do you have enough health to survive the fight? 3. Do you have room to escape if the fight goes badly? 4. Will this fight pull you away from the safe zone? If the answer to several of these questions is no, moving first may be smarter than shooting immediately. Watch your health bar throughout the match. If your health is low, do not keep fighting just because an enemy is nearby. Break away from danger first, then heal when you have enough space. Healing while exposed can waste the opportunity and leave you vulnerable. Use speed boost only when it changes your survival chance. Good uses include reaching the safe zone, escaping pressure, repositioning around an enemy, or chasing a clearly weakened opponent. Poor uses include boosting across open space with no plan or wasting it before the safe zone creates real pressure. When the safe zone refreshes, move early. Many beginner losses happen because a player wins a small fight but loses position. Staying inside the playable area is just as important as defeating enemies. To win, stay alive, manage your health, move with the safe zone, choose fights carefully, and survive until every other enemy has been eliminated. Beginner Strategy Guide Early match: Choose a quieter landing area if you are still learning. A safe start gives you time to read the battlefield, check nearby enemies, and understand where the safe zone is moving. Dropping into the busiest area may feel exciting, but it often forces you into a fight before you are ready. Landing plan: A good landing area should give you space to move, not just a place to start. Try to avoid landing where enemies can surround you immediately. If you land near danger, move first and fight only when your direction, health, and escape path make sense. Mid match: Move with the safe zone instead of chasing every enemy. If an enemy runs away from the safe area, do not automatically follow. One unnecessary chase can put you in a worse position, waste your boost, or force you to heal at the wrong time. Fight selection: A fight is usually worth taking when the enemy is already weakened, you have enough health, you have room to move, and the safe zone is not pulling you away. A fight is usually not worth taking when your health is low, another enemy may attack from the side, or you have no clear escape route. Speed boost: Save it for real problems. Use it to enter the safe zone, escape danger, reposition, or finish a clear opportunity. Do not use it just because it is available. Player tip: the later the match gets, the more valuable a saved boost can become. Healing: Heal after you create space. A good healing moment usually comes after you break contact with an enemy, before you enter another risky area, or when you know the next fight may happen soon. Do not wait until your health is almost gone if you already have a safe moment to recover. Final stage: Do not expose your position too early when only a few enemies remain. Let other enemies make mistakes, keep enough room to move, and avoid chasing into a bad angle just to finish one opponent. In the final moments, survival, health, and position often matter more than aggressive shooting. Use this simple decision table during a match: Situation · Better Choice · Why It Helps You land near several enemies · Move first before fighting · It gives you space and lowers early risk The safe zone moves away · Rotate early · You avoid rushed movement later Your health is low · Break contact and heal · You reduce the chance of losing the next trade An enemy runs away from the zone · Let them go or reposition · Chasing may damage your own position Only a few enemies remain · Stay patient · The final fight is easier when you keep health and space Weapon stats can help you understand different in-game behavior. Instead of treating every weapon the same way, notice whether a weapon feels better for short fights, safer distance, quick movement, or finishing weakened enemies. Use that information to choose a playstyle inside the match. • Scout Weapons: Higher movement speed, moderate damage. • Heavy Weapons: Lower movement speed, high impact. Check the home screen stats to match your chosen landing strategy. A lighter setup may help when you want to move early and avoid pressure, while a heavier setup may feel better when you expect slower, more committed fights. The best beginner mindset is simple: survive first, fight second. Drop Zone Survivor rewards players who move early, avoid bad fights, protect their health, and attack only when the situation is favorable. Common Mistakes Mistake · Why It Hurts · Better Habit Landing in the most crowded area too early · You may lose before you understand the match · Start in a quieter area and learn the flow first Chasing enemies away from the safe zone · You can win a fight but lose your position · Stop chasing if the enemy is pulling you into danger Fighting with low health · One more exchange may end your run · Create space, heal when safe, then decide whether to fight again Healing while exposed · You may be attacked before recovery helps · Move to safer space before healing Wasting speed boost · You may not have it when danger appears · Save boost for escape, safe zone movement, or repositioning Ignoring escape space while firing · You can get trapped if the fight turns bad · Keep room to move before committing Playing only for eliminations · You may forget that survival is the win condition · Take fights that improve your chance to be the last survivor The most common beginner mistake is treating every enemy as an immediate target. Not every fight improves your chance of winning. If a fight damages your health, wastes your boost, or pulls you away from the safe zone, it may be better to reposition. Another common mistake is moving too late. The safe zone should guide your route before it becomes urgent. Moving early gives you more control, more escape space, and better timing for future fights. Still having trouble? Experiment with different landing spots to find your own rhythm between survival and combat. FAQ What is Drop Zone Survivor? Drop Zone Survivor is a casual 2D battle royale survival shooter. Players enter the battlefield from a plane, choose where to land, move through the match, watch the safe zone, and try to become the final survivor. How do you play Drop Zone Survivor? Choose a landing area, use WASD or the arrow keys to move, use left click to attack, watch your health bar, and stay inside the safe zone. Use Space for boost and E or Q for healing when the timing is safe. If your health bar runs out, the match ends for you. What is the best beginner strategy? The best beginner strategy is to land in a quieter area, move early with the safe zone, avoid unnecessary fights, and save speed boost or healing for moments that protect your survival. To win, focus on staying alive first, then take fights when your health and position are favorable. How do you survive the safe zone? Check the safe zone often and move before you are forced to rush. Avoid chasing enemies in the wrong direction. A safe route with room to escape is usually better than a risky fight that leaves you trapped. When should you use speed boost or healing? Use speed boost when you need to enter the safe zone, escape danger, reposition, or chase a weakened enemy. Use healing after you have created distance from danger or before entering a risky area. Do not heal while exposed if an enemy can still pressure you. Do skins, weapon stats, or in-game items have real-world value? Skins, weapon stats, and item information in Drop Zone Survivor should be understood as virtual game content. They may affect appearance or help players understand in-game behavior, but they should not be treated as cash-value rewards, betting features, real-money competition, real weapon advice, or financial guidance. Editorial Note This guide is based on the gameplay information provided for Drop Zone Survivor. It is written to help players understand landing choices, movement, safe zone awareness, health management, speed boost timing, healing decisions, weapon stat differences, and beginner survival strategy. All combat, health, safe zone, boost, healing, skins, weapon stats, and item-related systems discussed here refer only to virtual in-game mechanics. This guide is for gameplay understanding only and should not be used as real-world combat, weapon, gambling, or financial advice.
- Core Adventure
About This Game Core Adventure is a casual drilling adventure and mining upgrade game built around a clear loop: drill down, collect materials while rising back up, return to the surface, and upgrade your equipment for the next run. Each run starts with the drill moving underground until it reaches its current depth limit. The most important moment comes during the upward phase, when you collect materials and try to meet the storage target shown in the upper-left corner. Once that target is reached, the drill returns to the surface and you can spend your in-game resources on upgrades. The main progression systems are Storage Capacity, Drill Depth, and Idle Resource Generation. Storage Capacity helps your runs carry more value, Drill Depth opens deeper collection opportunities, and Idle Resource Generation supports longer-term progress between active runs. Core Adventure also includes drill skins and a collection book. These features add visual variety and completion goals, but the main strategy comes from improving the drilling, collecting, and upgrading cycle. How to Play 1. Start a drilling run and let the drill move underground. 2. Wait until the drill reaches its current depth limit. 3. Collect materials during the upward phase as the drill rises. 4. Watch the storage target shown in the upper-left corner. 5. Once the target is reached, return to the surface. 6. Spend your in-game resources on Storage Capacity, Drill Depth, or Idle Resource Generation. 7. Use later runs to adjust your upgrade plan based on what slowed you down. The most important part of each run is the upward phase. This is when your drill depth turns into useful progress, so avoid treating the return trip as passive downtime. Look for reachable material clusters, stay on a stable route, and avoid chasing every single pickup if it makes you miss a larger group. Beginner Strategy Guide Do not upgrade randomly in the first few runs. Your early goal is to identify the bottleneck: storage, depth, route control, or idle progress. After every return to the surface, ask one question before spending resources: what stopped this run from being better? A practical early upgrade order is: 1. Upgrade Storage Capacity first if you are reaching the target quickly or losing value from collected materials. 2. Upgrade Drill Depth after storage feels stable enough to benefit from deeper runs. 3. Add Idle Resource Generation once your active runs already feel productive. 4. Delay drill skins and collection book goals until the basic upgrade loop feels reliable. A good beginner route is not to maximize one upgrade immediately. First make the drilling loop stable, then push deeper, then use Idle Resource Generation to support longer-term progress. Upgrade Priority List • T0: Storage Capacity • Best when you collect enough materials but feel capped too quickly. • Strong early upgrade because it improves the value of successful upward phases. • T0: Drill Depth • Best when runs feel resource-poor or the upward phase does not offer enough material clusters. • More useful after storage can handle the extra materials from deeper routes. • T1: Idle Resource Generation • Best after your active drilling loop already feels stable. • Useful for players who return across multiple sessions, but it should not replace active upgrade planning. • T2: Drill Skins • Good for visual variety and collection goals. • Not the first priority when your drill still feels weak. • T2: Collection Book • Useful as a long-term completion goal. • Better after you understand the main drilling, collecting, and upgrade cycle. Upgrade Decision Table What you notice during runs · Likely issue · Better focus You reach the storage target quickly · Storage may be limiting the run · Upgrade Storage Capacity The upward phase feels empty · Drill range may be too shallow · Upgrade Drill Depth You collect well but progress feels slow later · Idle gain may be low · Improve Idle Resource Generation You miss many materials during the rise · Route control is weak · Practice upward movement before spending blindly You spend on skins while runs still feel weak · Upgrade priority is misplaced · Improve core equipment first Upward Phase Tips The upward phase is not just the end of a run. It is the part where depth becomes useful progress. Treat it as the main collection window. Prioritize material clusters that are easy to reach. A small group near your path is usually safer than a single piece far on the edge. Do not overcorrect for one isolated pickup if it causes you to miss a larger group that was already within reach. Try to collect in controlled lines instead of drifting back and forth. Wide, panicked movement can make the drill miss more materials than it gains. If the storage target is almost complete, focus on stable pickups instead of chasing risky pieces near the side of the screen. If Core Adventure shows different material colors or values in your current version, use a simple rule: only chase higher-value materials when the route stays stable. A valuable pickup is not worth it if it makes you miss an entire cluster afterward. When progress feels slow, check these problems in order: 1. Are you missing too many materials during the upward phase? 2. Are your runs too shallow to reveal enough useful materials? 3. Are you filling storage too quickly? 4. Are you upgrading the same stat without checking the actual problem? 5. Are you spending too early on skins or collection goals? Common Mistakes Mistake 1: Chasing edge materials too often Edge materials can be tempting, but they are not always worth the movement cost. If you move too far sideways for one small pickup, you may miss a better cluster in the center path. Fix: Stay near reliable material groups. Only move toward the edge when the pickup is clearly worth the detour. Mistake 2: Treating the upward phase like a passive return Some players relax after the drill reaches depth, but the upward phase is where most useful collection happens. Fix: Watch the path early, line up with clusters, and avoid random movement. Your goal is not to touch everything; your goal is to collect consistently. Mistake 3: Upgrading Drill Depth before storage can support it Going deeper feels exciting, but it can create weak runs if Storage Capacity is still too low. Fix: Improve Storage Capacity first when your runs already produce enough materials. Then push Drill Depth when you are ready to benefit from deeper routes. Mistake 4: Overbuilding Storage Capacity without enough depth More storage does not help much if your drill does not reach areas with enough useful materials. Some players keep expanding capacity but still struggle because the upward route does not provide enough to collect. Fix: If your storage is not filling efficiently, improve Drill Depth or focus on better upward-phase route control before buying more capacity. Mistake 5: Buying visual goals before stabilizing equipment Drill skins and the collection book can make Core Adventure more enjoyable over time, but they do not replace basic upgrade progress. Fix: Build a stable loop first: collect well, hit the storage target reliably, and return with enough resources to improve equipment. Mistake 6: Ignoring Idle Resource Generation before a long break If you plan to stop playing for a while, leaving Idle Resource Generation underdeveloped can make your next return feel slower than necessary. Fix: Before ending a longer session, consider whether an Idle Resource Generation upgrade would support your next run better than another short-term upgrade. Mistake 7: Spending without diagnosing the last run Many slow-progress problems come from upgrading out of habit. If every return leads to the same upgrade choice, you may be missing the real bottleneck. Fix: Before spending, identify one clear issue from the last run: storage cap, shallow depth, weak upward route, or low idle gain. FAQ What is Core Adventure? Core Adventure is a casual drilling adventure and mining upgrade game where each run involves drilling down, collecting materials during the upward phase, returning to the surface, and upgrading for the next attempt. How do you play Core Adventure? Start a run, let the drill descend, collect materials as it rises, watch the upper-left storage target, and spend resources on upgrades after returning to the surface. What should I upgrade first in Core Adventure? Start with Storage Capacity if you are collecting materials quickly but feel capped. Choose Drill Depth when your upward phase does not offer enough useful pickups. Add Idle Resource Generation later if you play across multiple sessions. What does Drill Depth do? Drill Depth affects how far the drill can go before the upward collection phase begins. It is most useful when your storage and collection control are strong enough to benefit from deeper runs. What does Storage Capacity do? Storage Capacity helps you carry more useful materials from successful runs. It is especially important when you often reach the storage target quickly or feel limited by capacity. What does Idle Resource Generation mean? Idle Resource Generation is an in-game progression mechanic that supports resource gain between active runs. It should be understood only as a virtual game system, not real-world income. Are drill skins important? Drill skins are better treated as visual or collection goals unless the current game version clearly shows a gameplay effect. Beginners should stabilize Storage Capacity, Drill Depth, and collection control before prioritizing skins. What is the collection book for? The collection book gives completion-focused players a long-term goal beyond basic upgrades. It is useful for progression tracking, but it should not replace core equipment upgrades early on. Editorial Note This Core Adventure guide is based on the available gameplay information and focuses on the drilling loop, upward collection phase, storage target, and main upgrade choices. Specific upgrade costs, skin effects, material values, and collection details may depend on the current in-game version, so players should follow the latest information shown inside the game. Core Adventure is a casual mining upgrade game. Idle Resource Generation, drill skins, materials, and the collection book are virtual in-game systems only and should not be understood as real-world financial activity.
- Stickman Gunfight
Stickman Gunfight About This Game Stickman Gunfight is a landscape-view, cartoon-style stickman squad strategy game where the most important decisions happen before the battle begins. The goal is not to place soldiers randomly and hope the squad wins. Each level asks you to read the enemy side, plan your own formation, and decide which units should protect the front row and which units should support from behind. This beginner guide focuses on enemy checking, placement order, front-line balance, unit selection, formation ideas, and how to adjust your squad after a failed attempt. Your formation starts from the first available position in the first row, so early choices can affect the whole battle. If the first row is too weak, your support units may not have enough time to help. If the back row is too light, your squad may survive the opening but fail to finish the level. Different soldier types fill different roles. A Sword Unit works best as a front-line pressure unit, a Pistol Unit is useful as basic ranged support, and an SMG Unit helps when your squad needs steadier back-row output. As more units become available, the best choice is not always the newest soldier. A good Stickman Gunfight strategy is about choosing the unit that solves the current formation problem. Pre-Battle Checklist: How to Set Up Your Squad Before starting a battle in Stickman Gunfight, use this simple setup process. Step 1: Check the enemy side • Swipe right at the beginning of the level. • Count how many enemy units are waiting. • Look at where the enemy pressure seems strongest. • Decide whether the stage needs a stronger front row, more back-row support, or a balanced mix. Step 2: Build your squad in order • Start from the first available position in the first row. • Think about the next few placements before filling the current slot. • Use Sword Units when the front row needs more stability. • Use Pistol Units when you need flexible ranged support. • Use SMG Units when your squad needs steadier pressure from behind. • Check whether the front row and back row have clear jobs before starting the battle. A useful Stickman Gunfight formation usually has one clear purpose: protect the opening line, spread pressure evenly, or add enough support to finish the level. Unit Comparison Table Unit · Role · Suggested Row · Use When · Avoid When Sword Unit · Front-line pressure and early protection · Front Row · Enemy pressure reaches your squad early · Your squad already survives early but lacks output Pistol Unit · Basic ranged support and flexible filler · Middle or Back Row · You need simple support behind the first row · The front row collapses too quickly SMG Unit · Steadier back-row output · Back Row · Your squad survives the opening but needs more finishing pressure · There is not enough front-line protection These row suggestions are beginner-friendly guidelines, not fixed rules. The best position can change depending on enemy count, available slots, unlocked units, and how quickly your front row falls under pressure. If a recommended unit is not unlocked yet, use the closest role you currently have. The goal is not to copy one exact lineup, but to balance front-line protection and back-row support. Beginner Formation Ideas & Winning Strategies These formation ideas are beginner-friendly examples, not the only correct setups. Use them as starting points and adjust them based on enemy count, unit availability, and battle results. 1. Balanced Formation Recommended idea: Use enough Sword Units to protect the first row, then place Pistol Units or SMG Units behind them for steady support. Use this formation when the enemy side looks balanced and does not create one obvious problem. Why it works: • Sword Units help protect the opening line. • Pistol Units can fill simple support positions. • SMG Units help maintain pressure from behind. • The squad is not too weak in the front or too passive in the back. When not to use it: Do not rely on this setup if the enemy side creates very heavy opening pressure. In that case, strengthen the front row first. 2. Anti-Rush Formation Recommended idea: Add more Sword Units early when the enemy side creates heavy opening pressure, then keep only enough back-row support to finish the fight. Use this formation when your squad keeps losing almost immediately after the battle starts. Why it works: • Extra Sword Units give the first row more stability. • Your back row gets more time to contribute. • The formation is harder to break during the opening clash. When not to use it: Do not use this setup when your squad already survives early but fails to finish enemies. In that case, you may need more SMG or Pistol support instead of more Sword Units. 3. Firing Squad Formation Recommended idea: Use a light front-line anchor with more Pistol Units or SMG Units behind it when the enemy side has fewer early-pressure units. Use this formation when the enemy side has fewer units or when your main problem is not early survival but finishing the level. Why it works: • A small front-line anchor gives your support units time to work. • Pistol Units provide flexible ranged support. • SMG Units add steadier output from the back row. When not to use it: Avoid this setup when the enemy side rushes the front line. Too many back-row units can fail if the first row breaks too quickly. How to Adjust After Losing A failed battle usually shows which part of your formation was weak. If you are not sure what failed, watch the first few seconds of the battle. The first unit group to collapse usually tells you which part of the formation needs adjustment. • If your squad loses almost immediately, strengthen the front row. • If your squad survives early but cannot finish the level, add more back-row support. • If one side collapses first, spread useful units more evenly. • If a new unit makes the result worse, return to a simpler balanced setup. • Change one thing at a time so you can tell which adjustment helped. Quick Tips • Check the enemy side before every battle. • Do not fill the first row without planning the next few placements. • Use Sword Units when the front row collapses early. • Use SMG Units when your squad survives but lacks finishing pressure. • Use Pistol Units when you need flexible support. • Do not use newly unlocked soldiers unless they solve a clear formation problem. • A balanced squad is usually safer than stacking only one unit type. Common Mistakes Putting SMG Units in the first row • Problem: SMG Units are better as support, not as the first line of pressure. • What happens: They can be overwhelmed early if there is no Sword Unit protecting the front. • Fix: Place Sword Units first when the enemy side looks aggressive. Using only Sword Units • Problem: A full Sword lineup may survive the opening better but lack enough support later. • What happens: Your squad can hold at first but lose momentum before clearing the level. • Fix: Add Pistol Units or SMG Units behind the front row. Using every newly unlocked soldier right away • Problem: New units are options, not automatic upgrades. • What happens: Your formation can become unbalanced if the new unit does not fit the stage. • Fix: Use a new soldier only when it solves a visible problem. Ignoring enemy numbers • Problem: Some players focus only on enemy unit types and forget to count how many enemies are waiting. • What happens: A larger enemy group can pressure more positions than expected. • Fix: If the enemy side has many units, spread your useful roles instead of stacking everything in one area. Leaving the front row too weak • Problem: A weak first row gives your support units no time to work. • What happens: The formation can break before the back row becomes useful. • Fix: Reinforce the first row with Sword Units before adding more output behind it. Overloading one side of the formation • Problem: Placing too many useful units in one area leaves other positions exposed. • What happens: One side may hold while the other side falls apart. • Fix: Spread your strongest roles across the formation when the enemy layout is wide. Restarting without changing anything • Problem: Repeating the same layout usually repeats the same result. • What happens: You lose again for the same reason. • Fix: After each failed battle, change one clear thing: the first row, one support unit, or the placement order. FAQ Should I choose SMG Units or Pistol Units in Stickman Gunfight? Choose Pistol Units when you need simple ranged support or a flexible filler. Choose SMG Units when your squad already survives the opening but needs steadier back-row pressure. What should I do if my front-row Sword Units keep falling early? Strengthen the front row before adding more back-row support. If the first row breaks too quickly, your Pistol Units and SMG Units may not have enough time to help. What is the best beginner formation in Stickman Gunfight? The safest beginner idea is usually a Balanced Formation: enough Sword Units to protect the front, with Pistol or SMG support behind them. This gives your squad both early stability and steady follow-up pressure. Why do I keep losing even after unlocking stronger soldiers? You may be using new soldiers without a clear purpose. A stronger-looking unit does not automatically fix a weak formation. Check whether your problem is front-line weakness, poor back-row support, or uneven placement. How do I win more levels in Stickman Gunfight? Check the enemy side first, build around the enemy count, protect your front row, and avoid relying on only one unit type. After losing, adjust one part of the formation instead of rebuilding randomly. Editorial Note This guide discusses Stickman Gunfight as a cartoon-style squad strategy game. All Sword, Pistol, and SMG references describe virtual unit roles and in-game formation decisions only.
- Haunted Hostel
Haunted Hostel About This Game Haunted Hostel is a beginner-friendly room defense strategy game built around Bed income, Coins, Energy, Door upgrades, Repair timing, and defense tools. Haunted Hostel plays more like a survival tower defense challenge than an action escape game. Instead of moving through the hostel to fight directly, you choose a room, build an economy, protect the Door, and survive as pressure increases. The main resource loop is simple: the Bed helps generate Coins, while Energy-related facilities support stronger late-game options. Coins are used for core upgrades such as the Bed, Door, Repair, and basic defense tools. Energy becomes more important once your room is stable and you are ready to add stronger support or advanced defense. The challenge comes from timing. Spending too much on income can leave the Door weak, while spending everything on defense can slow your economy. Good Haunted Hostel strategy is about knowing when to grow, when to repair, and when to stop saving Coins because the Door is under pressure. This guide focuses on the upgrade timing and room-defense decisions that most often decide whether beginners survive or lose early. How to Play Start each round by choosing a room with a strong defensive layout. For beginners, a U-shaped dead-end room, a room with one clear entrance, or a room near other occupied rooms is usually easier to defend. These layouts make the attack path easier to read and may help nearby defenders create shared pressure. A practical beginner opening looks like this: 1. Choose a room with one clear entrance. 2. Close or secure the Door immediately. 3. Build or activate the Bed so Coins start coming in. 4. Upgrade the Bed once early if the next income tier is affordable and the ghost is not already pressuring your Door. 5. Upgrade the Door to the first stronger tier before heavy pressure starts. 6. Build one basic defense tool, such as a Broom or Gun. 7. Watch the Door pressure before spending on another economy upgrade. Use the room upgrade panel to choose between economy, Door durability, Repair, and defense tools. When the ghost starts hitting the Door, stop checking long-term upgrades and focus on Repair or Door durability first. Situation · What You Should Do Safe window: the ghost is away from your room · Upgrade the Bed or improve income Danger window: the ghost is approaching or attacking · Repair the Door, upgrade the Door, or add defense Door is stable but damage is low · Build or upgrade one focused defense tool Coins are low and pressure is light · Improve the Bed first Door is close to breaking · Stop economy upgrades and stabilize defense This window-based thinking is more useful than following the same upgrade order every round. Repair is one of the most important tools in Haunted Hostel. Use it to buy time when the Door is taking damage. A Door upgrade can also be valuable during pressure because it improves your room’s ability to hold back the ghost, but upgrading too early may waste Coins that could have gone into income or a stronger defense tool. Your goal is to keep the room standing until the round objective is complete. In most room defense runs, that means preventing the Door from collapsing while your Bed income, Repair timing, and defense tools scale. If the Door fails and the room can no longer hold the ghost back, the run is lost. Beginner Strategy Guide A safe beginner route is: 1. Pick a U-shaped or one-entrance room. 2. Start the Bed economy immediately. 3. Upgrade the Bed once when the next income tier is affordable. 4. Upgrade the Door before heavy pressure starts. 5. Build one basic defense tool. 6. Use Repair when the Door is under pressure. 7. Add a stronger defensive option after your income is stable. 8. Build Energy-related facilities only when your Coin economy can support them. Do not treat this route as a fixed formula. If the ghost pressure changes early, switch priorities immediately from income to Door safety, Repair, or defense. Room choice matters. A dead-end room gives you a clearer attack path and more time to react. A room placed near other occupied rooms can also be useful because nearby defenses may help pressure the ghost when several rooms are attacked around the same corridor area. Phase · Main Priority · Good Upgrade Choices Opening · Start income · Bed upgrade, basic Door security Early pressure · Prevent collapse · Door upgrade, Repair, first basic defense tool Mid game · Balance income and damage · Better Door, upgraded defense tool, stronger room support Heavy pressure · Survival first · Higher-tier Door, Repair, focused high-level defense Late defense · Scale carefully · Energy-related facility, advanced defense, stronger support tools The exact upgrade names may vary, but the decision logic stays the same: income first during safe time, Door and Repair first during pressure. Do not fill every available slot with weak defenses. One or two upgraded defense tools are often more useful than several weak buildings that drain Coins and block better late-game placement. Treat tools such as Broom, Gun, Shield, or Console by function: basic damage first, stronger defense later, and Energy support only after your room economy is stable. Energy buildings should come after your Coin base is stable. A Console or Energy-related facility can help unlock stronger options, but building it too early may delay Bed upgrades, Door durability, Repair, or your first reliable defense. If the ghost is already focused on your room, protect the Door before investing in Energy. A strong run usually follows this rhythm: Bed for income, Door for time, Repair for emergencies, defense tools for pressure, Energy for late scaling. Common Mistakes Mistake: Upgrading the Door while it still has full durability. Why it fails: If Haunted Hostel's Door upgrade restores or greatly improves durability in your version, upgrading too early can waste emergency value. Better move: Let the Door take some pressure first, use Repair when needed, then upgrade before it breaks. Mistake: Only upgrading the Bed at the start. Why it fails: More Coins do not help if the Door fails before your economy pays off. Better move: Upgrade the Bed early, then check the Door. If the ghost is near, switch to Door durability or Repair. Mistake: Building too many basic defense tools. Why it fails: Several weak Brooms, Guns, or similar low-level tools can fill space without giving enough late-game value. Better move: Build one basic defense early, then focus resources on upgrading 1–2 core defenses instead of spreading Coins too thin. Mistake: Building Energy facilities too early. Why it fails: Energy can support stronger options, but early Energy buildings may delay the Bed, Door, and first defense tool. Better move: Build Energy-related facilities only after your Coin income and Door safety are under control. Mistake: Ignoring Repair during pressure. Why it fails: Buying random upgrades while the Door is under attack can leave the room exposed. Better move: Use Repair to buy time, then decide whether the next priority is Door durability, damage, or income. Mistake: Spending Coins the moment they appear. Why it fails: Small upgrades can block you from reaching the next important Door or defense upgrade. Better move: Save toward the next important Door or defense upgrade instead of buying every cheap option immediately. Mistake: Choosing an exposed room. Why it fails: Rooms with awkward entrances or poor positioning give you less time to react. Better move: Choose a dead-end, U-shaped, or back-to-back room area where the attack path is easier to read. FAQ How do you play Haunted Hostel? Choose a room, secure the Door, build Bed income, and spend Coins on Door upgrades, Repair, and defense tools. What should beginners upgrade first in Haunted Hostel? Start with the Bed for early Coins, then upgrade the Door before serious pressure begins. Add one basic defense tool once your room has a stable opening. Should I upgrade the Door or the Bed first? Upgrade the Bed during safe windows and upgrade or repair the Door during danger windows. If the ghost is already attacking, Door safety comes first. How do you survive longer in Haunted Hostel? Pick a room with a clear entrance, avoid overbuilding weak defenses, use Repair during pressure, and focus on a few strong upgrades instead of spreading resources everywhere. Why do beginners lose early? Most early losses happen because players overbuild income, ignore Door durability, build too many weak defenses, or invest in Energy before the room is stable. Is Haunted Hostel a tower defense game? Yes. Haunted Hostel fits the room defense and survival tower defense style because you defend a single room through income, Door upgrades, Repair, and defense tools. Editorial Note Guide updated by GeevenTech Editors after reviewing Haunted Hostel room defense mechanics, early upgrade flow, and beginner survival patterns. This guide focuses on practical gameplay decisions: room choice, Bed income, Coins, Energy, Door durability, Repair timing, defense tool placement, and common early mistakes. Some interface labels, upgrade names, or values may vary by version, so players should follow the numbers shown in their current build. This article does not claim any official relationship with the developer, publisher, platform, or external franchise.
- Magic Block Pusher
Magic Block Pusher Magic Block Pusher is won by reading the board before pushing. This guide covers safe first moves, block order, narrow-path strategy, pressure plate timing, portal and gate routes, reset decisions, and common mistakes that cause players to get stuck. About This Game Magic Block Pusher is a casual magic-themed block pushing puzzle game where each stage is solved by moving blocks into useful positions while keeping the player’s path open. The challenge is not speed. The challenge is push order, spacing, and knowing when a block should move only one step instead of being pushed as far as possible. The game uses a compact puzzle-board layout where walls, tight paths, target spaces, movable blocks, and magic-themed objects create small but important decisions. A single wrong push can close a hallway, trap a block against a wall, or make the player lose access to the side needed for the next move. The magic theme gives Magic Block Pusher its visual style, but the gameplay is based on practical spatial logic. When a stage uses glowing switches, pressure plates, stone gates, blocked doors, blue portals, teleporters, or other puzzle objects, treat them as part of the route. Their value comes from how they change movement, block placement, or the path available to the player. Magic Block Pusher rewards careful play. The best move is not always the most obvious move. The best move is the one that keeps the next push possible. How to Play The exact control method can vary by device or version, but the core rule is the same: move the character into position, push blocks from the correct side, and keep enough space open for the next move. 1. Read the full level before moving. Find the target space, narrow path, blocked route, glowing switch, pressure plate, gate, or portal before touching a block. 2. Choose the main block. Do not push every block just because it can move. Identify which block actually helps complete the stage. 3. Move to the correct side. A block-pushing puzzle is often decided by where the player can stand. If you cannot reach the pushing side later, the move is unsafe. 4. Push in short steps. A one-step push is safer than sending a block deep into a corridor too early. 5. Keep recovery space open. Before each push, check whether you can still move around the block after it shifts. 6. Use puzzle objects carefully. Glowing switches, pressure plates, stone gates, blocked doors, blue portals, and teleporters should be used only after you understand how they affect the path. 7. Restart early when the route is locked. If a key block is trapped against a wall or the player cannot reach the needed pushing side, use Undo when only one recent move caused the problem. If the layout is fully locked, tap the reset or restart button, commonly shown with a circular arrow or replay icon, and try a cleaner opening route. Before You Push Checklist Check · Ask This Before Moving Goal · Where should this block end up? Standing space · Can I still stand behind it after the push? Route safety · Will this block a hallway or escape route? Recovery · Can I fix this move with one Undo, or would I need a full reset? If one answer is clearly bad, do not push yet. Reposition first. Beginner Strategy Guide Start With the Safest First Move The safest first move in Magic Block Pusher is usually not pushing a block. First, look for the target space, the narrowest route, and the side needed for the final push. Move only after you know which path must stay open. A rushed opening move often creates the first dead end. A careful opening move gives you more space, more angles, and more ways to recover. Work Backward From the Target Instead of asking, “Which block can I push now?” ask, “Where does the important block need to finish?” This makes the puzzle easier because the final position tells you which pushing angle matters. Use this order: 1. Find the final target. 2. Identify the block that should reach it. 3. Check which side the player must stand on for the final push. 4. Clear the route without blocking that side. This reverse-planning method is especially useful when the target is beside a wall, behind a gate, or at the end of a narrow path. Separate Main Blocks From Route Blocks Some blocks are not meant to finish the puzzle. They only open space, press a glowing switch, hold a pressure plate, block a path temporarily, or let the player reach another side of the board. A good rule is: • Move route blocks only as far as needed. • Keep main blocks in open space until the final route is ready. • Do not push secondary blocks into the path needed by the main block. This prevents one of the most common beginner mistakes: moving every block just because it can move. Use Corners Only for Final Placement A corner is usually a trap. Once a block is pushed into a corner, the player may not be able to push it out again. Use a corner only when it is clearly the final target. If the target is beside a wall, line up the block before the final push. Do not push it against the wall first and hope to adjust it later. Wall-side targets are solved by alignment, not force. Read Puzzle Objects by Function When a stage contains magic puzzle objects, judge them by what they do to the board. Puzzle Object · What It Usually Controls · Safe Use Marked target space · The final position for a block or route · Align the block before the final push. Glowing switch · Opens, closes, or changes a route · Step on it only after checking the path it affects. Pressure plate · Often needs a block or player to hold it down · Keep escape space open before placing a block on it. Stone gate or blocked door · Controls access to another area · Open the route before moving the main block into a tight space. Blue portal or teleporter · Moves the player or changes the route flow · Check the exit position before committing. Locked path · Forces a specific push order · Solve the opening route before pushing the goal block. Do not assume a glowing object helps immediately. Use it when it supports the next move. Advanced Puzzle Mechanics Narrow Hallway Strategy Use this strategy when one block is near a corridor and pushing it too far can block the only route. Move pattern: 1. Move beside the block instead of pushing from behind immediately. 2. Push the block one space only if it opens the walking path. 3. Move through the opened route. 4. Return to the correct pushing side. 5. Push toward the target only after the corridor remains open. Avoid this strategy when: the hallway end is clearly the final target and no return path is needed. Why this works: Narrow hallways punish over-pushing. The goal is to create movement space first, then complete the block placement later. Pressure Plate Strategy Use this strategy when a glowing switch or pressure plate is behind a movable block, or when a block needs to stay on the plate. Move pattern: 1. Clear walking space around the pressure plate. 2. Push the blocking block just enough to reach the plate area. 3. Do not trap the player between the block and the wall. 4. Place the block on the pressure plate only when the route remains open. 5. Move the main block after the gate or blocked door has opened. Avoid this strategy when: the player has not cleared enough walking space around the changed route. Why this works: A pressure plate can solve one problem while creating another. Always check both the opened path and the player’s escape path. Wall-Side Target Strategy Use this strategy when the target space is beside a wall and the final push must be straight. Move pattern: 1. Keep the block in open space first. 2. Move around it until the block is lined up with the target. 3. Push straight toward the wall-side target. 4. Stop pushing from the side once the block touches the wall. 5. Finish only when the player still has space to stand. Avoid this strategy when: the block is not aligned yet. Side pushes near a wall can remove the final angle. Why this works: A wall removes one side of control. Once the block touches the wall, your options shrink quickly. Crowded Block Strategy Use this strategy when multiple blocks are close together and the player cannot reach the correct side of the main block. Move pattern: 1. Identify the main block first. 2. Move only the secondary block that opens walking space. 3. Keep at least one open tile beside the main block. 4. Return to the main block from the correct side. 5. Push the main block through the cleared route. Avoid this strategy when: you are moving every block away from the center. That usually creates more problems than it solves. Why this works: Crowded stages are not about clearing everything. They are about creating just enough space to control the important block. Portal and Gate Strategy Use this strategy when the stage includes a blue portal, teleporter, stone gate, magic gate, or blocked door that changes how the player reaches the goal area. Move pattern: 1. Check where the portal sends the player or which route the gate opens. 2. Move the player through first when possible. 3. Keep blocks away from the portal or gate path until the route is clear. 4. Open the route before moving the main block into a tight space. 5. Use Undo if the portal move was only one step wrong; reset the level if the player ends up on the wrong side of the block with no recovery route. Avoid this strategy when: you do not know where the player or block will end up after using the portal, teleporter, or gate. Why this works: Portals and gates are route tools. They should create access before you commit the main block. Common Mistakes Mistake · Why It Hurts · Better Move Pushing before reading the board · The first move can close the route needed later. · Find the target and final push direction first. Moving the closest block first · The closest block may only be blocking space. · Identify the main block before moving anything. Pushing into a corner too early · The block may become impossible to recover. · Use corners only for final placement. Ignoring standing space · The block moves, but the player loses the next pushing side. · Check where the player will stand after the push. Stepping on a glowing switch too early · A gate or route may change before the layout is ready. · Clear walking space before activating it. Dropping a block onto a pressure plate too soon · The block may hold the plate but trap the player’s route. · Check both the opened path and your escape path. Entering a blue portal without checking the exit · The player may land on the wrong side of the block. · Use portals only when the exit position helps the next move. Trying to fix a locked layout too long · Repeating blocked moves wastes time. · Use Undo for one bad move or reset when the route is fully locked. Playing too fast · Speed creates unnecessary dead ends. · Slow down and solve one move ahead. FAQ What is Magic Block Pusher? Magic Block Pusher is a block pushing puzzle game where players solve stages by moving blocks, keeping routes open, and avoiding trapped positions. How do you play Magic Block Pusher? Read the layout, find the target, stand on the correct side of each block, and push in an order that keeps future moves possible. What is the safest first move in Magic Block Pusher? The safest first move is usually not pushing a block. First, find the target, the narrowest route, and the side needed for the final push. Why do I keep getting stuck in Magic Block Pusher? Most stuck situations happen because a block was pushed into a wall, corner, or hallway before the player had enough space for the next push. Should I move the closest block first? Not always. The closest block may only be blocking the route. Find the target first, then decide which block actually matters. How do I solve narrow hallway stages? Push only far enough to open the route. Do not send a block to the end of a hallway unless that end position is part of the solution. What should I do when a block is stuck in a corner? If the corner is not the final target, use Undo if that single move can be reversed. If not, reset the level and keep that block in open space next time. When should I use Undo instead of Reset? Use Undo when you made one recent mistake and the route is still mostly safe. Use Reset when the main block is trapped, the player cannot reach the needed side, or several earlier pushes caused the problem. Can this guide help if I am stuck on a later level? Yes. Later stages in Magic Block Pusher usually become harder because blocks, narrow routes, gates, pressure plates, or portals are combined in tighter spaces. Start from the target, keep the final pushing side open, and reset early when the main block becomes trapped.
- Milk Match Puzzle
Milk Match Puzzle About This Game Milk Match Puzzle is a casual match-3 / elimination puzzle game built around milk-themed tiles, glowing power pieces, and level-based clearing goals. The core loop is easy to understand: match tiles, clear space, create stronger effects, and finish the target shown on the board. The challenge comes from choosing the right move, not from tapping every available match. A basic three-tile clear can help, but a stronger move often creates a power tile, opens a blocked section, or prepares a better follow-up clear. Good play comes from asking what the board will look like after the move, not only what disappears immediately. The game rewards careful board reading. A four-tile match can create a row-clearing or column-clearing glowing tile. A larger pattern can create a stronger special tile that clears a wider area or removes a selected tile type. These enhanced pieces are most useful when they connect with the target area, blocked sections, or hard-to-reach tiles. Milk Match Puzzle is best played with a simple rule: every move should either clear something important, create a stronger tool, or make the next move easier. How to Play Start each level by checking the board layout, the target area, and the number of moves available. Then scan for matching tiles, blocked sections, and possible four-tile or five-tile setups. Do not rush into the first available three-tile clear if another move can create a stronger effect. Clear three matching tiles for a basic elimination. When the board allows a larger match, try to create a glowing special tile and use it where it can hit the most valuable area. Match Combination · Descriptive Result · Visual Description · What It Can Do · Best Use 3 matching tiles · Basic tile clear · Three identical milk-themed tiles disappear from the board · Removes the matched tiles · Use for direct progress, small openings, or simple target clearing 4 matching tiles in a row · Row-clearing glowing tile · A bright horizontal power tile with a glowing stripe effect · Can clear a full horizontal row when activated · Best for targets or obstacles spread across the same row 4 matching tiles in a column · Column-clearing glowing tile · A vertical glowing power tile with an up-and-down clearing effect · Can clear a full vertical column when activated · Best for lower tiles, vertical target paths, or stacked obstacles 5 matching tiles in a straight line · Color-clearing special tile · A bright multi-color special tile that stands out from normal pieces · Can remove one selected tile type from the board · Best when many useful tiles share the same type 5 matching tiles in an L or T shape · Area-clearing special tile · A stronger glowing tile with a bright center and burst-style effect · Can clear a wider area around the activated tile · Best for corners, dense sections, and obstacle clusters Two special tiles combined · Power tile combo · Two glowing special tiles trigger a larger combined effect · Can create a stronger clearing effect than using one tile alone · Best when the combo reaches targets or blocked sections After each clear, watch how tiles fall into place. A good move may create another match automatically, bring target tiles closer together, or place a special tile in a better position. Use boosters when normal matching cannot solve the board efficiently. Booster · Visual Description · What It Does · Best Timing Hammer · A small hammer-style tool icon used for direct tile removal · Removes one chosen tile or obstacle layer · Use on a final target tile, blocked corner, or tile that normal matches cannot reach Horizontal Clear Booster · A wide glowing booster with a left-to-right clearing direction · Clears or creates a horizontal clearing effect · Use when targets or obstacles are spread across one row Vertical Clear Booster · A tall glowing booster with an up-and-down clearing direction · Clears or creates a vertical clearing effect · Use when key tiles are stacked in one column or trapped below other tiles Color-Clearing Booster · A bright multi-color special booster that targets one tile type · Removes one selected tile type · Use when the board has many useful tiles of the same type When Not to Use a Booster Do not use a booster just because it is available. Avoid using a Hammer on a tile that can be cleared by a normal match. Avoid using a Horizontal Clear Booster or Vertical Clear Booster if the clearing path does not touch target tiles, obstacles, or a blocked section. A booster is most valuable when it solves a problem that normal matching cannot solve in time. If the board still has easy matches that lead toward the target, save the booster for a harder moment. Beginner Strategy Guide • Compare moves before clearing. Look at more than one possible match. The first legal move is often weaker than a move that creates a glowing tile or opens the target area. • Use three-tile clears for setup. A basic match is useful when it brings tiles together, opens space, or moves the board toward a stronger combination. • Create four-tile matches when they line up naturally. Row-clearing and column-clearing glowing tiles are reliable tools because they can reach across the board. • Do not force five-tile matches at any cost. A five-tile special is powerful, but wasting several moves to chase one can hurt your progress. Build it when the setup is already close. • Place special tiles near the problem area. A special tile is strongest when it touches targets, obstacles, or dense sections. Activating it in an empty area usually wastes its value. • Use bottom-board clears with purpose. Lower matches can trigger tile drops and chain reactions, but they should still help the target area or create a stronger follow-up move. • Save the Hammer for hard tiles. The Hammer is best for corners, final targets, locked pieces, or obstacle layers that cannot be reached through normal matching. • Use horizontal and vertical clears based on board shape. If the problem stretches across a row, use a horizontal clear. If the problem is stacked in a column, use a vertical clear. • Plan around the final five moves. When only a few moves remain, stop chasing random clears. Count what the level still needs and use every move to finish the target. • Think in two moves. Before clearing a match, ask what the next move will become. The strongest play is often the move that improves the next two turns. Dealing with Blockers (Obstacles) Some levels include obstacles that limit movement, block target tiles, or make certain areas harder to clear. These should be handled early because they become more difficult when only a few moves remain. Obstacle · Visual Description · How It Works · How to Clear It · Best Tool Frozen blocker · A tile covered by a pale ice-like layer · Covers or traps a tile under a frozen layer · Match beside it or hit it with a clearing effect; thicker layers may need repeated hits · Hammer, area-clearing special tile, horizontal clear, vertical clear Layered blocker · A stacked block with multiple visible layers · Takes up board space and needs more than one hit · Clear matches beside it or use power effects to remove layers faster · Area-clearing special tile, horizontal clear, vertical clear Locked tile · A tile held by a lock-style visual element · Holds a tile in place until the lock is broken · Clear nearby matches or hit it with a booster · Hammer, nearby match, row or column clear Corner obstacles should be handled early because fewer matches can reach them. Middle obstacles can often be cleared faster with an area-clearing special tile. Row or column obstacles are good targets for horizontal or vertical clearing boosters. If an obstacle needs multiple hits, do not leave it for the final few moves. Open space around it first, then use a special tile or booster when it can hit the blocked section directly. Common Mistakes Using special tiles in weak positions: A row-clearing or column-clearing tile is much stronger when its path crosses targets or obstacles. Do not activate it through an empty section unless it creates a clear follow-up. Wasting board-clearing effects too early: Do not spend a powerful clear while the real target is still hidden under a multi-layer obstacle. Open the obstacle first, then use the stronger effect when it can actually reach the target. Saving every booster for too long: Boosters should not be wasted, but they also should not sit unused when they can finish a difficult section. Use them when they directly solve the board’s biggest problem. Using the Hammer on an easy tile: Do not spend the Hammer on a tile that a normal match can remove. Save it for corners, locked pieces, final targets, or stubborn obstacle layers. Ignoring obstacles until the end: Frozen blockers, layered blockers, and locked tiles can slow the whole board. Start working on them before the level reaches its final moves. Forcing large matches too often: A five-tile special is useful, but chasing it for too long can waste moves. If a simple match clears the target, take the simple match. Playing only from the top of the board: Top-board matches usually change less of the board. Lower clears and obstacle-side clears often create stronger cascades. FAQ What is Milk Match Puzzle? Milk Match Puzzle is a casual match-3 puzzle game where players clear matching tiles, create glowing power tiles, and complete level targets. How do you play Milk Match Puzzle? Match three or more identical tiles, clear them from the board, build stronger special tiles through larger combinations, and use boosters when normal matches cannot solve the target area. What happens when you match four tiles? A four-tile match can create a row-clearing or column-clearing glowing tile. When activated, it can clear a full row or column. What happens when you match five tiles? A straight five-tile match can create a color-clearing special tile. An L-shaped or T-shaped five-tile match can create an area-clearing special tile. What is the best booster in Milk Match Puzzle? The Color-Clearing Booster is usually the strongest choice when the board has many target tiles of the same type, because it can remove that tile type in one move. The Hammer is better for saving a nearly failed level when only one hard-to-reach tile, locked tile, or obstacle layer is stopping progress. How should I save coins, boosters, and extra moves for harder levels? Save coins and boosters for hard boards, not easy clears. A good rule is to spend resources only when you have fewer than five moves left, one key target remains, or a blocked section cannot be reached by normal matching. Extra moves are most valuable when the level is almost complete, not when the board still needs too much work. How do I deal with frozen blockers? Clear matches beside them or hit them with a booster. If the frozen layer needs repeated hits, use a Hammer, area-clearing special tile, horizontal clear, or vertical clear to break it faster. What is the hardest mechanic in the game? The hardest mechanic is handling obstacles in corners or crowded sections. Open space around them early, then use a special tile or booster when normal matching cannot reach them.
- Chibi Hero Tile Quest
Chibi Hero Tile Quest About This Game Chibi Hero Tile Quest is a chibi hero match-and-battle puzzle game built around hero collection, clickable hero tiles, team deployment, and turn-based battle choices. This Chibi Hero Tile Quest strategy guide helps beginners understand how to build a team, read enemy targets, use hero tiles, and press Go at the right time. The game combines cute pixel-style hero portraits with light puzzle strategy. In battle, enemy targets are shown in the upper area, while available hero tiles appear around the lower and side areas of the screen. Players click hero tiles to prepare actions, then use the Go button to confirm the turn. This makes every round a small decision: check the enemy target, choose the hero tile that fits the situation, and press Go only when the move helps the current turn or sets up the next one. The game also includes a wider hero progression loop. The Hero Collection screen lets players view heroes such as KK Rainbow, Super Kid, and White Dragon, along with their level, upgrade progress, and role labels. The Deploy Hero area is where players choose which heroes to bring into battle. Other sections such as Battle, Trial, Treasure, and Shop support progression. In this game, Treasure is mainly connected with coins, while the Shop is used for hero shards and collection progress. The main skill in Chibi Hero Tile Quest is learning how hero roles, tile clicks, and turn timing work together. A strong player does not simply tap every available tile. They build a useful team, check enemy pressure, click the right hero tile, and confirm with Go only after the action makes sense. How to Play Follow this 6-step flow when starting a stage: 1. Step 1: Check your Hero Collection first. Before entering battle, review your available heroes. Look at characters such as KK Rainbow, Super Kid, and White Dragon, then check their level, upgrade progress, and role label. 2. Step 2: Read each hero’s battle role. Use the role labels to understand your team. Super Kid works as your DPS choice, KK Rainbow works as your support option, and White Dragon works as your control option. 3. Step 3: Build a balanced team before battle. A simple beginner setup is: Super Kid for damage, KK Rainbow for support, and White Dragon for control. This gives you a cleaner structure than choosing heroes only by appearance or level. 4. Step 4: Scan enemy targets before clicking tiles. Once the battle starts, look at the upper battle area first. Count the active enemies, find the most urgent target, and decide whether the next move needs damage, support, or control. 5. Step 5: Click the hero tile that solves the current problem. Hero tile actions are triggered by clicking. Click Super Kid when you need direct pressure, KK Rainbow when the team needs support, and White Dragon when enemy pressure needs to be controlled. 6. Step 6: Confirm with Go only after planning the next turn. The Go button confirms your selected action. Before pressing it, ask whether the clicked tile helps now and whether it leaves you with a playable next turn. After the action resolves, repeat the same loop: read the enemy target, scan your available hero tiles, click the best tile, then press Go. This rhythm is more reliable than tapping randomly because every move has a purpose. Beginner Strategy Guide Beginner Team Formula For early stages, use this simple lineup structure: Optimal Team = 1 DPS (Super Kid) + 1 SUP (KK Rainbow) + 1 CC (White Dragon) This formula gives your team three important tools: damage, stability, and control. It also prevents the common beginner mistake of using only damage heroes and then struggling when enemy pressure builds. Hero Skill Roles Super Kid is your main DPS option. Use Super Kid when you need direct damage pressure or when an enemy target is close enough to finish. KK Rainbow is your support option. Use KK Rainbow when the team needs more stability, safer turn flow, or a better setup before pressing Go. White Dragon is your control option. Use White Dragon when enemy pressure is building and you need to slow the pace of the battle or create a safer next turn. Target Priority Rule When several enemies are visible, do not attack randomly. Use this order: 1. Finish an enemy that is already close to defeat if doing so reduces pressure immediately. 2. Target the enemy that creates the biggest problem for your next turn. 3. Use KK Rainbow or White Dragon before damage if your team is under pressure. 4. Avoid spending Super Kid on a low-threat enemy unless it creates a safer board state. This rule is especially important before pressing Go. A strong move is not always the flashiest move. The best move is the one that makes the next turn easier. Hero Tile Click Rule In Chibi Hero Tile Quest, hero tile actions are triggered by clicking. That means every click should have a reason. Before clicking a hero tile, check: • Which enemy needs attention first? • Do I need damage, support, or control? • Is Super Kid, KK Rainbow, or White Dragon the best answer? • Will this click help the current turn? • Will this click leave better options after Go? Do not click the first tile you see. Tiles on the side of the battle area can be easy to miss, but they may offer a better move than the obvious tile near the bottom. Go Button Checklist Before pressing Go, run this quick check: • Did I look at the enemy area first? • Did I click the hero tile for a clear reason? • Am I solving the most urgent threat? • Will this move leave useful options for the next turn? • Am I using Super Kid, KK Rainbow, or White Dragon at the right moment? If the answer is unclear, pause and scan the board again. Most beginner mistakes happen because the player presses Go before the move has a purpose. Upgrade and Resource Rule Do not spread resources across every hero as soon as you unlock them. Build a small core team first. A practical early upgrade order is: 1. Upgrade Super Kid first if damage is your biggest problem. 2. Upgrade KK Rainbow if your team often loses stability before the battle ends. 3. Upgrade White Dragon if enemy pressure becomes difficult to control. 4. Delay upgrades for heroes you rarely deploy. Treasure is mainly connected with coins, while the Shop is used for hero shards. Use coins and shards to support heroes you actually deploy. The goal is to make your core team stronger, not to make every hero slightly upgraded. Energy Use Rule Energy should be spent on progress that improves your main team. Do not burn energy only because it is available. A practical beginner rule is: • Spend energy on battles that help your core team progress. • Use energy on Trial when it supports upgrades or hero growth. • Avoid repeating low-value stages if they do not help your current lineup. • Check whether you need coins, shards, or upgrade progress before spending energy. The best energy use is not always the fastest stage. It is the stage that gives your team the most useful progress. Common Mistakes Pressing Go before reading the enemy target. The Go button should confirm a decision, not replace one. Always check the enemy area before clicking a hero tile. Clicking the first available hero tile. A tile that can be clicked is not automatically the best tile. Compare the bottom and side tiles before acting, especially when multiple enemies are active. Ignoring the beginner team formula. A simple early team should include 1 DPS, 1 SUP, and 1 CC. Using Super Kid, KK Rainbow, and White Dragon together gives you a cleaner structure than stacking only damage. Using Super Kid on the wrong target. Super Kid should be used when damage matters. Do not waste a strong DPS action on a low-threat enemy unless it improves the next turn. Saving KK Rainbow for too long. Support is most useful before the battle falls apart. Use KK Rainbow when the team needs stability, not only after the situation is already bad. Forgetting White Dragon when enemy pressure builds. White Dragon is your control option. If enemies are creating too much pressure, use White Dragon to help slow the battle pace and create a safer turn. Spending coins or shards without a plan. Treasure gives coins, and the Shop provides hero shards. Focus both on heroes you use often instead of spreading upgrades across every character. Wasting energy on low-value progress. Energy should support your main team. Before spending it, decide whether you need coins, shards, upgrade progress, or battle advancement. FAQ What is Chibi Hero Tile Quest? Chibi Hero Tile Quest is a cute chibi hero match-and-battle puzzle game. It combines hero collection, clickable hero tiles, team deployment, enemy target reading, and turn-based battle decisions. How do you play Chibi Hero Tile Quest? Build a team in Hero Collection or Deploy Hero, enter battle, read the enemy targets, click the hero tile that solves the current problem, then press Go to confirm the action. What is a recommended beginner team in Chibi Hero Tile Quest? A strong beginner formula is 1 DPS + 1 SUP + 1 CC. For the early heroes shown in this guide, that means Super Kid as DPS, KK Rainbow as SUP, and White Dragon as CC. How should I use Super Kid? Use Super Kid when you need direct damage pressure. Super Kid is best used against urgent enemy targets or enemies that are close enough to finish. How should I use KK Rainbow? Use KK Rainbow when your team needs support or a safer turn setup. Do not wait too long to use support, because support is most valuable before the battle becomes unstable. How should I use White Dragon? Use White Dragon when enemy pressure is becoming difficult to manage. White Dragon works best as a control option that helps slow the battle pace and create a safer next turn. How should beginners use Shop items and Energy? Use Shop hero shards and Energy to support your main team first. Prioritize heroes you deploy often, such as Super Kid, KK Rainbow, and White Dragon, instead of spending resources across random characters or low-value stages. Coins, hero shards, Treasure, Shop items, and Energy are virtual in-game systems only. They are not real-world rewards, cash prizes, gambling rewards, or physical items.
- Rainbow Tube Sort
Rainbow Tube Sort Core Logic and Movement Rules Rainbow Tube Sort is a casual color sorting tube puzzle game where the goal is to move colored balls between tubes until each color is grouped cleanly together. The game looks simple at first, but every move changes the board, so careful planning matters more than fast tapping. The main movement rule is simple: a ball can usually be moved only when the destination tube is empty or when the top ball in that tube matches the same color. This means a useful move should do at least one of three things: connect matching colors, reveal a blocked color, or make the next move easier. An empty tube is valuable because it gives you room to rearrange balls. Instead of treating it as a place to drop any random color, think of it as your temporary sorting space. Once that space is gone, every later move becomes harder to control. Before moving a ball, look across the whole board. Check which colors are already close to completion, which colors are trapped near the bottom, and which move will help the next step. The challenge fails when no ball can legally move to another tube, so the safest approach is to keep the board flexible for as long as possible. Quick strategy summary: finish easy color groups first, uncover buried colors before the board gets crowded, protect at least one useful sorting space, and use Manage only when one extra tube clearly opens a safe path forward. Advanced Sorting Strategy A strong Rainbow Tube Sort strategy starts by looking below the top balls. The top ball decides what you can move right now, but the lower balls decide whether the puzzle will stay solvable later. One useful method is the bottom-up check. This simply means looking at the lowest visible colors before making obvious top-level moves. If the same color appears near the bottom of several tubes, do not keep covering it with unrelated balls. Try to uncover one version of that color first, then use it as the starting point for building the full stack. Another common situation is the sandwich pattern. This happens when one color is split by another color inside the same tube, such as Red - Blue - Red. The problem is not just the top Red ball. The real issue is that the Blue ball is separating two matching Red balls. For example, if a tube has Red - Blue - Red from top to bottom, a simple recovery sequence might look like this: 1. Move the top Red to a tube that already has Red on top, if that move is legal. 2. Move the blocking Blue into a safe open tube or a tube with Blue on top. 3. Reconnect the lower Red with the red stack once the path is clear. This kind of sequence teaches an important lesson: do not move a ball just because it can move. Move it only when the next two or three steps still make sense. Color priority means choosing which color should be solved first. A good early target is a color that is already visible in several places and not buried too deeply. A weak target is a color that looks easy to move now but would trap another color underneath it. If two tubes both contain the same color near the top, try to merge them only if the move does not block something more important. A clean 3-ball group may look useful, but it can still be a mistake if it traps the final ball of another color in a tube with no clear exit. Tool Guide Rainbow Tube Sort includes three helpful tools: Undo, Hint, and Manage. These tools work best when they support your own planning. They should not replace the basic skills of reading the board, choosing color priority, and thinking a few moves ahead. Undo is best used right after a bad move. If you just blocked a possible full-color stack, covered a color you needed to uncover, or used your only useful sorting space too soon, Undo can stop that mistake from turning into a dead end. Hint is useful when you cannot see a clear next move. After using it, do not just continue tapping. Look at the suggested move and ask why it helped. Did it reveal a hidden color, connect a color group, or open a better route? Manage adds an extra tube for the current round, and it can only be used once per game. Save it for a board that is crowded but still possible to fix. Do not wait until every useful move is gone, because the extra tube works best when it can still turn a blocked plan into a playable sequence. Do's and Don'ts ✅ Do plan a few moves ahead. Before moving a ball, check what that move opens next. A good move should improve the next step, not just the current tube. ❌ Do not fill every empty tube immediately. Use open space only when the move helps complete a color group, uncover a blocked color, or create a clearer path. ✅ Do protect clean color groups. If several balls of the same color are already stacked together, avoid breaking them apart unless doing so unlocks something important. ❌ Do not group three balls if it traps the fourth ball of another color. A move can look good in one tube but still damage the whole board. Always check what becomes harder after the move. ✅ Do use partial fills carefully. A partly filled tube can help when it still leaves enough room for the next move. This is useful when you need to shift one blocking ball without losing control of the board. ❌ Do not rely on tools instead of planning. Undo, Hint, and Manage can help with mistakes or tight positions, but the main solution still comes from choosing the right move order. ✅ Do choose a color priority. Pick one color that is close to completion or needs to be uncovered soon. Sorting one color with a clear purpose is better than moving several colors randomly. ❌ Do not move only because a move is legal. For example, moving a green ball into an open tube may be legal, but it may still be weak if that tube was the only place available to free a buried red ball. Board Survival Tips On easier boards, look for colors that already appear close together. If the same color is visible in several tubes and not buried too deeply, it may be a good early target because it takes fewer moves to complete. On crowded boards, protect your last useful open tube unless the move clearly completes a color group or opens another tube. The goal is not to keep space forever, but to spend it only when it creates progress. On mixed-color boards, look for buried colors before making obvious top-level moves. Sometimes the top ball is only a distraction. The real problem may be a color hidden two or three layers down. A healthy board usually gives you choices: one color close to completion, one route to uncover a blocked color, or several top balls that can connect with matching colors. A dangerous board gives you only moves that shift clutter around without opening anything. Watch for warning signs before the board locks. If your last open tube is filled, several useful colors are buried near the bottom, and every legal move only makes another tube messier, the puzzle is becoming dangerous. This is the moment to slow down, use Undo if the last move caused the problem, or use Manage if one extra tube can still create a path forward. If the board feels stuck but still has legal moves, look for one of three recovery options: complete one color, empty one tube, or uncover one blocked color. Most good recoveries begin with one of those three choices. FAQ How do I recover from a no-move situation? If no ball can legally move, the challenge may already be failed. Before that point, use Undo to reverse the mistake or Manage if one extra tube can still reopen the puzzle. Is there a time limit in Rainbow Tube Sort? Based on the provided gameplay information, the main challenge is move planning rather than speed. Focus on accuracy and clean sorting instead of rushing. When should I use the extra tube? Use Manage when the board is crowded but still possible to fix. Avoid using it early on a board that still has several safe moves. What is the best beginner strategy? Start by reading the whole board. Finish easy color groups, uncover buried colors, and avoid moves that block the next step. Should I use Hint often? Hint is helpful when you are stuck, but it should be used as a learning tool. After using it, check why that move improved the board. What causes most failed rounds? Most failed rounds come from covering important colors, breaking clean groups, spending open space too early, or making legal moves that do not create progress. Is Rainbow Tube Sort a gambling game? No. Rainbow Tube Sort is a casual color sorting tube puzzle game. Balls, tubes, tools, rewards, and similar elements are virtual game mechanics only. Editorial Note This guide is based on the gameplay information provided for Rainbow Tube Sort. It is designed to help players understand the movement rules, color sorting logic, tool timing, and practical ways to avoid dead ends. Rainbow Tube Sort is treated here as a casual color sorting tube puzzle game. Any balls, tubes, tools, rewards, or similar elements mentioned in this guide refer only to virtual in-game mechanics.
- Tank Arena Survivor
Tank Arena Survivor About This Game Tank Arena Survivor is a casual tank arena survival game built around swipe movement, bullet power-ups, and upgrade planning. Your goal is to guide your tank through the arena, avoid being trapped, collect useful boosts, defeat every enemy tank, and keep your own tank active until the round is cleared. The main challenge comes from reading enemy pressure, choosing when to grab a boost, and upgrading health, movement speed, or firepower after each round. How to Play At the start of a round, do not rush straight into the middle cluster. Use the opening moments to move around the outer area, read where enemy pressure is forming, and decide which side gives you the cleanest route. Swipe on the screen to guide your tank’s movement direction. Smooth movement matters more than rushing. A good beginner route is to move in wide curves, avoid sharp panic turns, and keep enough space to escape if enemies start closing in. A practical round flow looks like this: Round Phase · Main Goal · What to Do Early round · Stay active and read the arena · Stay on the perimeter, avoid early crowding, and watch where enemies group First power-up chance · Improve your attack without taking unnecessary risk · Collect bullet multiplier, faster firing, or firepower only if the route is open Mid-round pressure · Clear enemies without getting surrounded · Flank the enemies, keep turning space, and avoid chasing one target too long Low-health situation · Stop forcing direct trades · Create distance, move toward open space, and wait for a better angle Final cleanup · Finish carefully · Do not rush just because only a few enemies remain; keep moving and clear them from controlled angles A simple beginner movement pattern is: 1. Move along the edge of the arena first. 2. Watch which side becomes crowded. 3. Turn away from that side instead of cutting through it. 4. Engage from the outer edges while leaving an exit route. 5. Collect a boost only when you can enter and leave without being boxed in. 6. After the round, upgrade based on what actually caused the loss. Bullet power-ups change the pace of the match. A bullet multiplier is useful when several enemies are still active because it can increase your coverage. Faster firing helps when you need steady pressure while moving. Firepower boosts are better when you already have enough room to aim and reposition. To win, defeat all enemies in the arena. If your tank is defeated by enemy pressure, the challenge fails and you need to try again. After a round ends, choose between health, movement speed, and firepower upgrades depending on your biggest problem. Specific enemy behavior, upgrade limits, reward values, and power-up effects may vary by version, so use the in-game prompts as the final reference. Beginner Strategy Guide The strongest beginner habit is to treat movement as your first defense. Do not start a round by chasing the nearest enemy. First, make room, read the arena, and look for a route that lets you engage without trapping yourself. Opening Movement Strategy At the start of a round, avoid driving straight into the middle. Circle the outside first and watch where enemies begin to gather. This gives you more turning space and helps you choose your first attack angle. A safer beginner pattern is: 1. Circle the outer area during the opening. 2. Identify the most crowded side. 3. Move away from that pressure instead of cutting through it. 4. Flank the enemies instead of charging through the center. 5. Grab a power-up only when the path in and out is clear. This opening reduces early damage and gives you time to understand the round before committing to a fight. Enemy Pressure Patterns Think of enemies by pressure pattern rather than fixed names: Enemy Pressure Pattern · What It Feels Like · Better Response Grouped enemies · Several enemies gather in one area · Stay outside the cluster, flank the enemies, and use bullet multiplier when you have room Slow heavy pressure · A slower enemy still creates danger if you trade directly · Keep distance, turn early, and avoid straight-line fighting Chasing pressure · Enemies follow your movement path · Use wider turns, lead them away from boosts, then circle back Split pressure · Threats approach from more than one direction · Stop chasing and move toward the most open space first End-round pressure · Only a few enemies remain, but one mistake can still end the run · Slow down, avoid greedy boosts, and finish from a controlled angle Power-Up Choices Do not collect every boost just because it appears. A power-up is only valuable if you can use it without giving up your position. Power-Up or Upgrade · Best Use Case · Beginner Tip Bullet multiplier · Several enemies are active or grouped · Strong when you have space to move; risky if you are already trapped Faster firing · You need steady pressure while repositioning · Keep moving; faster firing does not make standing still safe Firepower boost · You survive well but clear enemies slowly · Use it from the outer edges instead of rushing into the center Health upgrade · You lose early or take too much damage · Consider this for your first few upgrade choices if you are still learning Movement speed upgrade · You struggle to dodge, escape, or reach boosts · Useful after you understand basic movement routes Firepower upgrade · You survive most rounds but need faster clears · Better once your movement is already consistent Upgrade Styles Choose upgrades based on your failure pattern, not just what looks strongest. Upgrade Style · Upgrade Focus · Works Well For Survival Build · Health first, then movement speed · Beginners who lose early or take too many hits Kiting Build · Movement speed + faster firing support · Players who prefer circling, dodging, and attacking while moving Clear-Speed Build · Firepower + bullet multiplier value · Players who survive well but take too long to finish rounds Balanced Build · Health, speed, and firepower upgraded evenly · Players who want steady progress without relying on one stat A simple upgrade decision rule: What Went Wrong · Upgrade Direction You were defeated early · Add health You could not escape crowded areas · Add movement speed You survived but enemies took too long to clear · Add firepower You lost after chasing boosts · Improve movement choices before blaming upgrades You lost near the end · Slow down during final cleanup and avoid risky direct trades The best beginner mindset is: survive the opening, collect only useful boosts, clear from the edges, and upgrade for the problem you actually faced. Common Mistakes Wrong Move · Better Move Driving into the center too early · Stay on the perimeter first, read enemy movement, then engage from a side route Standing still while attacking · Keep moving in curves so enemies have less time to surround you Chasing one enemy across the arena · Break off if the chase pulls you into crowded space Grabbing every power-up immediately · Check whether the route is open before committing Taking a bullet multiplier while trapped · Create room first so the extra bullets can actually help Ignoring low health · Stop forcing trades, create distance, and look for a cleaner angle Only upgrading firepower · Add health or speed if your main issue is survival or escape Repeating the same upgrade after every failure · Match the upgrade to the loss: health for early defeat, speed for escape problems, firepower for slow clears Playing too aggressively near the end · Treat the final enemies carefully and avoid unnecessary risks Expecting one power-up to win the round · Combine boosts with movement control, timing, and upgrade planning FAQ Do power-ups stack in Tank Arena Survivor? Current gameplay confirms bullet-related boosts such as bullet multiplier, faster firing, and firepower boosts, but stacking behavior may depend on the version. Watch the in-game effect after collecting a boost, and do not rely on stacking unless your version clearly shows it. Is there a max level for upgrades? A maximum upgrade level may depend on the version. If your version has a cap, it should appear in the upgrade screen. Until then, choose health, movement speed, or firepower based on your latest round result. What is the hardest enemy pattern to deal with? The hardest situation for beginners is usually split pressure, where enemies threaten from more than one direction. When that happens, stop chasing one target and move toward open space before attacking again. Should I always collect a bullet multiplier? No. Bullet multiplier is useful when several enemies are active, but it is not worth taking if the route is too risky. A missed power-up is better than driving into a trap. What should I do when my tank has low health? Stop forcing direct fights. Move away from crowded areas, use wider turns, and attack only when you have a clear escape route. Why do I keep losing near the end of a round? Many players become too aggressive when only a few enemies remain. Final cleanup still requires patience. Keep moving, avoid greedy power-up grabs, and finish enemies from controlled angles. Is faster firing better than stronger firepower? It depends on the situation. Faster firing helps with steady pressure while moving, while stronger firepower helps if enemies take too long to clear. If you are still getting surrounded, movement and positioning matter more than either one. Editorial Note This guide is based on the current version of Tank Arena Survivor. Gameplay mechanics, enemy patterns, and upgrade values may change in future updates.
- I'm Really Good With Tanks
I'm Really Good With Tanks In I'm Really Good With Tanks, survive first, collect second, and upgrade with a purpose. Use the middle lanes to keep escape options open, avoid getting trapped on the edge, skip risky Money Trucks or Fuel Trucks, and prioritize control-focused upgrades before speed-focused upgrades. About This Game I'm Really Good With Tanks is a casual tank driving arcade game built around lane switching, road survival, and quick reactions. You guide a tank along a five-lane road, moving between lanes to avoid traffic and clear selected road targets. The core loop is easy to understand: drive forward, read the traffic grid, avoid collisions, collect in-game cash from safe target clears, then return to the Home page to unlock tanks or improve performance. Money Trucks, Fuel Trucks, other tanks, and road vehicles all work as arcade gameplay elements inside the run. What makes I'm Really Good With Tanks interesting is the lane pressure. A clear lane can become dangerous quickly, especially if you move too late or chase a target into a blocked route. Strong runs come from planning your next lane before the current one becomes unsafe. The Basics • Watch the road across all lanes, not just the lane your tank is using. • Move left or right to avoid vehicles and keep the run alive. • Clear Money Trucks, Fuel Trucks, or other tank targets only when the route stays open. • Do not chase every target; a missed truck is better than an early crash. • Collect in-game cash during the run. • If your tank hits another vehicle, the run ends. • Use the Home page after a run to unlock new tanks or improve performance. The simplest rule is this: the best lane is not always the empty lane now. It is the lane that still gives you a way out two seconds later. Beginner Strategy Guide Read the Traffic Grid, Not Just Your Lane Many new players crash because they react only to the vehicle directly ahead. In I'm Really Good With Tanks, you need to scan the whole road pattern. Check your current lane, the lane you want to enter, and the lane beside that one. If two or three lanes are filling up at the same time, move before the gap disappears. Late lane changes force panic decisions, and panic decisions usually lead to collisions. A good habit is to keep your eyes slightly ahead of the tank instead of staring at the tank itself. This gives you more time to see where the next safe opening will form. Use the Center Lane Strategy The middle area of the road is usually safer for beginners because it gives you more escape options. From the center lanes, you can move left or right depending on where traffic opens. This does not mean you should sit in the center forever. It means you should use the center as a reset point after collecting a target or dodging a tight traffic pattern. Good center-lane moments: • You are unsure where the next target will appear. • Both sides of the road are changing quickly. • You just cleared a truck and need to recover position. • You want to avoid being forced into a single escape direction. The center lanes give you choices. In a lane switching game, choices are often more valuable than speed. Avoid the Edge Lane Trap The outer lanes can look safe, but they are dangerous when traffic closes in. If you move into the far-left or far-right lane, you only have one direction to escape. If that return path is blocked, you are trapped. Use edge lanes for quick moves, not long stays. Enter the edge only when the lane ahead is open and you can return toward the middle before the next traffic cluster arrives. Pro-Tip: Don't skim past targets. Give Money Trucks and Fuel Trucks a full lane's width of clearance, especially when they appear near the edge of the road. That extra space helps you avoid getting pinned with no recovery lane. Know When to Skip Money Trucks and Fuel Trucks Money Trucks and Fuel Trucks are tempting because they can help your in-game cash flow, but they are not worth chasing into a blocked lane. Before moving toward a truck, check three things: 1. Is the lane ahead open? 2. Can you leave that lane after clearing the target? 3. Will the move force you into the edge with no return route? If the answer looks risky, skip the target. The best way to collect more over time is usually to survive longer, not to grab every truck on screen. A strong player does not collect every target. A strong player collects the targets that do not break the route. Control Your Lane Switching Rhythm Fast movement is useful only when it is controlled. Random lane switching makes the tank harder to position and can place you directly in front of traffic you had already avoided. Use this rhythm: • Read the road. • Choose one safe lane. • Move once. • Recheck the pattern. • Move again only if needed. This rhythm keeps your tank stable and gives you time to plan. If you keep crashing early, slow down your decisions and move earlier instead of moving more often. First 3 Runs Practice Focus If you are new to I'm Really Good With Tanks, use your first few runs as practice instead of trying to collect everything immediately. • Run 1: Ignore most targets and focus only on avoiding collisions. • Run 2: Practice early lane changes before a lane becomes blocked. • Run 3: Start collecting safe trucks only when at least one escape lane remains open. After that, you can begin mixing survival, target collection, and upgrades more confidently. Upgrade Priority for Beginners The Home page upgrade system can help future runs, but beginners should avoid spending in-game cash randomly. The best early upgrade plan is to make the tank easier to control before making it faster. A useful beginner priority is: 1. Control-Related Upgrades First Prioritize handling, steering, movement stability, or any upgrade that makes lane changes easier to manage. A tank that responds cleanly is far more useful than a tank that moves fast but feels difficult to place. 2. Survival and Consistency Next Put your next upgrades into anything that helps you last longer or recover from lane pressure more easily. Longer runs create more chances to collect safely. 3. Collection Efficiency After Stability Once your tank feels stable, spend upgrades on anything that improves your ability to collect more from safe runs. Do this only after you can survive long enough to benefit from those upgrades. 4. Speed-Focused Upgrades Later Speed can make the road harder to read if your control is still weak. Choose speed-focused upgrades after you are comfortable handling crowded traffic patterns. 5. New Tanks When They Support Your Playstyle Unlock new tanks when they clearly help your control, comfort, or run consistency. If a new tank mainly changes appearance, it is usually better to improve basic performance first. Beginner rule: control before speed, survival before collection, and safe targets before risky trucks. Common Mistakes Looking only at the current lane The lane ahead may be open now but blocked a moment later. Watch the nearby lanes so you know where to move next. Switching too late Waiting until a vehicle is close gives you fewer options. Move early when the traffic pattern starts closing. Chasing trucks without an escape route Before going for Money Trucks or Fuel Trucks, check whether you can leave the lane afterward. If the target sends you into a dead end, skip it. Staying on the edge too long The far-left and far-right lanes limit your escape direction. Use them briefly, then return toward the center when possible. Choosing speed before control A tank that moves faster than you can steer is a problem, not an upgrade. Driving with high speed but poor control makes every lane change feel rushed, and it is an easy way to crash into the next truck or vehicle. Fix your handling first. Repeating the same crash pattern If you keep failing in the same situation, stop chasing targets for a few runs and focus on lane timing. Fix the route decision before trying to collect more cash. FAQ How can beginners collect more cash safely? Focus on survival time. The game naturally creates more safe target chances the longer you stay alive. Chasing every single truck is a trap that ends runs early. Should I upgrade control or speed first? Upgrade control-related performance first. Better steering, handling, or movement stability makes it easier to dodge traffic, recover from lane pressure, and collect safely. Are Money Trucks and Fuel Trucks always worth chasing? No. They are worth chasing only when the lane ahead is open and you can leave the lane afterward. If a truck pulls you into an edge trap or crowded traffic grid, skip it. Why do I keep crashing early? You are probably moving too late, watching only one lane, or chasing targets before checking escape routes. For a few runs, ignore trucks and practice early lane changes across the traffic grid.
- Teddy Glove Arena
Teddy Glove Arena About This Game Teddy Glove Arena is easiest to understand as two connected loops: survive the arena first, then improve your glove setup on the Home page. This is a casual cartoon boxing arena game with simple arena attacks and a glove merge upgrade system. You control a cartoon-style boxer in a match against nine rival boxers, moving around the arena, choosing when to attack, and trying to stay in the round until you are the last boxer standing. The action is built around two virtual attack moves: a quick punch and a heavier hammer swing. The attacks are virtual game mechanics, not real-world fighting instruction. Your success depends less on button mashing and more on reading the arena, choosing safer targets, and repositioning after each attack. The Home page adds the main growth system. You can buy basic gloves and merge matching glove levels to build higher-level gloves step by step. This gives Teddy Glove Arena a light glove merge game feel while keeping the core match focused on movement, attack choice, and arena survival. A good beginner approach is simple: do not treat every opponent as a target. Watch the field, pick one rival boxer you can approach safely, attack once, and move again before the arena closes around you. How to Play When a match begins, take a moment to read the arena. Look for open space, check where rival boxers are gathering, and avoid walking directly into the busiest area. Use the left side of the screen to control your boxer’s movement direction. Smooth swipes are better than sudden random movement because your position decides whether you can attack safely or escape pressure. Use the right side of the screen to choose your attack. The punch is the safer close-range option when a rival boxer is already near you. The hammer swing is a higher-commitment attack option when you have enough space, a clear angle, and a target path that makes sense. To win a match, defeat the other nine opponents and remain as the final boxer in the arena. If your boxer is defeated first, the challenge fails and you need to start another attempt. After the match, return to the Home page to manage glove upgrades. The upgrade system is based on merging gloves of the same level into the next level, so planning your pairs matters more than buying randomly. Quick Beginner Plan 1. Start by moving around the outer area. 2. Watch where opponents gather. 3. Choose one safer, isolated target. 4. Move in only when the angle is clear. 5. Attack once, then reposition. 6. Return to the Home page after the match to merge gloves. Specific button labels, glove stats, attack range, damage values, and reward rules may vary by version, so this guide focuses on the confirmed core loop: move, choose an attack, survive the arena, and upgrade gloves through merging. Beginner Strategy Guide Pro Tip: A good target is not always the closest target. A good target is one you can approach, hit, and leave without getting trapped. At the start of a match, use what can be called The Orbiting Strategy: move around the outer side of the arena instead of cutting straight through the middle. This gives you more time to see where rival boxers are grouping and helps you avoid being squeezed from several directions at once. When you chase a target, do not follow blindly. Choose a rival boxer near open space, move in from an angle, use one attack, and then step away. If the target is standing inside a group, leave it for later and circle toward a safer opponent. If two or more opponents close in on you, move first. New players often attack immediately when they feel pressured, but that usually keeps them in the danger zone. Create distance, reset your angle, and only attack after you have room to leave. When the center becomes crowded, stay near the outside and look for a lone boxer drifting away from the group. This is the safest time to apply the Safe Target Rule: approach only when you have a clear entry path and a clear exit path. Attack Choice Guide Situation · Better Choice · Why It Works Opponent is already close and not protected by nearby rivals · Punch · Fast, simple, and lower commitment There is open space and a clear attack angle · Hammer swing · Better when the angle gives the swing room to work Two or more opponents are nearby · Move first · Escaping pressure is safer than forcing an attack Your attack would place you in the center of a crowd · Do not attack yet · Bad position can cost the round Target is close but surrounded · Wait or change target · The safest target is not always the nearest one The punch is best when the target is already in range and the risk is low. Think of it as your close-range tool for quick moments. The hammer swing should be used more selectively. It works better when you have space, angle, and a clear target route. Do not treat it as a mindless power move. The Home page glove system should be handled with a simple Merge Pair Rule: merge existing pairs first, avoid random purchases, and build toward the next glove level step by step. If you already have one glove close to forming a pair, prioritize completing that pair before starting a new upgrade path. Each higher glove level requires more basic gloves behind the scenes. For example, a Level 2 glove needs two basic gloves, a Level 3 glove effectively needs four basic gloves, and a Level 4 glove effectively needs eight basic gloves if the same two-for-one merge pattern continues. Glove upgrades support your run, but they are not a replacement for arena control. A better glove setup can improve progression, while winning still depends on when you move in, when you back away, and which target you choose. Common Mistakes Pro Tip: Most early losses come from bad positioning before the attack, not from choosing the wrong attack button. Mistake · Fix Rushing into the center at the start · Circle around the outside first and wait for a safer target. Attacking while surrounded · Move away first, then attack after creating space. Spamming hammer swing · Use it only when the distance and angle are favorable. Chasing the closest opponent every time · Choose the safest target, not always the nearest one. Using punch from too far away · Step closer only when you can still retreat after attacking. Swinging into a crowded group · Wait for one opponent to separate from the cluster. Standing still after an attack · Reposition immediately so you are not caught by nearby rivals. Buying gloves randomly · Merge matching levels with a clear upgrade route. Relying only on glove level · Use upgrades as support, not as a substitute for arena decisions. A clean beginner rhythm is: move, check the angle, attack once, and reposition. If you skip the final step, even a good attack can leave your boxer in a bad spot. FAQ What should I do if I get pushed toward a corner? Move along the edge instead of attacking immediately. Look for the nearest opening, escape the pressure, and attack only after you have space again. Avoid forcing a hammer swing here, because it is a higher-commitment move and may leave your boxer exposed. How does glove merging work? The Home page lets you merge two gloves of the same level into one higher-level glove. Plan your upgrade route around matching existing pairs instead of buying random gloves and filling up your available glove space. Why am I losing even with a higher-level glove? A glove upgrade may improve your attack performance or margin of error, but poor movement and bad target choices can still cost you the round. Focus on safe approach paths, single strategic attacks, and quick repositioning. Is Teddy Glove Arena a real boxing or gambling game? No. Teddy Glove Arena is a casual cartoon arena game. Its boxers, gloves, attacks, upgrades, and rewards are virtual gameplay mechanics, not real boxing training, gambling, betting, or real-money rewards. Editorial Note This guide is based on the gameplay information provided for Teddy Glove Arena. It focuses on controls, attack choice, arena survival, target selection, and the glove merge system. All boxing, glove, attack, upgrade, and reward references describe virtual game mechanics only.
- Sheep Ranch Builder
Sheep Ranch Builder About This Game Sheep Ranch Builder is a casual sheep ranch management and idle farm upgrade game about building a virtual ranch, improving production, raising Ranch Level, and unlocking new ranch areas over time. This guide is based on the visible game interface and focuses on practical beginner decisions rather than hidden formulas, fixed reward values, or guaranteed outcomes. The game uses a staged idle-growth economy. Early progress feels simple because small upgrades can quickly move the ranch forward. Later, the game becomes more about choosing the right upgrade path: Ranch Level gates, resource flow, support features, and diamond spending decisions begin to matter more than fast tapping. The main long-term goal is to expand the ranch. New areas or features may require specific Ranch Level requirements, such as a visible Ranch Lv. 10 to Unlock prompt. These level gates are important because they turn the game from a simple collection loop into a progression puzzle: you are not only collecting coins, but deciding which upgrade helps the next unlock arrive sooner. Sheep Ranch Builder also includes side systems such as Explore, Sheepdog, Lucky Spin, Shop, Rich List, Check-in, and Diamond Pack. These features can add variety, but the main value of the game comes from understanding the ranch economy: what improves output, what supports unlock progress, and what only distracts from the next visible requirement. For new players, the most important idea is this: do not treat every button as equal. A ranch-growth upgrade, a collection upgrade, and a side-menu feature can all look important, but they do not carry the same value at the same stage of the game. How to Play The ranch screen gives you several types of information: Ranch Level, resource counters, sheep areas, locked requirements, Upgrade buttons, Claim, Go, and side features. Instead of reading the interface as a list of buttons, read it as a set of economic signals. Key Attributes That Affect Progress Attribute · What It Means · Why It Matters Ranch Level · Your main progression marker. · Unlocks or gates new ranch areas and features. Sheep Quantity · The number or scale of sheep-related production. · Helps expand the visible ranch base and may support broader output. Sheep Value / Efficiency · The value, strength, or efficiency of sheep-related upgrades. · Often matters more when raw quantity stops giving fast progress. Collection Efficiency · How smoothly resources move into your usable balance. · Reduces downtime and keeps upgrades affordable. Unlock Progress · How close you are to the next ranch, area, or feature. · Helps decide which upgrade deserves priority. Support Systems · Features such as Explore or Sheepdog. · Useful only when they clearly help your current bottleneck. Sheep Quantity vs. Sheep Value / Efficiency When choosing upgrades, think in terms of quantity and value. In this guide, “value” or “efficiency” means any clearly shown upgrade that improves sheep value, production strength, collection efficiency, or Ranch Level progress. Sheep quantity helps when the ranch needs broader production or when a new area depends on expanding the visible ranch base. It is useful in the early game because quantity upgrades can make the ranch feel more active and productive. Sheep value or efficiency becomes more important when progress slows. If adding more sheep does not noticeably improve your upgrade pace, look for upgrades that improve value, efficiency, collection, or Ranch Level progress. These upgrades often do more for long-term growth than simply adding more of the same output. A good rule is: use quantity to build the ranch foundation, then use value and efficiency upgrades to push through slower progression points. How to Handle a Ranch Lv. 10 Unlock Requirement When the interface shows a requirement such as Ranch Lv. 10 to Unlock, treat it as a visible progress target. Your next upgrade choices should support that requirement instead of drifting into unrelated side systems. This does not mean there is always a special Lv. 10 bonus or hidden milestone reward. It simply means the game is telling you that Ranch Level progress matters for the next unlock. A good upgrade at this point is one that helps you move closer to the required Ranch Level, improves the ranch economy, or makes future upgrades easier to afford. If an upgrade does not help the current unlock requirement, it can usually wait. Using Go Use Go after a quick upgrade check. If a clearly useful upgrade is available, upgrade first; if not, use Go to continue the next action. Reading Explore and Sheepdog Explore and Sheepdog should be judged by their visible value in your current run. If one of them clearly improves resource flow, support efficiency, or progress toward a locked requirement, it can be worth attention. If the benefit is unclear, focus on Ranch Level and production upgrades first. Beginner Strategy Guide Use the priority rules below only when the related upgrade or benefit is clearly shown in the game interface. Upgrade Priority Tier List Tier · Upgrade Focus · When to Choose It · Why It Matters S · Ranch Level progress or main ranch growth · Choose this when the next ranch or feature is locked by level. · It moves the main progression path forward. A · Sheep value, production, or collection efficiency · Choose this when coins feel slow or upgrades become harder to afford. · It improves the ranch economy instead of only expanding the screen. B · Sheep quantity or visible ranch expansion · Choose this when the ranch still needs a stronger basic foundation. · It helps early growth and makes the ranch more productive. C · Explore or Sheepdog · Choose this when the game clearly shows how it helps your current bottleneck. · It can support progress, but only when the benefit is clear. D · Lucky Spin, Rich List, and unclear shop-side systems · Choose this after the main ranch path is stable. · These systems add variety but should not lead early spending. The best early upgrade is not always the most exciting button. It is the upgrade that moves the ranch closer to the next visible requirement. Lucky Spin Value Check Lucky Spin is best treated as a bonus system. It can be worth using when the game clearly gives a free or low-risk attempt, but it should not become the center of your upgrade plan. The problem with relying on Lucky Spin early is uncertainty. A spin result may not match your current bottleneck. If your ranch needs Ranch Level progress or better production, a random reward may not solve the problem. Use Lucky Spin when it is clearly low-risk. Do not spend important resources on it while a visible Ranch Level requirement is still blocking progress. Diamond Value Check Diamonds should be reserved for clearly shown long-term progression value. The safest diamond use is a clearly shown long-term benefit, such as an upgrade that visibly improves production, collection, or unlock progress. Before using diamonds, ask: Question · Better Decision Does the game clearly show the result? · Spend only when the outcome is clear. Is the benefit long-lasting? · Prefer upgrades with clearly shown ongoing value. Does it help the current Ranch Level or unlock bottleneck? · Use diamonds only when they support real progress. Is it tied to a temporary, unclear, or random system? · Save diamonds. Do not use diamonds for unclear shop actions, random draws, ranking pressure, or short-term curiosity. If the game does not clearly explain the benefit, keeping diamonds is the stronger beginner decision. Mid-Game Slowdown Fix When progress starts slowing down, avoid the common mistake of jumping into every side feature. Slowdown usually means one of three things: Problem · What It Looks Like · Better Response Level gate · The next ranch requires a higher Ranch Level. · Focus on Ranch Level progress and ranch-growth upgrades. Weak economy · Upgrades are visible but feel too expensive. · Improve sheep value, production, or collection efficiency. Unclear support value · Explore, Sheepdog, or Diamond Pack becomes available but does not clearly solve the issue. · Wait until the benefit is visible and relevant. The strongest mid-game habit is to identify whether the ranch needs more scale, more value, or better efficiency. Spending across every system at once usually slows progress. Sheep Quantity vs. Value / Efficiency Decision Rule Use this simple rule when choosing between upgrade types: Situation · Better Upgrade Direction Ranch still feels early and cheap to upgrade · Sheep quantity or basic ranch expansion. Coins are coming in too slowly · Production or collection efficiency. Next area is locked by Ranch Level · Ranch Level progress. More sheep no longer feels helpful · Sheep value or efficiency-style upgrades. A side feature has unclear benefit · Delay it and strengthen the ranch economy first. This gives the guide more practical value than simply saying “upgrade carefully.” The goal is to understand what type of upgrade solves the current problem. Common Mistakes 1. Treating all upgrades as equal Mistake: Spending on whichever Upgrade button appears first. Why it hurts: Some upgrades support progress requirements, while others only add side value. Better move: Choose upgrades based on the current problem: level gate, weak economy, low collection efficiency, or unlock requirement. 2. Adding sheep quantity when the real problem is value Mistake: Expanding the ranch visually while coin progress still feels slow. Why it hurts: More sheep does not always mean better progress if each upgrade adds too little value. Better move: Look for production, value, or collection-efficiency improvements when growth slows. 3. Spending diamonds on unclear benefits Mistake: Using diamonds on a shop, pack, or random system without understanding the result. Why it hurts: Diamonds are harder to replace than coins. Better move: Save diamonds for clearly shown long-term progression value. 4. Expecting Lucky Spin to solve progression Mistake: Treating spin rewards as the main strategy. Why it hurts: Random rewards may not match the ranch’s current bottleneck. Better move: Use Lucky Spin as a bonus, not as the foundation of your ranch economy. 5. Ignoring visible unlock requirements Mistake: Spending on side systems while a visible Ranch Level requirement is blocking the next ranch. Why it hurts: The main path does not move forward. Better move: Treat the visible requirement as your next upgrade target. 6. Opening too many support systems too early Mistake: Jumping between Explore, Sheepdog, Shop, Diamond Pack, and ranking features before the ranch economy is stable. Why it hurts: You lose track of which upgrade actually solves the current slowdown. Better move: Test support systems only after you understand their value in the current run. FAQ What kind of game is Sheep Ranch Builder? Sheep Ranch Builder is a casual sheep ranch management and idle farm upgrade game built around Ranch Level progress, ranch upgrades, resources, and new area unlocks. What should I upgrade first? Prioritize Ranch Level progress, ranch growth, production, or collection efficiency before spending on side systems. Is sheep quantity better than sheep value? Quantity helps early foundation building, while value and efficiency matter more when progress slows. When should I use diamonds? Use diamonds only for clearly shown long-term progression value. Is Lucky Spin worth using? Lucky Spin is worth using as a bonus when the cost is low or free, but it should not replace ranch upgrades. Should I upgrade Explore or Sheepdog early? Only if the game clearly shows that they help your current bottleneck. Otherwise, strengthen the ranch economy first. Editorial Note This guide is written for the game page of Sheep Ranch Builder and focuses on beginner-friendly ranch progression, upgrade choices, resource collection, and common mistakes. Coins, diamonds, spins, draws, rankings, packs, and shop items in this guide refer only to virtual in-game systems. They are not real-world money, financial rewards, gambling, farming advice, or agricultural business guidance. For page layout, keep ads clearly separated from the game iframe and from interactive game buttons such as Play, Claim, Go, Upgrade, Lucky Spin, Shop, and Diamond Pack. Ads should not look like game controls, download buttons, menu buttons, or navigation links.
- Monster Checkers
Monster Checkers About This Game Monster Checkers is a casual piece placement and board battle strategy game where the most important decisions happen before the fight begins. Instead of rushing into battle, you need to read the board, understand the enemy layout, and place your pieces in positions that can hold pressure, cover routes, and support each other. The core gameplay is simple to understand: place your character pieces, start the battle, watch how both sides collide, and adjust your formation if the result does not work. The depth comes from the map. A narrow choke point rewards tighter route control, while a wide open board requires broader coverage. A divided map may force you to protect two pressure zones at once. This Monster Checkers guide focuses on beginner placement logic: where to place early-contact pieces, how to protect support-style pieces, how to avoid leaving side routes open, and how to improve after losing a battle. Treat each level like a small tactical puzzle. The question is not “Which piece looks strongest?” but “Where does this piece help the formation most?” How to Play Do not place pieces immediately when a level begins. First, look at the whole board. The closest enemy is not always the biggest threat; a side group, a center cluster, or an open lane can become the real reason your formation fails. A practical beginner flow looks like this: 1. Scan the enemy layout. Look for enemy clusters, side groups, and routes that lead toward your pieces. 2. Find the first contact point. This is where your formation is most likely to meet pressure first. On narrow maps, it may be a tight route or choke point. On open maps, it may be the side with the largest enemy group. 3. Place your front anchor. Use a piece that appears better suited for early contact near the first contact point. 4. Protect your safer support position. Support-style or less durable pieces should usually stay slightly behind or diagonally behind the front anchor when the board allows it. 5. Check the side route. Before starting the battle, look for any lane that is completely uncovered. Even a small enemy group can punish an empty side. 6. Keep pieces close enough to help. Your key pieces should be close enough to support each other. If they are too far apart, they may fight as separate weak groups. 7. Start the battle and watch the first clash. The opening moments show whether your front anchor holds, whether support pieces are exposed, and whether enemies are slipping around the side. 8. Change one major thing after a loss. Do not rebuild everything at once. Move the front anchor, protect the support piece, cover the side route, or tighten spacing, then test again. Beginner Strategy Guide The best beginner habit in Monster Checkers is to place with intention. Every piece should have a job: hold the first contact point, support the early-contact piece, cover a side route, or prevent the formation from splitting. The Bottleneck Defense Use The Bottleneck Defense on narrow route maps, especially when the enemy must pass through a tight choke point. Place your front anchor close to the first contact point. Then place support-style pieces slightly behind it or to the side. This creates a simple layered formation: the front piece handles the first pressure, while the support pieces stay safer and contribute from a better position. Do not stack every piece directly on the choke point. If your entire formation is packed into one small area, you may lose flexibility and leave nearby routes uncovered. A better Bottleneck Defense holds the narrow path while keeping at least one piece ready to cover a side opening. The Checkerboard Spread Use The Checkerboard Spread on open maps where enemies can approach from more than one direction. Instead of putting every piece in one corner, spread your pieces across the important lanes while keeping them close enough to support each other. Think of the board like a loose checkerboard: not every space needs a piece, but the important spaces should not be empty. A strong open-map setup usually covers the main enemy direction first, then places one piece toward a side route. Keep your support pieces protected, but do not place them so far away that they stop helping the fight. The Split-Lane Balance Use The Split-Lane Balance on divided maps where enemies are separated into two groups or the board has two pressure zones. Start by deciding which side is more dangerous. The side with the larger enemy group or faster first contact should receive more attention. However, the weaker side should not be completely abandoned. One isolated piece usually cannot hold an entire route alone, so keep it close enough to reconnect with the main formation. If the same side keeps collapsing, do not simply add more pieces to the strongest area. Move one piece toward the broken lane and shorten the distance between groups. Simple Formation Examples These are starting templates, not fixed winning formations. Adjust them after each failed attempt instead of copying them exactly. Balanced Beginner Formation Place one front anchor near the main contact point, one support-style piece behind or diagonally behind it, and one piece watching the side route. This is the safest beginner setup when you are still learning the map. Route Control Formation Use this on narrow maps. Put your front anchor near the choke point, keep support slightly behind it, and avoid overcrowding the entrance. The goal is to slow the enemy at the route instead of letting pressure reach your safer support position too quickly. Wide Coverage Formation Use this on open maps. Cover the main enemy direction, then place one piece toward a side lane. Your pieces should be spread out enough to cover space, but still close enough to help each other. Specific Enemy Layout Examples Enemies grouped near the center lane: Place a front-position piece near the first contact point in the center, then keep support close behind it. Do not send every piece to the exact same small area; leave enough spacing to prevent side pressure. Enemies split into left and right groups: Send more strength toward the larger group, but keep at least one piece or coverage point near the smaller group. If you ignore one side completely, the formation can get pulled apart. A small enemy group appears on the side: Do not dismiss it just because it looks less dangerous. Side enemies often cause losses by reaching unprotected support pieces. Place one piece toward that lane or widen your main formation. One of your pieces falls first every attempt: That piece is probably too exposed. Move it slightly back, place it diagonally behind a front anchor, or shift the first contact point away from it. Beginner Formation Checklist Before you start the battle, check these points: • Did I find the main enemy cluster? • Did I identify the first contact point? • Is my front anchor placed near the correct route? • Are support pieces protected from immediate contact? • Is one side lane completely open? • Are my key pieces close enough to support each other? • Does every piece have a clear job? After-Battle Review Frontline melted immediately Likely problem: your front anchor was too isolated, placed too far from support, or not positioned at the real first contact point. Better adjustment: move support closer, or shift the front piece toward the route where pressure actually begins. Flanked by side-route enemies Likely problem: one side lane was left open. Better adjustment: move one piece toward the side route or widen your formation before starting again. Support piece died instantly Likely problem: it was placed in the first contact position. Better adjustment: move it behind or diagonally behind a front-position piece. Pieces fought separately and lost one by one Likely problem: your formation was spread too far apart. Better adjustment: reduce the gap between key pieces so they can support each other. Formation got crushed in one crowded spot Likely problem: too many pieces were stacked into the same area. Better adjustment: keep the main route covered, but spread one piece toward a nearby lane. Small side group caused the loss Likely problem: you only looked at the largest enemy cluster. Better adjustment: scan the whole board before placing the first piece and assign coverage to side pressure. Change one major issue at a time. If you move every piece after every loss, it becomes difficult to understand which adjustment actually improved the formation. Common Mistakes Placing pieces before reading the map: Rushing placement makes it easy to miss side pressure, choke points, or the real first contact area. Choosing only the strongest-looking pieces: A strong piece still needs the right role. Front anchors, support positions, side coverage, and spacing all matter. Stacking every piece in one corner: This can make your formation look powerful while leaving the rest of the board open. Using the same setup on every map: The Bottleneck Defense may work on narrow maps, but open maps often need The Checkerboard Spread or wider side coverage. Repeating the same failed setup: If the frontline melts, support dies, or side enemies flank you, something specific needs to change. Placing support pieces in the first contact position: Support-style or less durable pieces should usually stay behind or beside the front anchor, not directly in front. Leaving one side route completely open: Even a small side group can break your formation if it reaches a safer support position for free. Spreading pieces too far apart: Wide coverage helps, but isolated pieces often lose before the rest of the formation can assist. Depending too much on one character piece: Do not expect one piece to hold two lanes, protect support pieces, and handle the main enemy group alone. Ignoring small enemy groups on the side of the map: Side enemies are easy to overlook, but they often explain why a formation that looked strong still failed. FAQ What is Monster Checkers? Monster Checkers is a casual piece placement and board battle strategy game where players arrange character pieces before battle and try to defeat opposing pieces on the map. How do you play Monster Checkers? You scan the enemy layout, find the first contact point, place your pieces with a clear role, start the battle, and adjust your formation after failed attempts. Why do my support pieces die instantly at the start of the battle? They are probably too close to the first contact point. Move them slightly behind or diagonally behind a front-position piece. Why does my frontline collapse so quickly? Your front piece may be isolated or placed too far from support. Bring nearby pieces closer so the front line is not fighting alone. What should I do if enemies keep coming around the side? You are leaving a side route open. Move one piece toward that lane or use a wider formation before starting the battle. How should beginners place their pieces in Monster Checkers? Start with one front anchor near the first contact point, protect support pieces behind it, and keep one piece or coverage point ready for side pressure. Do different maps require different strategies? Yes. Narrow maps favor route control, open maps need wider spacing, and divided maps require balanced pressure between lanes. What should I change after losing a battle? Change the first visible failure. If support dies, move it back. If the side lane breaks, widen coverage. If pieces fight alone, tighten the formation. Editorial Note This guide focuses on beginner placement logic for Monster Checkers, including board reading, first contact points, formation spacing, side-route coverage, and after-battle adjustment. Formation names such as Bottleneck Defense, Checkerboard Spread, and Split-Lane Balance are guide labels used to explain placement ideas, not confirmed official in-game terms. This guide does not present unconfirmed character stats, fixed skills, upgrade systems, reward rules, or full level data as facts. Pieces, characters, maps, battles, and rewards are discussed as virtual Monster Checkers game mechanics.
- Zuma Adventure
Zuma Adventure About This Game Zuma Adventure is a marble-shooting color puzzle built around aiming, matching, and pressure control. A moving line of colored marbles travels along a track toward the exit, and your goal is to clear the line before it reaches the end. The main challenge is not only hitting the right color. Good play depends on track pressure, color priority, shot timing, and combo planning. A small clear near the danger zone can be more useful than a large match far away, especially when the foremost group is already close to the exit. As levels become more difficult, players may need to respond to tighter paths, faster movement, denser color mixes, or special elements when they appear. The best approach is to keep the track organized, avoid random shots, and choose clears that give you more space to work with. How to Play Start each level by reading the track. Look at where the marbles enter, where they are moving, and where the exit is. This helps you decide which section is safe and which section needs immediate attention. Basic play flow: 1. Read the track direction and identify where the marble line is moving. 2. Check the launcher color before choosing a target. 3. Aim at a matching color group already on the track. 4. Connect three or more same-colored marbles to clear them. 5. Watch for pull-back clears when separated same-color groups connect after a match. 6. Protect the danger zone whenever the foremost group gets close to the exit. If the marble line reaches the exit, the level fails. If you clear the current line before that happens, the level is completed. Specific buttons, special effects, or booster behavior may vary by version or level, so focus first on clean matching, safe placement, and defensive decision-making. Beginner Strategy Guide The best beginner strategy in Zuma Adventure is to treat every shot as a board-management decision. A shot should either clear marbles, reduce danger, prepare a combo, or keep the track easier to manage. If a shot does none of those things, it may create more trouble than value. Shot Priority Order Use this order when you are not sure where to shoot: 1. Clear marbles near the exit if the line is close to failing. 2. Make a direct three-color match when it helps immediately. 3. Set up a combo only when the critical area is still safe. 4. Place an unmatched marble beside the same color when a direct match is not available. 5. Avoid narrow mixed sections unless the shot clearly improves the position. This priority system helps new players avoid random shooting. A clean small match in the danger zone is often better than a larger match far from the exit. When the Foremost Group Is Close to the Exit If the foremost group is near the finish point, stop chasing stylish clears in the back of the track. Focus on stabilizing the critical area first. Good emergency shots usually do one of these things: • Remove marbles from the front section. • Pull the line backward after a clear. • Open space before the final bend. • Connect a quick combo only if it helps the danger zone. Do not spend several shots building a long setup while the line is already close to failure. In pressure moments, survival comes before score. When the Launcher Color Does Not Match Sometimes the loaded marble will not give you a direct match. The worst response is to fire it into a tight mixed section just to get rid of it. A better approach is: • Place the marble beside the same color if that color is available. • Put it in a low-pressure section if no useful match exists. • Avoid splitting two colors that are close to forming a match. • Use the shot to prepare the next color instead of forcing a weak clear. A color that cannot clear immediately can still be useful if it keeps the track organized. How to Create Better Combos The strongest clears often happen when two same-color groups are separated by one or two marbles of another color. If you clear the blocker between them, the two matching groups may pull together and disappear as a follow-up clear. Example: • A red group is on one side. • Another red group is nearby. • A small blue group sits between them. • Clear the blue group first. • The red groups connect and may trigger another clear. This is the basic logic behind chain-clearing. It works best when the danger zone is under control and you have enough time to set up the middle clear. Safe Shot vs Risky Shot Shot Type · Better Choice Safe shot · Completes a match or reduces pressure near the exit Setup shot · Prepares a combo while the critical area is still safe Risky shot · Adds a random color into a tight mixed section Emergency shot · Clears the foremost group before it reaches the end If a shot does not clear, prepare, or protect, it is probably risky. Special Effects and Booster Timing When a level provides special effects, use them to solve real pressure instead of spending them immediately. A useful effect should either reduce danger near the front, slow down a difficult section, clear a crowded area, open a blocked color group, or help you aim at a narrow gap. Do not waste special effects when the board is already safe. Their best value comes from fixing danger, opening blocked colors, or turning a crowded section into a manageable one. Dealing with Complex Track Layouts If a level includes a more complex path, do not treat every visible marble as equally important. Always prioritize the route or section closest to the exit, because that is where failure is most likely to happen. When part of the line becomes harder to read, focus on the color order you can still see and prepare safer clears near the danger zone. If the track bends sharply or overlaps visually, avoid risky shots into crowded areas unless you are sure the marble will complete a match or reduce pressure. For confusing layouts, divide your attention in a simple order: first check the critical area, then look for direct matches, then consider combo setups. This keeps your decisions stable even when the track becomes harder to read. Strategy for Fast or Confusing Levels When the line moves faster or the colors become more mixed, simplify your decisions: • Clear the critical area first. • Avoid long setup shots unless the track is stable. • Keep colors grouped instead of scattering them. • Use special effects only when they solve an immediate problem. • Watch the next shot if the game shows it, but do not ignore current danger. Fast levels punish messy shooting. Clean, defensive clears usually work better than risky combo attempts. Common Mistakes Only looking at the nearest marbles The closest target is not always the best target. Check the danger zone often, especially when the track bends near the exit. Chasing big matches in the wrong area A large match far from danger may look useful, but it does not help if the foremost group is about to reach the end. Shooting unmatched colors into narrow gaps This can split useful color groups and make future clears harder. If the current color does not match, place it where it causes the least damage. Ignoring separated same-color groups Two groups of the same color with a small blocker between them are often a combo opportunity. Clear the blocker first when the critical area is safe. Using special effects too early Special effects are most valuable when they fix a real problem. Save them for crowded sections, fast movement, blocked colors, or dangerous pressure near the exit. Playing too fast after one successful clear A clear can change the whole track. Pause briefly after each important match and check whether the line pulled together, opened a combo, or created a new danger area. Trying to force combos under pressure Combos are useful, but not when the line is close to the end. In emergency situations, take the safe clear first. Ignoring difficult track shapes Sharp turns, tight paths, or visually crowded sections can hide the real danger. When the layout becomes harder to read, return to the basics: protect the exit, make clean matches, and avoid clutter. FAQ How do you play Zuma Adventure? Aim the launcher at matching colors on the moving track. Connect three or more marbles of the same color to clear them before the line reaches the end. What should beginners focus on first? Beginners should focus on the danger zone, clean three-color matches, and avoiding random shots that make the track harder to manage. What should I do when the launcher color does not match? Place the marble beside the same color if possible. If there is no useful match, put it in a low-pressure area and prepare for the next shot. How do you create chain reactions in Zuma Adventure? Look for two same-color groups separated by a small group of another color. Clear the middle group so the matching sides can pull together and possibly clear again. What is the best strategy for fast-moving levels? Play defensively. Clear the foremost group first, avoid risky setup shots, and use special effects only when they reduce immediate pressure. When should boosters or special effects be used? Use them when the line is close to the end, when colors are badly mixed, or when one effect can open several useful matches. Do not waste them while the board is already under control. How can I improve my level results? Focus on cleaner matches, faster recovery after each clear, and well-timed combos. Completing the stage safely should come before risky high-score attempts. Are boosters, scores, or level results real prizes? No. Boosters, scores, effects, and level progress in Zuma Adventure are virtual in-game elements only. Editorial Note This guide focuses on gameplay explanation and beginner strategy for Zuma Adventure. It describes marble launching, color matching, track pressure, combo planning, and defensive decision-making based on the game-style mechanics discussed on this page. Any scores, boosters, effects, rewards, or level progress mentioned in this guide refer only to virtual in-game elements. This article does not claim an official relationship with any other brand, developer, publisher, or franchise.
- Monster Elimination
Monster Elimination Platform: Mobile / Web Genre: Hex-Puzzle / Block Placement Core Mechanic: Place blocks to deal damage to the monster About This Game Monster Elimination is a casual monster-themed block placement and elimination puzzle game. It plays more like a board-space puzzle than a classic swap-based match-3 game: you choose from block batches at the bottom, drag them onto a hex-style board, create eliminations, and use those clears to attack the monster above the board. The early game layout makes the core loop easy to read. A monster stands above the puzzle board with a health bar, while the player works with three block batches, a Bomb tool, a Change Batch option, a Skin button, a coin counter, and a score-related Double Score button. The tutorial direction is simple: drag blocks onto the board, trigger eliminations, and attack the monster. The real challenge is space control. A piece that fits is not always the right piece to place. A strong move should do at least one of four things: create a clear, protect future space, repair an awkward gap, or help finish the monster. If you fill the center too quickly or leave too many isolated cells, the board can become difficult even when the monster is close to defeat. Feature · Beginner Reading Genre · Casual block placement elimination puzzle Board style · Hex-based block board Core goal · Clear blocks to damage the monster Main risk · Running out of usable board space Board tools · Bomb, Change Batch Other interface options · Skin, coin counter, Double Score Best habit · Protect open space before chasing every clear How to Play Start each round by checking three things: the monster health bar, the open board space, and the three block batches available at the bottom. In the early level screen shown here, the monster health bar makes the goal clear: every useful elimination should move you closer to defeating the monster. To make a move, drag one of the available block batches onto the hex board. Because the board is made of connected hex cells, the shape of each batch matters. A piece may fit near the edge but still leave behind a tiny gap that is hard to use later. A piece may fit in the center but become a bad move if it blocks the most flexible part of the board without creating a clear. After placement, the game can trigger eliminations. Those clears attack the monster and open board space. The best move is not always the largest-looking placement. The best move is the one that keeps the next move playable. A practical beginner priority order is: 1. Keep enough open space to continue placing blocks. 2. Protect the center and lower board. 3. Place awkward shapes before the board becomes crowded. 4. Create clears that open future placement space. 5. Use tools only when they solve a real board problem. The Bomb is best saved for serious board trouble: a blocked center, a dead corner, a crowded lower board, or a final clear that helps finish the monster. Check the in-game effect area before using it so you know what space it will actually remove. Change Batch is useful when the current three pieces do not match the board shape. If the board is still open and at least one piece fits safely, continue building normally. If every available batch makes the board worse, changing the batch can be the safer decision. Use the Double Score button when your board is stable and you are ready to trigger multiple eliminations in a row to maximize your points. Beginner Strategy Guide A practical way to start a round is to check where the largest open area is. If the center is still open, do not fill it with an easy piece unless that move creates a clear or prepares a strong follow-up. The center is usually the most flexible space because more block shapes can fit there. If the center is almost blocked, avoid closing the last useful lane just for a small clear. A small clear is good only when it improves the board. If it creates single-cell holes or breaks connected space, it may make the next placement harder. If an edge or corner develops an isolated empty cell, repair it with a small or narrow batch when possible. Do not waste a large batch on a cramped edge unless it also creates a clear. Large batches need clean open space, so they should be placed before the board becomes too tight. Think of every move as either a space-saving move or a space-wasting move. A space-saving clear opens the board, connects empty areas, removes a blockage, or gives the next batch more room. A space-wasting placement may look useful for the moment but leaves the board harder to manage. When the monster health bar is nearly finished, your priority changes. At that point, an immediate clear can be better than a long setup. If one placement can trigger an elimination and finish the monster, take the clear instead of trying to build a perfect board. Large batches usually belong in clean open space. Small batches are better for repairing edges, filling narrow areas, or setting up precise clears. If you spend all the small pieces randomly, you may have no way to fix awkward gaps later. Tool timing is one of the most important beginner skills in Monster Elimination. Use Bomb when it opens the center, removes a dead zone, or saves a nearly full board. Use Change Batch when the available pieces no longer match the board shape. Do not spend tools early just because they are available. After losing a round, review the board instead of only blaming the final move. Ask yourself: Did I fill the center too early? Did I leave too many single-cell gaps? Did I choose a short-term clear that damaged future space? Did I use Bomb before the board was truly in danger? Did I ignore the monster health bar when the level was close to ending? Common Mistakes • Dragging the first piece that fits: A piece can fit the board and still be weak. Place blocks where they protect future space or create useful clears. • Filling the center too early: The center is the most flexible area. Blocking it with easy pieces can make awkward batches difficult to place later. • Leaving too many single-cell gaps: Isolated holes are hard to use. Keep open cells connected so future batches have more room. • Using Bomb too early: Bomb is most useful when it solves a real space problem. Early use on a minor issue can leave you without a rescue option later. • Chasing score before stability: Score-related features work better when the board is under control. If the board is nearly full, space management comes first. FAQ How many levels are there in Monster Elimination? Monster Elimination uses level-based progression, starting with LV.1 in the early game interface. A fixed total level count is not confirmed, so focus on the current board, monster health bar, and available tools. Does Monster Elimination require WiFi? Offline availability may depend on the version and platform. Features that require online loading may not work without an internet connection. Are tools necessary to win? Tools can help when the board becomes crowded, but the core skill is still board reading, space control, and choosing the right placement order. Bomb and Change Batch are support tools, not replacements for good planning. What should I do when the board is almost full? Stop chasing score and look for space recovery. Try to open the center, repair dead corners, or create any clear that gives you more connected space. If none of the current batches fit well, Change Batch becomes more useful. Should I clear small groups or wait for a bigger clear? Take the clear that improves the board. A small clear is worth using if it opens space, attacks the monster, or sets up the next batch. Waiting for a bigger clear is risky when the board is already crowded. Where should beginners place large block batches? Place large batches in clean open areas before the board becomes tight. Avoid forcing them into narrow corners unless the placement creates a clear. Save flexible center space for awkward shapes whenever possible. Editorial Note This page is an independent gameplay guide and is not an official game manual. It is based on visible gameplay interface details and practical beginner board-reading observations. It does not claim hidden formulas, fixed reward values, official level counts, or guaranteed outcomes. Coins, tools, skins, and score features are described only as virtual in-game mechanics.
- A Master Pin
A Master Pin Category: Logic Puzzle | Format: HTML5 Game Page | Style: Pull-the-Pin Puzzle About This Game A Master Pin is a casual pull-the-pin logic puzzle game where the challenge is to read the route, keep key pins closed, and release the target object only when the path is ready. Core gameplay highlights: • Order-based pin puzzles: Pulling the right pin at the right time is the main challenge. • Route planning: The safest solution usually starts by checking the goal area, not the closest pin. • Casual brain-puzzle pacing: A Master Pin rewards careful observation, simple logic, and clean decision-making. Each level is built around pins, objects, blockers, and a target area. A rushed move can send the object into the wrong chamber, while a planned move can open the route step by step. The key is to understand what each pin controls before removing it. How to Play Look First | Plan the Route | Pull the Right Pin Start by checking where the target object needs to go. Then look at the pins and decide which ones open the route, which ones hold the object back, and which ones may cause trouble if pulled too early. A strong beginner flow is: 1. Check the goal area. 2. Identify what each pin controls. 3. Keep safety pins closed until the route is ready. 4. Pull route-opening pins before release pins when needed. For example, if the target object is held above a closed lower chamber, do not release it first. Open the route near the target area or remove the blocker that would stop progress. If the object can drop straight down but the target area is behind a side opening, check the side pin before releasing the object. A visible target does not always mean the route is safe. Before pulling the release pin, make sure the object will move toward the goal instead of falling into a dead-end chamber. Beginner Strategy Guide A practical beginner approach is simple: solve the level backward. Instead of asking “Which pin can I pull now?”, ask “What needs to happen before the object can reach the goal?” Use this three-step method: 1. Find the target area. Identify the final destination before making the first move. 2. Trace the safe route backward. Follow the path from the target area back to the starting object. Look for blockers, wrong exits, divided chambers, and risky paths. 3. Choose which pins open the route and which pins should stay closed temporarily. Open the path before releasing the object. Keep safety gates closed until they are no longer needed. Pin Role · What It Does · Beginner Decision Route opener · Opens the path toward the goal · Pull it when the object needs a clear route Safety gate · Holds an object back until the route is safe · Keep it closed until the path is prepared Release pin · Starts object movement · Pull it only after checking the next chamber Wrong early pull · Causes falling, blocking, mixing, or a failed route · Avoid pulling it just because it is visible If two pins control the same lower route, open the blocker near the target first before releasing the object from above. This prevents the object from reaching the right direction but stopping one step short of the goal. When the target area is below the object, check the chamber closest to the goal before starting movement. When the target area is on the side, focus on whether the entrance is open and reachable. The target position should guide the first move. If the object reaches the wrong chamber, the mistake usually happened before the object started moving. Check whether a route-opening pin should have been pulled before the release pin. Do not treat every visible pin as urgent. A pin can be useful because it stays closed, not because it gets pulled. Many beginner mistakes happen when a safety gate is opened before the route is prepared. Your first goal should be stable completion, not the fastest possible clear. Once you can read the route consistently, faster and cleaner solutions become easier. Common Mistakes Pulling the release pin before checking the next chamber: The closest pin often feels like the first move, but it can be the wrong move. Check where the object will land before releasing it. Opening a path that looks clear but leads into a separated section: A route can look open while still sending the object away from the target. Always check whether the chamber connects to the final goal. Removing a safety gate too early: Some pins are meant to hold the object in place. Pulling them too soon can make the object fall before the route is ready. Ignoring the target position: A bottom target, side target, and divided chamber require different planning. The target position should decide your first move. Repeating the same failed order: If the same sequence failed once, repeating it usually gives the same result. Change the pin that caused the object to fall, block, or miss the target. FAQ What is A Master Pin? A Master Pin is a casual pull-the-pin logic puzzle game where players solve levels by removing pins in the right order and guiding objects toward the correct target area. How do you play A Master Pin? Check the goal area, study what each pin controls, open the safe route, and release the target object only when the path is ready. How do beginners choose which pin to pull first? Start from the target area and trace the route backward. The first pin should help prepare the route, not simply start movement. What happens if you pull pins in the wrong order? The object can fall into the wrong chamber, become blocked, miss the target, or make the route impossible to complete. How can I avoid getting stuck? Slow down before the first move. Separate route-opening pins from safety gates, check the next chamber before releasing the object, and change your sequence after each failed attempt. Are in-game items real prizes? No. If A Master Pin includes optional in-game items, they are virtual gameplay features only and should not be understood as real-world prizes or cash rewards. Editorial Note This guide is based on visible gameplay behavior, on-screen puzzle layout, and beginner-level route-planning logic. It does not claim hidden formulas, guaranteed solutions for every level, or real-world reward value.
- Battle Monster Island
Battle Monster Island About This Game Battle Monster Island is a casual side-scrolling monster shooter and action adventure game built around stage movement, shooting timing, upgrades, and character growth. At first, the game can look like a title where holding the fire button is enough. Once a narrow platform, a flying butterfly-type monster, a seven-spotted ladybug monster, and a risky coin path appear together, the real lesson becomes clear: positioning matters just as much as firepower. The player controls a character through horizontal monster island stages, clears monster enemies, avoids obstacles, collects coins and items, and prepares for tougher stage pressure. Different themed chapters, including holy coast-style chapter areas, can change the rhythm by adding tighter platform space, denser monster placement, riskier pickup locations, and Boss pressure that forces more movement. The Arms button in the lower-left area opens the weapon upgrade area. In the Arms system, labels such as straight-fire or cutter-style options can represent different in-game firepower paths. A stronger weapon setup can help clear enemies faster, but it still works best when paired with good movement and safe positioning. Battle Monster Island also includes Reform and Research systems. Reform and Research are character growth areas that support survivability, including attributes such as health and defense. If Arms helps you remove threats faster, Reform and Research help you stay alive long enough to handle longer stages, crowded enemy patterns, and Boss encounters. How to Play When a stage begins, do not rush forward immediately. First, read the screen: where enemies are placed, where obstacles move, where coins and items appear, and where your safest landing spots are. In this title, many early failures come from moving into danger before understanding the layout. Mastering the joystick is your first step to survival. Use it to control distance, stop before hazards, retreat when enemies get too close, and create space before attacking. The right-side buttons are generally used for shooting and jumping, so the basic rhythm is simple: move into position, attack briefly, dodge or jump when needed, then reposition. Do not fire while drifting blindly into obstacles. If a monster is standing near a narrow platform or a hazard is directly ahead, settle your character first. A short controlled burst from a safe spot is usually better than jumping forward while shooting and landing with no escape route. For a more specific example, if a venom monster appears near a flame trap, do not run straight toward the coin path. Wait for the trap rhythm, move or jump to a safer platform, then attack the venom monster from a position where you can still retreat. Once the danger is cleared, collect the nearby coins or items if the route is stable. Jumping should always have a purpose. Jump when you can see the landing spot, when you need to cross an obstacle, when an enemy attack forces you to reposition, or when you need to reset your spacing. Avoid jumping inside enemy pressure without knowing where your character will land. Coins and items are useful, but they should not control the whole run. Use this collection order: 1. Clear or avoid the enemy blocking your route. 2. Watch the obstacle timing. 3. Confirm the landing space. 4. Collect coins and items only if the path remains safe. The Arms system is worth upgrading when enemies take too long to clear or when normal stages start dragging on. If your front-fire setup clears straight-line enemies well but struggles when flying monsters pressure you, focus on positioning before assuming another weapon upgrade will solve the stage. If cutter-style firepower appears more useful in close or crowded situations, treat it as a tool for specific pressure rather than a universal answer. Reform and Research become more important when your main problem is survival. If you keep losing health before reaching the later part of a stage, or if a holy coast-style Boss section pressures you before you can learn the pattern, invest in survivability before chasing faster clears. In Boss stages, watch the attack pattern before committing to damage. If the Boss creates a short quiet moment after an attack pattern, use that window for shooting instead of attacking during the dangerous part. The basic Boss rhythm is: observe the pattern, dodge first, attack briefly, then move again before the next pressure arrives. Beginner Strategy Guide Before starting a stage, check five things: enemy position, obstacle timing, safe platforms, coin or item risk, and whether your current upgrades match the problem you are facing. If you failed the same stage several times, do not retry with the same habits. Change one thing: movement, upgrade focus, or collection route. Early Game Upgrade Priority · When to Focus on It · Reason Arms · Monsters take too long to clear · Better firepower can reduce pressure in regular stages. Straight-fire weapon path · You need steady forward fire · Useful when enemies approach from the front or block the route. cutter-style weapon path · Enemies crowd your space · Better for close pressure if the stage gives you less room to stand safely. Reform · You lose health too quickly · Extra survivability gives beginners more time to react. Research · Boss or later-stage pressure ends runs early · Health and defense growth can help you survive long enough to learn patterns. Movement practice · You keep missing jumps or landing in danger · Upgrades cannot fix poor landing choices. Safer collection habits · Coins and items bait you into damage · Finish the route first; collect only when the stage is stable. A practical beginner rule is to diagnose the failure before upgrading. If enemies stay on screen too long, improve Arms. If you are defeated before understanding the pattern, improve Reform or Research. If you fall into hazards or jump into enemy pressure, practice movement before relying on upgrades. When facing a flying butterfly-type monster, avoid chasing it across unsafe platforms. Hold a stable position, fire when it enters your attack line, and move only after checking the next landing spot. When facing a seven-spotted ladybug monster on a narrow path, do not jump forward for coins first. Clear the monster or wait for a safer opening, then move through the platform. If a venom monster appears near a hazard, treat the hazard as the first problem. The monster may be the visible threat, but the trap or obstacle controls your movement. Move to a safer angle, wait for the obstacle rhythm, then attack when you have room to retreat. Boss stages should not be played like normal monster waves. In regular stages, you may be able to clear enemies while moving forward. In Boss stages, the safer pattern is slower: watch the attack, dodge, use the quiet moment for damage, and move again. Do not stand in one position just because your weapon feels strong. If you reach a holy coast-style chapter area or another tighter section, expect the stage to punish greedy movement. Coins may sit closer to danger, enemies may appear in denser groups, and Boss pressure may force more repositioning. When the platform space becomes smaller, your escape route matters more than one extra pickup. For repeated failures, use this troubleshooting table: Failure Pattern · Likely Problem · Better Fix You keep losing health · Standing still too long or jumping too late · Create distance, attack briefly, then reposition. You cannot clear enemies fast enough · Arms may be underdeveloped · Improve weapon firepower, then test the stage again. You lose in Boss stages · Attacking during dangerous patterns · Wait for the quiet moment after a Boss attack. You miss jumps often · Jumping without a visible landing spot · Pause, check the platform, then jump with a clear target. You collect coins but fail the stage · Pickups are pulling you into danger · Clear the route first; collect only safe items. You fail after entering a new chapter · The old tactic no longer fits the layout · Adjust for tighter platforms, denser enemies, and riskier item placement. The strongest beginner habit is controlled rhythm: move, stabilize, shoot, dodge, and reset. When that rhythm feels natural, Arms upgrades, Reform growth, and Research improvements become much more effective. Common Mistakes Common Mistake · What Goes Wrong · Better Approach Standing still while shooting · Enemies and obstacles can trap your character from both sides. · Fire in short bursts, then move before pressure closes in. Upgrading only Arms · More firepower may not help if you lose health too quickly. · Add Reform or Research when survival is the main issue. Chasing every coin or item · Risky pickups can pull you into enemy attacks or bad jumps. · Clear enemies first, then collect only what fits the safe route. Fighting near hazards · A trap or obstacle can block your escape while enemies advance. · Move to a safer platform before attacking. Jumping without a landing plan · Early or late jumps can place your character inside danger. · Jump only when the landing space is visible and useful. Ignoring Boss quiet moments · You waste damage chances or attack during unsafe patterns. · Dodge first, then use the short opening after the pattern. Treating every weapon the same · Straight-fire and cutter-style options may feel useful in different situations. · Match the weapon path to the stage pressure you are facing. Using one tactic in every chapter · Later areas may add tighter platforms, denser monsters, or riskier pickups. · Change your movement and upgrade focus as the stage design changes. Panicking during crowded sections · Random shooting and jumping can make the screen harder to control. · Step back, clear the closest threat, then continue forward. FAQ Should beginners upgrade Arms first or Reform first? Upgrade Arms if enemies take too long to clear. Upgrade Reform or Research if you lose health too quickly or cannot survive long enough to learn the stage. What should I upgrade after losing the same stage several times? If enemies stay on screen too long, improve Arms. If your health drops too fast, improve Reform or Research. If you keep missing jumps, practice movement before spending upgrades as the main solution. Why do I keep losing in Boss stages? You are probably attacking during dangerous patterns or standing still too long. Watch the Boss rhythm, dodge first, attack during the short quiet moment, then reposition. Should I collect every coin and item? No. Collect coins and items only when the route is safe. A risky pickup near a trap, enemy, or narrow platform can ruin a run. What should I do when enemies and obstacles appear together? Handle the obstacle rhythm first. For example, if a venom monster is near a flame trap, wait for the trap timing, move to a safer platform, then attack the monster from a position where you can still retreat. Is it better to keep shooting or keep moving? Keep moving. Shooting is important, but staying in one place makes your character easier to pressure. A better rhythm is move, stabilize, shoot briefly, dodge, and reset. What does the Arms button do? The Arms button opens the weapon upgrade area. Labels such as straight-fire or cutter-style options may appear as in-game weapon paths, depending on what your version shows. Are coins, items, weapons, and upgrades real rewards? No. Coins, items, weapons, and upgrades are virtual game systems only. They are not cash rewards, gambling prizes, real weapon guidance, or real-world benefits.
- Synthetic Cat
Synthetic Cat About This Game Synthetic Cat is a casual stacked match-3 and card slot puzzle game. You click visible cards, send them into the bottom slot, and clear them by collecting three identical cards. The main risk is the 7-card slot. If the slot fills with too many unmatched patterns, the board can quickly become difficult to recover. Revocation, Luck, and Shuffle are support tools that help with mistakes, pressure, or unclear layouts, but they do not guarantee success. The game is mainly about reading the board before clicking. Strong play comes from choosing the right pattern order, keeping the slot clean, opening useful cards, and saving tools for moments when they solve a real problem. Editorial note: All cats, icons, tools, rewards, and patterns mentioned in this guide refer only to in-game puzzle elements. This guide is based on the visible card-slot rules, tool labels, and beginner decision patterns shown during gameplay. Tool costs, button labels, or reward prompts may change if the game is updated. How to Play When a level begins, scan the visible cards before making your first move. Look for patterns that already appear more than once, such as cats, tennis balls, cat paws, or chicken legs. Clicking a card moves it into the bottom slot. When the slot contains three cards with the same pattern, those three cards clear automatically. For example, if the slot already has two cat cards and a third cat card is visible, clicking the cat is usually the safest move because it clears space immediately. The bottom slot can hold up to seven cards. If the slot reaches seven cards and no useful match can be made, the challenge fails. This makes slot control the most important part of the game. You are not just matching cards; you are protecting limited space. Tool · Cost · Best Use Revocation · 10 tools · Undo the previous move after a misclick or wrong card choice Luck · 20 tools · Move out three cards when the slot is close to full but still recoverable Shuffle · 20 tools · Rearrange the current elements when no clear route is visible Use Revocation only when the last move caused a clear problem. Use Luck when the slot is under real pressure, not just slightly crowded. Use Shuffle when the visible layout is too blocked or confusing to plan a safe route. Beginner Strategy Guide The best beginner strategy in Synthetic Cat is to follow a simple priority order: 1. Complete an immediate three-card clear whenever possible. 2. Build a two-card setup only when the third card looks reachable. 3. Avoid adding a fourth or fifth pattern type into the slot. 4. Save Revocation, Luck, and Shuffle for mistakes, heavy slot pressure, or layouts with no clear route. Do not click just because a card is available. In a card slot puzzle, every card you add takes space. Before clicking, ask whether the move clears a set, builds a useful pair, or opens access to better cards. Layer analysis is also important. In stacked match-3 gameplay, some cards may sit above deeper groups. If a card opens access to several blocked cards, it may be more valuable than a card sitting alone at the edge. Try to uncover dense middle areas when they lead to useful patterns, but do not overload the slot while doing it. Edge cards can become a visual trap. A single exposed edge card may look easy to take, but if it does not match anything in the slot, it may only add pressure. In many stacked puzzles, shallow edge cards are better saved for emergencies, while deeper central stacks can reveal more options. Core rule: Clear useful matches first, open deeper layers carefully, and save single unmatched cards for when they actually support your next move. Slot State · Risk Level · Best Decision 0–3 cards · Low · Build useful pairs and reveal safe cards 4–5 cards · Medium · Keep only two or three active pattern types 6 cards · High · Only click a card that clears or directly prepares a clear 7 cards · Failure risk · Use tools only if they solve the immediate blockage Example Move Sequence Example situation: • Slot: Cat x2, Tennis Ball x1, Paw x1 • Visible cards: Cat, Chicken Leg, Tennis Ball • Best move: Click Cat first • Reason: Cat completes a three-card clear immediately, reduces slot pressure, and leaves more room for the next setup. • Avoid: Clicking Chicken Leg first, because it adds a new pattern and makes the slot harder to control. This example shows the basic logic of the game. The safest move is usually the one that clears space now or prepares a clear with low risk. Adding a new pattern should only happen when it helps your next match plan. Example: When the Slot Has Six Cards Example situation: • Slot: Cat x1, Tennis Ball x2, Paw x1, Chicken Leg x1, Fish x1 • Visible cards: Chicken Leg, Cat, Tennis Ball • Best move: Click Tennis Ball if it completes a three-card clear. • Avoid: Clicking a new pattern that does not match anything in the slot. • Reason: At six cards, one unrelated click can fill the slot and end the attempt. This is the key decision point before a full-slot failure. When the slot has six cards, your next click should either clear three cards immediately or directly prepare a clear that you can finish safely. If the move only adds another unmatched icon, it is usually too risky. Common Mistakes Mistake: Clicking without scanning the board. Fix: Pause for a moment and look for repeated patterns before choosing your first card. Mistake: Adding too many different patterns. Fix: Stop adding new icons and focus on completing one existing pair. Mistake: Ignoring an immediate three-card clear. Fix: If two matching cards are already in the slot and the third is visible, clear that set before starting another pattern. Mistake: Taking edge cards just because they are easy to click. Fix: Check whether the edge card helps your current slot. If it does not match anything, it may be safer to leave it. Mistake: Digging into deep layers without slot space. Fix: Clear at least one set before opening more stacked cards, especially when the slot already has four or more cards. Mistake: Clicking an unmatched card when the slot has six cards. Fix: At six cards, only click if the move clears a set or directly prepares a clear. Mistake: Using Luck or Shuffle too early. Fix: Try normal matching first when the board still has a clear route. Save tools for real pressure. Mistake: Forgetting that Revocation only fixes the previous move. Fix: Use it immediately after a bad click. Do not wait until several more moves have made the slot worse. Mistake: Treating tools as guaranteed clears. Fix: Use Revocation, Luck, and Shuffle as support tools, not as replacements for careful slot management. FAQ What is Synthetic Cat? Synthetic Cat is a casual stacked match-3 and card slot puzzle game. Players click visible cards, move them into a bottom slot, and clear cards by matching three identical patterns. How do you play Synthetic Cat? Scan the visible cards, click in a planned order, and create three-card matches while protecting the 7-card slot. The safest moves are the ones that clear space or prepare a clear without adding too many new patterns. What happens when the card slot reaches 7 cards? If the slot reaches seven cards and no useful clear is available, the challenge fails. This is why slot management matters more than fast clicking. Why does Synthetic Cat suddenly feel harder? Later boards may feel harder because stacked layouts can hide useful cards under other patterns. When that happens, shift from fast matching to layer analysis and focus on opening deeper groups without filling the slot. Are reward prompts required in Synthetic Cat? If your version shows reward prompts, treat them as optional support. They may offer extra tools or recovery options, but they are not required for understanding the core puzzle. Careful slot management is still the main strategy.
- Jigsaw puzzle
Jigsaw Puzzle About This Game Jigsaw Puzzle is a casual shape-fitting puzzle game where you use triangle-based blocks to fill a blank outline. Instead of matching picture fragments like a traditional photo jigsaw, the challenge is about focusing on corners, edges, and how each piece changes the remaining space. Each level gives you a fixed set of pieces below the outline. Your task is to drag them into the empty shape until the entire area is filled. A strong placement should align with the outline border, avoid overlap, and avoid leaving a single-triangle gap that no remaining piece can cover. The game is simple to start, but it rewards careful planning. If you place pieces too quickly, the remaining space may become awkward or impossible to finish. The best approach is to study the outline first, identify the most restrictive areas, and build the solution step by step. How to Play 1. Look at the full outline before placing any piece. 2. Check the outline corners and long edges before moving the first piece. 3. Drag a triangle-based piece from the bottom area into the outline. 4. Place each piece so it stays inside the border and does not overlap other pieces. 5. Continue placing pieces until the full outline is filled. 6. Use every available piece to complete the level. 7. If your layout no longer works, use Reset to clear the board and try a better arrangement. 8. If you are stuck, Tips can help, but it costs 100 in-game diamonds. Diamonds are virtual game resources shown inside the game. Beginner Strategy Guide Start With the Most Restrictive Corners When to use it: At the beginning of every level. Why it works: Sharp corners and narrow angles usually accept fewer pieces than open center areas. What it prevents: It helps prevent awkward leftover spaces that no remaining piece can fill. Look for pointed corners, tight edges, and unusual outline angles first. If a piece has a matching sharp corner or long slanted side, test it there before filling the middle. Corners act like anchors because they limit how many shapes can fit cleanly. Match Long Edges Before Filling the Center When to use it: After you identify the obvious corner pieces. Why it works: Long border sections are easier to judge while the board is still open. What it prevents: It stops you from building a center layout that blocks the correct edge pieces later. A piece with a long straight side often belongs near the outside border. If you save it too long, the remaining outline may become too fragmented, and the piece may no longer have a clean place to fit. Test Large or Awkward Pieces Early When to use it: When one piece is much larger, wider, or harder to place than the others. Why it works: Large pieces need more space and fewer restrictions. What it prevents: It reduces the chance of ending with a big piece that cannot fit anywhere. Do not always save large pieces for last. If a block has an unusual shape, test it near the outline while there is still room to adjust. Once the center is crowded, large pieces become much harder to place. Use Small Pieces to Finish, Not to Start When to use it: After the main border and large spaces are mostly solved. Why it works: Small pieces are flexible and can close gaps more easily. What it prevents: It avoids wasting small pieces in open areas where larger pieces should go. Small triangle groups are useful near the end because they can fill tight spaces. If you use them too early, you may leave behind odd spaces that only those small pieces could have solved. Reset When the Remaining Space Looks Wrong When to use it: When the leftover area no longer matches any unused piece. Why it works: Reset is faster than forcing a layout that cannot be completed. What it prevents: It stops you from spending too long on a broken arrangement. A good sign that you should restart is a tiny triangle gap, a thin strip, or a leftover shape that clearly does not match any piece below. When that happens, the problem is usually an earlier placement, not the final piece. Best Solving Order 1. Find the sharpest corners first. 2. Match long-edge pieces to the outer border. 3. Test large or awkward blocks before the center becomes too fragmented. 4. Use smaller pieces to close remaining spaces. 5. Reset when the leftover space no longer matches any unused piece. This order keeps the most restrictive decisions early and leaves the flexible pieces for the end. Ready to test your spatial skills? Scroll up to the game board and start placing your first corner piece! Common Mistakes 1. Treating It Like a Photo Jigsaw Jigsaw Puzzle is not mainly about matching images. The important clues are shape, border alignment, angles, and how the remaining pieces can fill the outline. 2. Dragging Before Reading the Outline Placing the first piece too quickly can create problems later. Check the corners, long edges, and narrow spaces before making your first move. 3. Starting From the Center Too Early The center gives you more freedom, but that freedom can be misleading. If you fill the middle first, you may block pieces that needed to connect with the outer border. 4. Leaving Awkward Tiny Gaps A single-triangle gap or thin leftover space can break the whole layout. Before placing a piece, look at the shape it leaves behind, not just the space it covers. 5. Saving Large Pieces Too Late Large or unusual pieces need open space. If you wait too long, the board may become too crowded for them to fit naturally. 6. Using Tips Before Testing Obvious Edge Pieces Tips are more useful after you have checked the clear corners and border pieces yourself. If several obvious edge matches remain untested, try those before spending a hint. FAQ Is Jigsaw Puzzle a traditional photo jigsaw game? No. This game focuses on fitting triangle-based pieces into a blank outline. The challenge is shape placement, not rebuilding a picture. What should I place first in Jigsaw Puzzle? Start with the sharpest corners or the pieces that clearly match the outer border. These areas are more restrictive than the center, so solving them early gives you a stronger layout. When should I use Reset? Use Reset when the remaining empty space no longer matches any unused piece. This usually means an earlier piece is in the wrong position, so restarting the layout is faster than forcing the final moves. When is Tips worth using? Use Tips only after you have checked the corners, long edges, and large pieces carefully. It works better as a final nudge than as your first solving method. Is Jigsaw Puzzle a gambling game? No. Jigsaw Puzzle is a shape-fitting puzzle game based on piece placement and outline completion. It does not require betting, wagering, or real-money gambling decisions. Editorial Note This triangle block strategy guide was compiled for players using the visible gameplay mechanics of Jigsaw Puzzle, including outline filling, triangle-based pieces, Reset, Tips, and the 100-diamond Tip system. We regularly review our guides for clarity and accuracy, but this is an independent gameplay resource and not an official developer manual.
- Marksman legend
Marksman Legend About This Game Marksman Legend is a casual archery aiming and target shooting challenge game built around drag-to-aim controls, limited arrows, and simple physics-based shot adjustment. Your goal is to hit the target and clear the level before your arrows run out. The game is easy to understand, but each shot still requires judgment. A close target may only need a short, controlled pull, while a far target usually needs more power and a slightly higher angle because the arrow can drop during flight. The red center of the target gives the highest score, but smart arrow use matters just as much as accuracy. In the current example layout, the upper-right corner shows 5 arrows. That small counter matters because every missed shot reduces your room for correction. Classic Mode is the basic progression mode for learning distance and power control. If Limited Mode appears in your version, treat it as a stricter aiming challenge where quick, clean decisions matter. Obstacle Mode adds blockers between the bow and the target, making the shot more about reading the path before release. How to Play Start each level by checking the target position. Look at the distance, the height of the target, the remaining arrow count, and whether the path is clear. Press and hold the screen, then drag backward to aim. Pulling farther back usually sends the arrow farther and faster. Move your aim to adjust the angle, then release your finger to shoot. For close targets, avoid using maximum power unless the layout clearly requires it. A lighter pull gives you more control and helps prevent overshooting. For distant targets, use more power and lift the angle slightly so the arrow can travel far enough before dropping too low. In Obstacle Mode, look at where the blocker sits before aiming. A blocker near the middle of the path may require a higher arc. A blocker close to the target may require a more precise landing angle. A blocked direct line usually means you should plan the path first instead of firing immediately. Quick start routine: • Check the target distance. • Use controlled power for close targets. • Add power and a slightly higher angle for far targets. • Watch the arrow counter before taking risky shots. • In blocked layouts, plan the arrow path before release. Beginner Strategy Guide The best beginner habit is to treat every shot as feedback. Do not simply repeat the same pull after a miss. Watch where the arrow lands, then adjust one thing at a time. If the arrow lands low, raise the angle slightly or add a little more power. If it flies over the target, lower the angle or reduce pull strength. If it falls short, increase power first before making a major angle change. Small corrections are usually more reliable than dramatic changes. A practical three-arrow plan can help you stay calm: • First arrow: Read the distance and observe the arrow drop. • Middle arrows: Make small corrections to angle and pull strength. • Last arrow: Choose the safest target hit instead of forcing a risky precision shot. Classic Mode teaches distance control, Limited Mode tests decision speed, and Obstacle Mode tests path reading. Use that difference to guide your play: build consistency first, then work on tighter shots and blocked paths. Situation · Better Adjustment The arrow lands low. · Raise the angle slightly or add a little more power. The arrow falls short. · Increase pull strength first, then adjust angle if needed. The arrow flies over the target. · Lower the angle or reduce power. The target is close. · Avoid full power and use a controlled pull. A blocker covers the direct path. · Look for a higher arc or a safer side angle before releasing. Once you can hit the target consistently, aiming closer to the red center becomes a scoring goal rather than a risky guess. Common Mistakes • Using full power on every shot: Stronger shots are not always more accurate. Close targets usually need a lighter pull. • Shooting before checking distance: A nearby target and a far target need different aiming habits. • Aiming too flat at long range: Far targets often need a slightly raised angle to account for arrow drop. • Changing too much after one miss: If the arrow was close, make a small correction instead of rebuilding the whole shot. • Ignoring blockers in Obstacle Mode: A visible target does not always mean the path is open. Read the obstacle position first. • Forgetting the arrow limit: Every level gives you limited attempts, so a careless early miss can make the final shot much harder. • Rushing in Limited Mode: Fast decisions help, but a rushed miss usually costs more than taking a brief moment to line up the shot. FAQ What is Marksman Legend? Marksman Legend is a casual bow-and-arrow aiming game where you drag to aim, release to shoot, and try to hit targets with a limited number of arrows. Why do my arrows fall short on distant targets? Your shot may need more pull strength, a higher angle, or both. Start by adding a little more power, then adjust the angle if the arrow still lands low. How should I adjust after missing a shot? Look at where the arrow landed. If it was low, raise the angle slightly. If it went too far, reduce power or lower the angle. If it was close, make a small correction rather than a large one. What is the best practice order for beginners? Start with close targets and controlled pulls, then practice mid-range angle adjustment, and finally work on long-distance shots or blocked paths. This order helps you build consistency before chasing red-center accuracy. How do obstacles change the way you aim? Obstacles make the shot more about path reading. Instead of aiming directly at the target, look for a clear arc or side angle that avoids the blocker. What is the most important beginner tip? Do not treat power as the answer to every shot. Distance, angle, and remaining arrows all matter, so controlled adjustments are usually better than pulling as hard as possible. Note: Marksman Legend uses virtual bow, arrow, target, score, mode, and reward systems only. This guide is about casual gameplay, not real-world archery instruction, gambling, betting, or real-money rewards.
- General Kitty
General Kitty Quick Strategy Summary General Kitty is a cat-themed tower defense game about route control, smart placement, and wave pressure. Beginners should build one strong chokepoint first, then support it with Backline DPS cats. Coins, upgrades, traps, and Lightning matter most when the enemy wave is actually putting your castle under pressure. About This Game General Kitty is a casual side-scrolling cat tower defense and castle defense strategy game. Your job is to protect the castle by placing cat units along the enemy route and stopping each wave before it breaks through your defense. The game starts on a forest-style map, but the pressure ramps up as later waves become harder to control. Good play is not about placing every cat as soon as you can afford it. It is about reading the route, finding the best defensive section, and making your cats work together around the busiest part of the path. The main roster has clear roles: Samurai cat: your main Frontline Tank for holding the first serious chokepoint. Ninja cat: a flexible Blocker for early pressure, quick lane support, or catching leaks. Machine-gun cat: a steady Backline DPS cat that works best behind a Blocker. Cannon cat: a heavier Backline DPS cat for crowded waves or overloaded route sections. Mines and traps: support items for narrow paths, turns, and backup defense areas. Lightning: a pressure-control skill for dangerous grouped waves. Coin / buff skill: a support option for rebuilding, upgrading, or strengthening a key defense point. General Kitty feels simple at first, but the real strategy comes from lane control. A well-placed Samurai cat and Machine-gun cat can do more than a messy row of random units if they cover the right part of the route. Mastering the Early Game Start every level by looking at the route before spending coins. Do not panic-place cats at the entrance just because enemies are moving. The strongest defense usually begins where enemies stay inside your attack range the longest. Use this simple early-game plan: 1. Find the first busy route section. Look for the first turn, narrow path, or chokepoint where enemies slow down or group together. 2. Place one Frontline Tank or Blocker there. Use a Samurai cat if you need a stronger front line. Use a Ninja cat if you need cheaper early support or a quick fix for a weak lane. 3. Add one Backline DPS cat behind it. A Machine-gun cat gives steady damage. A Cannon cat is better when enemies arrive in tighter groups. 4. Upgrade the core defense. Once your first defensive section is working, upgrade the unit that helps most in that area. Do not spread coins across too many weak cats too early. 5. Keep a small coin reserve. Save enough for one emergency Ninja cat, upgrade, trap, or backup unit. A small reserve can stop one leak from becoming a lost run. 6. Build a backup defense near the castle. After your main chokepoint becomes stable, place one backup defense closer to the castle gate. This catches fast enemies and gives you a second chance if the first line breaks. 7. Use skills when they change the outcome. Lightning is strongest when enemies group together or when your front line is close to failing. A coin or buff skill is most useful when it helps you afford a key upgrade, rebuild pressure, or strengthen a weak point before the next wave. Mines and traps should go where enemies must walk. The best spots are before chokepoints, around turns, or just ahead of your backup defense. If enemies rarely pass a tile, that tile is usually a poor trap location. If your castle keeps taking hits, rebuild your defense from the route instead of adding random units. Ask yourself: Is the first Blocker placed at the real busy route section? Is your Backline DPS covering the same area? Is there a backup defense near the castle? Are coins being saved for one emergency move? Are upgrades going into the units that actually control the busiest lane? Most early failures happen because the defense is spread too thin. Once your main chokepoint becomes reliable, the whole level feels less chaotic. Common Mistakes Placing every unit near the enemy entrance: build a backup defense closer to the castle. Using only Backline DPS cats: add a Samurai cat or Ninja cat to hold enemies in range. Spending coins too quickly: keep enough for one emergency placement, upgrade, or trap. Using Lightning on small waves: save it for grouped enemies or near-collapse moments. Upgrading too many weak units: improve one or two core defense points first. Placing mines or traps on quiet tiles: use turns, narrow paths, and unavoidable route sections. Repeating the same layout on every map: recheck the route whenever stage pressure changes. Ignoring the first leak: treat it as a warning and build backup defense before the next wave. \Editorial Note: This strategy guide is based on the visible gameplay rules and current beginner-facing version of General Kitty. Unit effectiveness and route-control decisions may change if future game updates adjust enemies, skills, maps, or upgrades. Coins, upgrades, traps, units, and Lightning refer to in-game mechanics and progression systems.\ FAQ Why do fast enemies keep slipping through? Fast enemies usually slip through when your first Blocker is too far from the real chokepoint or your Backline DPS is not covering the same area. Move the Blocker closer to the busy route section, then add a backup defense near the castle. What should I do when I get stuck on a Forest map? Rebuild the route step by step. Find the first turn or narrow path, place a Samurai cat or Ninja cat there, add a Machine-gun cat or Cannon cat behind it, keep coins for one emergency move, and create a backup defense before the castle. Should I upgrade Machine-gun cat or Cannon cat first? Upgrade the unit doing the most work in your main defensive section. If enemies arrive steadily, Machine-gun cat is usually the safer first upgrade. If enemies group together in one lane, Cannon cat may give better value. Why do my mines or traps feel useless? They are probably placed on low-traffic tiles. Mines and traps work best on fixed route sections enemies must cross, especially before turns, narrow paths, or backup defense areas. What should I do if my front line collapses too quickly? Strengthen the first busy route section. Move your Samurai cat or Ninja cat to a better chokepoint, upgrade your main Blocker if possible, and make sure your Backline DPS is supporting the same area.
- Conscience farm
Conscience Farm About This Game Conscience Farm is a casual farming simulation and idle farm management game about turning empty land into a stronger farm through planting, harvesting, upgrades, pets, employees, and building development. The main loop is simple: prepare land, plant crops, use the watering can to reduce growth time, harvest when Waiting for harvest appears, and spend coins on the next useful upgrade. Each harvest adds coins and experience progress through the star bar in the upper-left corner. The strategy comes from deciding where your resources should go next. New plots increase planting space, Lv+1 strengthens existing plots, pets can support experience growth, employees help reduce repeated manual actions, and buildings such as shops or larger structures can provide steady virtual coin support through rent. Conscience Farm works best when you treat it as a rhythm game as much as a farm game. A strong farm is not only about unlocking more things. It is about keeping crops moving, collecting on time, and choosing upgrades that solve your current bottleneck. How to Play Start by checking your available land, coin total, and active plots. If you have empty usable land, plant crops. If land is still locked, use the shovel and wait for the progress bar to complete. If crops are still growing, use the watering can when it helps shorten the wait. Once a crop shows Waiting for harvest, collect it with the sickle so that plot can return to the planting cycle. After each harvest, your coins and experience increase. Coins are used for three main types of progress: unlocking new land, upgrading buildings, and improving plots with Lv+1. The best choice depends on what is slowing your farm down. If your current plots are always busy and collected on time, Lv+1 can be a good way to strengthen your core farm. If every plot is active and you clearly need more space, unlocking new land becomes more useful. If manual work is becoming repetitive, employees can help. If you want steadier background progress, buildings and shops can support your farm through virtual rent. The get pet option adds another long-term layer. Pets can provide an experience bonus, which becomes more valuable when your farm already has a steady harvest cycle. A pet does not replace good timing, but it can make repeated crop cycles feel more rewarding over time. Beginner Strategy Guide In the early game, focus on a small number of stable plots. Do not spend coins everywhere just because several buttons are available. A few plots that are planted, watered, harvested, and upgraded consistently are usually better than a wide farm with weak or idle spaces. Pro-Tip: Focus your first Lv+1 upgrades on one reliable plot instead of leveling everything evenly. This creates a stronger core plot that can support expansion more consistently. In the early-mid game, start judging Lv+1 against new land. If your existing plots are almost always active, Lv+1 can make your main farm area stronger. If you keep running out of planting space while still harvesting on time, unlock another plot instead. The key question is simple: are you limited by plot strength or by plot count? Pets are better once your harvest cycle is already working. Because their value comes from supporting experience progress over repeated actions, they are most useful when crops are being collected regularly. If your farm still has long idle gaps, fix the crop rhythm first. Employees make sense when the farm becomes large enough that manual care starts to slow you down. They are not a replacement for basic planning. Use them after your crop loop is stable, not before you understand which plots need the most attention. Buildings and shops are better as mid-game goals. Their rent is a virtual game mechanic that supports coin growth, but it works best when your crop side is already productive. If you invest in buildings too early while your plots are weak, your farm may still feel slow. This priority is not a fixed formula, but it gives beginners a practical order for deciding where coins should go first. Suggested Upgrade Priority Stage · Main Focus · When to Prioritize It · What to Avoid Early Game · Stable crop cycle · Focus on a small number of plots you can plant, water, and harvest consistently. · Do not unlock too much land before your first plots are productive. Early-Mid Game · Lv+1 on key plots · Use Lv+1 when existing plots are active often and harvested on time. · Do not upgrade every system at once if coins feel unstable. Mid Game · Pets and stronger plot planning · Consider pets when the experience bonus supports repeated farming cycles. · Do not delay all farm upgrades just to chase one new feature. Later Mid Game · Employees and buildings · Use employees when manual work becomes repetitive; use buildings when your farm can support passive virtual coin growth. · Do not rely on automation or rent systems before the crop loop is stable. Common Mistakes Your farm feels slow even with several plots. The likely cause is over-expansion. Too many low-level plots can create more work without giving your farm a strong base. Improve one or two reliable plots first, then expand when you can keep the full cycle active. Crops take longer than expected to finish. This usually happens when watering is forgotten or used too late to matter. Use the watering can while crops are still growing so the time reduction actually helps your next harvest cycle. Plots show Waiting for harvest, but progress still feels stuck. The problem is delayed collection. A mature crop that sits unharvested blocks the next planting cycle. Harvest ready crops before focusing on another upgrade. You have coins, but your upgrade path feels scattered. This often means you are switching between land unlocks, Lv+1, pets, employees, and buildings without a clear priority. Spend coins on the system that solves your current bottleneck instead of reacting to every available button. Employees are unlocked, but the farm still needs constant checking. This usually means the manual rhythm was not stable before automation started. Employees work better when they support a clean system, not when they are expected to fix poor planting, watering, and harvesting habits. Buildings are unlocked, but coin growth still feels weak. Passive rent helps more when the crop side of the farm is already moving. If buildings feel underwhelming, check whether your plots are too low-level or your harvest timing is too slow. Pets are available, but level progress still feels slow. A pet bonus helps over time, but it works best when paired with repeated harvests. If crops are not being collected regularly, experience progress will still feel sluggish. FAQ Should I upgrade plots or unlock new land first? Upgrade existing plots when they are already active most of the time and you can harvest them quickly. Unlock new land when your current plots are busy and you clearly need more planting space. When should I use Lv+1? Use Lv+1 on plots that already play an important role in your farm cycle. It is less useful on land that sits idle or is not part of your regular planting and harvest rhythm. Should I unlock a pet or hire an employee first? Choose a pet first if your farm is already producing regular harvests and you want more experience progress over time. Choose an employee first if your farm has become large enough that repeated manual care is slowing you down. When is a pet not worth unlocking yet? A pet may be less useful if your farm still has long idle gaps or crops are not being harvested regularly. Improve the crop cycle first, then use the pet bonus once repeated harvests can support steady experience progress. When do employees become useful? Employees become useful when your farm has enough active plots that manual actions start to interrupt your rhythm. They are best used to support a working farm, not to replace basic planning. How do you maximize passive coin income from buildings? Build a reliable crop cycle first, then add buildings and shops when your coins can support them without weakening your main plots. Passive rent works better when it supports an already stable farm rather than carrying the whole progression system alone. Does the farm grow while I'm offline? Only rely on offline progress if your version of Conscience Farm clearly shows an offline reward, idle progress, or return bonus screen. If no offline reward is shown, treat progress as something you build through active planting, watering, harvesting, and upgrading. Why does my farm feel slow even though I keep unlocking things? Your upgrades may be spread across too many systems. Focus on the biggest bottleneck first: plot level, planting space, harvest timing, pet progress, employee support, or building development. Is building rent real money? No. Building rent in Conscience Farm is a virtual in-game coin source used only for game progress. It does not represent real-world income. Editorial Note This guide is based on visible gameplay systems in Conscience Farm. Coins, rent, pets, employees, buildings, rewards, and upgrades are virtual game mechanics only and do not represent real-world farming, employment, construction, pet care, or financial advice.
- Villagee limination
Villagee limination About This Game Villagee limination is a casual tap-to-clear block elimination puzzle game about completing target goals within a limited number of moves. Each level asks you to remove a required number of target blocks, such as yellow clouds, red moons, or other pattern-based objectives, before the move counter reaches zero. Tap 2 or more connected blocks of the same color to clear them. Once blocks disappear, the blocks above fall into the empty spaces. That falling movement can create new connected groups, open chain reactions, or bring scattered target blocks closer together. The game rewards careful target reading more than fast tapping. A large clear is not always the right move if it does not help the objective. A small clear that removes target blocks, shifts targets downward, or prepares a useful tool can be more valuable than a flashy non-target clear. Larger same-color clears can create virtual in-game tools. Rocket clears a full row or column, Bomb removes a 3×3 area, and Rainbow Block can remove one color from the board after being swapped with that color. Daily check-ins and level chests may also provide virtual in-game items or rewards, but they are part of the puzzle progression system only. Key takeaways: • Read the level target before the first tap. • Lower clears often create stronger board movement. • Use tools for target progress, not just for large visual clears. How to Play Start by checking the target panel. It shows what the level wants you to clear, such as yellow clouds, red moons, or another goal icon. Then check the move counter so you know how many taps you can spend. Tap a group of 2 or more connected same-color blocks to remove it. After the clear, blocks above fall down. Before tapping, look at the spaces that will open and think about whether the falling blocks may connect target pieces or create a better group. Tools are created by clearing larger same-color groups: Tool · Created by · Best use · Avoid using when Rocket · Clearing 4 or more same-color blocks · Several target blocks sit in one row or column · The row or column contains few useful targets Bomb · Clearing 6 or more same-color blocks · Target blocks are packed in a small area but not directly connected · The 3×3 area removes mostly unrelated blocks Rainbow Block · Clearing 8 or more same-color blocks · Many target-color blocks remain across the board · Only a few targets remain and a direct clear can finish the level Choose Rocket when several target blocks sit in the same row or column. After it appears on the board, check the line it can clear before using it. The tool is more valuable when it removes multiple required blocks at once. Choose Bomb when target blocks are close together but separated by other colors. Its 3×3 clearing area can solve a tight cluster that would otherwise take several small moves. Choose Rainbow Block when many target-color blocks remain across the board. In target-based levels, swapping it with the current target color is usually more useful than clearing a random color. To pass a level, complete the target before the move counter reaches zero. If the moves run out while the target is still unfinished, the level fails. Before each move, ask: • Does this tap remove target blocks? • Does it create a useful Rocket, Bomb, or Rainbow Block? • Will falling blocks bring targets closer together? • Is this move still helpful if no chain reaction happens? Beginner Strategy Guide Play toward the target from the first move. Do not clear the largest group automatically. A smaller target clear can be the better choice if it reduces the required count or brings target blocks into a stronger position. Look for target blocks that are already connected. If 3 or more target-related blocks are grouped together, clearing them early reduces pressure and opens the board. If targets are scattered, clear nearby lower blocks to shift the board and help them fall together. Lower clears often create better movement than top clears. Removing blocks near the bottom makes more pieces fall, which can connect separated targets, form larger groups, or create a tool without extra setup. Do not build tools just because the board offers a large group. A Rocket, Bomb, or Rainbow Block is only worth the move if it helps the objective. If the tool would appear far away from useful targets, a direct target clear may be stronger. Best Tool by Situation Situation · Best choice · Why it works Several targets line up horizontally or vertically · Rocket · It can remove multiple targets in one straight clear Targets are close together but split by other colors · Bomb · Its 3×3 area can clear a compact problem zone Many target-color blocks remain across the board · Rainbow Block · It can remove that color from multiple areas Targets are scattered but can fall together · Normal clear · A lower tap may connect them without spending a tool We have all been there: one move left, one red moon trapped in a corner, and no clean group nearby. That situation usually comes from spending too many early moves on clears that looked big but did not move the level goal forward. Use Rocket only after scanning the full row or column. If it clears several targets, it is probably worth using. If it hits mostly unrelated blocks, wait for a better line unless you are almost out of moves. Use Bomb near the center of a compact target cluster. Avoid triggering it on the edge of the problem area, because half of the 3×3 effect may miss the blocks you actually need. Use Rainbow Block before the board becomes too scattered. If the target color is still common across the board, it can create a major swing. If only a few target blocks remain, a Rocket, Bomb, or direct tap may finish more efficiently. Final 5 Moves Checklist When only a few moves remain, stop building long setups. Count what is left and choose the most direct route. • Count how many target blocks remain. • Check whether one tool can finish the target. • Stop building new tools unless the setup also clears targets. • Use Rainbow Block before the board becomes too scattered. • Prefer a direct target clear over a large non-target clear. The beginner goal is consistency. Clear targets first, use falling blocks to improve the board, create tools only when they support the objective, and spend the final moves on finishing the level. Common Mistakes • Tapping before reading the target: Always check the required goal first. If the level asks for yellow clouds or red moons, early moves should help remove those blocks or bring them closer together. • Clearing large groups that do not matter: Big clears are not automatically good. Before tapping, ask whether the move removes targets, creates a useful tool, or improves the board position. • Building tools in the wrong area: A tool created far away from the target zone may not help. Build Rocket, Bomb, or Rainbow Block only when the setup supports the objective. • Using tools at the wrong time: Do not fire Rocket before targets line up, but do not save a strong tool until there are no moves left. Use tools when they remove several targets or set up the final clear. • Choosing the wrong tool target: Bomb should hit a valuable 3×3 area, and Rainbow Block should usually be swapped with the target color. Match the tool to the level goal, not to the flashiest effect. • Ignoring how blocks fall: The board changes after every clear. Look at the empty spaces that will open and predict whether new blocks may connect after falling. • Mistaking non-target icons for target blocks: Do not treat Green Leaf blocks, or any other similar-looking block, as targets unless the goal icon specifically shows them. • Relying on tiny clears near the end: With 3–5 moves left, small manual clears may not be enough. Count the remaining targets and use a tool if it gives the clearest path to finish. • Misunderstanding check-ins and chests: Daily check-ins, chests, tools, moves, blocks, and rewards are virtual in-game mechanics. Treat them as part of puzzle progression only. Editorial Note: This guide is an independent player resource and is not affiliated with the official developers of Villagee limination. It is based on visible gameplay rules and beginner-level puzzle decisions. It does not claim hidden formulas, official drop rates, guaranteed level outcomes, or real-world rewards. Check-ins, chests, tools, and rewards mentioned here refer only to virtual in-game mechanics. FAQ What is Villagee limination? Villagee limination is a casual tap-to-clear puzzle where players remove connected same-color blocks, complete target goals, and manage limited moves. How do you play the game? Check the target, tap 2 or more connected same-color blocks, watch how the board falls, and use tools when they help complete the objective. What is the goal of each level? Each level asks you to clear a specific target, such as a required number of yellow clouds, red moons, or another pattern block shown in the target panel. What happens when you run out of moves? If the move counter reaches zero before the target is complete, the level fails. Planning each tap matters more than clearing quickly. When should I use tools instead of normal clears? Use a tool when it removes more target blocks than a normal tap or creates a direct path to finish the level. What should I do if target blocks are scattered? Clear lower blocks near the target area to make the board fall. This can bring scattered targets closer together and create better connected groups. Are the rewards in Villagee limination only in-game items? Yes. Daily check-ins, chests, tools, moves, blocks, and rewards are virtual gameplay mechanics used only inside the game. They are not real-world prizes or cash rewards.
- Flip Blocks
Flip Blocks About This Game Flip Blocks is a casual sliding number merge puzzle game about board control, matching numbers, and smart movement. Each swipe moves the blocks in one shared direction, and matching number blocks can merge when they touch. The goal is not simply to create the biggest number possible. The real challenge is to reduce board pressure, clear useful space, and complete the current level objective through planned merges. A strong Flip Blocks run usually comes from calm movement rather than fast swiping. You need to decide which blocks should merge first, where larger blocks should stay, and how each swipe affects the next turn. Low-number blocks are often easier to remove from the board, while higher-number blocks need safer positioning so they do not get trapped in the middle. For beginners, the three most useful habits are simple: do not swipe randomly, clear easy low-number matches before they become clutter, and protect larger blocks near stable edges or corners when possible. Once the board becomes crowded, every move matters more because one careless swipe can separate matching blocks or block a future merge route. Gameplay note: This guide focuses on visible gameplay behavior, including block movement, matching, board pressure, and beginner decision-making. It does not claim hidden scoring formulas, exact internal calculations, official level data, or guaranteed outcomes. How to Play Start each level by checking the full board. Look for matching number blocks, open spaces, low-number blocks that can be cleared early, and any higher-number block that may become hard to move later. Swipe the screen to move all blocks in the same direction. When matching number blocks touch, they can merge. Based on the provided rules, matching number blocks appear to merge toward clearing or completing the level objective, so each merge should help reduce pressure on the board. If the board runs out of usable space or you can no longer create a practical merge route, the level may become stuck or fail. The safest approach is to keep the board open, guide matching numbers together, and avoid moves that scatter blocks across opposite sides. Beginner Strategy Guide The best beginner strategy in Flip Blocks is to treat every swipe as a board-shaping decision. Do not move just because a merge is available. Move because the merge improves the next position. Use Corner Locking carefully. Corner Locking means keeping a higher-number block near a stable corner or edge so it does not drift into the center. This gives you an anchor point, but it only works when the corner stays clean and support blocks can still reach it. If a corner is filled with low-number clutter, clear the clutter before trying to lock a higher-number block there. Use the Snake Pattern as a guide, not a rule. The Snake Pattern means moving blocks in a controlled flow, such as compressing them toward one side, then guiding them down or across in a predictable path. This can help beginners avoid chaotic left-right-up-down swiping, but it should not force every move. Break the pattern when a direct merge or space-saving move is clearly better. Clear low-number blocks before they become clutter. Number 1 blocks and other low numbers are often easier to resolve early. If you leave them scattered across the board, they can block movement paths later and make higher-number merges harder to set up. Think one move ahead. Before merging two blocks, ask whether the next move will still be playable. A merge is not always good if it pushes a key block into the center or removes the only open route. Use chain reactions, but do not depend on luck. A chain reaction can happen when one merge creates another useful match nearby. These are valuable because they reduce pressure quickly, but they work best when your board is already organized. Before You Swipe • Will this move create a real merge or improve a merge path? • Will it leave enough open space afterward? • Will it protect important high-number blocks? • Will the next move still be playable? • Will this swipe make the board more organized or more scattered? Situation · Recommended Swipe Control · Why It Helps Early board with several low-number blocks · Compress toward one side, then use a secondary direction · Helps bring easy matches together without scattering the board A higher-number block is already near a corner · Avoid breaking that corner unless the move creates a clear merge · Keeps the block stable and easier to support later The board is getting crowded · Return to one main edge or corner pattern · Reduces chaos and creates more predictable merge paths Two low-number blocks can merge near one side · Make the merge only if it does not pull a high-number block into the center · Clears space without damaging long-term structure A chain reaction is possible · Swipe in the direction that keeps the next matching pair close · Lets one merge set up the next instead of resetting the board For example, if two small blocks can merge on the right side but that swipe would pull a high-number block out of a safe corner, delay the small merge and protect the corner first. A short-term match is not worth losing your best anchor point. Common Mistakes Mistake: Swiping without a board goal. Fix: Before moving, identify one merge route or one space-saving goal. Even a simple plan is better than moving just to see what happens. Mistake: Clearing every visible match immediately. Fix: A merge should improve the board, not just reduce one pair. If a quick merge breaks a corner anchor, separates future matches, or fills open space, it may be better to prepare the board first. Mistake: Letting low-number blocks spread everywhere. Fix: Handle easy low-number matches early. Small blocks become dangerous when they occupy corners, block movement lanes, or separate higher-number pairs. Mistake: Pushing high-number blocks into the middle. Fix: Use edges and corners as anchors. A high-number block in the center can block several movement paths at once and become difficult to reconnect with a match. Mistake: Overusing one direction without checking the result. Fix: A main swipe direction is helpful, but it should not become automatic. For example, repeated upward movement can leave the lower rows cluttered if you never compress or clean them. Mistake: Changing direction every move. Fix: Use controlled direction changes. A good pattern should gather blocks into readable groups, not send them to opposite sides of the board. Mistake: Waiting until the board is almost full to plan. Fix: Start managing space from the first few moves. Once the board is crowded, fixing a bad layout takes more effort and fewer mistakes are allowed. Fair Play Note: All numbers, blocks, scores, levels, and objectives in Flip Blocks are virtual in-game puzzle mechanics. They are part of gameplay progress only and should not be understood as outside-game value, betting, or gambling activity. FAQ What is Flip Blocks? Flip Blocks is a casual sliding number merge puzzle game where players move blocks, merge matching numbers, and manage board space. Is Flip Blocks the same as 2048? No. Flip Blocks uses number merging, but it should not be treated as a standard 2048 game. The focus is more on reducing board pressure, clearing blocks, and completing level objectives than simply building the largest number. How do you merge blocks in Flip Blocks? Swipe to move blocks in one direction. When matching number blocks touch, they can merge. Should you merge blocks as soon as possible? Not always. A fast merge is useful only if it improves the board. If it breaks a corner anchor, separates future matches, or fills open space, it may be better to prepare the board first. What should you do when a high-number block is trapped? Stop swiping randomly and rebuild space around it. Try to compress nearby blocks toward a stable edge, open a path for matching numbers, and avoid moves that push the trapped block deeper into the center. When should you change swipe direction? Change direction when it creates a real merge, restores open space, or protects an important block. Avoid changing direction just because the board looks temporarily stuck. What causes most failed boards in Flip Blocks? Most failed boards come from poor space management: scattered low-number blocks, high-number blocks stuck in the center, and repeated swipes that do not create future merge paths. What is the safest beginner goal? The safest beginner goal is to keep a small buffer of open space while building predictable merge paths. Do not merge only for short-term progress if the move makes the next turn harder.
- Prison Escape
Prison Escape About This Game Prison Escape has a simple idea that becomes challenging once you start reading each level like a small logic map. The main challenge comes from reading a blocked route, making one careful cut, and seeing whether the stickman now has a safer way forward. It is not about rushing your finger across every dotted line. Better solutions often come from removing less paper than expected and keeping the right support in place. Prison Escape is a casual paper cutting and stickman escape game built around logic-based pathfinding. Your job is to cut yellow paper and create a safe route toward the EXIT on the right side of the stage. The stickman does not need the widest possible opening. He needs a connected path that stays stable from start to finish. Each cut changes the level. Removing yellow paper can open a useful passage, smooth a step, or connect two parts of the route. It can also break the ground the stickman needs to stand on. That is why the game is less about fast swiping and more about careful planning. Every level gives you a limited number of cuts, shown through the scissors at the bottom of the screen. This adds a light resource management layer: you need to decide which obstacles are worth cutting and which pieces of paper should stay in place. A strong route usually comes from three habits: protect the walking surface first, open the path second, and restart with a better plan when your first route clearly does not work. How to Play Start each level by observing the stickman, the yellow paper, the dotted cut lines, and the EXIT. The exit is usually the most important clue because it tells you which direction the final route must connect to. Swipe along a dotted line to cut the yellow paper. The removed section disappears and reveals the path underneath. The most useful cuts usually remove a real obstacle, smooth a step, or connect two parts of the route. A cut is less useful if it only clears extra space without helping the stickman move closer to EXIT. Do not cut away the area under the stickman unless you are sure the route will remain safe. In this kind of paper cutting puzzle, support matters as much as open space. A path that looks clear but has no stable walking surface can fail quickly. Watch the remaining cuts at the bottom of the interface. Since each level has limited cutting chances, avoid spending them on paper that does not affect the route. Resource management is part of the puzzle: the question is not “Can I cut this?” but “Does this cut solve the next real problem?” A simple beginner habit is to follow this order: 1. Find EXIT first. 2. Trace the safest possible route from the stickman to the exit. 3. Identify which yellow paper is actually blocking that route. 4. Cut only the blocking sections. 5. Keep enough support under the stickman and along the walking path. 6. Keep one cut available when the route ahead is still uncertain. 7. Use Restart if the route becomes broken, blocked, or impossible to repair. Route Check: Before cutting, scan the level in this order: EXIT → final approach → middle path → stickman’s starting point. This helps you avoid opening a path that looks good at first but fails near the end. If the stickman gets stuck, falls, or cannot reach EXIT, use Restart to reset the level. Treat Restart as a planning tool rather than a punishment. A failed attempt often shows exactly which piece of paper should have stayed in place. Beginner Strategy Guide The most useful beginner strategy is to plan from the EXIT backward. Instead of cutting the first dotted line you notice, look at where the stickman needs to end up. Then imagine the route in reverse: exit area, final approach, middle path, starting point. This makes it easier to see which paper truly blocks progress. Avoid large cuts at the start. Removing a big section may feel efficient, but it can create gaps, steep drops, or missing support. Smaller cuts are often safer because they let you adjust the route step by step. Focus on obstacles in front of the stickman or above the walking route before cutting the ground below him. Yellow paper under the character may be part of the support structure. If you remove it too early, the level can fail before the main route is even open. Before making a cut, ask three quick questions: does this remove a real obstacle, does it keep enough support under the stickman, and does it leave enough cuts for the next problem? If the answer is unclear, study the route again before swiping. Pro Tip: The cleanest solution is often not the biggest cut. In many layouts, a small cut that connects two surfaces is better than a large cut that creates empty space. For diagonal obstacles, think about building a gentle slope. A smoother angled route is usually easier for the stickman to cross than a sharp drop or broken platform. You do not need to remove every nearby piece of paper. You only need enough space for a stable path. For step-like barriers, divide the route into sections. First open the lower approach, then connect the middle platform, then clear the final path toward EXIT. This prevents the route from becoming disconnected halfway through. Here is a practical strategy matrix for common situations: Situation · Better First Move · What to Avoid Paper blocks the path directly ahead · Cut the blocking section while keeping the floor intact · Cutting the support under the stickman A diagonal wall blocks movement · Create a smooth slope or angled opening · Making a steep gap that breaks the route A tall step stops progress · Build a connected path in sections · Removing too much paper at once The route ahead is unclear · Save a cut and study the layout again · Spending every cut early The path is already broken · Use Restart and adjust the first cut · Forcing a route that cannot connect Some layouts can be understood as common puzzle patterns: Simple Drop: If the stickman needs to move from a higher surface to a lower path, do not remove all the paper between them. Cut only enough to open the landing area while keeping a surface that prevents an unsafe fall. Zig-Zag Route: If the path changes direction more than once, solve one turn at a time. Open the first turn, check whether the middle path stays connected, then use the next cut for the final approach. Scissors Trap: If several dotted lines look tempting, pause before cutting. The trap is spending all cuts on visible paper while leaving the final obstacle untouched. In uncertain layouts, keep one cut available until the route to EXIT is clear. One helpful way to improve is to think in smaller route decisions. Instead of thinking “remove this whole area,” think “remove only the part that blocks movement.” That mindset protects support and reduces wasted cuts. Your first goal should be simple: help the stickman reach EXIT safely. After you understand how the paper, support, and route connection work, you can start looking for cleaner solutions with fewer unnecessary cuts. Common Mistakes • Cutting away too much yellow paper: Removing extra paper can destroy support and make the route unsafe. Cut only what blocks progress. • Opening space without preserving a path: A wide empty area is not helpful if the stickman has no connected surface to walk on. • Following every dotted line automatically: Dotted lines show possible cuts, not required cuts. Judge whether each section actually affects the route. • Ignoring the EXIT position: Cutting before checking the exit can send your plan in the wrong direction and waste limited cuts. • Using all cuts too early: If the route ahead is still uncertain, save a cut for the next obstacle instead of clearing minor details. • Removing support under the stickman first: Cutting below the character too soon can break the level before the main puzzle begins. • Forcing a clearly failed route: If the path is blocked, broken, or impossible to repair with the cuts left, use Restart and rebuild the plan. • Reading the virtual theme too literally: Prison Escape is only a paper cutting stickman puzzle game. Its prison setting, scissors, rewards, paths, Restart button, and EXIT are in-game mechanics, not real-world escape advice, tool guidance, gambling content, or cash-value rewards. FAQ How do I decide which yellow paper to cut first? Start with the paper that directly blocks the safest route to EXIT. If a section does not stop the stickman from moving forward, leave it alone until you know it matters. Should I plan from the stickman or from EXIT? Planning from EXIT backward is usually safer. It helps you understand where the final route must connect before you spend cuts near the starting point. Do scissors refill over time? The provided gameplay information only confirms that the scissors at the bottom show the remaining cuts for the current level. Treat them as limited resources and plan each cut carefully instead of assuming they will refill. How should I handle moving platforms in later stages? If your version includes moving platforms or shifting support areas, wait to read their movement before cutting nearby paper. The safest cut is one that keeps the route connected when the platform is in a usable position. Why does the stickman fall after I open the path? This usually happens when too much support has been removed. A route needs both open space and stable ground, so avoid cutting away the paper directly under the stickman unless the next surface is clearly safe. What should I do with diagonal obstacles? Try to create a gentle slope or angled opening instead of a sharp drop. A smoother route gives the stickman a better chance to continue toward EXIT without getting stuck. When should I use Restart? Use Restart when you cut the wrong section, remove necessary support, run out of useful cuts, or create a route that no longer connects to EXIT. Restarting helps you replan with a cleaner cutting order. Is Prison Escape a real escape guide or gambling game? No. Prison Escape is a virtual paper cutting stickman puzzle. Its prison theme, scissors, rewards, Restart button, and EXIT are gameplay mechanics only, not real-world escape instructions, tool guidance, betting content, or cash-value rewards.