Captain, Don't Throw
Description
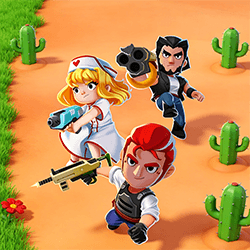
Captain, Don't Throw About This Game Captain, Don't Throw is a casual shooting action game built around movement control, automatic attacks, mission objectives, airdrop timing, support rescue, and upgrade choices. You control a captain through short battlefield stages where enemy groups close in from different directions and pressure the player into making fast route decisions. The captain attacks automatically when hostile units enter range, so the core skill is not manual aiming. The real challenge is guiding the captain with the movement slider, keeping enough space to avoid being surrounded, collecting airdrops at the right moment, and rescuing support soldiers without walking into a trap. A typical stage is short and objective-driven. Some missions ask you to survive enemy pressure, while others require you to rescue support soldiers or finish the objective before a timed mission condition is missed. The safest early approach is to improve clearing power first, keep your escape route open, and avoid chasing rewards through dense enemy groups. The main danger is not one enemy by itself. Problems usually begin when fast enemies push the captain toward tougher enemies and cut off the route to airdrops or support soldiers. Strong play comes from managing space, choosing upgrades that solve the current pressure, and finishing the mission instead of trying to clear everything on screen. How to Play Use the movement slider to guide the captain around the battlefield. When enemies enter the captain’s attack range, the captain fires automatically. Your job is to control spacing, choose safe routes, collect useful airdrops, rescue support soldiers, and complete the mission objective before the captain is defeated or a timed objective is missed. In the opening seconds, move away from the first enemy cluster instead of standing in place. Let the captain’s auto-attacks thin out the closest threats while you guide him along the edge of the enemy group. When the screen becomes crowded, circle around the outside of the group instead of cutting through the center. The round becomes dangerous when Swarmers and Armored Raiders appear together. Swarmers close distance quickly, while Armored Raiders take longer to defeat and can block the path to supplies or support soldiers. Mechanic · How It Works · Practical Use Movement · Use the movement slider to guide the captain · Move in wide routes and avoid tight corners Auto-attacks · The captain fires when enemies enter range · Stay close enough to trigger attacks, then reposition Airdrops · Supply crates appear during the stage · Collect them after clearing a safe route Support soldiers · Rescued allies add combat pressure · Reach them with both an entry path and an exit path Mission timer · Some stages have timed objectives · Do not chase low-value enemies far from the goal Failure condition · The captain is defeated, or a timed mission objective is missed · Protect health and mission progress at the same time Beginner Strategy Guide Upgrade Priorities Combat upgrades decide how safely the captain can handle crowded stages. Do not upgrade randomly in the early game. Choose the upgrade that solves the problem you are actually facing. Priority · Upgrade · Best Use Case · Why It Helps 1 · Heavy Rounds · Enemies survive too long near the captain · Increases clearing power and opens safer routes 2 · Extended Barrel · You need more space while kiting enemies · Expands useful attack range so you can fight from safer positions 3 · Twin Fire · Groups are stacking up too quickly · Adds multi-target pressure and helps thin Swarmers 4 · Field Armor · You are moving better but still losing health too fast · Gives more room for small positioning mistakes 5 · Supply Magnet · Airdrops are hard to reach without risk · Makes reward collection safer after your damage is stable Choose Heavy Rounds first when enemies remain alive too long near the captain. Choose Extended Barrel when you need more distance to control enemy groups. Choose Field Armor when your route planning is improving but you still lose health too quickly during crowded stages. Support Soldiers Support soldiers are not just bonus characters. In rescue missions, they are part of the main objective rather than optional rewards. After being rescued, support soldiers increase your combat pressure and make it easier to thin enemy groups. The danger is not the rescue itself. The danger is entering the rescue area without a safe exit path. Before moving toward a support soldier, pull nearby enemies away from the route, open a gap, then enter and leave quickly. A strong rescue pattern is: 1. Move near the support route. 2. Pull Swarmers away from the direct path. 3. Let auto-attacks clear the closest group. 4. Move in when the route opens. 5. Exit before Armored Raiders close the gap. Airdrop Timing Airdrops can give valuable resources and combat advantages, but they are also one of the easiest ways to lose a run. Do not treat every airdrop as urgent. When an airdrop lands behind a group of enemies, wait briefly, circle around the crowd, and let auto-attacks reduce the closest threats. If the path is still blocked, skip the drop and protect the mission objective instead. A missed reward is better than a failed run. Airdrop Situation · Best Decision Airdrop lands in open space · Collect it immediately Airdrop lands behind Swarmers · Circle once before entering Airdrop lands near Armored Raiders · Clear or weaken the route first Airdrop appears while the mission timer is tight · Take it only if it does not delay the objective Airdrop is blocked by multiple enemy types · Skip it unless you already have strong clearing power First Run Walkthrough Step 1: Move out of the starting pressure. At the beginning of a stage, use the movement slider to guide the captain away from the first enemy cluster. Do not let the opening group surround you before your auto-attacks start creating space. Step 2: Build a safe attack loop. Move close enough for enemies to enter attack range, then guide the captain away before they reach him. This lets the captain deal damage while keeping contact time low. Step 3: Watch the first airdrop. If the first airdrop appears in open space, collect it. If it appears behind enemies, circle around first. The first airdrop is useful, but it is not worth losing half your health. Step 4: Rescue support with an exit route. When a support soldier appears, check both the entry route and the exit route. The rescue is only safe if the captain can leave the area after reaching the support soldier. Step 5: Push the mission objective. Once you have one or two upgrades and at least one support soldier, shift attention back to the mission objective. Do not clear every enemy unless the objective requires it. Stage Progression Tips Stage Phase · What Usually Gets Harder · Best Adjustment Opening wave · Basic movement pressure · Learn attack range and avoid standing still Early pressure · More fast enemies begin to appear · Upgrade Heavy Rounds or Twin Fire Crowded phase · Enemy groups begin blocking rewards · Collect only safe airdrops Support phase · Rescue routes become riskier · Pull enemies away before entering rescue zones Final objective phase · Mission pressure increases · Ignore enemies that are far from the objective Many beginners start losing runs when enemy groups begin blocking rewards and support routes more aggressively. At that point, survival and mission completion matter more than collecting every airdrop on the screen. Advanced Strategy Crowded screen control: When Swarmers and Armored Raiders fill the center of the battlefield, move around the outside edge and let auto-attacks hit the nearest enemies. This reduces contact from multiple directions and keeps your escape path open. Airdrop delay: When a supply crate lands inside or behind an enemy group, wait briefly, circle the group, then collect it from the safer side. Treating every airdrop as an emergency pickup is one of the easiest ways to lose a run. Support rescue routing: When a support soldier is surrounded or placed near a dangerous route, open a path first, then enter and exit quickly. Rescued soldiers help your combat pressure, but only if the captain survives the rescue. Upgrade-based routing: If enemies start surviving long enough to block movement, choose upgrades based on the current problem. Use Heavy Rounds for tough enemies, Extended Barrel for safer spacing, and Twin Fire for enemy groups. Mission-first play: When the objective is nearly complete or the mission timer is becoming a problem, stop chasing enemies far from the mission route and move toward the objective. Common Mistakes Mistake · What It Looks Like · How to Fix It Walking into dense enemy groups · Health drops quickly before rewards can help · Move around the edge and protect your route Chasing airdrops too early · The captain reaches the crate but gets trapped · Delay the pickup until the route opens Weak upgrade priority · Enemies survive long enough to surround you · Start with Heavy Rounds or Extended Barrel Unsafe support rescue · The support soldier is rescued, but the captain cannot escape · Plan the exit before entering Poor timer management · The captain survives but the mission fails · Stay closer to the mission route Ignoring mixed enemy pressure · Fast enemies push you into tougher enemies · Separate enemy groups by moving in wide loops The most common beginner mistake is treating automatic attacks as permission to stand still. The captain can shoot on his own, but he cannot escape danger unless you keep moving and protect a route out of crowded areas. FAQ What is Captain, Don't Throw? Captain, Don't Throw is a casual shooting action game where you guide a captain through short mission-based stages. The game focuses on automatic attacks, movement control, airdrop timing, support rescue, and upgrade choices. Does the mission timer pause when picking up an airdrop? Do not plan around the timer stopping during a pickup. If the mission timer is tight, collect only the airdrops that are already close to your objective route. Which upgrade should I choose first? Choose Heavy Rounds first if enemies survive too long near the captain. Choose Extended Barrel if you need safer spacing, and choose Twin Fire when Swarmers begin stacking up in groups. Do auto-attacks target the closest enemy first? Auto-attacks are most useful when enemies are inside the captain’s active range. For practical play, assume nearby enemies create the most immediate danger and position the captain so the closest threats are cleared before they can surround him. When should I rescue support soldiers? Only when you have secured both an entry and an exit path. Rushing blindly into a crowd to save a soldier is one of the fastest ways to end your run. Why do beginners lose during crowded phases? Crowded phases are where enemy groups begin blocking rewards and support routes more aggressively. Beginners usually lose because they chase airdrops through dangerous areas instead of improving clearing power and protecting their movement route. Editorial Note This page provides a gameplay overview and beginner strategy guide for Captain, Don't Throw. It focuses on movement control, automatic attacks, mission objectives, upgrade choices, airdrop timing, support rescue, and common early mistakes. This guide is based on practical strategy analysis for surviving high-pressure swarms and optimizing upgrade paths in the game.