Doodle Toss Squad
Description
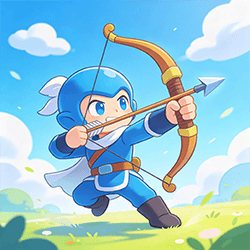
Doodle Toss Squad Doodle Toss Squad is a creative and fast-paced casual game where your drawing choice matters. Instead of selecting pre-made items, you draw your own in-game shapes to knock down the opposing squad. If you are looking for ways to improve your throws or clear challenges more smoothly, this guide breaks down useful beginner shapes, how to adjust your aim, and the common mistakes to avoid. 1. Top 3 Useful Shapes to Draw The game responds best to clear, readable drawings. Complex or messy scribbles can behave unpredictably. Instead, match these three simple shapes to the opposing squad's formation: • The Solid Block (Square/Rectangle) • Best For: Clustered opponents. • Strategy: A solid block has a wide contact area. Use it when multiple opponents are standing close together. Keep your drawing clean and balanced so it travels in a more predictable direction. • The Hook Shape (L-Shape or Curve) • Best For: Different contact angles. • Strategy: If an opponent is standing in a difficult position, a hook or curved shape can help you test a different landing angle. Keep the curve simple so the shape remains easy to control. • The Long Line (Horizontal or Vertical) • Best For: Single, exposed targets. • Strategy: A long line travels in a narrower path and covers less space than a block. Draw a straight line when one squad member is clearly exposed and you do not need a wide contact area. 2. Beginner Tips for Aiming and Throwing Knowing what to draw is only half the process. Improve your throwing technique with these adjustments: • Master the Micro-Adjustment: If you miss, do not make huge up-or-down swipes on your screen. If your previous shape flew slightly too high, lower your angle by a small amount. Gradual corrections usually lead to better control. • Read the Formation First: Never throw before checking the screen. Pause and identify the easiest target. Knocking down one opponent early can reduce pressure on your own squad. • Protect Your Own Squad: You fail the challenge if your squad is completely knocked down. If you are down to your last remaining member, choose a safer shape with a wider contact area rather than attempting a risky narrow throw. Aim Correction Table What Happens · Likely Problem · Better Adjustment Shape flies too high · Angle is too high · Lower aim slightly Shape falls short · Angle is too low · Raise direction gradually Shape reaches target but misses · Target choice may be wrong · Aim at an exposed opponent Shape hits only one opponent in a group · Contact area may be too narrow · Try a solid block Near hit becomes a complete miss · Overcorrection · Use smaller movements 3. Common Mistakes to Avoid • Overcomplicating the Drawing: Highly detailed or uneven shapes can make the object's in-game behavior harder to predict. Fix: Start with simple, balanced shapes, then experiment with more creative drawings after you understand how they move. • Sticking to One Shape: A block shape may work well against grouped opponents, but it may not work as well against widely spread targets. Fix: Change your drawing based on the specific round instead of using the same shape every time. • Assuming Customization Improves Performance: Coins, drawing skins, and pets mainly support customization and collection. Fix: Focus first on shape control, target choice, and aim correction. • Changing Aim Too Aggressively: Large aim changes can turn a near hit into a complete miss. Fix: If your throw was close, adjust gradually and use small up-or-down movements. • Only Focusing on Style: Creative drawings are fun, but a stylish shape is not always the easiest one to aim. Fix: Choose a shape that can make reliable contact first, then add style once your throws feel consistent. 4. FAQ: Troubleshooting Your Throws Q: Why do my drawings often miss the target completely? A: Your shape may be unbalanced, too messy, or aimed at the wrong angle. Try drawing a cleaner shape and raising or lowering your throwing direction slightly. Q: What happens if I run out of squad members? A: If your entire squad is knocked down before the opponents are cleared, the challenge fails. Watch your remaining squad members and choose safer throws when needed. Q: Is there a specific shape that works for every round? A: No. The most useful shape depends on how the opposing squad is positioned in that specific challenge. Adaptability is your best approach. Q: How can I aim more consistently after missing? A: If your throw was close, adjust your aim first with a small up-or-down movement. Watch where the shape landed, make one careful correction, and keep your drawing simple enough to control. If the same shape keeps missing or feels unreliable, switch to a cleaner shape that better matches the opposing squad's formation.